To install shower backer board, first, you must ensure that the wall is clean and dry. Next, apply thin-set mortar to the wall using a trowel, then press the backer board firmly into place.
Secure the backer board with screws, making sure to space them every 8 inches. Finally, seal the seams with mesh tape and thin-set mortar, and allow the shower backer board to dry before tiling. Installing shower backer board is an essential step in bathroom remodeling or constructing a new shower.
It provides a sturdy and waterproof surface for tile installation, ensuring durability and longevity. By following a few simple steps, you can properly install shower backer board and create a solid foundation for your shower walls. This guide will walk you through the process, from preparing the wall to securing the board and finishing the seams. Get ready to tackle this DIY project and achieve professional-looking results. Read on to learn the step-by-step instructions for installing shower backer board.
Choosing The Right Backer Board
When it comes to installing a shower, one of the most important steps is choosing the right backer board. The backer board provides a solid surface for the tile and helps to prevent moisture damage. With various types of backer boards available on the market, it’s crucial to select the right one for your specific needs. In this post, we will discuss the different types of backer boards, factors to consider when selecting the right backer board, and how to assess the moisture resistance of backer boards.
Different types of backer boards available
Before diving into the factors to consider when choosing a backer board, let’s take a look at the different types available:
- 1. Cement Backer Board: This type of backer board is made from a mixture of cement and reinforcing fibers, making it durable and resistant to moisture. Cement backer boards are a popular choice for shower installations due to their strength and ability to withstand wet conditions.
- 2. Fiber Cement Board: Similar to cement backer boards, fiber cement boards are also made from a combination of cement and reinforced fibers. However, they contain higher quantities of fibers, making them lighter and easier to handle. These boards are an excellent choice for DIY enthusiasts.
- 3. Gypsum Board: Gypsum boards, also known as drywall or plasterboard, are widely used for interior walls and ceilings. While not as moisture-resistant as cement backer boards, they can still be used in shower installations with proper waterproofing measures.
- 4. Waterproof Membrane: In addition to traditional backer boards, there are also waterproof membranes available. These membranes are applied directly to the wall and offer superior moisture protection. However, it’s worth noting that they are often used in conjunction with backer boards for added strength.
Factors to consider when selecting the right backer board
When choosing the right backer board for your shower installation, several factors should be considered:
- 1. Moisture resistance: Select a backer board that is specifically designed to resist moisture and prevent mold and mildew growth. This is particularly important in wet areas like bathrooms and showers.
- 2. Durability: The backer board should be strong enough to support the weight of the tiles and daily use. It should also be resistant to impacts and cracks to ensure the longevity of the shower installation.
- 3. Ease of installation: Consider the installation process and your level of expertise. Some backer boards may require specific tools or professional assistance, while others are more suitable for DIY installations.
- 4. Compatibility with adhesive: Ensure that the backer board is compatible with the tile adhesive you plan to use. Certain backer boards may require specific adhesives for proper installation.
- 5. Cost: Lastly, consider your budget and choose a backer board that offers a good balance of quality and affordability.
How to assess the moisture resistance of backer boards
Moisture resistance is a crucial factor when selecting a backer board for your shower installation. Here are a few ways to assess the moisture resistance of backer boards:
- 1. Look for waterproof or moisture-resistant labels: Check the packaging or manufacturer’s specifications for labels indicating that the backer board is designed for wet areas or has excellent moisture resistance properties.
- 2. Research reviews and ratings: Read reviews or check for ratings from other professionals or homeowners who have used the backer board in similar applications. This can provide valuable insights into its moisture resistance and overall performance.
- 3. Consider the warranty: Backer boards with longer warranties often indicate superior quality and durability, which translates into better moisture resistance.
By considering these factors and assessing the moisture resistance of different backer boards, you can make an informed decision and choose the right backer board for your shower installation. This will ensure a long-lasting and water-resistant foundation for your tiles, giving you peace of mind and a beautiful shower for years to come.
Preparing The Shower Area
Before installing a shower backer board, it is crucial to properly prepare the shower area. This involves removing old tiles and fixtures, inspecting and repairing the underlying structure, and measuring and marking the area for backer board installation. By following these steps, you can ensure a solid foundation for your shower and enhance its durability and performance.
Removing old tiles and fixtures
If you’re planning to install a new backer board, it is necessary to remove any existing tiles and fixtures from the shower area. Begin by carefully prying off the tiles using a chisel and hammer. Take precautionary measures to avoid damaging the surrounding walls or floor. Once the tiles are removed, inspect the area thoroughly for any signs of damage, such as mold or water leakage. This will allow you to address these issues before proceeding with the installation process.
Inspecting and repairing the underlying structure
After removing the old tiles, it is crucial to inspect the underlying structure of the shower area. Look for any signs of rot or water damage, as these can compromise the integrity of the backer board installation. If any issues are detected, it is essential to address them before proceeding. This may involve replacing damaged studs or reinforcing weakened areas with additional framing. By taking the time to thoroughly inspect and repair the underlying structure, you can ensure a solid foundation for your backer board.
Measuring and marking the area for backer board installation
Once the underlying structure is inspected and repaired, the next step is to measure and mark the area for backer board installation. Start by measuring the width and height of the shower area using a tape measure. Ensure that the measurements are accurate to avoid any gaps or overlaps. Mark these measurements on the walls using a pencil or marker, creating clear guidelines for the backer board installation. It is also important to consider the location of any plumbing fixtures or showerheads to ensure proper alignment and positioning of the backer board.
By preparing the shower area accurately, you can create a solid foundation for the backer board installation. This will not only enhance the overall stability and durability of your shower but also make the installation process smoother and more straightforward.

Installing The Backer Board
Preparing the backer board for installation
Before installing the backer board, it is important to ensure that it is properly prepared. Start by measuring the dimensions of the shower area and cutting the backer board to fit. Use a utility knife or a circular saw to make precise cuts. Remember to wear safety goggles and gloves during this process.
Cutting and fitting the backer board to the shower area
Once the backer board is cut to the correct size, test its fitting in the shower area. Make adjustments as needed to ensure a snug fit. Take into consideration any openings for fixtures such as faucets and showerheads. Cutting the backer board into smaller sections may be necessary for these areas. Ensure that the cut edges are smooth and even.
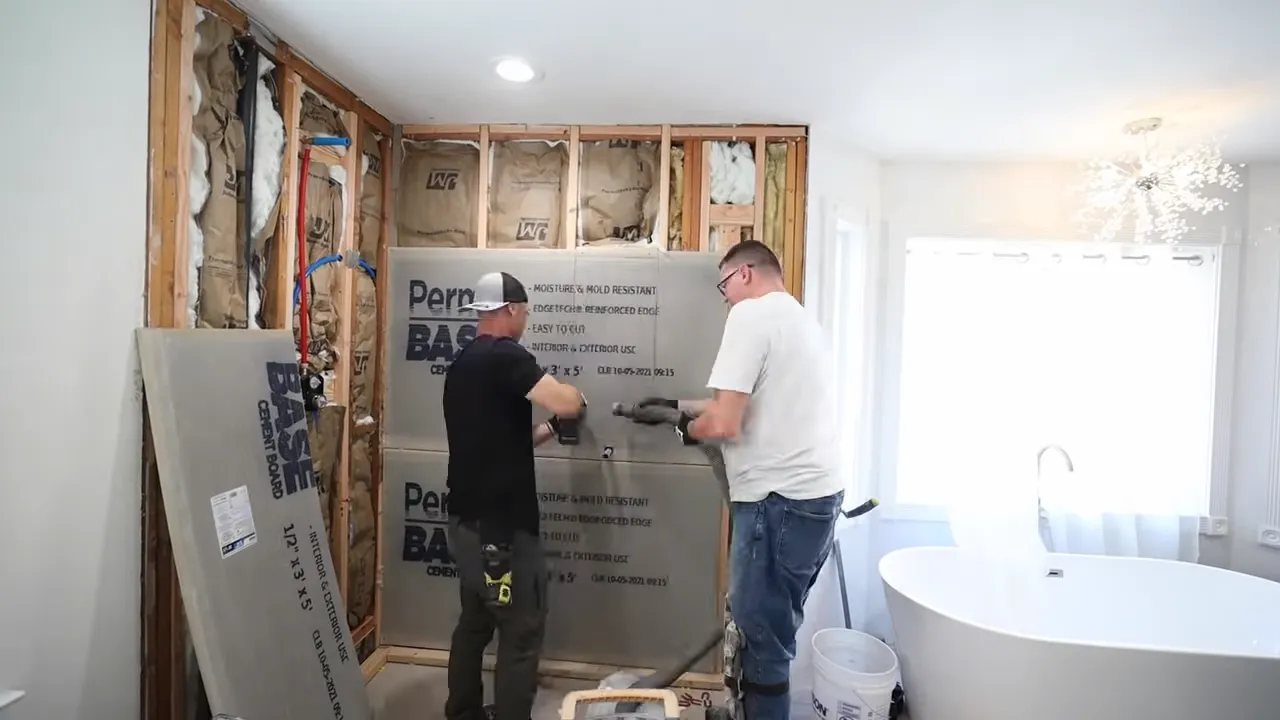
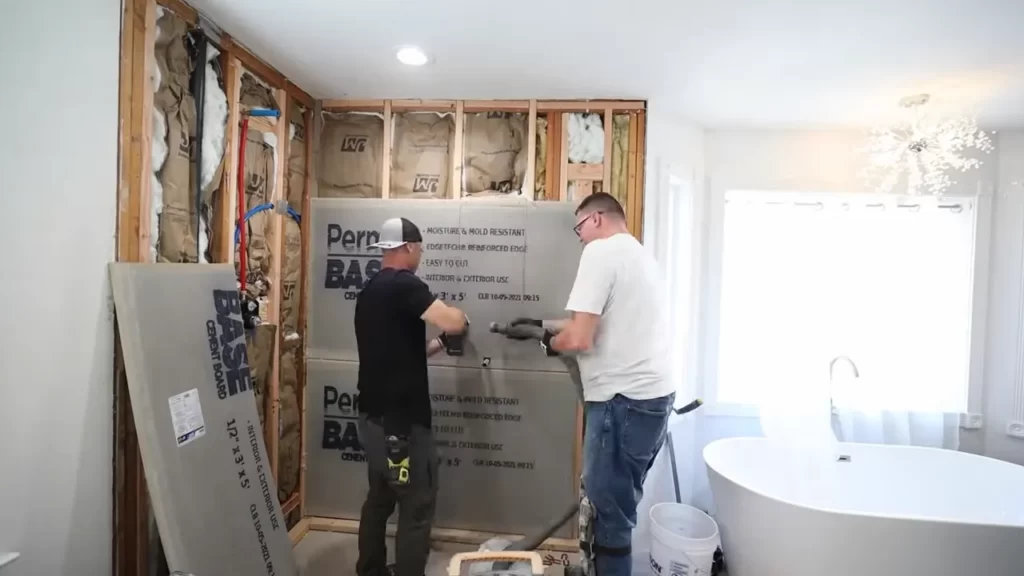
Securing the backer board to the studs
With the backer board cut and fitted, it is time to secure it to the wall studs. Begin by applying a layer of thin-set mortar to the studs using a notched trowel. This will create a bond between the backer board and the wall. Press the backer board firmly against the mortar, making sure it is level and plumb. Secure the backer board to the studs using screws or nails, placing them every 6-8 inches along the edges and every 12 inches in the field.
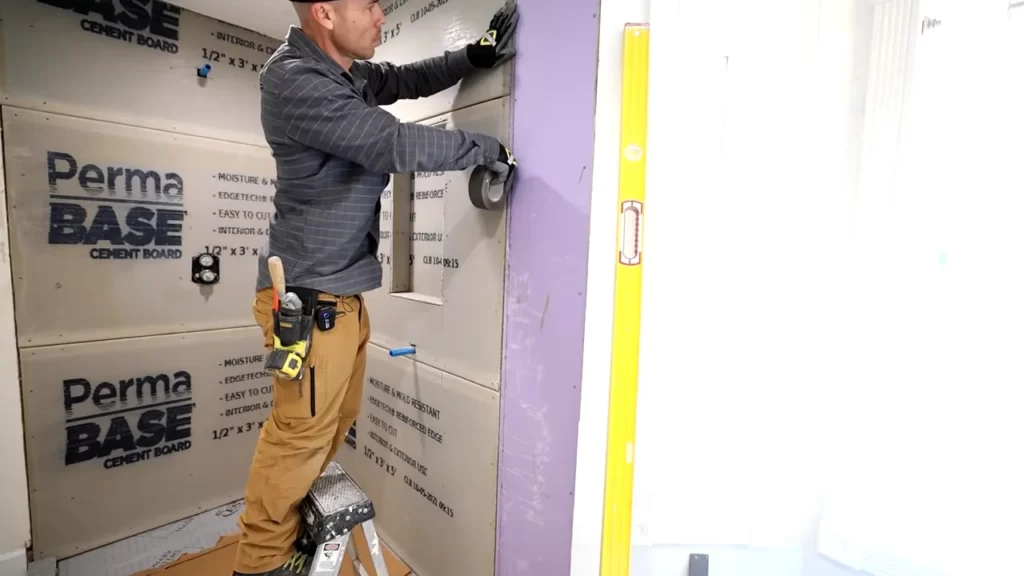
Ensuring proper spacing and alignment of the backer board
Proper spacing and alignment of the backer board is essential for a successful installation. Leave a 1/4 inch expansion gap between the edges of the backer board and adjacent surfaces, such as walls or floors. This will allow for any movement or expansion without causing damage. Use shims or spacers to maintain consistent spacing between the backer board panels. Check for levelness and plumbness frequently during the installation process to ensure that everything is aligned correctly.
To summarize, the process of installing the backer board involves preparing it for installation, cutting and fitting it to the shower area, securing it to the studs, and ensuring proper spacing and alignment. Make sure to follow these steps carefully for a successful installation of your shower backer board, providing a solid foundation for your tile or stone installation.
Sealing And Waterproofing The Backer Board
Sealing and waterproofing the backer board is a critical step in ensuring a leak-free and durable shower installation. By applying a waterproofing membrane or sealer, you create a protective barrier that prevents water from seeping through the backer board and causing damage to the surrounding walls. In this section, we will discuss the steps involved in properly sealing and waterproofing the backer board, including applying a waterproofing membrane or sealer, ensuring full coverage and proper adhesion, and allowing adequate drying and curing time.
Applying a Waterproofing Membrane or Sealer to the Backer Board
To begin the sealing and waterproofing process, you’ll need to select a high-quality waterproofing membrane or sealer. There are several options available in the market, ranging from liquid-applied membranes to sheet membranes. Choose one that is suitable for your specific shower installation and follow the manufacturer’s instructions for application.
Here are the general steps to follow when applying a waterproofing membrane or sealer to the backer board:
- Clean the backer board surface thoroughly, removing any dust, dirt, or debris. Ensure the surface is dry before proceeding.
- Using a suitable tool, apply the waterproofing membrane or sealer to the backer board, starting from the bottom and working your way up. Ensure that the entire surface is covered with a uniform layer of membrane or sealer.
- Pay special attention to corners, seams, and joints, as these areas are more prone to leaks. Apply extra membrane or sealer to reinforce these vulnerable spots.
- Allow the first coat to dry according to the manufacturer’s instructions. This drying time may vary depending on the type of waterproofing product used.
- Apply a second coat of waterproofing membrane or sealer for added protection, following the same application process as before.
Ensuring Full Coverage and Proper Adhesion
When applying the waterproofing membrane or sealer, it is crucial to ensure full coverage and proper adhesion to the backer board surface. This will help create a reliable and long-lasting waterproof barrier. Here are some tips to ensure full coverage and proper adhesion:
- Use the recommended tools and techniques for application, as specified by the manufacturer.
- Apply the membrane or sealer in even and consistent strokes, using a brush or trowel.
- Check for any missed areas or thin spots, and reapply the membrane or sealer as needed to achieve a uniform coverage.
- Press the membrane or sealer firmly onto the backer board surface to ensure proper adhesion.
Drying and Curing Time for the Waterproofing Membrane or Sealer
After the application of the waterproofing membrane or sealer, it is important to allow sufficient drying and curing time. This time period ensures that the membrane or sealer fully bonds with the backer board and forms a solid waterproof barrier. The drying and curing time may vary depending on the specific product used, humidity levels, and temperature conditions. Refer to the manufacturer’s instructions for the recommended drying and curing time.
Typically, the drying time can range from a few hours to a day, while the curing time may take several days or even weeks. It is important not to rush this process and allow the waterproofing membrane or sealer enough time to set properly. Avoid any moisture or water contact during the drying and curing period, as it can compromise the effectiveness of the waterproofing barrier.
By carefully following these steps and allowing sufficient drying and curing time, you can ensure a properly sealed and waterproofed backer board for your shower installation. This will provide peace of mind knowing that your shower is protected against water damage and will last for years to come.
Finishing Touches And Next Steps
Now that the shower backer board installation is complete, it’s time to focus on the finishing touches and prepare for the next steps. This is an important phase that ensures the backer board is properly sealed and ready for tile installation.
Checking for any gaps or imperfections in the backer board installation
Before moving forward, it’s crucial to carefully inspect the backer board installation for any gaps or imperfections. These gaps can cause water to penetrate through the backer board, leading to moisture damage and potential mold growth. To make sure everything is in order, follow these steps:
- Visually examine the entire surface of the backer board to identify any gaps or protrusions.
- Use your hands to feel for any unevenness or raised spots.
- If you come across any gaps, use a utility knife to widen them slightly for better adhesion when filling them later.
- Mark the areas that need attention with a pencil or tape, as this will make the repair process easier.
Repairing and sealing any gaps or imperfections
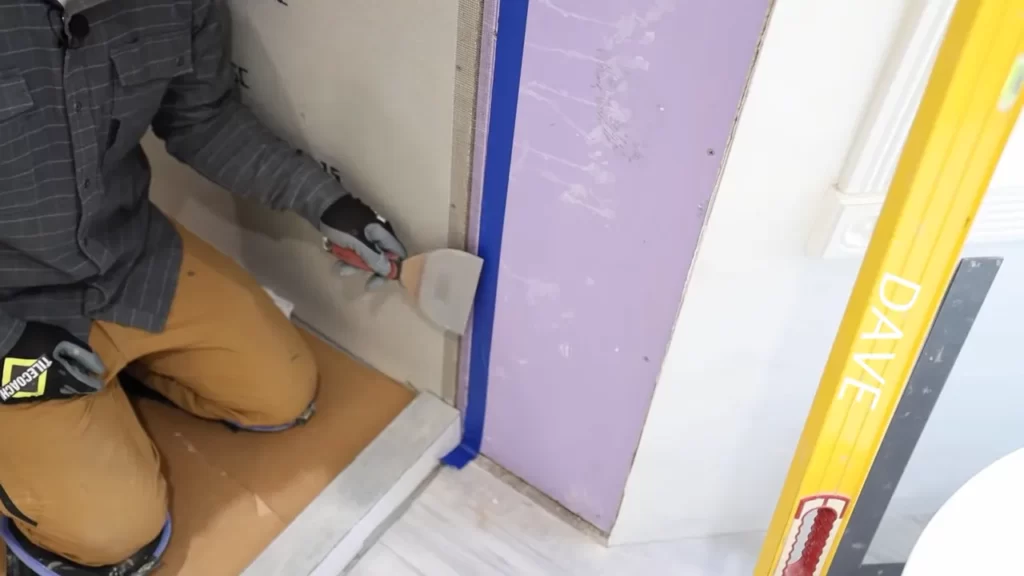
Once you’ve identified the problematic areas, it’s time to repair and seal them to ensure a water-tight installation. Follow the steps below to address these gaps or imperfections:
- Using a premixed thin-set mortar, scoop up a small amount with a putty knife.
- Press the mortar into the gaps or imperfections, ensuring it fills them completely.
- Smooth out the mortar using a trowel or putty knife, making it level with the rest of the backer board surface.
- Allow the mortar to dry completely according to the manufacturer’s instructions.
- Once the mortar is dry, use a sanding block or sandpaper to smooth out any rough patches, ensuring a seamless transition between the patched areas and the rest of the backer board.
- Apply a waterproofing membrane over the entire surface of the backer board, including the patched areas. This will provide an extra layer of protection against moisture.
Preparing the backer board for tile installation
With the gaps and imperfections patched and sealed, the next step is to prepare the backer board for the tile installation. This involves the following:
- Clean the surface of the backer board using a damp cloth or sponge to remove any dust or debris.
- Allow the backer board to dry completely before proceeding.
- Apply a primer or sealer to the entire surface of the backer board, following the manufacturer’s instructions.
- Allow the primer or sealer to dry completely before moving forward with the tile installation.
Next steps after the backer board installation is complete
Now that the backer board is fully prepared, it’s time to move on to the next steps in the shower installation process. These may include:
- Marking the layout of the tile installation to ensure proper alignment and aesthetics.
- Applying a waterproofing membrane to the seams and corners of the backer board, providing extra protection.
- Installing the tile according to the desired pattern and design, using the appropriate adhesive and grout.
- Letting the tile and grout dry completely before applying a sealant to protect the tile and enhance its longevity.
By following these steps and taking the necessary precautions, you can ensure a successful and long-lasting shower backer board installation. Now it’s time to bring your vision to life and enjoy the benefits of a beautiful, functional, and waterproof shower!
Frequently Asked Questions
Can I Just Screw Down Backer Board?
No, you should not just screw down backer board.
What Do You Put Behind Backer Board For Shower?
For shower installations, it’s recommended to apply a waterproof membrane behind the backer board to prevent water damage. This membrane acts as an additional barrier against moisture, ensuring a long-lasting and leak-proof shower.
What Is The Best Way To Install Backer Board?
The best way to install backer board is to start by cleaning the subfloor, then lay the boards in a staggered pattern using thinset mortar. Secure the boards with screws or nails, making sure to leave a small gap between each one.
Finally, apply another layer of thinset and tile on top.
Do I Need To Waterproof Cement Board In Shower?
Yes, it is necessary to waterproof cement board in showers to prevent water damage. The waterproofing helps to protect the underlying structure and prevent mold and mildew growth.
Conclusion
Installing shower backer board is an essential step in creating a durable and water-resistant shower space. With the right tools and techniques, you can ensure a sturdy foundation for your tile installation. Remember to carefully measure and cut the backer board, properly secure it to the wall studs, and seal any seams or fastener holes.
By following these steps, you can confidently create a long-lasting and beautiful shower that will withstand the test of time.