
To install bathroom hardware, first, gather all the necessary tools and hardware, then follow the specific instructions provided by the manufacturer. Proper installation is crucial for ensuring the functionality and durability of bathroom hardware.
Introducing bathroom hardware into your bathroom can enhance its overall look and functionality. Whether you are replacing old hardware or starting from scratch, installing bathroom hardware is a straightforward process. By following the manufacturer’s instructions and using the right tools, you can add new towel bars, toilet paper holders, hooks, or other bathroom accessories in no time.
This article will guide you through the steps to ensure a successful installation. So, let’s get started and transform your bathroom into a well-organized and stylish space.
Factors To Consider Before Installing Bathroom Hardware
Installing bathroom hardware is not just about functionality, it is also an opportunity to enhance the overall design and aesthetic appeal of your bathroom. However, before diving into the installation process, there are a few key factors that you should consider to ensure that you make the right choices. Keep reading to discover the important factors to consider before installing bathroom hardware.
Design and Style
When it comes to bathroom hardware, design and style play a crucial role in creating the desired look and feel of your bathroom. Before making any purchases, take a moment to consider the overall design theme of your bathroom. Is it modern and sleek, or more traditional and rustic?
Consider the existing fixtures and furniture in your bathroom. Are they minimalistic or ornate? This will help guide you in selecting bathroom hardware with the right design elements to complement the existing style. For instance, if your bathroom features clean lines and a minimalist aesthetic, hardware with simple and sleek designs will likely be the best fit.
Material and Finish
Bathroom hardware is available in a variety of materials and finishes, each offering its own unique benefits and drawbacks. When choosing the right material and finish for your bathroom hardware, consider factors such as durability, maintenance, and aesthetics.
Popular materials for bathroom hardware include brass, stainless steel, and zinc alloy. These materials are known for their strength and resistance to corrosion, making them suitable for high-moisture environments like bathrooms.
The finish of the hardware is equally important and can heavily influence the overall look of your bathroom. Whether you prefer a sleek chrome finish, a warm brushed nickel, or an elegant oil-rubbed bronze, the choice of finish should tie in with the existing fixtures and accessories in your bathroom.
Budget and Cost Considerations
Setting a budget is necessary when it comes to any home improvement project, including installing bathroom hardware. Consider your overall budget and allocate a portion of it specifically for hardware installation.
Take into account the cost of each piece of hardware you are considering, as well as any additional materials or tools that may be required for the installation process. Remember that higher-priced options may offer better quality and durability, but there are also affordable options available that can provide both style and functionality without breaking the bank.
It is important to strike a balance between your desired style and your budget to ensure a successful bathroom hardware installation.
By considering these vital factors of design and style, material and finish, and budget and cost, you can make informed decisions and create a cohesive and functional bathroom that meets your needs and preferences.
Tools And Equipment Required
Checklist of Necessary Tools
Before you begin installing bathroom hardware, it is essential to ensure you have all the necessary tools to complete the job efficiently. Here is a checklist of the tools you will need:
- Screwdriver: A screwdriver with both flathead and Phillips head options is essential for tightening screws.
- Drill: A drill will be needed for creating pilot holes before installing screws. Make sure your drill is suitable for the materials you will be working with.
- Measuring Tape: Accurate measurements are crucial for proper installation. Ensure you have a measuring tape for precise marking and alignment.
- Level: A level will help you ensure that your hardware is straight and properly aligned. This is particularly important for items such as towel bars or toilet paper holders.
- Adjustable Wrench: An adjustable wrench will be necessary for tightening nuts and bolts.
- Stud Finder: If you are installing hardware on a wall, a stud finder will help you locate the studs for secure and sturdy installation.
- Mallet or Hammer: A mallet or hammer will be needed for tapping anchors into place or making slight adjustments.
- Pliers: Pliers can be helpful for gripping and holding pieces in place while fastening them.
- Allen Wrench: Depending on the type of hardware you are installing, an Allen wrench may be necessary for tightening screws or fasteners.
- Masking Tape: Masking tape can be useful for marking wall positions or protecting surfaces from scratches or damage.
Safety Precautions
When working on any DIY project, it is essential to prioritize safety. Here are some safety precautions to keep in mind while installing bathroom hardware:
- Wear Protective Gear: Always wear appropriate protective gear, such as gloves and safety goggles, to protect your hands and eyes from potential hazards.
- Turn Off Power: If your installation involves electrical work, make sure to turn off the power to the area before starting.
- Use Caution on Ladders: If your installation requires working at heights, it is crucial to use a stable ladder and exercise caution to prevent falls and injuries.
- Follow Manufacturer’s Instructions: Read and follow the manufacturer’s instructions carefully to ensure proper installation and minimize the risk of accidents.
- Check for Water and Electrical Lines: Before drilling or driving screws into walls, ensure there are no hidden water or electrical lines behind the surface. Using a stud finder can help with this.
- Work in a Well-Ventilated Area: If you are using any adhesives or paints during the installation process, make sure you are working in a well-ventilated area to avoid inhaling harmful fumes.
- Take Breaks: Do not rush through the installation process. Take regular breaks to prevent fatigue, which can lead to accidents.
By having these essential tools and following the necessary safety precautions, you will be well-prepared and equipped to successfully install bathroom hardware. Remember to take your time, have patience, and enjoy the process of transforming your bathroom into a functional and aesthetically pleasing space.
Removing Old Bathroom Hardware
Before installing new bathroom hardware, it’s important to remove the old hardware properly. This step-by-step guide will walk you through the process, as well as provide tips for dealing with stubborn or damaged hardware.
Step-by-Step Guide to Removing Old Hardware
Follow these steps to easily remove your old bathroom hardware:
- Gather your tools: Before starting, make sure you have all the necessary tools. This may include a screwdriver, pliers, and a putty knife.
- Inspect the hardware: Carefully examine the hardware to determine how it is attached. Look for screws, bolts, or other fasteners that need to be removed.
- Loosen screws or bolts: Use an appropriate tool, such as a screwdriver or pliers, to loosen and remove any screws or bolts holding the hardware in place.
- Remove any caulk or adhesive: If the hardware is secured with caulk or adhesive, gently pry it away with a putty knife, being careful not to damage the surrounding surface.
- Pull off the hardware: Once all screws, bolts, and adhesive have been removed, carefully pull off the old hardware. If it’s stubborn, use gentle pressure and wiggling motions to loosen it.
Tips for Dealing with Stubborn or Damaged Hardware
If you encounter stubborn or damaged hardware during the removal process, try these tips to make the job easier:
- Apply lubricant: If screws or bolts are difficult to turn, apply a small amount of lubricant to help loosen them.
- Use heat: Heat can sometimes help break the grip of caulk or adhesive. Use a hairdryer to warm the area before attempting to remove the hardware.
- Use pliers or a wrench: If screws or bolts are stripped or damaged, use pliers or a wrench to grip them and provide extra leverage.
- Be patient and gentle: Avoid using excessive force that could cause damage to the hardware or surrounding surfaces. Take your time and work carefully.
By following this step-by-step guide and utilizing these tips, you’ll be able to remove your old bathroom hardware with ease. Once removed, you can proceed with installing your new hardware to give your bathroom a fresh and updated look.
Installing Towel Bars And Rings
When it comes to adding functionality and style to your bathroom, installing towel bars and rings is a must. These accessories not only provide a convenient place to hang towels, but they also enhance the overall aesthetic of your space. Follow these easy steps to ensure a successful installation.
Measuring and Marking the Wall
Before you begin installing your towel bars and rings, it’s essential to measure and mark the wall properly. Here’s what you need to do:
- Start by using a tape measure to determine the desired height for your towel bars and rings. Generally, a height of around 48-52 inches from the floor is recommended.
- Once you’ve decided on the height, use a pencil to mark the mounting points on the wall. Make sure the marks are level and evenly spaced for a balanced look.
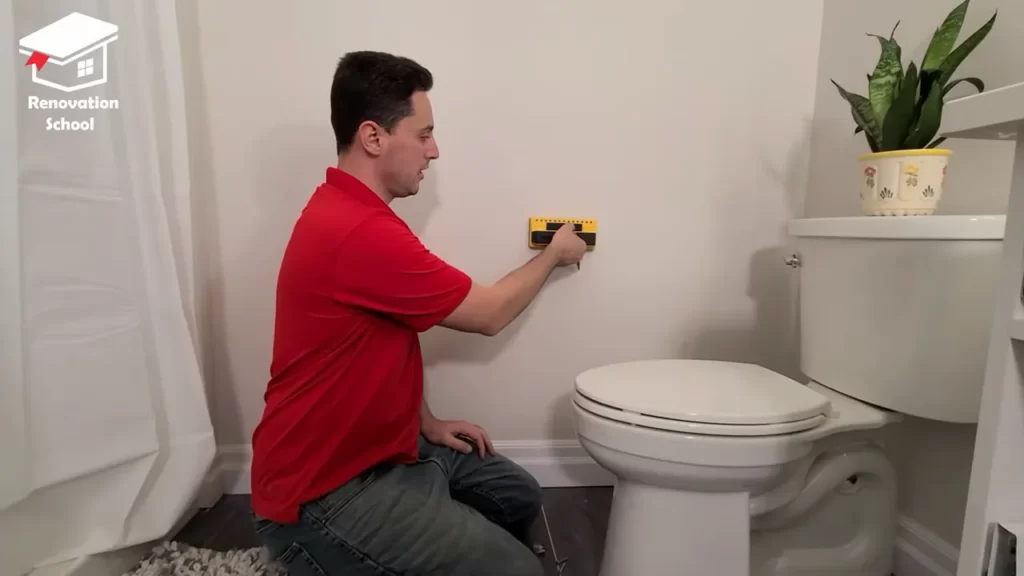
- Next, check the location of any studs in the wall using a stud finder. Mounting your towel bars and rings directly onto studs is ideal for added stability.
- If you don’t have studs in your desired location, you can use wall anchors to secure the hardware.
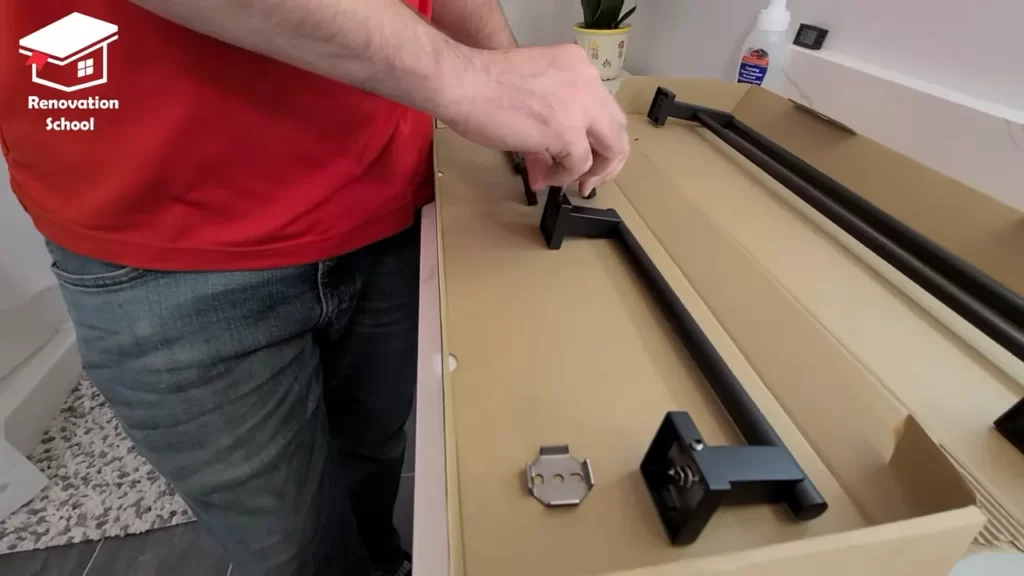
Mounting the Hardware
With the wall properly marked, it’s time to mount your towel bars and rings. Follow these steps:
- Hold the mounting bracket against the wall, aligning it with the pencil marks you made earlier. Ensure it is level and centered.
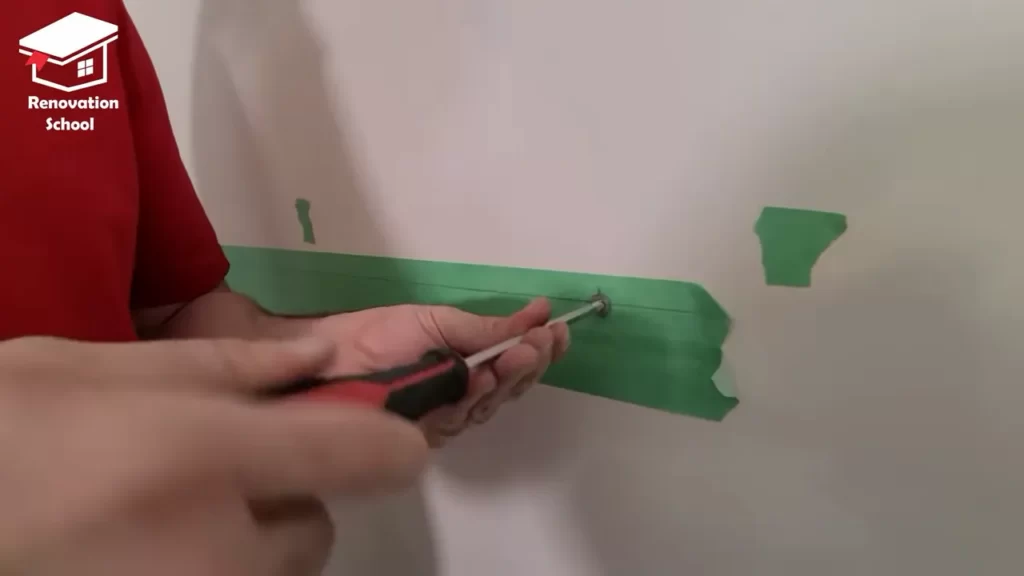
- If you are mounting directly onto studs, use a drill to insert screws through the bracket holes into the studs. Make sure the screws are tight and secure.
- If you are using wall anchors, carefully follow the manufacturer’s instructions for installation. Generally, this involves drilling pilot holes, inserting the anchors, and then screwing in the brackets.
- Repeat this process for each mounting bracket until all of the hardware is securely attached to the wall.
Securing the Hardware in Place
Once the mounting brackets are in place, it’s time to secure the towel bars and rings. Here’s what you need to do:
- Attach the towel bars or rings to the mounting brackets, following the instructions provided by the manufacturer.
- Ensure that the hardware is level and aligned properly.
- Tighten any set screws or locking mechanisms to secure the towel bars and rings in place.
- Give the hardware a gentle tug to ensure it is sturdy and properly attached to the wall.
With these simple steps, you can easily install towel bars and rings in your bathroom. Enjoy the added convenience and style these accessories bring to your space!
Installing Toilet Paper Holders
Installing a toilet paper holder may seem like a simple task, but it’s important to get it right to ensure convenience and functionality in your bathroom. In this section, we’ll discuss the appropriate height and placement of the toilet paper holder, the different mounting options you can choose from, and the steps to attach the holder securely.
Appropriate Height and Placement
Choosing the right height and placement for your toilet paper holder is crucial for a comfortable and ergonomic bathroom experience. Here are a few tips to consider:
- Place the toilet paper holder within easy reach, ideally within arm’s length from the toilet.
- Consider the height of the people using the bathroom. A height of 26 inches from the floor is generally suitable for most individuals.
- Ensure that the holder is mounted at a height where the toilet paper rolls can easily be changed without any hassle.
By following these guidelines, you can make sure that your toilet paper holder is conveniently placed for anyone using the bathroom.
Mounting Options
When it comes to mounting your toilet paper holder, you have a few options to choose from. Here are the most common mounting options:
- Wall-mounted: This is the most popular choice and involves attaching the holder directly to the wall. Make sure to find a suitable spot where the holder can be securely fastened.
- Freestanding: Freestanding holders are versatile and allow you to easily move them around if needed. They usually come with a weighted base for stability.
- In-wall: If you prefer a sleek and minimalist look, you can opt for an in-wall toilet paper holder. These holders are installed into the wall and provide a seamless appearance.
Consider the style and functionality you desire when choosing the mounting option that best suits your bathroom’s aesthetics and your personal preferences.
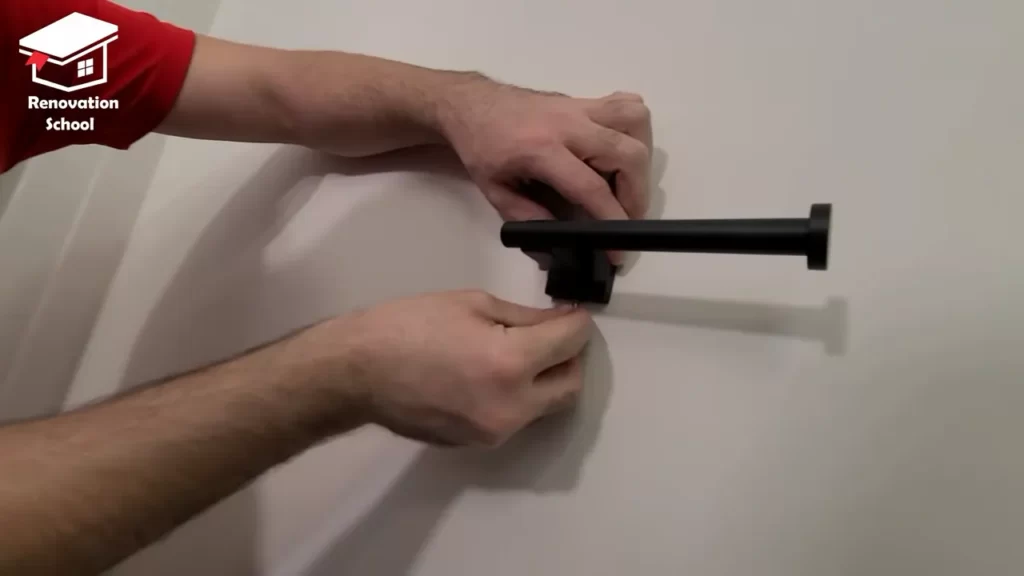
Attaching the Toilet Paper Holder
Once you’ve identified the appropriate height, placement, and mounting option, it’s time to attach the toilet paper holder. Here’s a step-by-step guide to help you:
- Using a tape measure and level, mark the desired location for the holder.
- Follow the manufacturer’s instructions to determine the appropriate drill bit size and drill holes into the marked spots.
- Insert wall anchors into the drilled holes to provide sturdiness for the screws.
- Align the holder with the drilled holes and securely fasten it to the wall using screws.
- Double-check the stability of the holder and ensure it is level before placing a new roll of toilet paper on it.
By following these steps carefully, you can install the toilet paper holder securely and confidently.
Installing a toilet paper holder may seem like a small task, but getting it right can make a big difference in your bathroom. Ensure the appropriate height and placement, choose the right mounting option, and attach the holder securely for an organized and functional bathroom space. Happy installing!
Installing Shower Curtain Rods And Rings
One of the key elements in any bathroom is the shower curtain, providing both functionality and style. To complete the installation of your bathroom hardware, it’s important to know how to properly install shower curtain rods and rings. This section will guide you through the process, from determining the right length to installing tension rods and mounting permanent curtain rods.
Determining the Right Length
Before you begin installing your shower curtain rod, it’s essential to determine the right length for your specific shower area. This will ensure a proper fit and prevent any issues with the curtain dragging or not providing adequate coverage. To measure the correct length, follow these steps:
- Using a measuring tape, measure the width of your shower area.
- Add a few inches to the measurement to allow for the curtain to hang properly.
- This total measurement will be the appropriate length for your shower curtain rod.
Installing Tension Rods
Tension rods are a popular choice for shower curtain installations due to their easy setup and adjustability. Follow these steps to install a tension rod:
- Extend the tension rod to approximately the desired length.
- Position one end of the rod against the shower wall.
- Hold the other end of the rod and twist it clockwise to create enough tension to hold it securely in place.
- Verify that the rod is level and adjust if necessary.
- Once the rod is securely in place, hang the shower curtain rings onto the rod and attach the curtain.
Mounting Permanent Curtain Rods
If you prefer a more permanent installation, you can mount curtain rods directly onto the shower walls. Follow these steps for a successful installation:
- Using a pencil, mark the spots on the wall where the curtain rod will be mounted.
- Use a stud finder to locate the wall studs, ensuring a secure placement for the curtain rod.
- Drill pilot holes into the marked spots using an appropriate drill bit size.
- Insert wall anchors into the pilot holes for added stability.
- Position the curtain rod brackets over the pilot holes and anchor them securely to the wall using screws.
- Double-check the brackets for levelness before proceeding.
- Once the brackets are securely in place, slide the shower curtain rings onto the rod and attach the curtain.
With these steps, you can now confidently install both tension rods and permanent curtain rods for your shower curtain. Take care in following the instructions to ensure a successful and functional installation. Now it’s time to enjoy your newly adorned bathroom!
Installing Towel Hooks And Shelves
When it comes to adding the finishing touches to your bathroom, installing towel hooks and shelves can not only provide functional storage solutions but also add style and organization to the space. Whether you prefer wall-mounted options or over-the-door alternatives, here is a step-by-step guide to help you install towel hooks and shelves in your bathroom.
Choosing Placement for Hooks and Shelves
Before you start installing your towel hooks and shelves, it’s important to determine the ideal placement for them. Consider the following factors:
- Accessibility: Ensure that the hooks and shelves are within easy reach when you need to grab a towel or place personal items.
- Space availability: Take into account the available wall space and the size of your towels or items to determine how many hooks or shelves you’ll need.
- Aesthetics: Think about the overall design and style of your bathroom, and choose a placement that complements the existing decor.
Installing Wall-Mounted Hooks and Shelves
If you’ve decided to go with wall-mounted towel hooks and shelves, follow these steps:
- Choose a sturdy and level section of the wall for installation.
- Using a tape measure, mark the desired height and spacing for each hook or shelf.
- Drill pilot holes into the marked spots, ensuring that the holes are slightly smaller than the screws or anchors you will be using.
- Insert wall anchors into the pilot holes, if necessary, to provide additional support.
- Align the hooks or shelves with the pilot holes and secure them in place using screws or mounting brackets.
- Double-check that everything is level and secure before hanging towels or placing items on the hooks or shelves.
Mounting Over-the-Door Hooks and Shelves
If you prefer the convenience of over-the-door hooks and shelves, here’s how to install them:
- Select a sturdy and well-fitted over-the-door hook or shelf unit.
- Position the unit over the top of the bathroom door or any other suitable door in your bathroom.
- Ensure that the unit is properly aligned and balanced, with no wobbling or tilting.
- Make sure that the hooks or shelves are securely attached to the door, following the manufacturer’s instructions.
- Test the stability by gently pulling on the hooks or shelves to confirm that they are firmly in place.
- Once you’re satisfied with the installation, hang towels or place items on the hooks or shelves as needed.
By carefully selecting the placement and following the installation steps for towel hooks and shelves, you can create a functional and aesthetically pleasing bathroom space. Whether you choose wall-mounted options or over-the-door alternatives, the additional storage will help keep your bathroom organized and tidy.
Ensuring Level And Secure Installations
Installing bathroom hardware doesn’t just improve the functionality of your bathroom, but it also adds a touch of elegance to the overall design. However, it’s essential to ensure that the installation is both level and secure to avoid any mishaps or damage. In this section, we will explore some important guidelines for achieving a level and secure installation of bathroom hardware.
Using a Level
A level is a crucial tool when it comes to installing bathroom hardware. It helps ensure that the hardware is perfectly level, providing a neat and professional finish. Here’s how to use a level effectively:
- Start by marking the desired location for the hardware, using a pencil or tape measure.
- Place the level on the marked spot and adjust the position until the bubble inside the level is centered. This indicates that the hardware will be installed perfectly level.
- Make any necessary adjustments to the marked spot before proceeding with the installation.
Securing Hardware Properly
Properly securing bathroom hardware is essential to ensure its longevity and stability. While every installation may have specific requirements, here are some general guidelines to follow:
- Choose the appropriate screws or anchors for the type of wall material. For example, use wall anchors or toggle bolts for drywall installations.
- Ensure that the screws or anchors are long enough to penetrate the wall or stud properly.
- Tighten the screws firmly, but be careful not to over-tighten, as it may damage the hardware or the wall.
- If installing on tile, use a drill bit specifically designed for tile to prevent cracks.
Checking Stability and Durability
Once the bathroom hardware is installed, it’s crucial to check its stability and durability to guarantee its long-term functionality. Here are some steps to ensure stability and durability:
- Gently test the hardware by applying slight pressure in different directions to ensure that it doesn’t move or wobble.
- Periodically check the hardware’s tightness and retighten if necessary to prevent loosening over time.
- Consider the weight capacity of the hardware and make sure it can withstand the intended use.
- Regularly clean and maintain the hardware to prevent corrosion or damage.
Following these guidelines will help ensure that your bathroom hardware is installed level and secure, providing both functionality and aesthetic appeal. So, take your time and get it right the first time, and enjoy your beautifully designed bathroom for years to come.
Proper Maintenance And Care
Proper maintenance and care are essential for maintaining the longevity and appearance of your bathroom hardware. By following a few simple steps, you can keep your fixtures looking pristine and ensure their functionality for years to come. In this section, we will discuss two crucial aspects of proper maintenance and care: cleaning and polishing the hardware, and avoiding damage or scratches. We will also provide guidance on replacing worn or damaged hardware when necessary.
Cleaning and Polishing Hardware
To maintain the shine and cleanliness of your bathroom hardware, regular cleaning is essential. Follow these steps:
- Start by removing any existing grime or residue using a soft cloth or sponge and mild soap.
- Rinse the hardware thoroughly with warm water to remove any soap residue.
- Dry the hardware completely using a clean, lint-free cloth to prevent water spots.
- For tackling stubborn stains or buildup, you can create a mixture of equal parts vinegar and water. Dip a cloth into the solution, wring out excess liquid, and gently wipe the affected areas.
- After cleaning, apply a thin layer of metal polish specifically designed for your hardware’s material. Using a soft cloth, buff the surface in circular motions until it shines.
Avoiding Damage or Scratches
To prevent damage and scratches, it is crucial to handle bathroom hardware with care. Here are some tips to keep in mind:
- Avoid using abrasive cleaners, scrub brushes, or rough sponges when cleaning your hardware, as they can scratch the surface.
- Place a soft cloth or towel on the countertop or floor before working with any hardware to provide a cushioned surface and prevent accidental damage.
- When installing or tightening hardware components, use gentle pressure and avoid overtightening, as this can lead to cracks or dents.
- Regularly inspect your hardware for any signs of wear or damage. If you notice loose screws, tarnish, rust, or other issues, take prompt action to prevent further damage.
Replacing Worn or Damaged Hardware
Over time, bathroom hardware may become worn or damaged, requiring replacement. Here’s what you should do:
- Begin by identifying the specific hardware component that needs to be replaced.
- Measure the dimensions of the existing hardware to ensure you select the appropriate replacement.
- Research reputable brands and suppliers to find high-quality hardware that matches your desired style and budget.
- Follow the manufacturer’s instructions for proper installation, or seek the assistance of a professional if you are unsure about the process.
By following these guidelines, you can ensure that your bathroom hardware not only looks great but also functions optimally for years to come.
Final Touches And Added Accessories
Once you have successfully installed your bathroom hardware, it’s time to add the final touches and incorporate some added accessories to enhance the overall look and functionality of your bathroom. These final details can make a significant difference in transforming your bathroom into a stylish and organized space. In this section, we will explore different ways to add decorative elements, how to coordinate the hardware with your bathroom decor, and the importance of considering additional accessories.
Adding Decorative Elements
When it comes to adding decorative elements to your bathroom, there are several options to consider. These elements not only serve as eye-catching features but can also contribute to the overall ambiance of the space. Here are a few ideas to get you started:
- Hang a stylish mirror on the wall, which can serve as a focal point and enhance the illusion of space.
- Add wall art or framed pictures that complement your bathroom’s color scheme and style.
- Place decorative candles or plants on shelves or countertops to create a calming and inviting atmosphere.
- Invest in attractive storage solutions, such as baskets or decorative boxes, to keep your bathroom organized while adding a touch of elegance.
Coordinating Hardware with Bathroom Decor
Coordinating the hardware with your bathroom decor is crucial to achieve a cohesive and aesthetically pleasing look. When selecting your hardware, consider the following:
- Choose hardware finishes that complement the existing fixtures and elements in your bathroom. For instance, if you have chrome faucets and showerheads, opt for chrome hardware to create a unified look.
- Take into account the style and theme of your bathroom. If your bathroom has a modern design, sleek and minimalist hardware will be a great match. On the other hand, if you have a traditional or vintage-inspired bathroom, ornate and detailed hardware can add charm and character.
- Ensure that the size and scale of the hardware are proportionate to the size of your bathroom. Oversized or undersized hardware can disrupt the overall balance and harmony.
Considering Additional Accessories
Aside from bathroom hardware, there are various additional accessories you may want to consider to further elevate the functionality and comfort of your space. Here are some popular options:
| Towel Warmers | Shower Caddies |
|---|---|
| Towel warmers not only keep your towels cozy and warm but also add a touch of luxury to your bathroom experience. | Shower caddies are ideal for storing your shower essentials, such as shampoo, conditioner, and body wash, conveniently within reach. |
Remember to select accessories that align with your personal needs and preferences, as well as the available space in your bathroom. Incorporating these additional elements will not only enhance the functionality of your bathroom but also contribute to its overall appeal.
By paying attention to these final touches and added accessories, you can turn your bathroom into a stylish haven that reflects your personal taste and offers a relaxing escape from the outside world.
Frequently Asked Questions
How Do You Install Bathroom Accessories?
To install bathroom accessories, follow these steps: 1. Gather the necessary tools and equipment. 2. Determine the placement of each accessory. 3. Securely attach the accessories to the bathroom walls or surfaces. 4. Ensure proper alignment and stability. 5. Test the accessories for functionality.
Enjoy your newly installed bathroom accessories!
How To Arrange Bathroom Hardware?
Arrange bathroom hardware by following these steps: 1. Start by determining what items you need and where you want them to be placed. 2. Install towel bars, hooks, and shelves at convenient heights and locations. 3. Ensure proper spacing between items for a visually pleasing arrangement.
4. Use adhesive hooks or suction cup accessories for temporary or rental-friendly setups. 5. Regularly clean and maintain your hardware to keep it looking its best.
How High To Install Bathroom Hardware?
To install bathroom hardware at the right height, consider the following tips. Install towel bars at around 48 inches above the floor, toilet paper holders at 26 inches, and shower rods at 60 to 72 inches. Hooks should be placed at a height that is convenient for use.
How To Install Bathroom Accessories Without Drilling?
You can install bathroom accessories without drilling by using adhesive hooks or suction cups that stick to the surface. Clean the area first, then apply the adhesive or suction cup firmly. Make sure to follow the manufacturer’s instructions for best results.
This method is ideal for temporary installations or if you don’t want to damage your walls.
Conclusion
To sum up, installing bathroom hardware doesn’t have to be a daunting task. By following the step-by-step guide outlined in this blog post, you can confidently tackle this project and give your bathroom a fresh and updated look. Remember to choose the right hardware for your style and needs, measure accurately, use the proper tools, and secure everything properly.
With a little patience and attention to detail, you’ll have a beautifully finished bathroom in no time. Happy installing!