Install a walk-in shower kit by following the manufacturer’s instructions, using appropriate tools and materials for a secure and proper installation. Transforming your bathroom into a sleek and modern space can be achieved with the installation of a walk-in shower kit.
These kits offer a convenient and stylish alternative to traditional bathtubs, providing a spacious showering area that is easily accessible. With the right tools and materials, as well as careful attention to detail, you can successfully install a walk-in shower kit in your bathroom.
This article will guide you through the steps to complete the installation, ensuring a seamless and functional addition to your home. So, let’s dive in and explore how to install a walk-in shower kit.
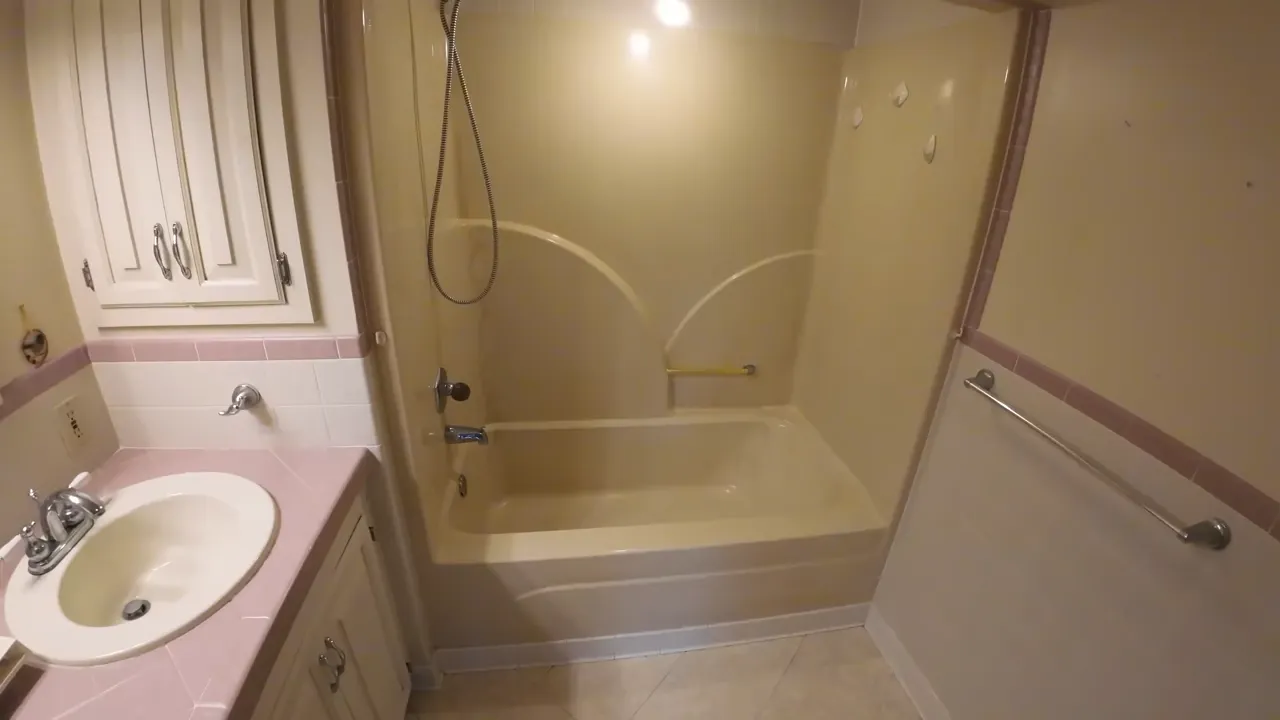
Considerations For Your Bathroom Space
The size and layout of your bathroom, plumbing and drainage requirements, as well as accessibility and safety features, play crucial roles when considering the installation of a walk-in shower kit. The right choices can transform your bathroom experience, ensuring both comfort and practicality.
Size and layout of your bathroom
Before diving into the installation process, it’s important to consider the size and layout of your bathroom. Understanding the available space allows you to choose an appropriate walk-in shower kit that fits harmoniously. Here are a few key factors to keep in mind:
- Measure the dimensions of your bathroom accurately, including the length, width, and ceiling height. This information ensures you choose a walk-in shower kit that fits well without causing any obstructions.
- Consider the overall layout of your bathroom. This includes the location of existing fixtures such as sinks, toilets, and bathtubs. Determine how the walk-in shower kit can be integrated seamlessly into the current design, maximizing both functionality and aesthetics.
- Think about the ideal placement of the shower in your bathroom. Keep in mind factors such as ease of access, privacy, and proximity to other elements you might want to include, such as storage units or seating areas.
Plumbing and drainage requirements
Proper plumbing and drainage are vital for a fully functional walk-in shower kit. Consider the following aspects:
- Check your current plumbing system to ensure it can support the additional load of a walk-in shower kit. You might need to consult a professional plumber to assess if any modifications or upgrades are necessary.
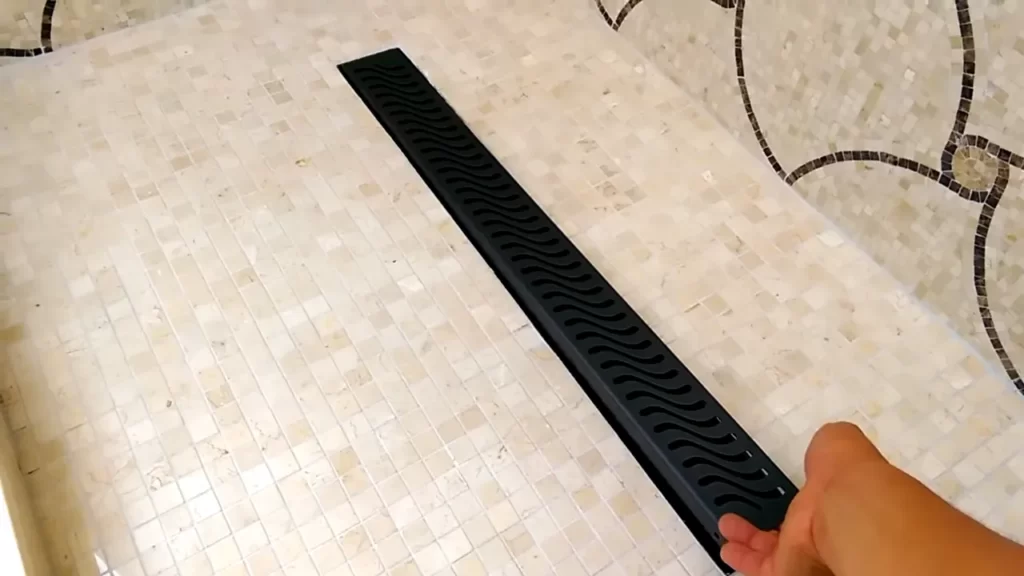
- Confirm the location and condition of the existing drain. If necessary, consider repositioning the drain to accommodate the walk-in shower kit. This ensures efficient water flow and prevents any potential water damage.
- Consider the material of the shower floor, as it should be slip-resistant and capable of directing water towards the drain effectively.
Accessibility and safety features
When installing a walk-in shower kit, it’s important to prioritize accessibility and safety. Here are a few features to consider:
- Add grab bars to the walls of your walk-in shower in strategic positions, allowing for stability and support while moving in and out of the shower.
- Choose a shower seat that provides comfort and security, especially for those who may have difficulty standing for extended periods.
- Ensure the shower controls are easy to reach and simple to operate. This is particularly important for individuals with limited mobility.
- Consider installing non-slip flooring or using non-slip mats inside the shower to reduce the risk of falls.
By considering the unique attributes of your bathroom space, such as its size, layout, plumbing and drainage requirements, as well as accessibility and safety features, you are paving the way for a successful walk-in shower kit installation. Remember, these considerations not only enhance the functionality and aesthetics of your bathroom but also contribute to a more enjoyable and convenient bathing experience.

Assessing Your Diy Skills And Tools
Before embarking on any home improvement project, it’s important to assess your skills and tools to ensure you are equipped for the task at hand. Installing a walk-in shower kit can be a rewarding project that adds luxury and convenience to your bathroom, but it’s crucial to determine whether you have the necessary plumbing and electrical expertise, as well as the required tools and equipment. Considering these factors will not only save you time and effort but also help you stay within your budget.
Level of Plumbing and Electrical Expertise
The first aspect to evaluate is your level of plumbing and electrical expertise. While installing a walk-in shower kit may seem straightforward, it involves connecting water supply lines, drainage systems, and potentially handling electrical wiring for shower features such as lighting or temperature controls. It is important to have a good understanding of these systems and be comfortable working with them. If you have prior experience with plumbing and electrical tasks, you may feel confident tackling this project on your own. However, if you are unsure or lack the necessary expertise, it is advisable to consult a professional to avoid any potential issues or safety hazards.
Required Tools and Equipment
Equally vital is having the appropriate tools and equipment for the installation process. The exact tools required may vary based on the walk-in shower kit you have chosen and the existing plumbing and electrical setup in your bathroom. However, some common tools you may need include a level, pipe wrenches, adjustable wrenches, pipe cutters, screwdrivers, electrical testers, pliers, and waterproofing materials. It’s crucial to ensure you have access to these tools before starting the project. If you do not already own them, you can consider renting or purchasing them from a local hardware store. Having the right tools will not only make the installation smoother but also minimize the chance of damage or errors during the process.
Budget Considerations
Lastly, it is necessary to factor in your budget when considering a walk-in shower kit installation. Assessing your DIY skills and tools can help you determine whether it is economical to undertake the project yourself or whether hiring a professional is a more cost-effective option. If you have extensive plumbing and electrical knowledge, installing the walk-in shower kit on your own can save you money on labor costs. However, if you need to invest in tools, equipment, and materials that you do not already possess, it is important to include these expenses in your budget calculations. Additionally, consider the potential cost of any mistakes or damage that could occur during the installation process. Weighing these budget considerations will help you make an informed decision and ensure the successful completion of your walk-in shower kit installation project.
By thoroughly assessing your DIY skills and tools, you can determine whether installing a walk-in shower kit is a suitable project for you. Remember to evaluate your plumbing and electrical expertise, gather the necessary tools and equipment, and consider your budget before proceeding. This preparation will set you up for a successful and satisfying DIY endeavor.
Removing Existing Fixtures And Fittings
Before installing a walk-in shower kit, you need to remove any existing fixtures and fittings. This step is crucial to ensure a smooth and successful installation process. In this section, we will discuss the different aspects of removing old shower enclosures, handling plumbing and electrical connections, as well as dealing with any necessary repairs.
Disconnecting and removing old shower enclosure:
The first step in removing the old shower enclosure is to disconnect any plumbing and electrical connections. Begin by turning off the water supply to the shower and shutting off the electricity to the bathroom. Next, use a wrench to disconnect the water pipes and carefully remove any fixtures attached to the enclosure.
Once the connections have been removed, you can start dismantling the old shower enclosure. Remove the screws or bolts that hold it in place and carefully detach it from the wall. Be cautious during this process to avoid damaging the surrounding tiles or walls.
Handling plumbing and electrical connections:
After disconnecting the old shower enclosure, you may need to address the plumbing and electrical connections. This is a critical step to ensure that your walk-in shower kit operates smoothly and safely.
If you encounter any leaks or damaged pipes during the removal process, it is important to fix them before proceeding. This may require replacing faulty pipes, tightening connections, or applying sealant to prevent any future leaks.
In terms of electrical connections, it is recommended to consult a professional electrician. They will ensure that the wiring is appropriately handled and connected, adhering to the necessary safety protocols. This will provide you with peace of mind and guarantee the safe functioning of your walk-in shower kit.
Dealing with any necessary repairs:
Before installing the new walk-in shower kit, it is essential to address any necessary repairs. Inspect the walls and floor for any signs of damage, such as cracks or water leaks.
If you come across any issues, you will need to fix them before moving forward. Repair any damaged walls or flooring, ensuring a sturdy and stable foundation for the walk-in shower. This will extend the lifespan of your new shower kit and prevent any potential problems down the line.
By following these steps and taking the time to properly remove existing fixtures and fittings, you will pave the way for a smooth and successful installation of your walk-in shower kit. Remember to handle plumbing and electrical connections with care, addressing any repairs along the way. In doing so, you will create a functional and enjoyable shower space for years to come.
Waterproofing And Floor Preparation
Waterproofing and Floor Preparation
One of the most crucial steps in installing a walk-in shower kit is ensuring proper waterproofing and floor preparation. This ensures that your shower area remains free from leaks and water damage, providing a durable and long-lasting solution for your bathroom. In this section, we will discuss the steps involved in evaluating the condition of walls and floors, applying waterproofing membrane or sealant, leveling the floor, and ensuring proper drainage.
Evaluating the condition of walls and floors
Before you begin the installation process, it is essential to evaluate the condition of the walls and floors in your bathroom. Look for any signs of damage such as cracks, wet spots, or mold growth. If you notice any issues, it is important to address them before proceeding with the installation. Repairing any damage will ensure a solid foundation for your walk-in shower kit and prevent future problems.
Applying waterproofing membrane or sealant
Once you have assessed the condition of the walls and floors, the next step is to apply a waterproofing membrane or sealant. This additional layer of protection helps prevent water from seeping through the walls or floor and causing damage. There are various types of membranes and sealants available, so choose one that suits your needs and budget. Apply the membrane or sealant according to the manufacturer’s instructions, ensuring that all areas prone to water exposure are properly covered.
Leveling the floor and ensuring proper drainage
After applying the waterproofing membrane or sealant, it is crucial to level the floor to ensure proper drainage. A sloping floor allows water to flow easily towards the drain, preventing any potential pooling or stagnation. Use a self-leveling compound if necessary to create a smooth and even surface. Additionally, make sure that the drain is properly installed and functioning correctly. This will ensure that water is efficiently drained from your shower area, reducing the risk of water damage and mold growth.
By following these steps for waterproofing and floor preparation, you can create a solid foundation for your walk-in shower kit. Taking the time to evaluate the condition of your walls and floors, applying proper waterproofing, and ensuring level flooring with proper drainage will result in a beautiful, functional, and durable walk-in shower installation.
Assembling The Shower Walls And Base
Installing a walk-in shower kit can be a great way to enhance the functionality and aesthetics of your bathroom. When it comes to assembling the shower walls and base, following the manufacturer’s instructions is crucial to ensure a smooth and successful installation. In this section, we will cover the essential steps for connecting the panels and securing them in place and installing the shower base or pan.
Following the manufacturer’s instructions
Before you begin assembling the shower walls and base, make sure to carefully read and understand the manufacturer’s instructions. These instructions will provide you with specific guidance and details that are unique to your particular walk-in shower kit. Following these instructions will not only ensure a proper installation but also protect your warranty.
Connecting panels and securing them in place
Once you have familiarized yourself with the manufacturer’s instructions, you can start connecting the panels and securing them in place. This process typically involves interlocking the panels or using adhesive to join them together. It’s important to check that each panel is level and plumb before securing it. This will help to ensure that your walk-in shower is not only visually appealing but also properly sealed to prevent any leaks.
If you are using adhesive to connect the panels, make sure to apply it according to the manufacturer’s instructions. Spread the adhesive evenly onto the back of the panels, and carefully press them together, following the recommended order. Use clamps or other suitable tools to hold the panels in place while the adhesive dries. This will provide the necessary strength and stability to your shower walls.
Installing the shower base or pan
Once you have assembled the shower walls, it’s time to install the shower base or pan. The shower base provides a sturdy foundation for your walk-in shower and ensures proper drainage. Begin by checking the level of the floor and making any necessary adjustments to ensure a level installation.
If you are using a shower base, carefully position it in the desired location. Ensure that it is aligned with the drain hole and mark the position. Apply a suitable adhesive or mortar to secure the base, following the manufacturer’s instructions. Use a level to check that the base is even on all sides before allowing the adhesive or mortar to dry.
If you are using a shower pan, position it in place and follow the manufacturer’s instructions for securing it. Make sure to properly connect the drain to the pan, ensuring a watertight seal. Test the drain for any leaks before proceeding to the next steps of your installation.
By diligently following the manufacturer’s instructions and taking the necessary precautions, you can effectively assemble the shower walls and base for your walk-in shower kit. This will create a beautiful and functional space in your bathroom, providing you with the perfect showering experience.
Connecting Plumbing And Electrical Components
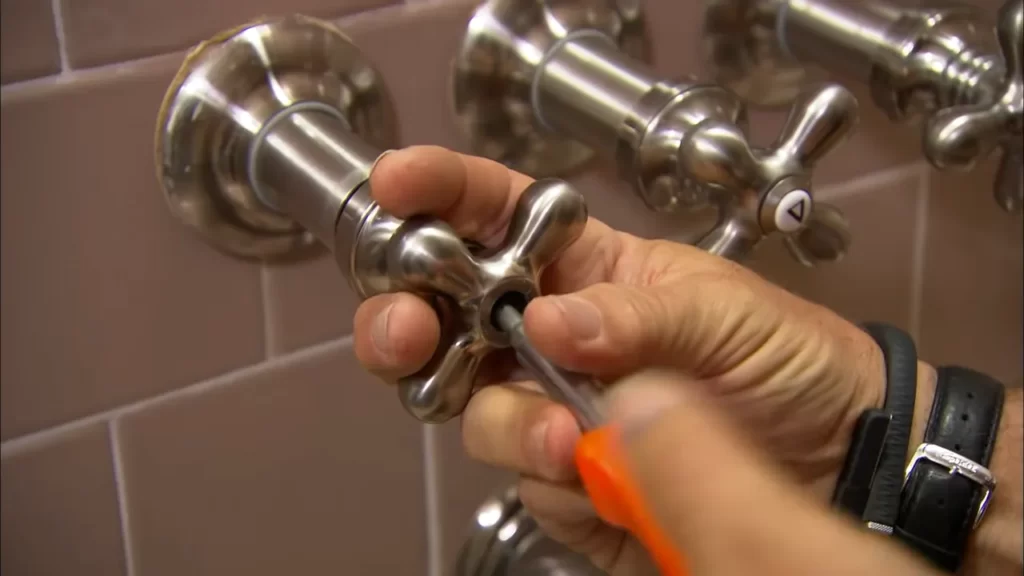
Installing the Shower Valve and Controls
To connect the plumbing components of your walk-in shower, start by installing the shower valve and controls. This step is crucial in ensuring that the water flow and temperature are properly regulated. Here’s how you can accomplish this:
- Locate the position where you want to mount the shower valve and controls. Make sure it is easily accessible and within reach while showering.
- Measure and mark the exact position of the valve and controls on the wall.
- Use a suitable drill bit to create holes for the water supply and the control handle.
- Insert the shower valve into the wall, aligning the inlet and outlet pipes with the corresponding holes.
- Tighten the valve in place using the appropriate wrench or pliers.
- Attach the control handle to the valve, ensuring it is securely fastened.
Make sure to cross-check the manufacturer’s instructions for specific details on the installation process. Once the valve and controls are securely in place, you can proceed to connect the water supply and drain pipes.
Connecting Water Supply and Drain Pipes
Properly connecting the water supply and drain pipes is essential for the functionality and longevity of your walk-in shower. Follow these steps to ensure a seamless connection:
- Identify the hot and cold water supply lines. They are usually indicated by color-coded pipes.
- Attach the water supply lines to the appropriate inlets on the shower valve.
- Tighten the connections using adjustable wrenches, ensuring a snug fit without over-tightening.
- Next, connect the drain pipe to the shower base or floor drain. Ensure the drain pipe is properly aligned and securely attached.
- Apply a waterproof sealant or plumber’s putty to prevent any leaks at the connections.
- Check for any leaks by running water through the shower and inspecting the connections.
By following these steps, you can ensure that the plumbing components of your walk-in shower are properly connected and functioning optimally. Now, let’s move on to the electrical components.
Wiring Any Necessary Electrical Components
Installing and wiring necessary electrical components is an important aspect of your walk-in shower installation, especially if you plan to have features like lighting, exhaust fans, or digital controls. Here’s how you can safely wire these components:
- Turn off the power supply to the bathroom circuit at the main electrical panel.
- Identify the specific electrical components you want to install, such as light fixtures or ventilation fans. Make sure they are suitable for use in a wet environment.
- Plan the electrical layout and determine the appropriate wiring paths for each component.
- Carefully run the electrical wiring through the walls and ceiling, making sure to follow safety guidelines and regulations.
- Connect the electrical wires to their respective components, ensuring proper grounding and insulation.
- Securely mount and install the electrical components in their designated locations.
Always remember to follow local electrical codes and consult a licensed electrician if you are unsure about any aspect of the wiring process. Once the electrical components are wired and installed, you can double-check all connections before restoring power to the bathroom circuit.
By connecting the plumbing and electrical components properly, you can ensure the functionality and safety of your walk-in shower kit installation. With these steps completed, your walk-in shower will be ready for use, providing convenience and comfort in your daily bathing routine.
Sealing And Finishing The Installation
Once you have successfully installed your walk-in shower kit, it is important to properly seal and finish the installation to ensure a leak-free and aesthetically appealing result. In this section, we will discuss three essential steps: applying silicone sealant to prevent leaks, installing shower fixtures and accessories, and performing a thorough cleanup and inspection.
Applying silicone sealant to prevent leaks
One of the most crucial aspects of sealing a walk-in shower kit is applying silicone sealant. This ensures that water does not seep through the cracks and joints, preventing any potential leaks that can cause moisture damage to your bathroom. Here is a step-by-step guide:
- Clean the surfaces: Before applying silicone sealant, make sure to clean the surfaces thoroughly. Use a mild detergent and water to remove any dirt, dust, or debris.
- Prepare the silicone sealant: Cut the nozzle of the silicone tube at a 45-degree angle. Insert it into a caulking gun and apply a bead of silicone around the edges and seams of the shower kit.
- Smooth the sealant: Use a wet finger or a sealant smoothing tool to create a neat and smooth finish. Remove any excess sealant.
- Allow for drying: Let the silicone sealant dry completely according to the manufacturer’s instructions before using the shower.
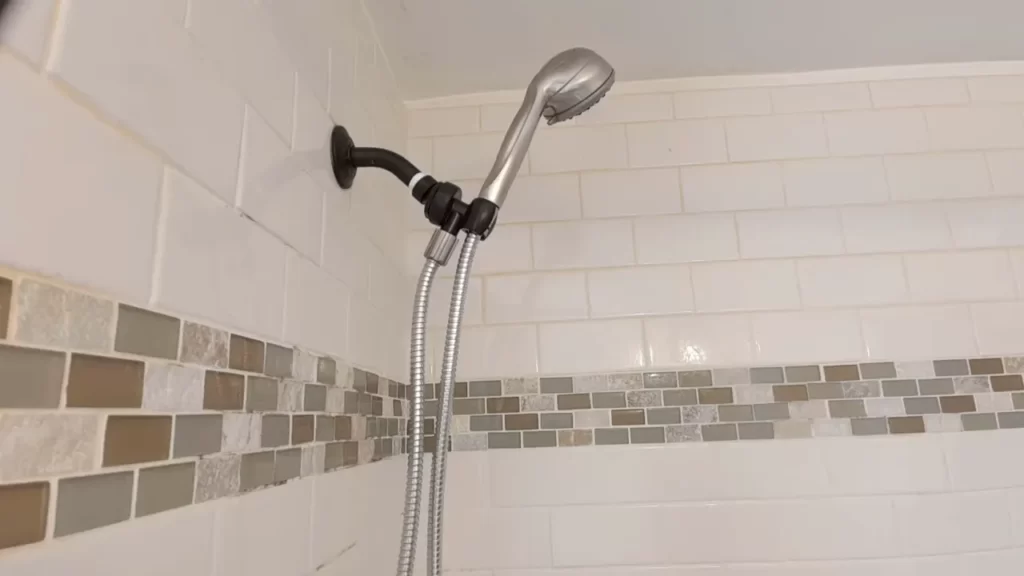
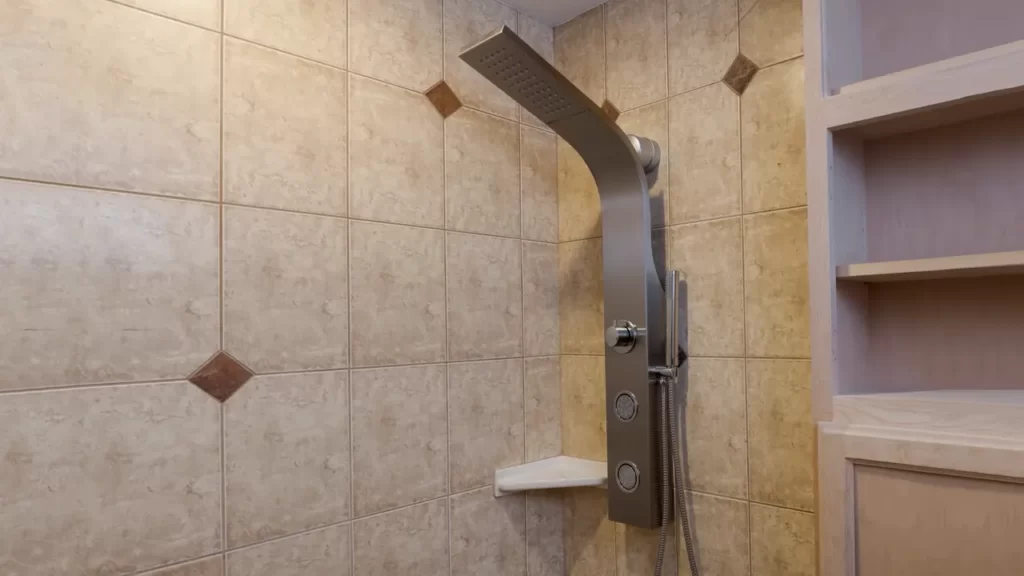
Installing shower fixtures and accessories
Now that you have sealed the shower kit, it’s time to install the shower fixtures and accessories. These include the showerhead, faucets, drain cover, and any additional components you may have purchased. Follow these steps:
- Refer to the manufacturer’s instructions: Each shower fixture and accessory may have specific installation guidelines. Make sure to read and follow the instructions carefully.
- Attach the fixtures: Use the appropriate tools to attach the showerhead, faucets, and other fixtures. Follow the provided instructions to securely fasten them in place.
- Check for leaks: Turn on the water supply and check for any leaks around the installed fixtures. Tighten any connections if necessary.
Performing a thorough cleanup and inspection
Once the shower kit is sealed and all the fixtures are installed, it’s time to perform a thorough cleanup and inspection. This ensures that everything is in proper working order and that your installation is complete. Here’s what you should do:
- Remove any debris: Clean up any leftover debris or construction materials from the installation, ensuring that the shower area is clean and ready for use.
- Inspect for any issues: Carefully examine the entire installation, including the surrounding walls and flooring. Look for any signs of damage, loose connections, or potential issues that may need attention.
- Check functionality: Test the shower’s functionality by turning on the water and checking for proper water flow, temperature control, and drainage.
By following these steps and properly sealing and finishing your walk-in shower kit installation, you can enjoy a safe and well-functioning shower that adds value and convenience to your bathroom.
Conducting A Pressure And Leak Test
Installing a walk-in shower kit can be an exciting project that adds both style and functionality to your bathroom. However, before you can fully enjoy your new shower, it’s essential to conduct a thorough pressure and leak test. This step is crucial to ensure proper water flow, pressure, and leak-proof installation. By following the steps outlined below, you can identify and fix any issues that may arise during the testing process.
Checking for Water Flow and Pressure Issues
Before conducting a pressure and leak test, it’s vital to check for any water flow and pressure issues. This step will help you determine if there are any underlying problems that need to be addressed before moving forward with the installation. Here’s how you can do it:
- Connect the main water supply to the walk-in shower kit.
- Turn on the water supply and let it flow into the shower.
- Observe the water flow and pressure. Make sure it is consistent and strong enough for a satisfying shower experience.
- If you notice any issues, such as low water pressure or inadequate flow, you may need to consult a professional plumber to address the problem.
Identifying and Fixing any Leaks or Drips
Once you have confirmed the water flow and pressure are in good shape, the next step is to identify and fix any potential leaks or drips. This is crucial to prevent water damage and maintain a watertight shower enclosure. Follow these steps to ensure a leak-free installation:
- Inspect all the connections and fittings of the walk-in shower kit carefully.
- Look for any signs of water leakage, such as water stains, dampness, or dripping.
- If you find any leaks, tighten the connections using appropriate tools, such as pliers or wrenches.
- If the leak persists, consider applying plumber’s tape or sealant to create a watertight seal.
- After making adjustments, conduct another pressure test to ensure the leak has been effectively fixed.
Remember, a proper pressure and leak test can help you avoid potential problems in the future and ensure a seamless installation. Take your time during this step, as it can make a significant difference in the longevity and functionality of your walk-in shower kit.
Addressing Common Installation Challenges
Installing a walk-in shower kit can be a rewarding DIY project that adds a touch of elegance to your bathroom. However, like any home improvement task, it comes with its fair share of challenges. If you’re considering installing a walk-in shower kit and are worried about potential hurdles along the way, fret not! In this section, we’ll discuss some common installation challenges and provide practical solutions to overcome them.
Dealing with uneven walls or floors
One common challenge during walk-in shower kit installation is dealing with uneven walls or floors. Uneven surfaces can make it difficult to achieve a seamless and watertight installation. To address this issue:
- Start by inspecting the walls and floors to identify any uneven areas.
- Use a leveling tool to determine the extent of the unevenness.
- If the discrepancy is minor, you can consider using a self-leveling compound to even out the surface. Simply follow the manufacturer’s instructions to apply the compound and let it dry completely before proceeding.
- For more significant unevenness, you may need to hire a professional to assess and address the structural issues before proceeding with the installation.
Resolving plumbing and electrical problems
Another challenge that may arise during walk-in shower kit installation involves plumbing and electrical issues. While it’s always best to consult a professional plumber or electrician for complex problems, here are a few steps you can take to resolve minor issues on your own:
- Check for any leaks or blockages in the existing plumbing system. Repair or replace any damaged or faulty parts as necessary.
- If you plan to install new electrical fixtures or outlets, ensure that you follow the building codes and regulations. If you are uncertain, it’s advisable to seek the assistance of a licensed electrician.
- Remember to turn off the water and electricity supply before commencing any work in order to ensure your safety.
Seeking professional help if needed
While tackling a walk-in shower kit installation on your own can be a rewarding experience, it’s important to recognize when to seek professional help. Certain installation challenges may require expertise beyond your capabilities. If you encounter any of the following situations, it’s best to consult a professional:
- If the installation involves complex plumbing or electrical work that you’re not familiar with.
- If you uncover existing structural issues that could compromise the integrity of your wall or floor.
- If you’re unsure about how to ensure proper waterproofing and sealing.
Remember, safety should always be your utmost priority. Seeking professional help when necessary ensures that the installation is not only successful but also compliant with building codes and regulations.
By addressing common installation challenges such as dealing with uneven walls or floors, resolving plumbing and electrical problems, and seeking professional help when needed, you’ll be well-equipped to install your walk-in shower kit efficiently and with confidence. Get ready to enjoy the convenience and luxury of a walk-in shower in your own home!
Frequently Asked Questions
Can I Install A Shower Kit Myself?
Yes, you can install a shower kit yourself. Just follow the instructions provided and ensure you have the necessary tools. It’s a straightforward process that can save you money. However, if you’re unsure or inexperienced, it’s advisable to hire a professional for the best results.
How Easy Is It To Install A Walk-In Shower?
Installing a walk-in shower is relatively easy. With proper planning and tools, you can have it done without much hassle. Ensure you have the necessary plumbing and electrical connections ready and follow the installation instructions carefully. Seek professional assistance if needed.
How Do You Install A Shower Wall Kit?
To install a shower wall kit, follow these steps: 1. Measure the area and ensure it’s clean and level. 2. Apply adhesive to the back of the panels and press them firmly onto the wall. 3. Secure the panels with screws or nails if needed.
4. Install corner trims and seal any gaps with silicone caulk. 5. Let the adhesive dry before using the shower.
How Much Does It Cost To Install A Shower Kit?
The cost of installing a shower kit can vary depending on factors such as the type of kit and the complexity of the installation. On average, homeowners can expect to pay between $500 and $1,500 for professional installation services. However, DIY installation can reduce costs significantly.
Conclusion
Installing a walk-in shower kit can be a simple and cost-effective way to upgrade your bathroom. By following the step-by-step instructions provided in this blog post, you can confidently tackle this DIY project. Remember to gather all the necessary tools and materials before starting, and take your time to ensure a successful installation.
With a walk-in shower kit, you can enjoy a stylish and convenient bathing experience. So why wait? Start transforming your bathroom today!