
To install a Waterpik shower head, first, remove the existing shower head. Then, attach the Waterpik shower head to the shower arm by screwing it in tightly.
Are you looking to upgrade your shower experience? Installing a Waterpik shower head can make a significant difference. With its advanced features and superior water pressure, a Waterpik shower head provides a refreshing and invigorating shower. Luckily, the installation process is straightforward and can be done in a few simple steps.
In this guide, we will walk you through the process of installing a Waterpik shower head to help you enjoy your new shower experience in no time. So, let’s get started!
Factors To Consider When Selecting A Waterpik Shower Head
Factors to Consider When Selecting a Waterpik Shower Head
Choosing the right shower head for your bathroom is essential to enhance your showering experience. A Waterpik shower head offers a variety of options to suit your preferences. From water pressure requirements to size and design options, as well as special features and functionalities, there are several factors to consider before making your selection.
Water Pressure Requirements
When it comes to selecting a Waterpik shower head, it is important to consider your water pressure requirements. Different shower heads have varying water pressure specifications, ranging from high-pressure to low-flow options. If you enjoy a powerful and invigorating shower, a high-pressure shower head might be ideal for you. On the other hand, if you prefer a gentle and water-saving shower experience, a low-flow shower head might be more suitable. Consider your water pressure needs and choose a Waterpik shower head accordingly.
Size and Design Options
An important aspect to consider when selecting a Waterpik shower head is the size and design options available. Waterpik offers a range of shower head sizes, from compact handheld options to larger rainfall shower heads. The size you choose depends on your personal preference and the available space in your shower. Additionally, Waterpik shower heads come in various designs to complement your bathroom style. Whether you prefer a sleek and modern design or a classic and elegant look, there is a design option to match your aesthetic.
Special Features and Functionalities
In addition to water pressure requirements and size options, Waterpik shower heads also come with special features and functionalities to enhance your shower experience. Some shower heads offer massage settings, which provide a soothing and therapeutic massaging sensation on your body. Others include adjustable spray settings, allowing you to customize the water flow pattern according to your preference. Consider these special features and functionalities when selecting a Waterpik shower head to ensure it meets your specific showering needs.

Gather The Necessary Tools And Materials
Before you begin installing your Waterpik shower head, make sure you have all the necessary tools and materials at hand. This will help you complete the installation smoothly and efficiently.
Waterpik shower head kit
The first thing you will need is the Waterpik shower head kit. This kit typically includes the shower head, a shower arm, and any additional components required for installation. Ensure that all the parts are included in the kit before you start.
Adjustable wrench
An adjustable wrench is an essential tool for installing the Waterpik shower head. It allows you to tighten or loosen the connections securely. Make sure you have a wrench that fits the size of the connections on the shower head and shower arm.
Teflon tape
Teflon tape is crucial for creating a watertight seal between the shower head and the shower arm. This thin white tape is applied to the threaded connections to prevent any leaks. When wrapping the tape, ensure that it goes in the same direction as you will be screwing on the shower head.
Towel or rag
Having a towel or rag nearby is always a good idea during installation. It will come in handy to wipe away any water or debris that may be present on the shower arm or connections. Plus, it helps protect the shower head finish from accidental scratches.
Once you have gathered all the necessary tools and materials, you can proceed with the installation process confidently. Having everything within reach ensures that you won’t have to pause midway to search for missing items, saving you time and frustration.

Familiarize Yourself With The Existing Shower System
Before you begin installing your new Waterpik shower head, it’s important to familiarize yourself with the existing shower system in your bathroom. This will ensure a smooth installation process and help you identify any potential issues or challenges along the way. In this section, we will guide you through two key steps to get you started: identifying the type of shower arm and checking for any leaks or issues.
Identify the type of shower arm
The shower arm is the pipe that extends from the wall and connects to the shower head. Identifying the type of shower arm you have is crucial to ensure compatibility with your new Waterpik shower head. Here’s how you can determine the type of shower arm:
- Inspect the current shower head: Take a close look at your existing shower head. Is it screwed onto the shower arm or does it have a ball joint connection?
- If it’s screwed on: If your current shower head is screwed onto the shower arm, it is most likely a standard threaded connection. This means you will need a shower head with matching threads to replace it.
- If it has a ball joint connection: If your existing shower head has a ball joint connection, it means you have a swivel ball shower arm. This type of shower arm allows for better adjustability and flexibility.
Check for any leaks or issues
Prior to installing your new Waterpik shower head, it’s essential to ensure that there are no leaks or issues in your current shower system. This will help prevent any potential problems after installation. Here’s what you need to do:
- Turn on the shower: Start by turning on the shower and closely inspecting the shower arm and connections for any visible leaks. Look for dripping water or signs of moisture.
- Check the shower valve: While the shower is running, check the shower valve for any leaks or unusual sounds. Make sure the valve operates smoothly without any stiffness or resistance.
- Examine the showerhead connection: Inspect the connection between the shower arm and the current shower head for any signs of leakage. Tighten if necessary, but be careful not to overtighten, as it could cause damage.
- Test the water pressure: Take note of the water pressure coming from the current shower head. This will help you assess any changes in water pressure once you install the new Waterpik shower head.
By familiarizing yourself with the existing shower system, identifying the shower arm type, and checking for leaks or issues, you’ll be well-prepared for a successful installation of your new Waterpik shower head. Next, we’ll guide you through the step-by-step installation process, ensuring you can enjoy a refreshing and invigorating shower experience in no time!
Turn Off The Water Supply
Locate and turn off the main water valve for the shower
Before you begin installing your new Waterpik shower head, it is important to turn off the water supply to avoid any potential water damage or accidents.
To locate the main water valve for your shower, you may need to look inside your bathroom or utility room. The valve is typically located near the shower or bathtub area. Once you’ve found it, follow these steps to turn off the water supply:
- Locate the main water valve for your shower. It is usually a small lever or knob.
- Turn the lever or knob clockwise until it reaches the fully closed position.
Note: In some cases, the main water valve may be located elsewhere in your home, such as the basement or utility room. If you are unsure about the location of the main water valve, it’s a good idea to consult your home’s plumbing layout or contact a professional plumber for assistance.
Unscrew The Old Shower Head
Use an adjustable wrench to loosen the shower head
Before you can install your shiny new Waterpik shower head, you’ll need to remove the old one. To do this, grab your trusty adjustable wrench. This handy tool will allow you to loosen the shower head and make the removal process a breeze.
Carefully remove the shower head
Once you have your adjustable wrench in hand, it’s time to carefully remove the old shower head. Remember that the shower head may still have some water in it, so be prepared for a little bit of drippage. Take your wrench and place it around the base of the shower head, making sure it’s snugly fitted. Then, using a counterclockwise motion, turn the wrench to loosen the shower head.
Be cautious not to apply too much force, as you don’t want to damage any surrounding plumbing or fixtures. Slowly and steadily, continue turning the wrench until the shower head is loose enough to remove by hand.
Once the shower head is loosened, carefully unscrew it by hand in a counterclockwise direction. Set it aside for disposal or future use, depending on its condition. Ensure you have a cloth or towel handy to catch any remaining water that may spill.
Now that you have successfully removed the old shower head, you’re one step closer to enjoying the benefits of your new Waterpik shower head. The next step is to install it, so stay tuned for our next guide on how to do just that!
Apply Teflon Tape To The Shower Arm
When it comes to installing a Waterpik shower head, applying Teflon tape to the shower arm is an essential step to ensure a secure and leak-free connection. Teflon tape, also known as plumber’s tape, creates a tight seal between the shower arm and the shower head, preventing any water leaks. Follow these simple steps to apply Teflon tape correctly:
Wrap Teflon Tape Clockwise Around the Shower Arm Threads
Start by unwinding a small section of Teflon tape from the roll. Hold the loose end of the tape against the base of the shower arm threads, ensuring that it is positioned on the outermost edge. Now, carefully wrap the tape around the shower arm threads in a clockwise direction, ensuring that each wrap overlaps the previous one by about 50%. Applying the Teflon tape in this direction ensures that it remains in place when you attach the shower head. Make sure to apply a few extra wraps near the end of the shower arm threads to create a tight seal.
Ensuring a Secure Connection
After wrapping the Teflon tape around the shower arm threads, firmly press the tape into place to ensure it adheres properly. This will help prevent the tape from unraveling while you install the shower head. Remember, a secure connection is crucial to avoid any water leaks, so take your time to properly wrap and press the Teflon tape.
Final Steps
Once you have applied the Teflon tape to the shower arm, you’re almost ready to attach the Waterpik shower head. Hold the shower head in one hand, and with the other hand, gently screw it onto the shower arm threads. Make sure to hand-tighten it, as over-tightening can damage the threads and cause leaks. If you notice any water leaks after installation, double-check that the Teflon tape is applied correctly and securely.
With Teflon tape properly applied to the shower arm, you can now enjoy your new Waterpik shower head without worrying about any water leaks. Follow these simple steps, and you’ll have it installed in no time!
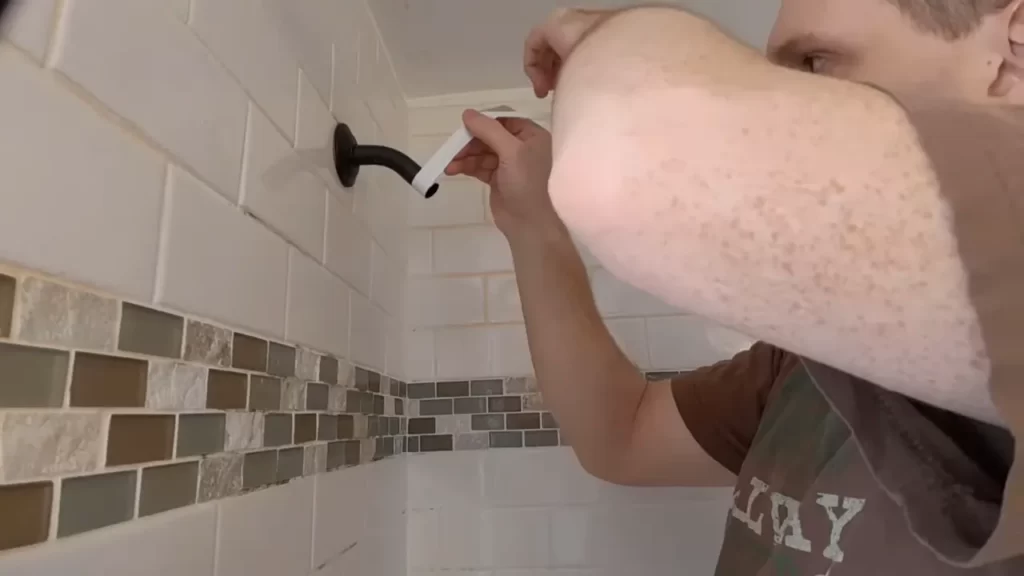
Attach The New Waterpik Shower Head
Once you have chosen your new Waterpik shower head and gathered the necessary tools, it’s time to attach it to the shower arm. Follow these simple steps to ensure a secure and leak-free installation:
Screw the new shower head onto the shower arm
Start by unscrewing your old shower head from the shower arm. Turn it counterclockwise until it comes off completely. Then, take your new Waterpik shower head and screw it onto the shower arm in a clockwise motion. Ensure that the threads on the shower arm and the shower head align properly.
Hand-tighten the shower head until secure
Use your hand to tighten the shower head onto the shower arm. Begin by gripping the shower head firmly and turning it clockwise. Continue tightening until you feel resistance and the shower head is securely in place. Be careful not to overtighten, as this may cause damage to the shower head or the shower arm.
Once the shower head is hand-tightened, give it a gentle test to ensure it is secure and there are no leaks. If you notice any water leaking from the connections, use a wrench to give the shower head a small turn to the right to achieve a tighter seal. Avoid using excessive force or tools, as this may cause damage.
By following these steps, you can easily attach your new Waterpik shower head to the shower arm. Enjoy the enhanced shower experience and the benefits of a high-quality shower head!
Turn On The Water Supply
1. Gradually turn on the water to check for leaks
Once all the necessary connections have been made, it’s time to turn on the water supply. This step is crucial to ensure that everything is properly installed and functioning as it should. To do this, follow the steps below:
- Locate the main water supply valve in your bathroom. It’s typically located near the sink or toilet.
- Slowly turn the valve clockwise to open the water supply. Take care to do it gradually to avoid any sudden water surges that could potentially damage the shower head or cause leaks.
- As you turn on the water, keep a close eye on the shower head and its connections. Look out for any signs of water leakage, such as dripping or spraying.
- If you notice any leaks, it’s important to take immediate action to prevent further damage. Tighten the connections or replace any faulty parts as necessary. Remember, even a small leak can result in significant water wastage over time.
Regularly checking for leaks and addressing them promptly will not only save water but also prolong the lifespan of your Waterpik shower head.
Adjust The Spray Settings
Once you have successfully installed your Waterpik shower head, the next step is to adjust the spray settings. The spray settings determine the force and pattern of water flow, allowing you to customize your shower experience to your liking. Here’s how you can explore the different spray settings and modes and make any necessary adjustments for optimal water flow.
Explore the different spray settings and modes
Waterpik shower heads offer a variety of spray settings and modes, allowing you to find the perfect combination for your needs. To explore the different options available, follow these steps:
- Locate the spray settings dial or button on your Waterpik shower head. It is usually located on the handle or the top of the shower head.
- Turn on the shower and rotate the spray settings dial to cycle through the different spray options. You may find settings like rainfall, massage, power spray, mist, or a combination of these.
- Take a moment to experience each spray setting and mode. Pay attention to the water pressure, pattern, and coverage.
- Make a mental note of your favorite spray settings and modes that provide the most comfort and relaxation.
Make any necessary adjustments for optimal water flow
Once you have explored the different spray settings, you may need to make some adjustments to achieve optimal water flow. Here are a few tips:
- If you find the water flow too weak, remove any flow restrictors that may be installed in your shower head. Check the manufacturer’s instructions for guidance on removing and reinstalling flow restrictors.
- If the water flow feels too strong or uncomfortable, you can reduce it by adjusting the shower head angle. Tilting the shower head downwards can help lower the pressure and soften the flow.
- Experiment with different spray settings and modes to find the combination that provides the perfect balance of pressure and coverage.
- If you have multiple people using the shower, consider adjusting the spray settings to accommodate each person’s preferences. This can be especially helpful if you have options for individual or dual shower heads.
By exploring the various spray settings and making any necessary adjustments, you can ensure a refreshing and personalized shower experience with your Waterpik shower head. Enjoy the benefits of a rejuvenating shower by customizing it to your liking and making the most of the available options.
Troubleshooting Common Issues
Installing a Waterpik shower head is a great way to enhance your showering experience and save water at the same time. However, like any other shower head, you may come across some common issues that can hinder its performance. In this section, we’ll discuss some troubleshooting tips for low water pressure, leaks, and drips.
Low water pressure
If you’re experiencing low water pressure with your Waterpik shower head, there are a few possible causes to consider:
- Check the water flow restrictor: Many shower heads come with a water flow restrictor installed to conserve water. However, sometimes they can become clogged or damaged, resulting in low water pressure. To troubleshoot this issue, you can remove the flow restrictor and clean it thoroughly before re-installing it.
- Inspect the shower head filter: A clogged shower head filter can also cause low water pressure. Over time, mineral deposits and debris can accumulate in the filter, obstructing the water flow. To fix this issue, remove the filter, rinse it with warm water, and use a soft brush to scrub away any residues.
- Consider the water supply: Another potential reason for low water pressure is a problem with the water supply itself. Check if there are any issues with the water pressure in your area or if there are any plumbing problems in your home that could be affecting the shower head.
Leaks or drips
Leaking or dripping shower heads not only waste water but can be frustrating to deal with. Here are some steps to troubleshoot this issue:
- Inspect the connection: Start by ensuring that the shower head is tightly connected to the shower arm. Over time, the connection can become loose, causing leaks. Use an adjustable wrench to tighten the connection if necessary.
- Examine the O-rings: The O-rings are rubber seals that help prevent leaks. If they are worn out or damaged, they may need to be replaced. Remove the shower head, examine the O-rings, and if necessary, purchase replacements that are compatible with your Waterpik shower head model.
- Apply plumber’s tape: If you’re still experiencing leaks, you can try applying plumber’s tape to the threads of the shower arm. This can create a better seal and reduce the chances of water escaping.
By following these troubleshooting tips, you can address common issues with your Waterpik shower head and ensure optimal performance. Remember, if the problems persist, it’s always a good idea to consult the manufacturer’s instructions or contact their customer support for further assistance.
Regularly Clean The Shower Head
Remove mineral build-up
Keeping your waterpik shower head free of mineral build-up is crucial for maintaining its optimum performance. Over time, minerals present in the water can accumulate inside the shower head, leading to reduced water pressure and less efficient water flow. To remove mineral build-up, follow these simple steps:
- Begin by turning off the shower and removing the shower head from its mounting.
- If your shower head has a removable faceplate or nozzles, gently detach them and set them aside.
- Fill a bowl or basin with equal parts white vinegar and water. Submerge the shower head or its components in the vinegar solution. Ensure that all the affected areas are covered.
- Let the shower head soak in the vinegar solution for at least 30 minutes. This will help break down and dissolve the mineral deposits effectively.
- Once the soak time is complete, use a small brush with soft bristles, such as a toothbrush or an old toothbrush, to scrub the shower head and its components. Focus on the areas where mineral build-up is the most prominent.
- Rinse the shower head thoroughly with clean water to remove any vinegar residue and loosened mineral deposits.
- Lastly, reattach the shower head or its components, ensuring everything is securely in place.
By regularly removing mineral build-up, you will not only preserve the functionality of your waterpik shower head but also improve the overall water flow and enhance your showering experience.
Keep the nozzles clear
To ensure optimal performance and longevity of your waterpik shower head, it is essential to keep the nozzles clear and free from any obstructions. Over time, debris, such as dirt, soap scum, and hair, can accumulate in the nozzles, diminishing the water flow and spray pattern. Here’s how you can keep the nozzles clear:
- Periodically inspect the shower head nozzles. If you notice any visible blockages, proceed to the next steps.
- Prepare a solution of warm water and mild soap in a bowl.
- Remove the shower head or its faceplate containing the nozzles, following the manufacturer’s instructions.
- Place the shower head or faceplate in the bowl with the warm soapy solution and let it soak for a few minutes.
- Gently scrub the nozzles with a soft brush or an old toothbrush to remove any debris or build-up.
- Rinse the shower head or faceplate thoroughly with clean water to eliminate any soap residue and debris.
- Reattach the shower head or its faceplate, ensuring a secure fit.
By keeping the nozzles clear, you will enjoy a more invigorating and satisfying shower experience. Remember to clean your waterpik shower head regularly to maintain its performance and efficiency for years to come.
Check For Any Signs Of Damage
Inspect the shower head for cracks or leaks
Before you begin the installation process for your new Waterpik Shower Head, it’s crucial to check for any signs of damage. This step is essential to ensure the smooth functioning of your shower head and prevent any leaks or cracks that could lead to water wastage or poor performance. Here are a few steps to follow when inspecting your shower head:
|

|
If you notice any cracks, leaks, or other damages, it’s crucial to address them before proceeding with the installation. Damaged shower heads not only affect water flow and pressure but can also cause water damage to your bathroom walls or ceiling. In severe cases, they might need complete replacement.
Replace any worn-out parts as needed
If you find any worn-out or damaged parts during the inspection process, replacing them is the next step. It’s important to ensure that your new Waterpik Shower Head functions optimally and delivers the best showering experience. Follow these steps to replace worn-out parts:
- Identify the damaged part that requires replacement
- Refer to the user manual or manufacturer’s instructions for guidance on replacement
- Turn off the water supply to the shower head before starting the replacement process
- Detach the damaged part carefully using appropriate tools
- Install the new part firmly, ensuring a tight fit
- Turn the water supply back on and check for any leaks or loose connections
By replacing any worn-out parts, you can ensure that your Waterpik Shower Head functions efficiently, delivers the desired water pressure, and provides a refreshing shower experience.
Frequently Asked Questions
Is A Waterpik Shower Head Good For Low Water Pressure?
Yes, a Waterpik shower head is good for low water pressure. It increases water flow and pressure, providing a satisfying shower experience.
How Do You Replace A Hand Held Shower Head And Hose?
To replace a handheld shower head and hose, first, turn off the water supply. Unscrew the existing shower head by twisting it counterclockwise. Disconnect the hose from the shower arm by unscrewing it. Attach the new hose to the shower arm and the new shower head to the hose.
Finally, turn on the water supply and test for leaks.
How Do You Remove A Waterpik Shower Head?
To remove a Waterpik shower head, follow these simple steps: 1) Turn off the water supply. 2) Unscrew the shower head counterclockwise by hand. 3) If it’s too tight, use pliers with a cloth to protect the finish.
Where Is The Water Restrictor In A Waterpik Shower Head?
The water restrictor in a Waterpik shower head is typically located inside the shower head nozzle. It helps to regulate and limit water flow, conserving water while still providing a refreshing shower experience.
Conclusion
To wrap up, installing a Waterpik shower head can be a straightforward process that enhances your showering experience. By following the easy step-by-step instructions, you can quickly upgrade your bathroom. Remember to choose the right model for your needs, gather the necessary tools, and take your time during installation.
With a Waterpik shower head, you can enjoy a powerful and invigorating shower every day. So why wait? Upgrade your shower today!