
To install a shower faucet stem, turn off the water supply, remove the handle and cover plate, unscrew the retaining nut, and replace the old stem with a new one. Once complete, reassemble the faucet and turn the water supply back on.
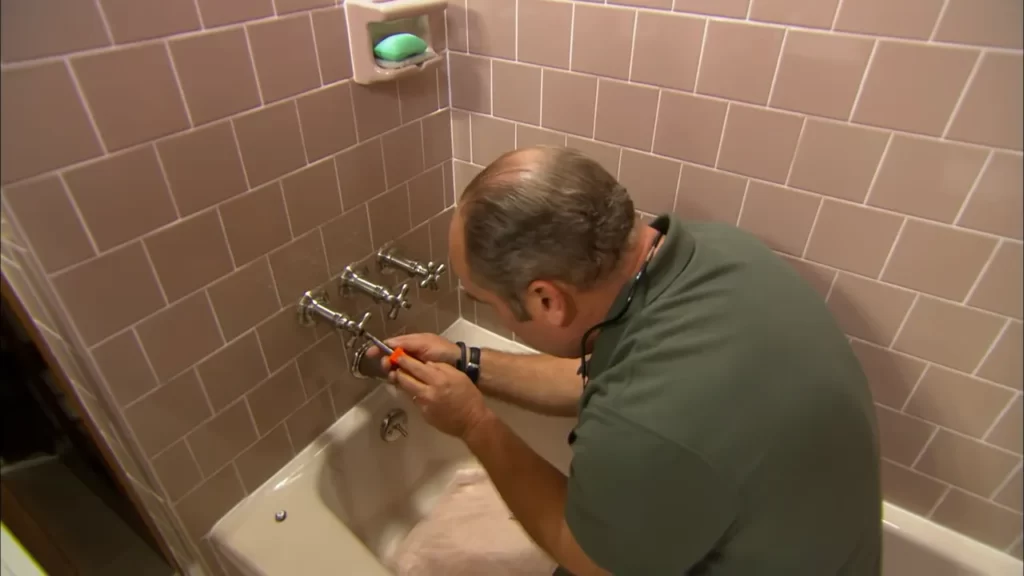
Installing a shower faucet stem can seem like a daunting task, but with a few simple steps, you can easily replace a faulty or outdated stem. Before starting, remember to turn off the water supply to your shower. Then, remove the handle and cover plate to expose the stem.
Unscrew the retaining nut and carefully take out the old stem. Finally, insert the new stem, reassemble the faucet, and turn the water supply back on. By following these steps, you can have your shower faucet stem replaced and working properly in no time.
Removing Old Faucet Stem: A Key Step In Installation
When installing a new shower faucet stem, one of the most crucial steps is removing the old stem. This step is essential to ensure a smooth and successful installation process. In this section, we will discuss the importance of removing the old faucet stem, the tools required for the task, and provide a step-by-step process to guide you through the removal process.
Importance of removing old faucet stem
Removing the old faucet stem is crucial for several reasons:
- Allows for a proper fit: The new stem needs to fit perfectly in the existing faucet body. Removing the old stem ensures that there are no obstructions or residue that could prevent a snug fit.
- Prevents leaks: Over time, faucet stems can become worn, leading to leaks. By removing the old stem, you can identify any damage or deterioration that may be causing the leaks. This step allows for a thorough inspection and ensures a leak-free installation.
- Maintains water pressure: A faulty faucet stem can affect the water pressure in your shower. By removing the old stem, you can assess the condition of the internal components and make any necessary repairs or replacements to restore optimal water pressure.
- Enhances durability: Installing a new stem on top of an old and damaged stem can compromise the durability of the faucet. Removing the old stem ensures a clean and solid base for the new stem, promoting longevity and functionality.
Tools required for the task
Before you can begin removing the old faucet stem, it’s essential to gather the necessary tools:
| Tools | Description |
|---|---|
| Adjustable wrench | To loosen and remove the stem |
| Plumbing grease | To lubricate the stem and prevent future leaks |
| Screwdriver | To unscrew any screws holding the stem in place |
| Plumber’s tape | To provide a watertight seal when installing the new stem |
Step-by-step process of removing the old stem
- Locate the water shut-off valves: Before beginning any plumbing work, it’s crucial to turn off the water supply to the shower. Locate the water shut-off valves, typically found near the shower or in the basement.
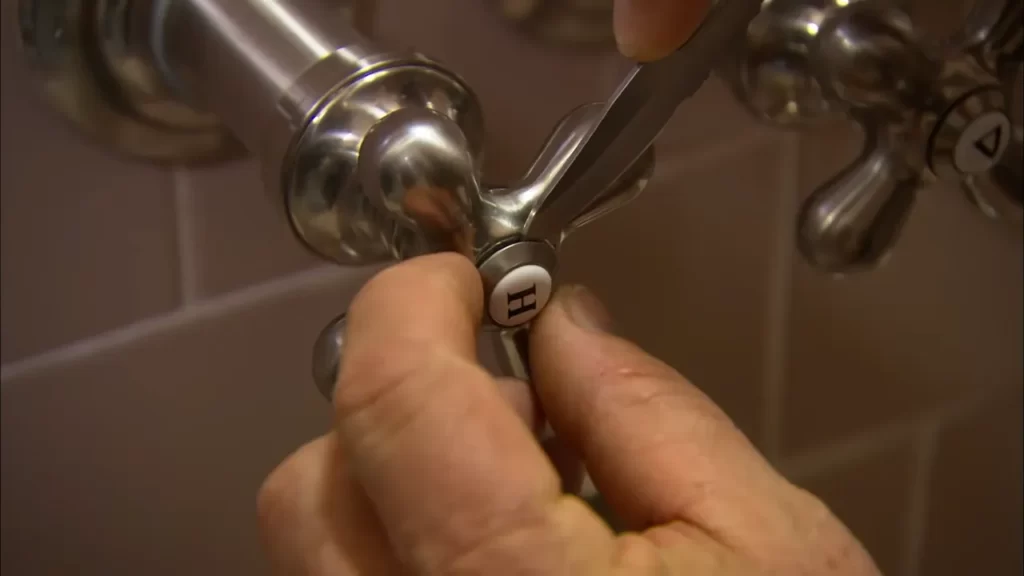
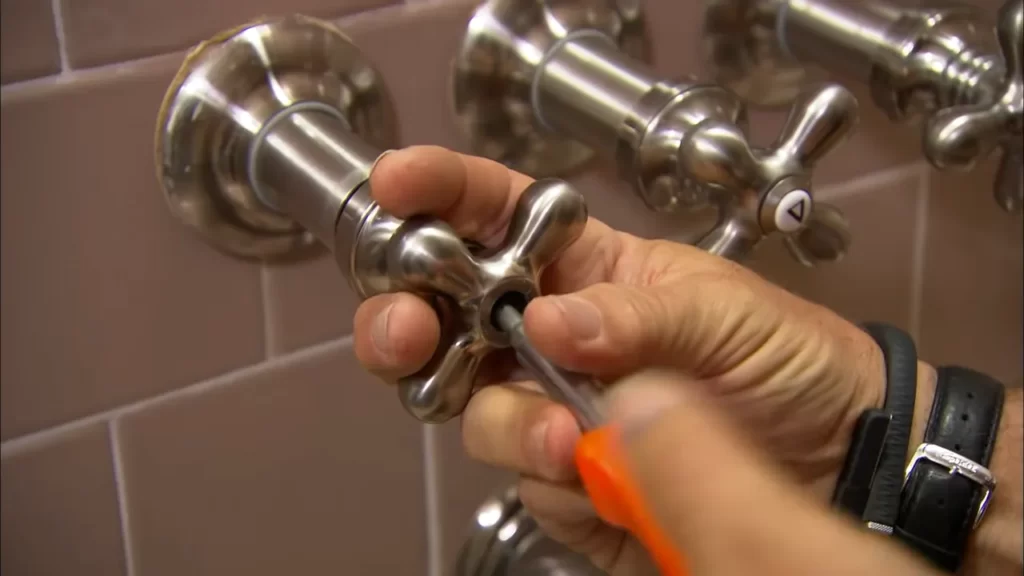
- Remove the faucet handle: Use a screwdriver to remove any screws or caps covering the handle. Once exposed, use an adjustable wrench to loosen and remove the handle by turning it counterclockwise.
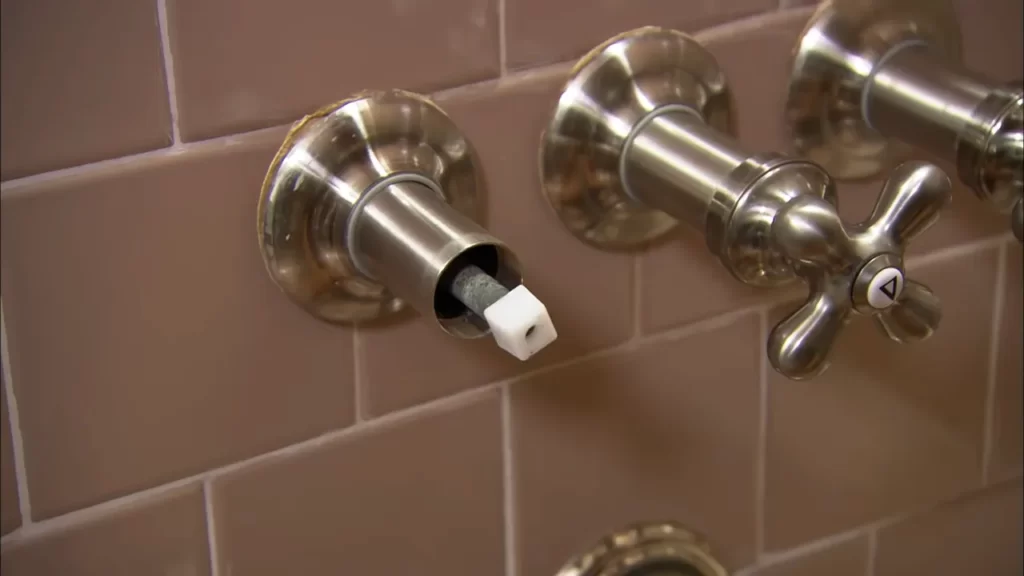
- Expose the stem assembly: With the handle removed, you will be able to see the stem assembly. Inspect it for any screws or nuts holding it in place. Use the appropriate tools to remove these fasteners.
- Loosen and remove the old stem: Once the fasteners are removed, use an adjustable wrench to loosen the old stem by turning it counterclockwise. Continue until the stem is free and can be pulled out.
- Inspect the faucet body: With the old stem removed, take a moment to inspect the faucet body for any debris or residue. Clean it thoroughly with a cloth or brush to ensure a clean, smooth surface.
- Apply plumber’s tape: Before installing the new stem, wrap plumber’s tape around the threads of the faucet body. This step creates a watertight seal and prevents leaks.
By following these steps and taking the time to remove the old faucet stem properly, you’ll ensure a smooth installation process for your new shower faucet. Remember to consult the manufacturer’s instructions for any specific details regarding your particular faucet model.
Leveraging The Right Tools And Materials
Installing a shower faucet stem requires the right tools and materials to ensure a successful and hassle-free process. By selecting the essential tools and correct materials, you can streamline your installation and ensure that your shower faucet operates smoothly for years to come. In this section, we will cover the necessary tools and materials you need to complete the installation process with ease.
Essential Tools Required
Before you begin installing your shower faucet stem, it is crucial to have the necessary tools at your disposal. Here is a list of the essential tools you will need:
| Tools | Description |
|---|---|
| Screwdriver | A flathead or Phillips screwdriver will be needed to remove any screws holding the faucet together. |
| Wrench | A wrench allows you to loosen and tighten nuts and bolts, helping you secure the faucet stem in place. |
| Plumber’s Tape | Plumber’s tape (also known as thread seal tape) is essential for creating a watertight seal between different parts of the faucet stem. |
| Adjustable Pliers | These pliers are helpful for gripping and turning various components during the installation process. |
| Allen Wrench | An Allen wrench, or hex key, is necessary if your faucet stem has hexagonal screws that need to be loosened or tightened. |
With these tools readily available, you will be well-equipped to tackle the shower faucet stem installation process.
Choosing the Correct Materials for the Installation Process
Alongside the necessary tools, it is vital to select the correct materials for a smooth and effective installation. Here are the crucial materials you need to consider:
- Faucet Stem Replacement Kit: Ensure you choose a compatible replacement kit specifically designed for your shower faucet model. This will include all the necessary components, such as washers, gaskets, and O-rings.
- Plumber’s Putty: Plumber’s putty is a sealant used to create a water-resistant barrier around the base of the faucet stem. This helps prevent any leaks or water damage.
- Replacement Cartridge: If your shower faucet operates with a cartridge system, make sure to purchase a matching replacement cartridge to ensure proper functionality.
- Silicone Caulk: Silicone caulk is essential for sealing any gaps or crevices around the new faucet stem, providing additional water protection and a clean finish.
- Thread Seal Tape: As mentioned earlier, thread seal tape creates a tight seal between threaded connections, preventing leaks and ensuring a secure installation.
By carefully choosing the correct materials and keeping them on hand throughout the installation process, you can eliminate any unnecessary hiccups and achieve a successful installation.
In conclusion, when it comes to installing a shower faucet stem, leveraging the right tools and materials is vital. By having the essential tools and correct materials at your disposal, you can ensure a smooth and efficient installation process. Take the time to gather the necessary tools and materials, and you’ll be well-prepared to embark on your shower faucet stem installation adventure.
Installing The New Shower Faucet Stem
Now that you’ve successfully removed the old shower faucet stem, it’s time to install the new one. This process may seem daunting if you’re unfamiliar with plumbing, but with a clear understanding of the new stem’s anatomy and a step-by-step guide, you’ll have your new shower faucet stem installed in no time.
Understanding the anatomy of the new faucet stem
Before jumping into the installation process, it’s important to familiarize yourself with the anatomy of the new faucet stem. This will ensure that you know where each component should be positioned and how they fit together. The following table outlines the key parts of a typical shower faucet stem:
| Part | Description |
|---|---|
| Stem | The main cylindrical part of the faucet that controls the flow of water. |
| Handle | The lever or knob that you turn to operate the faucet. |
| Cartridge | The component that contains the valve mechanism inside the stem. |
| Seals and O-rings | Rubber gaskets that prevent leaks by creating a watertight seal between parts. |
Step-by-step guide to installing the new stem
- Start by inserting the new stem into the faucet body, aligning it properly.
- Attach the handle to the stem, making sure it is securely tightened.
- Insert the cartridge into the stem, ensuring it is positioned correctly.
- If provided, place the new seals and O-rings onto the appropriate areas of the stem.
- Tighten any screws or nuts that secure the cartridge and seals in place, using a suitable wrench or pliers.
- Turn on the water supply and test the new faucet stem for leaks.
- If any leaks are detected, carefully inspect the seals and O-rings to ensure they are correctly installed.
By following this step-by-step guide and having a good understanding of the new faucet stem’s anatomy, you’ll be able to complete the installation process with ease. Remember to take your time and double-check each step to ensure a successful and leak-free installation.
Checking For Proper Fit And Functionality
Ensuring the Proper Fit of the New Faucet Stem
Once you have removed the old shower faucet stem, it’s time to check for the proper fit of the new one. This step is essential to ensure that your shower faucet is installed securely and functions optimally. With a few simple steps, you can ensure a perfect fit and avoid any leakage or malfunctioning issues later on.
Testing the Functionality of the Installed Stem
After successfully installing the new shower faucet stem, the next crucial step is to test its functionality. By performing a few tests, you can identify any potential issues and make sure everything is in proper working order. Testing the functionality will not only save you time and effort but also give you peace of mind knowing that your shower faucet is functioning as it should.
Ensuring the Proper Fit of the New Faucet Stem
Now, let’s dive into the details of ensuring the proper fit of the new faucet stem. Here are the steps you should follow:
- Inspect the stem and shower valve: Before installing the new faucet stem, examine it closely to ensure that it matches the specifications of your shower valve. Check for any discrepancies or damages. Also, inspect the shower valve for any signs of wear or corrosion that may affect the fit.
- Compare measurements: Take note of the measurements of the old faucet stem and compare them to the new one. Ensure that the length and diameter match to guarantee a proper fit. If there are any differences, it may indicate that you have the wrong stem or valve.
- Apply plumbers tape: Before inserting the new faucet stem, wrap a layer of plumbers tape around the threads. This will create a tight seal and prevent any potential leakage. Be sure to apply the tape in a clockwise direction.
- Insert the stem: Carefully insert the new faucet stem into the shower valve, making sure it goes in straight and fully seated. Use gentle pressure to avoid damaging the threads or the stem itself.
- Tighten the stem: Once the stem is inserted, use an adjustable wrench or pliers to tighten it securely. Be careful not to overtighten, as this can cause damage. Aim for a firm connection that ensures stability and prevents any movement.
Testing the Functionality of the Installed Stem
To ensure that the installed stem is functioning correctly, consider the following tests:
- Check for leaks: Turn on the water supply and carefully inspect the area around the shower faucet. Look for any signs of leaks, such as dripping or water escaping from the connections. If you notice any leaks, you may need to tighten the stem further or adjust the connections accordingly.
- Test hot and cold water: Adjust the shower faucet handle to the hot and cold water settings. Confirm that the water temperature changes accordingly and there are no sudden fluctuations or inconsistencies. This test ensures that the stem is controlling the flow of water successfully.
- Operate the shower faucet: Turn the shower faucet handle on and off multiple times. Pay attention to the smoothness of the operation and ensure that the handle does not stick or become difficult to turn. A properly installed stem should allow for easy control of the water flow.
- Inspect for any unusual noises: While operating the shower faucet, listen for any strange noises such as rattling or squeaking. Unusual sounds may indicate problems with the stem or other components, which should be addressed promptly to avoid further issues.
By following these steps and performing the necessary tests, you can install a shower faucet stem with confidence, ensuring both the proper fit and functionality. Remember to exercise caution and seek professional help if you encounter any difficulties during the installation process.
Troubleshooting And Prevention Of Leaks
Properly maintaining your shower faucet stem is essential to avoid leaks and ensure a smooth and enjoyable shower experience. In this section, we will discuss how to identify potential issues and leaks, address common problems, and provide preventive measures to avoid leaks in the future.
Identifying potential issues and leaks
To prevent leaks, it is crucial to identify potential issues early on. Here are a few signs that may indicate a problem with your shower faucet stem:
- Constant dripping or leakage
- Low water pressure
- Inconsistent water temperature
- Difficulty in turning the faucet handle
If you notice any of these signs, it is important to take immediate action to avoid further damage and costly repairs.
Addressing and troubleshooting common problems
Now, let’s dive into some common problems related to shower faucet stems and how to troubleshoot them:
- Dripping faucet: If your shower faucet is constantly dripping, it may be due to a worn-out washer or O-ring. To fix this, turn off the water supply, disassemble the faucet, replace the damaged parts, and reassemble the faucet.
- Low water pressure: Low water pressure can be caused by a clogged showerhead or water restrictor. Remove the showerhead, clean or replace it if necessary, and check if the water pressure improves. If not, check for clogs in the water pipe or valve.
- Inconsistent water temperature: If you find that your shower water temperature is fluctuating, it could indicate a problem with the shower cartridge. You might need to replace the cartridge or adjust the temperature control valve.
- Difficulties in turning the faucet handle: If you’re experiencing difficulties in turning the faucet handle, there might be a buildup of mineral deposits or corrosion. Clean the faucet handle and stem thoroughly using vinegar or a descaling solution to ensure smooth operation.
By addressing these common problems, you can avoid further complications and keep your shower faucet stem in excellent working condition.
Preventive measures to avoid leaks in the future
It’s always better to prevent leaks rather than dealing with them later. Here are some preventive measures you can take to keep your shower faucet stem leak-free:
- Regular maintenance: Perform regular inspections of your shower faucet stem to identify any signs of wear and tear. Replace any worn-out parts immediately to prevent leaks.
- Use quality materials: Invest in high-quality faucet stems and components that are built to last. This will reduce the chances of leaks caused by inferior materials.
- Avoid overtightening: When installing or repairing your shower faucet stem, be careful not to overtighten the parts. Over-tightening can damage the components and lead to leaks.
- Proper usage: Teach everyone in your household to use the shower faucet stem responsibly. Avoid forcefully turning the handles or pulling on them, as this can damage the internal mechanisms.
By following these preventive measures, you can ensure a leak-free shower experience and extend the lifespan of your shower faucet stem.
Remember, taking prompt action when you notice any signs of leaks or issues, addressing common problems, and implementing preventive measures are key to maintaining a water-efficient and problem-free shower faucet stem.
Finalizing The Installation Process
Congratulations on successfully installing your new shower faucet stem! Now that the hardest part is over, it’s time to focus on the final steps to ensure a smooth and efficient operation of your shower. This section will guide you through the steps to check for any remaining adjustments or modifications, as well as cleaning and maintaining the new shower faucet stem.
Checking for any remaining adjustments or modifications
Before you start enjoying your newly installed shower faucet stem, it’s important to check for any lingering adjustments or modifications that may need to be made. Here are some key points to keep in mind:
- Water flow: Turn on the water and observe the flow. Ensure that it is steady and consistent. If you notice any irregularities, such as a weak flow or sudden changes in pressure, there may be a problem with the installation. In such cases, it’s recommended to consult a professional plumber.
- Leakage: Carefully inspect the area around the faucet stem for any signs of leakage. Look for dripping water or puddles forming on the floor. Even a small leak can lead to extensive water damage over time, so it’s crucial to address the issue immediately.
- Temperature control: Adjust the temperature control knob or handle and check if it operates smoothly. Ensure that the water temperature is within the desired range and remains consistent throughout your shower. If there are any issues with temperature control, consider contacting the manufacturer or a professional plumber for assistance.
- Handle alignment: Take a closer look at the alignment of the handle. It should be properly aligned with the faucet stem and function smoothly. If the handle feels loose or misaligned, you may need to tighten the set screw or adjust the handle accordingly.
Cleaning and maintaining the new shower faucet stem
Keeping your new shower faucet stem clean and well-maintained is essential for its long-term functionality. Follow these simple steps to ensure your shower remains in top condition:
- Regular cleaning: Use a non-abrasive cleaner and a soft cloth to wipe down the exterior surfaces of the faucet stem. This will help remove any dirt, soap scum, or mineral deposits that may accumulate over time. Avoid using harsh chemicals or abrasive materials as they can damage the finish of the faucet.
- Maintaining the cartridge: Periodically, it’s a good idea to check and clean the cartridge inside the faucet stem. This will help prevent any debris or sediment from affecting its performance. Refer to the manufacturer’s instructions for cartridge removal and cleaning guidelines to ensure proper maintenance.
- Seal inspection: Check the seals around the faucet stem for any signs of wear or damage. Over time, seals can deteriorate, leading to leaks or a drop in water pressure. If you notice any issues with the seals, it’s best to replace them promptly to avoid further complications.
- Regular maintenance schedule: Set a routine maintenance schedule to inspect and clean your shower faucet stem. This will help prevent any potential problems from escalating and ensure that your shower remains in optimal condition for years to come.
By following these final steps of checking for any remaining adjustments or modifications and properly cleaning and maintaining your new shower faucet stem, you can enjoy a hassle-free and refreshing shower experience every time. Take pride in your DIY installation and feel confident in your ability to keep your shower faucet stem in excellent working order.
Frequently Asked Questions
How Do You Replace A Shower Handle Stem?
To replace a shower handle stem, follow these steps: 1. Turn off the water supply. 2. Remove the handle and trim plate. 3. Unscrew the stem nut and pull out the old stem. 4. Insert the new stem and secure with the nut.
5. Reassemble the handle and turn on the water supply.
How Does A Shower Faucet Stem Work?
A shower faucet stem controls the flow of water by moving up and down. When you turn the handle, the stem opens or closes valves, allowing water to either flow or stop. It’s an essential component for regulating water temperature and pressure in your shower.
How Do You Install A Faucet Stem?
To install a faucet stem, start by turning off the water supply. Remove the old stem by unscrewing the packing nut and handle. Clean the opening and apply plumber’s tape to the new stem. Insert the new stem and secure it with the packing nut and handle.
What Is The Difference Between A Shower Stem And Cartridge?
A shower stem and cartridge serve different functions in a shower system. The stem controls the flow of water, while the cartridge controls the temperature.
Conclusion
Installing a shower faucet stem can be a relatively simple process if you follow the steps outlined in this guide. By ensuring you have the necessary tools and materials, carefully disassembling the old stem, properly aligning and securing the new stem, and testing for any leaks, you can successfully replace your shower faucet stem and enjoy a fully functioning shower.
Don’t hesitate to tackle this DIY project and upgrade your bathroom with a new faucet stem.