
To install a bathroom shower, first, measure the area, purchase the necessary materials such as shower kit, piping, and fixtures, then follow the instructions provided by the manufacturer to assemble and secure the shower in place. Transforming your bathroom with a new shower can enhance the functionality and aesthetic appeal of the space.
Whether you’re replacing an old shower or installing a new one, the process can be straightforward if you have the right tools and knowledge. This article will guide you through the steps of installing a bathroom shower, ensuring that you can enjoy a refreshing and rejuvenating experience in your own home.
Preparing For The Installation Process
Before you start with the bathroom shower installation, it is important to make sure you are fully prepared. Taking the time to gather the necessary tools and materials, as well as ensuring proper measurements and planning, will help streamline the installation process and ensure a successful outcome. In this section, we will guide you through each step, so you can be well-prepared to tackle the installation with confidence.
Gathering the Necessary Tools and Materials
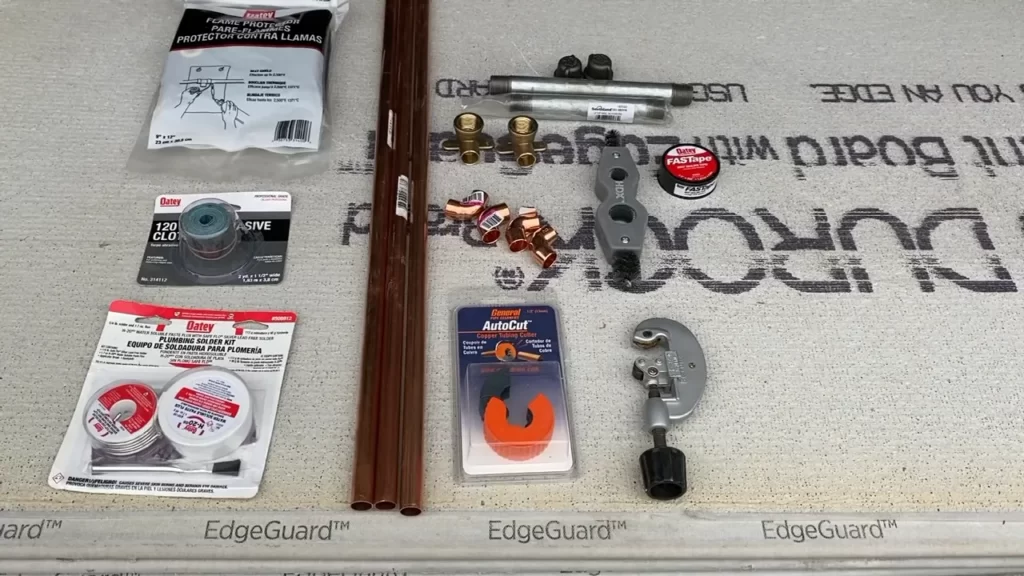
Having the right tools and materials on hand is crucial for a smooth and efficient installation. Before you begin, gather the following items:
| Tools | Materials |
|---|---|
|
|
Ensuring Proper Measurements and Planning
Before you install the shower, it is crucial to ensure proper measurements and planning. Here’s what you need to do:
- Measure the area where the shower will be installed, taking into account the dimensions of the shower unit, shower base, and any necessary spacing.
- Meticulously plan the placement of the shower valve, showerhead, shower arm, and shower handle, considering the height and accessibility.
- Determine the positioning of the plumbing pipes and make any necessary adjustments. Ensure that the pipes are properly aligned and will fit seamlessly with the shower unit.
- Decide on the type of shower base or pan you will use and verify that it fits the dimensions of the shower unit and the overall bathroom layout.
- Consider waterproofing the shower area by applying a waterproofing membrane. This is essential to prevent water damage and maintain the integrity of the installation.
- Plan the tile layout, ensuring that the tiles are cut to size and will fit neatly around the shower unit, shower valve, and other fixtures.
By gathering all the necessary tools and materials and ensuring proper measurements and planning, you’ll set yourself up for a successful bathroom shower installation. Stay tuned for the next section, where we will guide you through the actual installation process.
Removing The Old Shower
Before you can install a new bathroom shower, you’ll need to remove the old one. This process involves disconnecting the water supply and drainage, as well as removing the shower enclosure and fixtures. By following these steps, you can ensure a smooth transition and prepare for the installation of your brand new shower.
Disconnecting water supply and drainage
To begin, you’ll first need to disconnect the water supply and drainage. This step is crucial to avoid any water leakage during the removal process. Follow these steps:
- Start by turning off the water supply to the shower. Locate the shut-off valve, usually located near the shower or in the basement.
- Once the water supply is turned off, relieve any excess pressure by turning on the shower faucet and letting the remaining water drain out.
- Next, use pliers or an adjustable wrench to disconnect the water supply lines from the shower faucet. Make sure to place a bucket or towel underneath to catch any residual water.
- After disconnecting the water supply lines, move on to disconnecting the drainage pipe. This pipe is typically found underneath the shower. Again, use pliers or a wrench to loosen the connections and collect any water that may be present.
Removing the shower enclosure and fixtures
With the water supply and drainage disconnected, you’re ready to remove the shower enclosure and fixtures. Follow these steps:
- Start by removing any screws or fasteners that are holding the shower enclosure in place. You may need a screwdriver or drill for this step.
- Once the enclosure is detached, carefully lift it from its position and set it aside.
- Next, focus on removing the shower fixtures, such as the showerhead and handles. Use a wrench or pliers to loosen the connections and gently pull the fixtures away from the wall.
- Finally, inspect the walls and floor for any remaining adhesive or caulking. Use a scraper or putty knife to remove any residue, ensuring a clean surface for the installation of your new shower.
By following these steps to remove the old shower, you’ll be well-prepared to install a fresh, updated bathroom shower. Stay tuned for our next blog post on the step-by-step process of installing a new shower!
Installing The New Shower
Installing a new shower in your bathroom can completely transform the space and add value to your home. Whether you are replacing an old shower or installing one for the first time, this guide will walk you through the process step by step. In this section, we will focus on installing the shower pan and base, as well as connecting the plumbing and drainage system.
Installing the Shower Pan and Base
The first step in installing a new shower is to prepare the area by removing any existing fixtures or materials. Make sure the floor is clean and level before proceeding. Once you have a clean slate, it’s time to install the shower pan and base.
To install the shower pan, follow these steps:
- Measure the dimensions of the shower pan and mark the area on the floor.
- Apply a layer of mortar to the floor to create a stable surface for the shower pan.
- Place the shower pan onto the mortar and press it firmly into place.
- Use a level to ensure the shower pan is even and adjust accordingly.
- Allow the mortar to dry completely before moving on.
Once the shower pan is in place, you can install the shower base. Here’s how:
- Measure and cut the shower base according to the dimensions of your shower pan.
- Apply a layer of waterproofing membrane to the shower base to protect against leaks.
- Place the shower base onto the shower pan and secure it in place using screws or adhesive.
- Check again with a level to make sure the shower base is level and adjust if necessary.
Connecting the Plumbing and Drainage System
With the shower pan and base securely installed, it’s time to connect the plumbing and drainage system. This step requires careful attention to ensure proper functionality and prevent leaks.
Follow these steps to connect the plumbing and drainage system:
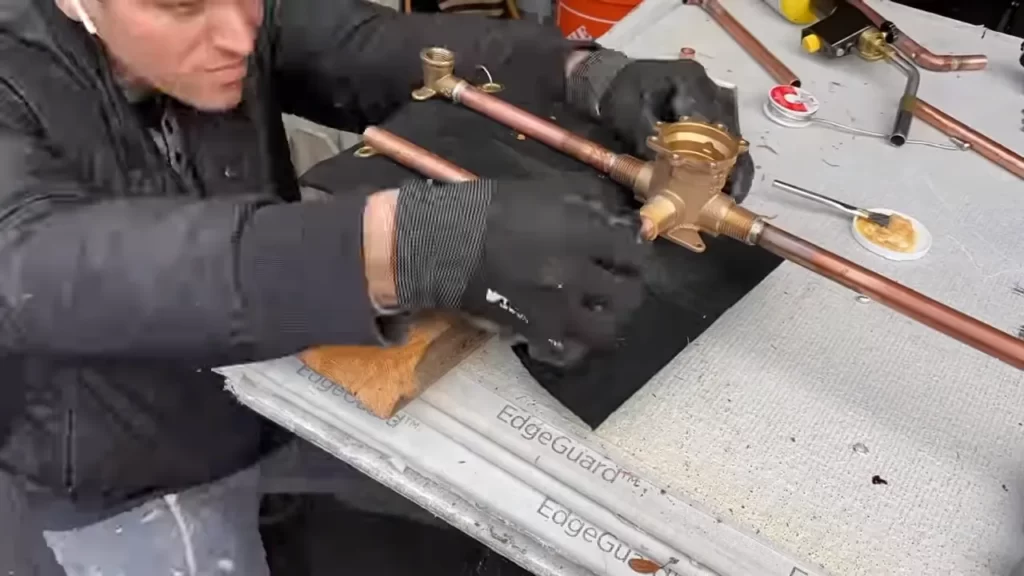
- Attach the shower head and arm to the shower wall according to the manufacturer’s instructions.
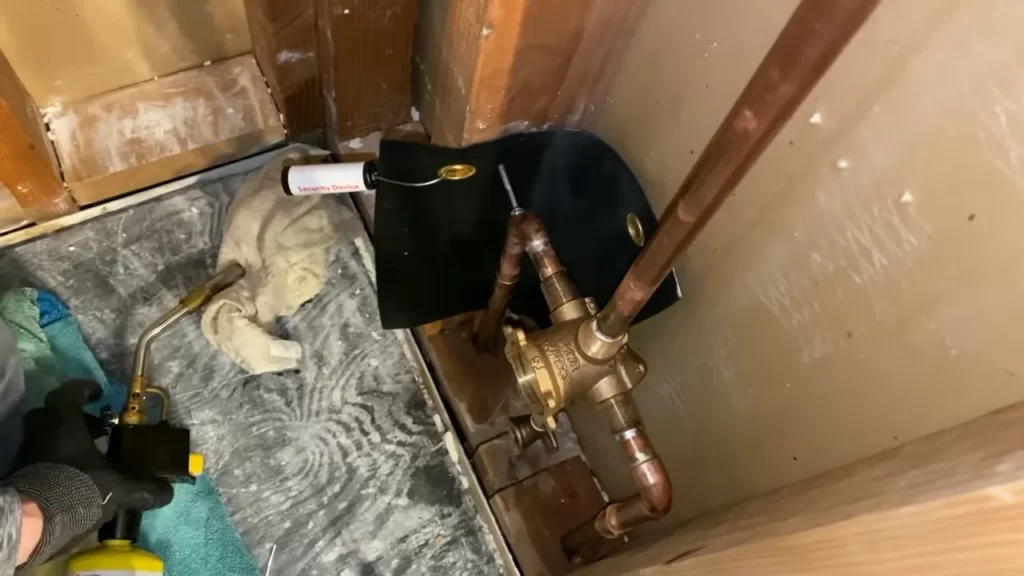
- Connect the hot and cold water supply pipes to the shower mixing valve.
- Install the drainpipe and trap, making sure to create a watertight seal.
- Test the plumbing connections by turning on the water and checking for any leaks.
- If there are no leaks, finish the installation by attaching the shower handles and any other accessories.
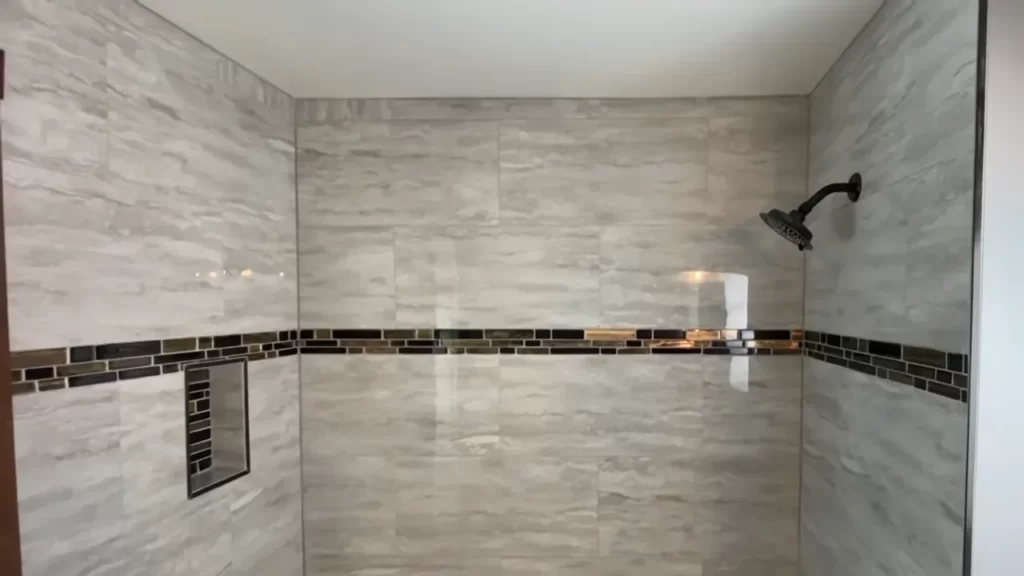
With the shower pan, base, plumbing, and drainage system properly installed, you are now ready to enjoy your new bathroom shower. Remember to follow the manufacturer’s instructions and consult a professional if you have any doubts or concerns.
Waterproofing The Shower Area
Applying Waterproofing Membrane or Sealant
Waterproofing the shower area is an essential step in any bathroom renovation project. Installing a waterproofing membrane or sealant not only protects your bathroom from water damage, but also ensures the longevity and durability of your shower installation.
When it comes to waterproofing, there are several options to consider. One popular choice is to use a waterproofing membrane, which is a flexible material applied directly to the shower walls and floor. This creates a barrier that prevents water from seeping into the walls and causing mold or rot.
Another option is to apply a waterproof sealant, which can be either liquid or a paste-like substance. This is typically brushed or rolled onto the shower walls and floor, creating a protective layer that repels water.
To ensure effective waterproofing, it’s important to apply the membrane or sealant according to the manufacturer’s instructions. This may involve a combination of priming the surface, applying multiple coats, or allowing sufficient drying time between applications. Make sure to follow these guidelines carefully to achieve the best results.
Installing Cement Board or Moisture-Resistant Wall Panels
Once the waterproofing membrane or sealant is in place, the next step is to install the shower wall materials, such as cement board or moisture-resistant wall panels.
Cement board is a popular choice for shower walls as it is highly durable and moisture-resistant. It provides a solid and stable surface for tile installation, allowing for a long-lasting and professional finish. To install cement board, it is important to secure it to the studs using screws or nails, ensuring a tight and even fit.
Alternatively, you may opt for moisture-resistant wall panels, which are specifically designed for wet areas like the shower. These panels are often made from a combination of materials, such as PVC or fiberglass, which are resistant to water damage and mold growth. Installation typically involves cutting the panels to size and securing them with adhesive or nails, creating a seamless and waterproof surface.
Whichever option you choose, it’s important to properly prepare the walls before installation. This may involve removing any existing wall coverings, such as wallpaper or tiles, and ensuring the surface is clean and dry. It’s also worth considering adding a vapor barrier behind the cement board or wall panels for additional protection against moisture.
Setting Up The Shower Enclosure
Installing a bathroom shower can be an exciting DIY project that can transform your bathroom into a more functional and stylish space. One crucial step in the installation process is setting up the shower enclosure. This involves installing the shower walls and door and sealing the joints and edges for a watertight finish. Follow the steps below to ensure a successful installation.
Installing the Shower Walls and Door
To begin setting up your shower enclosure, you’ll first need to install the shower walls and door. Here’s a step-by-step guide:
- Measure and mark: Start by measuring the walls to determine the correct height and width for your shower enclosure. Mark the measurements on the walls, ensuring they are level and plumb.
- Prepare the walls: Before installing the shower walls, make sure the walls are clean, dry, and free from any obstructions. Remove any existing tiles or wallpaper if necessary.
- Install the shower base: If your shower enclosure requires a base, follow the manufacturer’s instructions to install it securely on the bathroom floor. Make sure it is level and firmly in place before proceeding.
- Position the walls: Carefully position the shower walls against the marked lines on the walls. Use a level to ensure they are plumb, and adjust as necessary. Secure the walls to the studs using screws or adhesive, following the manufacturer’s guidelines.
- Install the shower door: Once the walls are in place, you can install the shower door according to the manufacturer’s instructions. Make sure the door fits properly and opens and closes smoothly. Adjust the door hinges and handles if needed.
Sealing the Joints and Edges for a Watertight Finish
Sealing the joints and edges of your shower enclosure is essential to prevent water leaks and ensure a watertight finish. Follow these steps to seal your shower enclosure:
- Clean the surfaces: Before applying any sealant, clean the joints and edges of the shower enclosure thoroughly. Remove any dirt, debris, or old caulk using a scraper or a caulk removal tool.
- Choose the right sealant: Select a high-quality waterproof sealant that is designed for use in bathrooms. Silicone sealants are commonly used for shower enclosures due to their flexibility and water resistance.
- Apply the sealant: Cut the tip of the sealant cartridge at a 45-degree angle, ensuring a small hole. Apply a thin and even bead of sealant along the joints and edges of the shower enclosure. Use a caulking gun for easier application.
- Smooth and shape the sealant: After applying the sealant, use a wet finger or a caulk smoothing tool to smooth and shape the sealant. This helps create a neat and professional-looking finish.
- Allow the sealant to dry: Leave the sealant to dry completely according to the manufacturer’s instructions. Avoid using the shower until the sealant is fully cured, as this can affect its effectiveness.
By properly setting up your shower enclosure and sealing the joints and edges, you can enjoy a beautiful and leak-free showering experience. Follow the instructions above, and you’ll be on your way to a functional and stylish bathroom shower installation.
Installing The Fixtures And Accessories
Installing the Fixtures and Accessories
After successfully installing the shower base and walls, it’s time to move on to the next step – installing the fixtures and accessories that will make your bathroom shower functional and aesthetically pleasing. Attaching the showerhead and controls and installing shelves, towel bars, and other accessories are crucial to completing your bathroom shower installation.
Attaching the showerhead and controls
Attaching the showerhead and controls is a straightforward process that requires a few basic tools and some careful attention to detail. Here are the steps:
- Step 1: Start by removing any protective coverings from the showerhead and controls.
- Step 2: Take the showerhead and screw it onto the shower arm. Make sure it’s securely tightened but avoid overtightening to prevent any damage.
- Step 3: Connect the control handles or knobs to the water supply pipes. Follow the manufacturer’s instructions to ensure the proper connection.
- Step 4: Test the showerhead and controls for any leaks by turning on the water supply and inspecting for any water seepage. If there are leaks, tighten the connections further or use plumber’s tape as needed.
Installing shelves, towel bars, and other accessories
Adding shelves, towel bars, and other accessories not only enhances the functionality of your bathroom shower but also adds personal style and convenience. Here’s how you can install them:
- Step 1: Determine the ideal locations for your shelves, towel bars, and accessories. Consider the height, accessibility, and overall design of your shower area.
- Step 2: Use a level to ensure accurate placement. Mark the desired locations with a pencil.
- Step 3: If you’re installing shelves or towel bars, use a drill and appropriate screws or anchors to attach them securely to the wall. Make sure they are level before tightening the screws.
- Step 4: For other accessories like soap dishes or shower caddies, check if they come with adhesive backs or suction cups. If not, use a drill and screws to securely fasten them to the wall or shower area.
- Step 5: After installing the accessories, double-check their stability and ensure they are aligned with your initial markings.
Remember, a well-installed showerhead and controls, along with carefully positioned shelves, towel bars, and other accessories, will make your bathroom shower more functional and enjoyable. Take your time during this phase to ensure a successful and visually pleasing installation.
Testing And Finishing Touches
Checking for leaks and proper functionality
After successfully installing your bathroom shower, it is crucial to thoroughly test for leaks and ensure proper functionality. Leaks can lead to water damage and costly repairs, so taking the time to check for any potential issues is essential.
Here are a few steps to help you test for leaks and ensure the shower is working as it should:
- Turn on the water supply to the shower and let it run for a few minutes. Pay close attention to the showerhead, faucet, and any connections for any signs of leakage. Feel around the base of the shower, walls, and floor to ensure no water is escaping.
- Inspect the showerhead for any drips or leaks. Tighten any loose connections and replace any damaged parts if necessary. Remember to use a protective cloth or towel to avoid scratching the showerhead’s finish during the tightening process.
- Check the faucet handles and valves for proper functionality. Turn the handles on and off to test the water flow and temperature control. Verify that the hot and cold water mix properly to achieve the desired temperature.
- Test the shower drain to ensure it is free from any clogs. Pour a small amount of water down the drain and observe how quickly it drains. If there are any issues with drainage, you may need to clear the drain or consult a professional plumber for further assistance.
Caulking and sealing the shower area
Properly caulking and sealing the shower area is vital to prevent water damage and maintain the integrity of your bathroom. It helps create a watertight seal, protecting the walls and floor from moisture.
Below are the essential steps to follow when caulking and sealing your bathroom shower:
- Ensure the shower area is clean and dry. Remove any residue or old caulk using a scraper or utility knife.
- Apply painter’s tape on the surrounding walls and floor, leaving a clean edge for caulking.
- Choose a high-quality silicone caulk specifically designed for bathrooms. Cut the tip of the caulk tube at a 45-degree angle.
- Start applying the caulk in a smooth, continuous line along the edges of the shower walls, floor, and any other gaps or joints. Use a caulk gun for even application.
- With a damp finger or caulk smoothing tool, gently press and smooth the caulk to create a neat finish. Wipe away any excess caulk with a damp cloth.
- Allow the caulk to cure as per the manufacturer’s instructions before using the shower. This usually takes around 24 hours.
- Inspect the caulked areas for any gaps or imperfections. If needed, apply a second layer of caulk for added protection.
- Remove the painter’s tape carefully before the caulk fully dries to achieve clean, crisp edges.
By following these steps and ensuring your bathroom shower is properly tested for leaks and sealed, you can enjoy a functional and worry-free showering experience. Don’t forget to regularly check for any maintenance and address any issues promptly to avoid potential problems down the line.
Cleaning And Maintenance Tips
Proper cleaning and maintenance of your bathroom shower is essential to keep it looking sparkling clean and fully functional. Regular upkeep will help prevent issues such as clogged drains, mold and mildew growth, and limescale buildup. In this section, we will cover two key aspects of shower maintenance: regular cleaning routines and troubleshooting common issues.
Regular cleaning and maintenance routines
To keep your bathroom shower in top condition, follow these regular cleaning and maintenance routines:
- Wipe down the shower walls and door after each use to remove soap scum and prevent water spots.
- Use a mild cleaner specifically designed for showers to clean the surfaces. Avoid abrasive cleaners as they may damage the shower materials.
- Pay special attention to the grout lines between tiles. Clean them thoroughly using a grout brush or an old toothbrush.
- Regularly clean the showerhead by soaking it in a mixture of vinegar and water to remove mineral deposits.
- Don’t forget to clean the shower drain. Remove any hair or debris that may have accumulated to prevent clogs.
- Periodically inspect the caulking around the edges of the shower. If it’s cracked or worn out, remove and replace it to maintain a watertight seal.
By following these routine cleaning and maintenance practices, you can keep your bathroom shower clean, hygienic, and free from common issues.
Troubleshooting common issues
Despite regular cleaning and maintenance, you may still encounter some common issues with your bathroom shower. Here are a few troubleshooting tips for those problems:
| Issue | Troubleshooting Tip |
|---|---|
| Clogged drain | Try using a plunger or a drain snake to clear the blockage. If the problem persists, consider calling a professional plumber for assistance. |
| Mold and mildew growth | Use a mold and mildew cleaner to remove any visible growth. Improve ventilation in the bathroom by running a fan or opening a window after each shower to prevent future mold and mildew problems. |
| Limescale buildup | Apply a mixture of vinegar and water to the affected areas. Let it sit for a while before scrubbing with a non-abrasive sponge or brush. Rinse thoroughly. |
Remember, proactive maintenance and timely troubleshooting can help you address common issues promptly and extend the lifespan of your bathroom shower. Implement these cleaning and maintenance tips to enjoy a clean, functional, and long-lasting showering experience.
Frequently Asked Questions
Can You Install A Shower By Yourself?
Yes, you can install a shower by yourself. It’s important to follow the instructions carefully and have basic plumbing skills. Ensure you have the necessary tools and materials for the installation process.
How Much Does It Cost To Install A Shower In A Bathroom?
The cost of installing a shower in a bathroom can vary, but it usually ranges from $1,000 to $5,000. This depends on factors such as the type of shower, materials, labor, and any modifications needed for plumbing or wiring.
What Is The Cheapest Way To Add A Shower To A Bathroom?
The most affordable way to add a shower to a bathroom is by installing a showerhead attachment to the existing bathtub. This allows you to enjoy the benefits of a shower without the need for extensive renovations or additional plumbing work.
What Is Needed To Install A Shower?
To install a shower, you will need a shower stall or enclosure, a showerhead, a mixing valve, a drain, and plumbing pipes. Ensure proper waterproofing, connect the plumbing and drainage systems, and secure everything in place. A professional plumber may be needed for complex installations.
Conclusion
Installing a bathroom shower can be a challenging yet rewarding task. By following the step-by-step guide provided in this blog post, you can successfully accomplish this project. Remember to gather all the necessary tools and materials, measure and plan properly, and take your time to ensure a professional finish.
With patience, attention to detail, and proper technique, you’ll have a beautiful and functional bathroom shower in no time. Happy DIY-ing!