To install a safety bar in the shower, measure and mark the desired location, drill pilot holes, secure the bar with screws, and test its stability before use. Introducing a safety bar in the shower is an essential step towards ensuring a secure and injury-free bathing experience.
Whether you have mobility issues or simply want extra support, a safety bar provides stability and peace of mind. By following a few straightforward steps, you can easily install a safety bar in your shower. We will guide you through the installation process, from measuring and marking the location to securing the bar firmly in place.
With the bar successfully installed, you can confidently enjoy your showers while reducing the risk of accidents. So, let’s delve into the details and get your shower safety bar installed in no time.
Importance Of Installing Safety Bar In The Shower
When it comes to bathroom safety, one cannot underestimate the importance of installing a safety bar in the shower. The bathroom is a space where accidents are prone to happen, especially when wet surfaces are involved. This is why having a safety bar in the shower is crucial for people of all ages, but particularly for older adults and those with mobility issues. In this blog post, we will explore the risk of slips and falls in the bathroom and delve into the benefits of installing a safety bar for added security and support.
Risk of Slips and Falls in the Bathroom
The bathroom can be a dangerous place, with its wet and slippery surfaces. One wrong step or loss of balance can lead to a serious fall, resulting in injuries ranging from minor bruises to fractures or even head trauma. According to the Centers for Disease Control and Prevention (CDC), falls are the leading cause of non-fatal injuries among older adults, and the bathroom is a common location for these accidents to occur. It’s not just older adults who are at risk; people of all ages can slip and fall in the shower, particularly if they have certain medical conditions or disabilities.
To mitigate the risk of slips and falls in the bathroom, it is essential to install a safety bar in the shower. This simple addition can provide much-needed support and stability, minimizing the chances of accidents and injuries.
Benefits of a Safety Bar for Added Security and Support
A safety bar in the shower offers numerous benefits, ensuring enhanced security and support for individuals using the bathroom. Here are some key advantages:
- Prevents Slips and Falls: The primary purpose of a safety bar is to prevent slips and falls by providing a sturdy and reliable handhold. By offering a secure grip, individuals can maintain their balance while entering, exiting, or moving within the shower, minimizing the risk of accidents.
- Improves Accessibility: For people with limited mobility or physical disabilities, a safety bar can make the shower more accessible. It allows them to support their weight and maneuver with ease, making bathing a safer and more independent activity.
- Extra Support for Aging Adults: As we age, our balance and strength may decline, making us more susceptible to falls. A safety bar in the shower provides extra support for older adults, giving them the confidence to maintain their personal hygiene without the fear of slipping or falling.
- Easy to Install: Installing a safety bar is a relatively straightforward process. Most safety bars are designed to be mounted securely to the wall using durable brackets. With the right tools and following manufacturer’s instructions, you can ensure a proper installation that withstands regular use.
Overall, a safety bar in the shower is a small investment that can significantly reduce the risk of accidents and injuries in the bathroom. Its installation not only enhances safety but also promotes confidence and independence, allowing individuals to maintain their personal hygiene routine with peace of mind.

Choosing The Right Safety Bar For Your Shower
Installing a safety bar in your shower is a practical and important step towards ensuring bathroom safety, especially for individuals with limited mobility. With a wide range of options available in the market, it can be overwhelming to choose the right safety bar that suits your specific needs. In this section, we will discuss the key factors to consider when selecting a safety bar for your shower.
Factors to consider when selecting a safety bar
Before making a purchase, it is essential to consider several factors that will help you choose the most suitable safety bar for your shower. These factors include material and durability, size and weight capacity, and installation and mounting options.
Material and durability
The material of the safety bar plays a crucial role in its durability and longevity. Look for bars that are made of high-quality and corrosion-resistant materials such as stainless steel or brass. These materials not only provide stability but also ensure that the safety bar will withstand the moist environment of the shower. Additionally, consider bars with a textured surface for a firm grip, especially when the hands are wet.
Size and weight capacity
Another important aspect to consider is the size and weight capacity of the safety bar. Measure the available space in your shower and ensure that the chosen safety bar will fit comfortably. Ideally, it should be long enough to provide support but not too bulky that it obstructs movement within the shower. Additionally, check the weight capacity of the bar to verify that it can safely support the intended user’s weight.
Installation and mounting options
The installation process and mounting options are crucial factors to consider to ensure a proper and secure attachment of the safety bar. Look for safety bars that come with detailed installation instructions and all the necessary mounting hardware. Most safety bars can be mounted using screws, adhesive, or suction cups. Screw-mounted bars offer the highest level of stability and should be preferred if possible. However, if drilling into the wall is not feasible, consider adhesive or suction cup options that are designed to provide a secure hold on smooth surfaces.
By considering these factors – material and durability, size and weight capacity, and installation and mounting options – you can confidently choose the right safety bar for your shower. Prioritizing the safety and comfort of yourself and your loved ones is paramount, and installing a safety bar is a step towards achieving just that.
Tools And Materials Needed For Installation
Necessary tools for the installation process
To install a safety bar in your shower, you will need a few essential tools. These tools will help make the installation process smoother and more efficient. Here’s a list of the necessary tools you will need:
1. Drill: A power drill is essential for creating the holes necessary for mounting the safety bar. Make sure you have the correct drill bit size for the mounting hardware you will be using.
2. Measuring tape: Accurate measurements are crucial to ensure that the safety bar is installed at the correct height and position. A measuring tape will help you measure the distance between the mounting points and ensure that they are aligned.
3. Level: To ensure that the safety bar is installed straight, a level is required. This tool will help you align the bar horizontally and make adjustments as needed.
List of materials required to install the safety bar
In addition to the necessary tools, you will also need a few materials to complete the installation process. These materials are essential for securely mounting the safety bar in your shower. Here’s a list of the materials you will need:
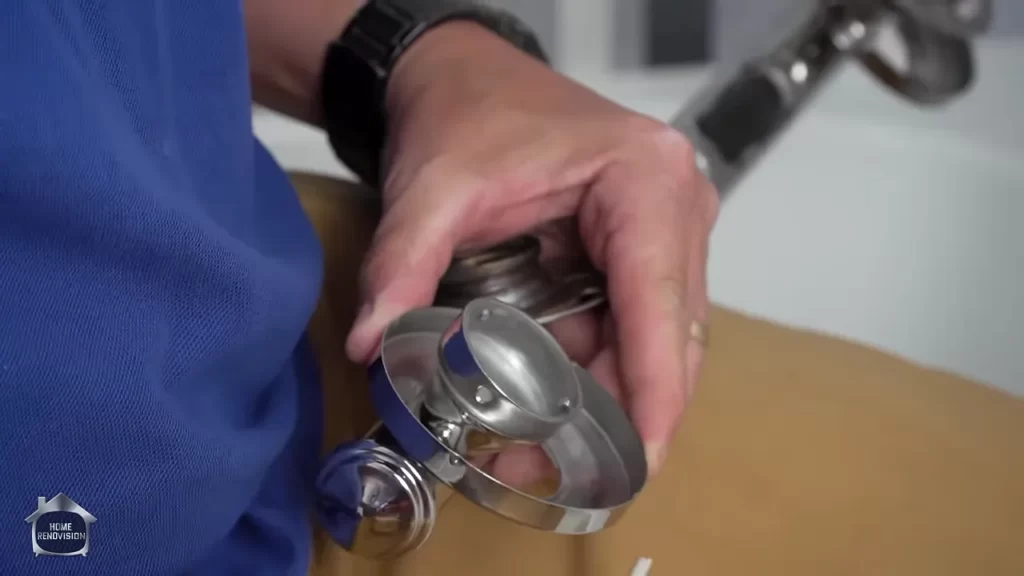
1. Safety bar: The safety bar itself is the main component of this installation. Choose a bar that is appropriate for your needs, taking into consideration the size and weight capacity.
2. Mounting hardware: This includes screws and anchors that will secure the safety bar to the wall. Ensure that you have the correct type and size of mounting hardware for your specific shower wall material.
3. Wall studs: If possible, it is recommended to mount the safety bar directly into wall studs for maximum stability and support. Locate the studs using a stud finder before beginning the installation process.
4. Silicone sealant: Applying silicone sealant around the mounting points of the safety bar will provide an extra layer of waterproofing and help prevent leakage.
It is important to gather all the necessary tools and materials before starting the installation process. This will ensure a smoother and more efficient installation and help create a safe and secure shower environment.

Measuring And Marking The Installation Points
Installing a safety bar in the shower can provide much-needed stability and support, especially for individuals with mobility challenges. By following a few simple steps, you can ensure that the safety bar is installed securely and in the optimal location. In this section, we will discuss how to measure and mark the installation points accurately.
Identifying the optimal location for the safety bar
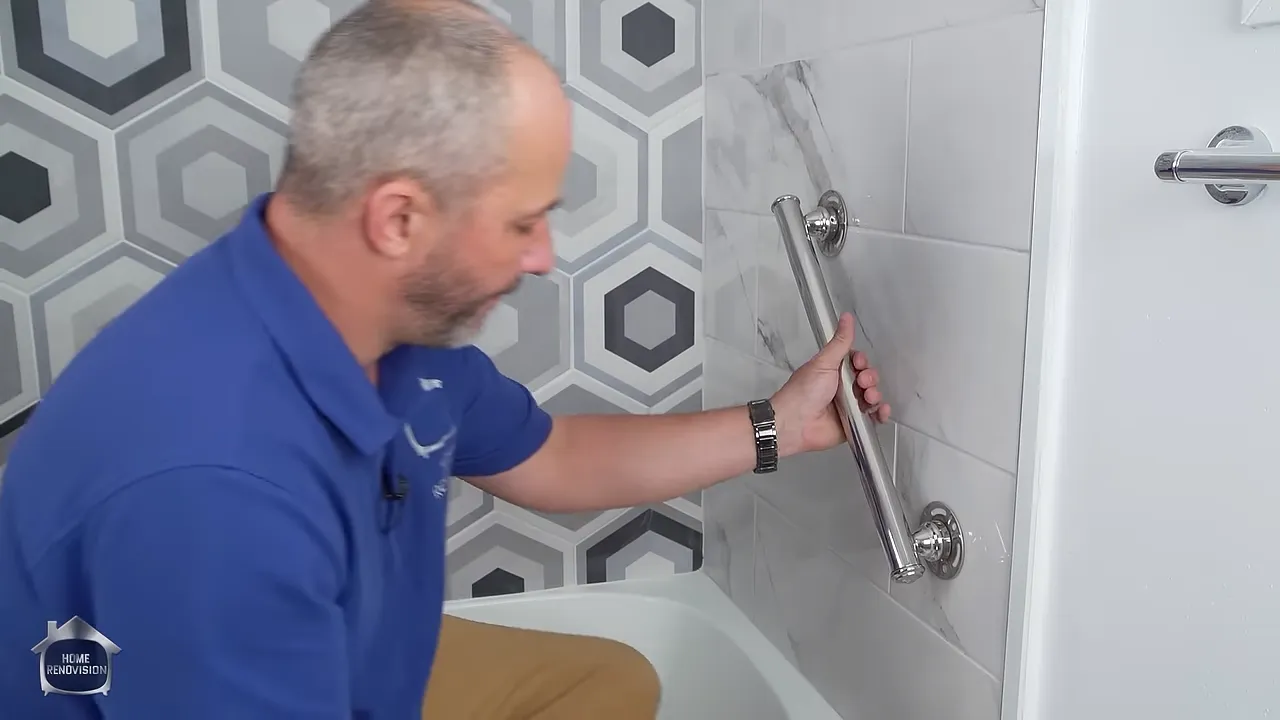
Before beginning the installation process, it is essential to identify the optimal location for the safety bar. The goal is to choose a spot that offers maximum support and stability. One approach is to place the safety bar near the shower entrance.
By positioning the safety bar here, it allows individuals to grip it as they enter or exit the shower, minimizing the risk of slip and fall accidents. Furthermore, placing the bar near the entrance provides a convenient location for users to grab hold of as they step into or out of the showering area.
Placement near the shower entrance
When determining the specific placement of the safety bar near the shower entrance, there are a few factors to consider. First, take into account the layout of your shower. Look for a solid wall or stud where you can securely attach the safety bar.
Next, consider the height at which the safety bar should be placed. This leads us to the next point of discussion.
Determining the proper height
Ensuring the safety bar is installed at the proper height is crucial for its optimal functionality. The general guideline is to position the safety bar between 33 and 36 inches above the shower floor. This range accommodates a variety of users and allows for a comfortable grip while standing or sitting.
However, it is essential to consider the specific needs of the individual using the shower. Factors such as height, reach, and physical abilities must be taken into account when determining the proper height for the safety bar. Consulting with a professional or occupational therapist can provide valuable insight and guidance in this regard.
Once you have determined the proper height, use a measuring tape to mark the exact spot on the wall where the safety bar will be installed. Double-check your measurements to ensure accuracy before proceeding to the installation process.
In conclusion, measuring and marking the installation points for a safety bar in the shower requires careful consideration of the optimal location, placement near the entrance, and determining the proper height. By following these steps correctly, you can ensure that the safety bar is securely installed and provides the necessary stability and support for a safer showering experience.
Preparing The Shower Wall For Installation
Assessing the Wall Type for Appropriate Installation Method
Before you begin installing a safety bar in your shower, it’s crucial to assess the type of wall you have. This will help determine the appropriate installation method, ensuring the bar is firmly secured and able to support weight. There are two common types of shower walls: stud walls and walls without studs. To determine which method you need to follow, you first need to find out what type of wall you have.
Stud Wall Installation
If you have a stud wall, you’re in luck! Studs provide a sturdy and secure foundation for your safety bar. Studs are vertical beams made of wood or metal that are hidden within the wall. To install a safety bar on a stud wall, follow these steps:
- Locate the studs: Use a stud finder or tap the wall lightly to find the solid areas. Mark the stud positions with a pencil.
- Measure and mark the mounting holes: Determine the desired height and position of the safety bar. Use a tape measure to mark the exact locations of the mounting holes on the wall.
- Pre-drill the holes: Use an electric drill and an appropriate drill bit to pre-drill the marked holes on the wall. This will make it easier to screw in the mounting brackets.
- Attach the safety bar: Place the mounting brackets over the pre-drilled holes. Secure them to the wall using screws and a screwdriver. Make sure they are tightly fastened.
Wall Anchor Installation
If you have a wall without studs, don’t worry! You can still install a safety bar using wall anchors. Wall anchors are devices that provide extra support when there are no studs to attach the safety bar to. Follow these steps to install a safety bar using wall anchors:
- Choose the appropriate wall anchors: Depending on the weight capacity of your safety bar, select suitable wall anchors. There are various types available, such as toggle bolts, Molly bolts, or plastic anchors. Refer to the manufacturer’s instructions for guidance.
- Measure and mark the mounting holes: Determine the desired height and position of the safety bar. Use a tape measure to mark the exact locations of the mounting holes on the wall.
- Drill pilot holes: Use an electric drill and an appropriate drill bit to drill pilot holes at the marked locations. This will help guide the wall anchors into place.
- Insert the wall anchors: Insert the wall anchors into the pilot holes. Follow the manufacturer’s instructions for the specific type of wall anchor you are using.
- Attach the safety bar: Place the mounting brackets over the wall anchors. Secure them to the wall by screwing in the provided screws. Ensure everything is tightened properly.
Preparing the Wall Surface for Drilling
Now that you’ve determined the appropriate installation method, it’s time to prepare the wall surface for drilling. This will help ensure a clean and successful installation. Follow these steps:
- Clean the area: Clear the shower area of any obstacles or items that may interfere with the installation process. Remove soap scum, grime, and any other debris from the wall surface using a mild cleaning solution and a cloth.
- Mark the mounting holes: Use a pencil or marker to mark the exact locations where the mounting holes will be drilled. Double-check the measurements and make sure they are accurate.
By following these steps, you can prepare your shower wall for the installation of a safety bar. Whether you have a stud wall or a wall without studs, the appropriate methods will ensure a secure and reliable installation. Take the time to assess your wall type, gather the necessary tools and materials, and follow the instructions carefully.
Installing The Safety Bar On A Stud Wall
Step-by-step guide for stud wall installation
Installing a safety bar in the shower can greatly increase accessibility and prevent accidents. One of the most secure methods for installation is on a stud wall, as the studs provide a sturdy anchor point for the safety bar. In this guide, we will walk you through the steps of locating the studs, drilling pilot holes, and mounting the safety bar on a stud wall.
Locating the studs
The first step in installing the safety bar on a stud wall is to locate the position of the studs. Studs are vertical wooden or metal beams that provide structural support to the wall. To find the studs:
- Start by using a stud finder tool. Place the stud finder against the wall and move it slowly horizontally.
- When the stud finder indicates the presence of a stud, mark the position on the wall using a pencil or tape.
- Repeat this process along the desired installation area to locate the studs that will support the safety bar.
Drilling pilot holes
Once you have located the studs, it is time to drill pilot holes. Pilot holes are small guide holes that help ensure that the screws will go in smoothly and securely. Follow these steps to drill pilot holes:
- Choose an appropriate drill bit size for your screws. The drill bit should be slightly smaller in diameter than the screws you will be using.
- Place the drill bit into the drill, ensuring it is securely tightened.
- Position the drill bit on the marked spots where you will be mounting the safety bar.
- Hold the drill perpendicular to the wall and apply steady pressure as you start drilling.
- Drill the pilot holes into the studs, making sure to go deep enough for the screws to hold securely.
Mounting the safety bar
Now that you have drilled pilot holes, it is time to mount the safety bar on the stud wall. Follow these steps for a secure installation:
- Align the pre-drilled holes of the safety bar with the pilot holes in the studs.
- Insert the screws into the pilot holes and use a screwdriver or drill to tighten them. Ensure that the screws go through the safety bar and into the studs.
- Check that the safety bar is level and secure by giving it a firm tug. It should not move or wobble.
- If the safety bar feels loose, reposition it and drill additional pilot holes for extra screws.
Congratulations! You have successfully installed a safety bar on a stud wall in your shower. Regularly check the stability of the safety bar to ensure that it remains securely mounted.
Installing The Safety Bar With Wall Anchors
Step-by-step guide for wall anchor installation
To ensure the safety and stability of your shower bar, it is crucial to install it properly with wall anchors. Follow this step-by-step guide to install the safety bar using wall anchors for added support.
1. Start by positioning the safety bar in your desired location within the shower. Make sure it is within easy reach and at a comfortable height for you or the person using it.
2. Once you have determined the ideal position, use a pencil to mark the spots on the wall where the wall anchors will be installed. It is recommended to use at least two wall anchors for maximum stability.
3. Take measurements to ensure that the marks for the wall anchors are level and evenly spaced. This will help to ensure that the safety bar is securely installed.
Choosing the right wall anchors
Choosing the appropriate wall anchors is vital to ensure that your safety bar is securely installed and able to bear weight. There are different types of wall anchors available, and the right choice will depend on the material of your shower wall.
1. Plastic anchors: These are suitable for lightweight installations and can be used with drywall or plaster walls. They are easy to install and provide a stable hold.
2. Expansion anchors: These anchors are ideal for solid materials such as concrete or tile. They create a secure grip by expanding against the material, ensuring a strong connection.
3. Toggle bolts: Toggle bolts are excellent for installations on hollow walls. They consist of a pair of wings that expand behind the wall, providing a sturdy anchor point.
Consider the material of your shower wall and the weight-bearing capacity required for your safety bar to determine the most suitable type of wall anchor.
Drilling holes for the anchors
Now that you have chosen the appropriate wall anchors, it’s time to drill the holes to accommodate them. Follow these steps for proper hole drilling:
1. Using an electric drill and the appropriate drill bit for your wall anchors, start at the marked locations and drill the holes. Make sure to use a steady and even pressure to avoid damaging the wall.
2. The size of the drill bit will depend on the type of wall anchor being used, so refer to the instructions provided with the anchors for the correct size.
3. Clean away any dust or debris from the drilled holes to ensure a secure fit for the wall anchors.
Installing the safety bar
With the holes drilled and cleaned, it’s time to install the safety bar. Follow these steps for a successful installation:
1. Insert the wall anchors into the drilled holes, ensuring that they are flush with the wall surface.
2. Align the safety bar with the installed wall anchors and insert the screws provided through the safety bar’s mounting holes.
3. Tighten the screws securely until the safety bar is firmly attached. Ensure that it does not wobble or move when pressure is applied.
4. Finally, give the safety bar a firm tug to make sure it is securely installed and will provide the necessary support.
By following this step-by-step guide, you can install a safety bar in your shower with wall anchors for added stability and peace of mind. Remember to choose the appropriate wall anchors, drill the holes properly, and ensure a secure installation.
Securing And Testing The Safety Bar
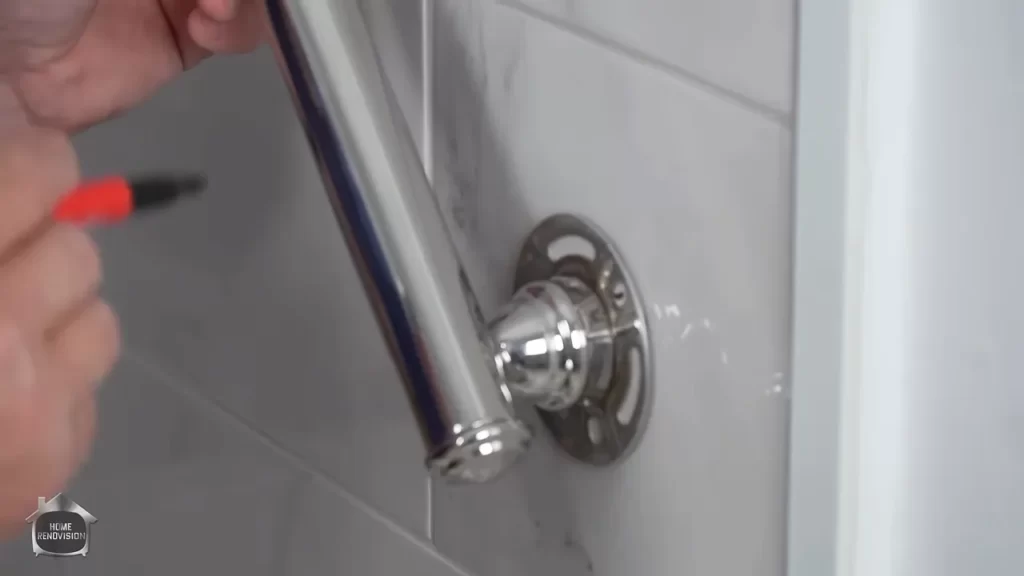
Properly tightening the mounting hardware
Securing the safety bar in your shower is crucial for your safety and peace of mind. Once you have positioned the safety bar at your preferred height and location, it’s time to secure it in place. The first step is to thoroughly read the manufacturer’s instructions, as the specific method for tightening the mounting hardware may vary depending on the model.
Typically, you’ll need an adjustable wrench or screwdriver to tighten the mounting hardware. Start by ensuring that all screws and bolts are properly aligned with the pre-drilled holes in the wall. Once aligned, use steady and firm pressure to tighten the hardware. Be careful not to overtighten, as it can lead to damage to your shower wall or an unstable installation.
Remember to test the tightness of the hardware by gently applying pressure to the safety bar. If there is any movement or if the bar feels loose, you’ll need to further tighten the mounting hardware until the bar is securely fixed in place.
Checking the stability and strength of the safety bar
Ensuring the stability and strength of your safety bar is crucial before relying on it for support. Follow these steps to properly check the stability and strength:
- Apply pressure to the bar: Grab the safety bar and apply gradual pressure, simulating a real-life scenario. Pay close attention to any movement or flexing of the bar. It should feel sturdy and should not wobble or give way under applied pressure.
- Check attachment points: Examine the mounting hardware and its attachment to the wall. Look for any signs of loose screws or bolts, as well as any gaps between the hardware and the wall. If you notice any issues, it may indicate that the mounting hardware needs to be further tightened or repositioned.
- Test weight capacity: Safety bars come with weight capacity ratings, and it’s essential to ensure that the bar can support your weight. Check the manufacturer’s guidelines for the weight capacity and compare it to your own body weight. If there is a significant difference, it may be necessary to choose a different safety bar that can accommodate your weight.
Remember, the safety bar is only as strong as its installation and the materials it’s attached to. Regularly inspect the safety bar and its mounting hardware for any signs of wear, damage, or loosening. If you notice any issues, it’s important to address them promptly to maintain a secure and reliable safety bar in your shower.
Maintenance And Care For Long-Lasting Functionality
Installing a safety bar in your shower is a smart move that ensures the safety of you and your loved ones. Taking the time to properly maintain and care for this essential bathroom accessory is essential to ensure its functionality for years to come. In this section, we will discuss two key aspects of maintaining and improving the longevity of a safety bar: regular cleaning and maintenance, and ensuring the bar remains securely attached over time.
Regular Cleaning and Maintenance of the Safety Bar
Regularly cleaning your safety bar is an important step in maintaining its functionality and prolonging its lifespan. Soap scum, mildew, and dirt can accumulate on the surface, compromising its grip and making it less effective. Here are some steps you can follow to ensure the cleanliness of your safety bar:
- Start by wiping the surface of the safety bar with a clean, damp cloth to remove any loose dirt or debris.
- Mix a solution of mild soap diluted in warm water. Using a soft brush or cloth, gently scrub the surface of the safety bar to remove any built-up grime or soap scum.
- Rinse the safety bar thoroughly with warm water to remove any soap residue.
- Finally, dry the safety bar with a soft towel to prevent water spots and maintain its shine.
By following these simple maintenance steps on a regular basis, you can keep your safety bar looking clean and functioning optimally.
Ensuring the Bar is Securely Attached Over Time
Regularly checking the attachment of your safety bar is crucial to maintaining its stability and ensuring long-lasting functionality. Over time, the adhesive or screws that hold the bar in place can loosen due to regular use or the natural movement of the shower wall. Here are some tips to ensure your safety bar remains securely attached:
- Inspect the safety bar regularly, looking for any signs of loose attachments, such as wiggling or movements.
- If the safety bar is attached with adhesive, make sure it is still firmly adhered to the surface. If it appears loose, remove the existing adhesive and reapply a fresh layer according to the manufacturer’s instructions.
- If the safety bar is attached with screws, use a screwdriver to tighten them as necessary. Ensure all screws are securely fastened.
- Consider using an extension bracket for added stability. These brackets can provide extra support, especially if your shower wall is not completely flat.
By regularly inspecting and maintaining the attachment of your safety bar, you can ensure its stability and functionality, providing you with peace of mind every time you step into the shower.
In conclusion, proper maintenance and care are essential to maximize the functionality and lifespan of a safety bar in your shower. By regularly cleaning the surface and ensuring secure attachment, you can enjoy the added safety that a safety bar brings for many years to come.
Frequently Asked Questions
How Do You Install A Safety Bar In A Shower?
To install a safety bar in a shower, follow these steps: 1. Choose a suitable location on the shower wall. 2. Use a stud finder to locate wall studs. 3. Mark the placement of the safety bar. 4. Drill pilot holes into the marked spots.
5. Securely attach the safety bar to the wall using screws.
Where Should Safety Bars Be Placed In Shower?
Safety bars in a shower should be strategically placed to ensure maximum safety. They should be installed vertically, positioned horizontally 33-36 inches from the floor, and ideally in a position where they can be easily reached from a sitting or standing position.
Do Shower Grab Bars Need To Be Installed In Studs?
Shower grab bars don’t necessarily need to be installed in studs. However, it is recommended for maximum strength and stability. Installing grab bars in studs ensures a secure anchor point, preventing the bars from pulling out under pressure. This helps ensure safety and durability.
How Much Does It Cost To Install A Shower Grab Bar?
The cost of installing a shower grab bar can vary, but on average it ranges between $75 to $200. The actual price depends on factors like the type of grab bar, the complexity of the installation, and any additional services required.
Conclusion
Installing a safety bar in the shower is a simple yet essential step in ensuring the safety of yourself and your loved ones. With just a few tools and a little bit of time, you can greatly reduce the risk of slips and falls in the bathroom.
By following the step-by-step instructions in this guide, you can easily install a safety bar and have peace of mind knowing that you have taken an important measure to prevent accidents. Don’t wait any longer – prioritize safety and make your shower a safer place today!