To install a shower insert, remove the old shower stall, carefully measure and fit the new insert, and secure it in place with adhesive and screws.
Preparing For Installation
Installing a shower insert can be a great way to update your bathroom and give it a fresh, modern look. Before diving into the installation process, it’s important to properly prepare to ensure a smooth and hassle-free experience. This involves gathering all the necessary tools and materials, as well as accurately measuring the shower area. In this guide, we’ll walk you through these crucial steps to help you get started.
Gathering the necessary tools and materials
Before beginning the installation, it’s essential to have all of the required tools and materials at your disposal. This will save you precious time and prevent unnecessary delays. Here is a handy checklist of everything you’ll need:
| Tools | Materials |
|---|---|
|
|
Having these tools and materials ready will ensure that you can proceed with the installation smoothly without any interruptions.
Measuring the shower area
Accurate measurements are crucial to ensure that the shower insert fits perfectly into your bathroom space. Here’s a step-by-step guide to help you measure the shower area:
- Start by measuring the height, width, and depth of the existing shower area using a measuring tape.
- Note down these measurements and use them to select a shower insert kit that matches the size of your shower area.
- Before purchasing the kit, double-check the measurements to ensure they are accurate.
- If you’re replacing an old shower, carefully remove it, and measure the space again to confirm the dimensions.
By following these steps and maintaining precise measurements, you can avoid any issues during the installation process and ensure a seamless fit for your new shower insert.
With the necessary tools and materials gathered and the shower area accurately measured, you’re now ready to move on to the next phase of the installation process. Stay tuned for our upcoming blog post on installing the shower insert itself!
Choosing The Right Shower Insert
Understanding the different types of shower inserts available
When it comes to installing a shower insert, one of the most crucial steps is choosing the right type for your bathroom. There are several different types of shower inserts available, each with its own set of advantages and considerations. By understanding the different options, you can make an informed decision that meets your specific needs and preferences.
One of the most popular choices is the one-piece shower insert. As the name suggests, this type of insert comes in a single piece, which makes installation a breeze. It also provides a seamless and sturdy solution that is easy to clean and maintain. Another option is the multi-piece shower insert. This type is ideal for bathrooms with limited access or tight corners, as it can be maneuvered through narrow doorways or staircases. Multi-piece shower inserts also offer flexibility in terms of design and customization.
If you’re looking for a more affordable option, consider a shower kit. These kits typically come with the necessary components, such as walls, base, and door, in a convenient package. They are relatively easy to install and are available in various sizes and styles to suit your bathroom aesthetic. Finally, for those who desire a luxurious and spa-like experience, a tile-in shower insert may be the perfect choice. With endless design possibilities, these inserts allow you to create a truly customized and unique shower space.
Considering the size and style options
Once you have chosen the type of shower insert that suits your needs, it’s important to consider the size and style options available. The size of the insert will depend on your bathroom’s dimensions and the available space. Measure the area carefully to ensure a perfect fit. Additionally, think about the height and width of the insert, as well as the door opening dimensions, to guarantee comfortable access.
In terms of style, shower inserts come in various designs to complement your bathroom decor. Whether you prefer a modern and sleek look or a more traditional and timeless aesthetic, there is a shower insert style that will suit your taste. Consider the color, pattern, and texture of the insert to create a cohesive and visually appealing bathroom space.
Evaluating the material and durability factors
When choosing a shower insert, it’s essential to evaluate the material and durability factors. The material of the insert plays a crucial role in its performance and longevity. Common materials include fiberglass, acrylic, and composite. Fiberglass inserts are lightweight and affordable, but they may not be as durable as other options. Acrylic shower inserts, on the other hand, are known for their durability and resistance to scratches and stains. Composite inserts combine the best features of various materials, offering a balance of strength, durability, and affordability.
Durability is a significant factor to consider, as the shower insert will be exposed to water, moisture, and daily wear and tear. Look for inserts that are resistant to cracking, chipping, and discoloration over time. Reading product reviews and considering the warranty provided by the manufacturer can give you valuable insights into the durability of the shower insert.
In conclusion, when choosing the right shower insert, take into account the different types available, the size and style options, as well as the material and durability factors. By considering these aspects, you can ensure that your shower insert not only meets your functional needs but also enhances the overall aesthetic of your bathroom.
Step 1: Removing The Old Shower
Before installing a new shower insert, the first step is to remove the old shower. This process involves disconnecting the water supply, removing the shower fixtures and drain cover, and demolishing the existing shower walls. By following these steps, you can ensure a smooth and successful installation of your new shower insert.
Disconnecting the Water Supply
To begin, you need to disconnect the water supply to the shower. This is an essential step to prevent any accidental leaks or damage during the removal process. Locate the main water valve supplying water to the shower and turn it off. This will cut off the water flow and allow you to safely proceed with the next steps.
Removing the Shower Fixtures and Drain Cover
Once the water supply is disconnected, it’s time to remove the shower fixtures and drain cover. Start by turning off the shower’s faucet and handles. Use a wrench or pliers to loosen and remove the fixtures from the wall. Remember to place a cloth or bucket under the drain to catch any water that may drip out.
After removing the fixtures, unscrew or pry off the drain cover. This will expose the drain pipe and allow you to proceed with demolishing the existing shower walls.
Demolishing the Existing Shower Walls
Demolishing the existing shower walls is the final step in removing the old shower. Before starting, ensure you have the necessary protective gear, such as gloves and goggles, to safeguard yourself from any debris.
Use a hammer and a pry bar to carefully remove the tiles or panels from the walls. Start from the top and work your way down to avoid damaging the underlying structure. Take your time and exert gentle force to prevent any unnecessary damage.
Once the walls are cleared, inspect the area for any remaining adhesive or grout. Use a scraper or putty knife to remove any stubborn residue, ensuring a clean and smooth surface for the installation of your new shower insert.
With the old shower removed, you’re now ready to proceed to the next step of installing your new shower insert. Stay tuned for Step 2: Preparing the Shower Base!
Step 1.1: Assessing The Plumbing System
Before you begin installing a shower insert, it is crucial to assess the plumbing system in your bathroom. This step ensures that your shower will function properly and prevents any potential issues down the line. In this section, we will examine how to inspect the pipes and drains for any damages or leaks and make any necessary repairs or replacements.
Inspecting the Pipes and Drains for Any Damages or Leaks
The first task in assessing the plumbing system is to thoroughly inspect the pipes and drains for any damages or leaks. Even a small leak can lead to water damage or mold growth over time, so it’s essential to identify and address any issues early on.
| Steps to inspect the pipes and drains: |
|---|
|
By conducting a thorough inspection, you can ensure that your plumbing system is in good condition and ready for the installation of the shower insert.
Making Necessary Repairs or Replacements
If you identified any damages or leaks during the inspection, it is crucial to make the necessary repairs or replacements before proceeding with the shower insert installation. Ignoring plumbing issues can lead to more extensive damage and costly repairs in the future.
- Repairing Minor Leaks: If you notice minor leaks, you can try repairing them with plumber’s tape or a pipe sealant. Be sure to follow the manufacturer’s instructions for the best results.
- Replacing Damaged Pipes: In cases where the pipes are severely corroded or cracked, it is advisable to replace them entirely. Contact a professional plumber if you are uncertain about how to carry out this task.
- Fixing Drainage Issues: If you experience slow drainage, try using a chemical drain cleaner or a plunger to clear any clogs. However, if the issue persists, it may be necessary to call a plumber to address the underlying problem.
By making the necessary repairs or replacements, you can ensure that your plumbing system is in optimal condition and ready to support the installation of your new shower insert.
Step 1.2: Removing The Existing Shower Enclosure
The first step in installing a shower insert is to remove the existing shower enclosure. This is an essential step to ensure a smooth installation process. Properly removing the old enclosure will help you avoid any damage to the new shower insert and ensure a sturdy and secure installation.
Detaching the shower walls from the studs
To begin, you will need to detach the shower walls from the studs. This involves carefully removing any screws or nails that are holding the walls in place. It’s important to take your time and be gentle during this process to avoid causing any unnecessary damage.
If the shower walls are secured with adhesive, you may need to use a putty knife or a pry bar to gently separate the walls from the studs. Be cautious not to put too much pressure on the walls to prevent any cracks or breakage.
Removing any leftover adhesive or caulk
Once the shower walls are detached, the next step is to remove any leftover adhesive or caulk. This step is crucial to ensure a clean and smooth surface for the new shower insert. Leaving any adhesive or caulk behind can lead to an uneven installation and may compromise the overall durability of the insert.
Grab a scraper or a putty knife and carefully scrape off any adhesive or caulk residue from the studs and the surrounding area. Make sure to be thorough and remove any traces of the old adhesive to create a clean working environment.
It’s also a good idea to clean the area with a mild cleaning solution to remove any dirt or grime that may have accumulated over time. This will further prepare the surface for the installation of the new shower insert.
By properly detaching the shower walls from the studs and removing any leftover adhesive or caulk, you are setting a solid foundation for installing the new shower insert. This meticulous approach ensures a smooth and secure installation process, guaranteeing the longevity and functionality of your new shower.
Step 2: Preparing The Shower Area
Once you have gathered all the necessary tools and materials for installing a shower insert, it’s time to move on to the second step: preparing the shower area. This step involves a few essential tasks, including cleaning the shower space, repairing any damaged walls or surfaces, and installing a vapor barrier.
Cleaning the Shower Space
The first thing you need to do is to ensure that the shower space is clean and free from any debris or residue that could interfere with the installation process. Here’s how you can effectively clean the shower space before proceeding:
- Remove any existing shower fixtures, such as showerheads, handles, and knobs.
- Thoroughly clean the walls and floor of the shower area using a mildew remover or a mixture of warm water and vinegar. Pay attention to any stubborn stains or mold growth, and scrub them away using a soft brush.
- Rinse the walls and floor with clean water to remove any residue from the cleaning solution.
- Allow the shower space to air dry completely before moving on to the next step.
Repairing any Damaged Walls or Surfaces
Before installing the shower insert, it’s important to inspect the walls and surfaces of the shower area for any existing damage. Here’s what you need to do to repair any issues:
- Check for any cracks, holes, or loose tiles on the walls. Use a suitable filler or patching compound to repair these imperfections. Ensure that the repaired areas are smooth and level with the surrounding surface.
- If there are any damaged or deteriorated areas on the shower floor, consider replacing them or repairing them with a suitable substrate material.
- Allow the repairs to fully dry and cure before proceeding with the installation.
Installing a Vapor Barrier
A vapor barrier is an essential component in preventing moisture buildup and protecting the shower walls from potential damage. Here’s how you can install a vapor barrier:
| Steps | Description |
|---|---|
| 1 | Measure the dimensions of the shower area and cut the vapor barrier material accordingly. |
| 2 | Apply a thin layer of adhesive or sealant on the shower walls where the vapor barrier will be installed. |
| 3 | Press the vapor barrier onto the adhesive, ensuring that it covers the entire shower area and overlaps the edges. |
| 4 | Smooth out any wrinkles or air bubbles by gently pressing on the vapor barrier with a roller or a flat tool. |
| 5 | Trim any excess vapor barrier material using a utility knife. |
By following these steps, you can effectively prepare the shower area for the installation of a shower insert. Once the cleaning, repairing, and vapor barrier installation steps are complete, you’ll be ready to move on to the next stage of the installation process.
Step 2.1: Waterproofing The Shower Area
After properly preparing the shower area, it is time to move on to the crucial step of waterproofing. Waterproofing ensures that water does not seep through the walls and cause potential damage to the structure. It is an essential process that helps to maintain the longevity and integrity of your shower insert.
Applying a liquid waterproof membrane
The first step in waterproofing your shower area is to apply a liquid waterproof membrane. This membrane acts as a protective barrier, preventing water from penetrating the walls and causing any moisture-related issues. Here’s a step-by-step guide to applying a liquid waterproof membrane:
- Start by thoroughly cleaning the shower area to remove any dirt or debris. This will help the membrane adhere better to the surface.
- With a paintbrush or roller, apply the liquid waterproof membrane evenly on the walls of the shower area. Make sure to cover the entire surface, including corners and seams.
- Pay extra attention to areas that are more prone to water exposure, such as the base of the walls and the corners where the walls meet the floor.
- Allow the liquid waterproof membrane to dry completely. This typically takes about 24 hours, but refer to the manufacturer’s instructions for specific drying times.
Sealing seams and corners
While applying a liquid waterproof membrane provides a great level of protection, it is essential to take extra measures to seal the seams and corners properly. These are potential areas where water can seep through if not adequately sealed. Here are some tips to seal seams and corners effectively:
- Use a waterproof sealant specifically designed for sealing seams and corners in wet areas. These sealants are flexible and can withstand movement without cracking.
- Apply the sealant generously along the seams and corners, ensuring complete coverage.
- Smooth out the sealant with a putty knife or your finger to create a seamless finish and remove any excess.
- Allow the sealant to dry completely before proceeding with further installations.
By following these steps and ensuring proper waterproofing, you can prevent water damage and enjoy a long-lasting, leak-proof shower area. Remember, a well-waterproofed shower area not only enhances your comfort but also protects your home investment.
Step 2.2: Preparing The Shower Drain
One crucial aspect of installing a shower insert is preparing the shower drain. This step ensures smooth water flow and prevents any potential leaks. In this section, we will guide you through the process, making sure your shower drain is aligned correctly and ready for installation.
Checking the Drain Pipe Alignment
Before proceeding with the installation, it is essential to check the alignment of your existing drain pipe. A misaligned drain could lead to issues down the line, such as leaking or inefficient water drainage. Follow these steps to ensure proper alignment:
- Remove the drain cover or grate by unscrewing it counterclockwise. Place the cover aside for later use.
- Inspect the exposed drain pipe for any signs of misalignment, such as gaps or crooked positioning.
- If the drain pipe needs adjustment, use a wrench to loosen the locking nut underneath the drain pipe. This allows you to rotate the pipe and align it properly.
- Once realigned, tighten the locking nut securely to hold the drain pipe in place.
Installing a New Drain if Necessary
In some cases, you may find that your existing drain is damaged, corroded, or incompatible with the shower insert. Installing a new drain is a straightforward process and ensures a reliable and leak-free connection. Here is how to install a new shower drain:
- Remove the old drain by unscrewing the locking nut beneath it and lifting it out.
- Clean the drain hole thoroughly, removing any debris or residue.
- Apply a thin layer of plumber’s putty around the underside of the new drain flange, which will create a watertight seal.
- Insert the new drain flange into the drain hole and press firmly to ensure a tight fit.
If your shower drain includes a rubber gasket or compression seal, make sure to follow the manufacturer’s instructions to properly secure the connection.
Remember, a well-prepared shower drain is crucial for the long-term performance and functionality of your shower insert. Take the time to check the alignment of your drain pipe and install a new drain if necessary. With these steps completed, you are now ready to move on to the next phase of the shower insert installation process.
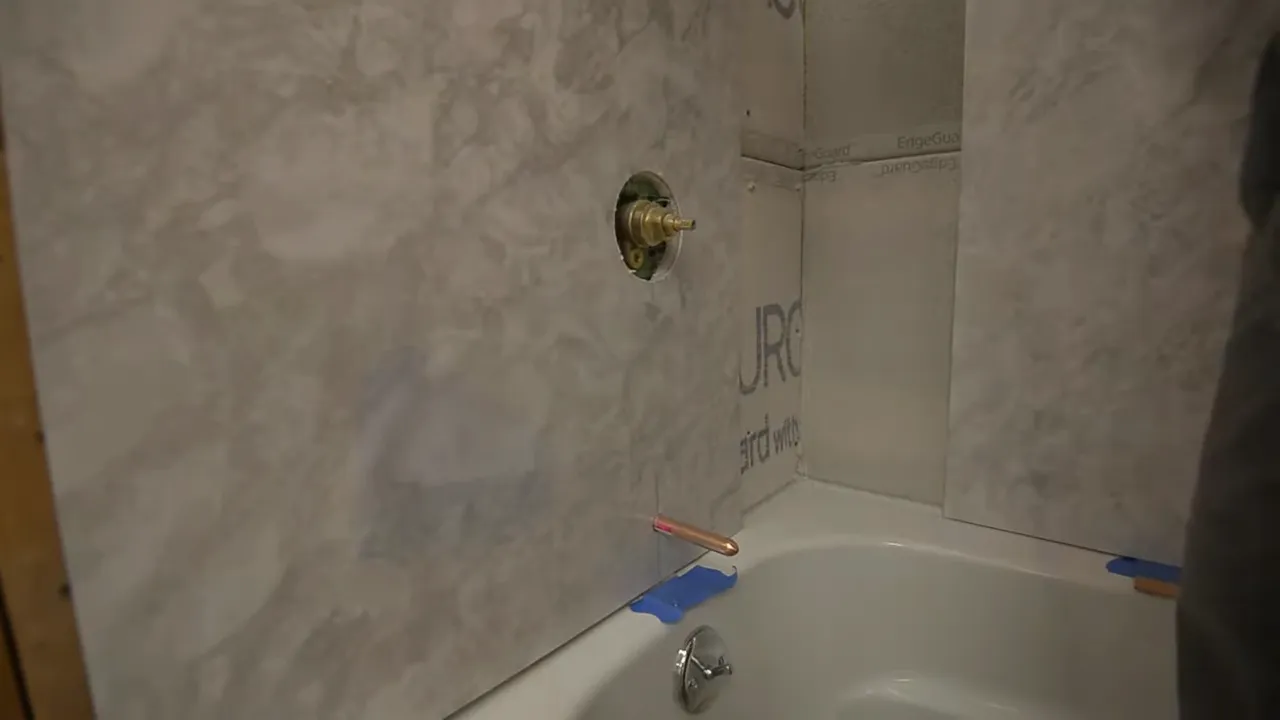
Step 3: Installing The Shower Insert
Now that you have prepared the area and assembled the necessary tools and materials, it’s time to move on to the exciting part – installing the shower insert! This step involves a few important tasks, including assembling the shower walls, securing them to the studs, and connecting the plumbing fixtures. Let’s dive in and get started!
Assembling the Shower Walls
Start by carefully unpacking all the components of your shower insert. Lay them out in an organized manner, making it easier to locate the required pieces during installation. Refer to the manufacturer’s instructions for detailed guidance on how to assemble the shower walls properly.
You may need to attach the panels together using the provided connectors or clips. Align the panels accurately to ensure a seamless fit. Some inserts may require adhesive or caulking to hold the panels together securely. Apply these materials as instructed, following a steady and consistent motion.
Securing the Walls to the Studs
Once the shower walls are fully assembled, it’s time to secure them to the studs of your bathroom wall. This is a crucial step that ensures the stability and durability of your shower insert.
- Position the shower walls against the studs, making sure they are level and plumb.
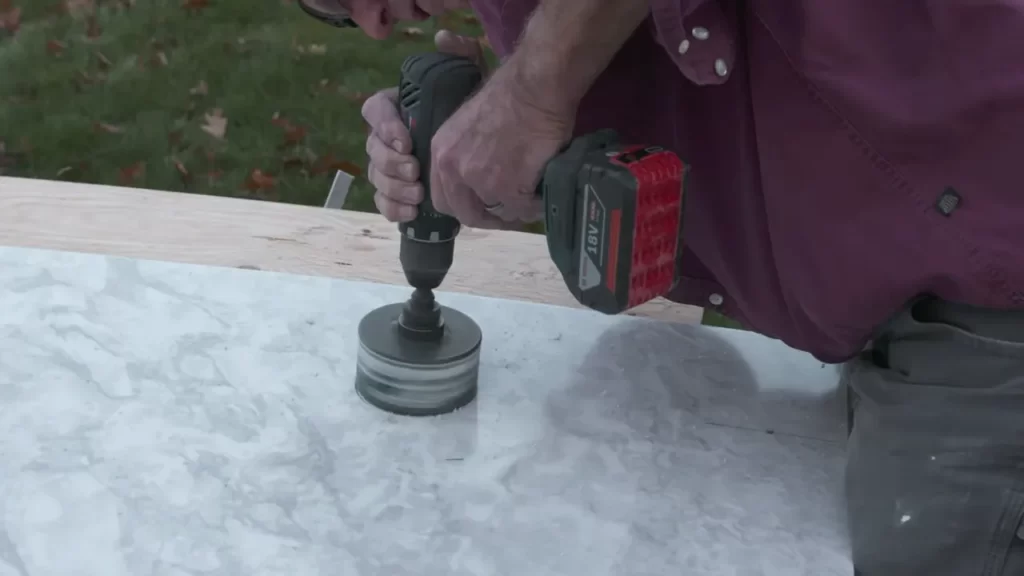
- Use a drill to create pilot holes through the flanges or designated areas of the panels.
- Insert screws into the pilot holes and secure the walls to the studs firmly. Be cautious not to overtighten, as it may damage the panels or compromise their integrity.
Ensure each screw is securely fastened to guarantee a secure installation. Check the alignment of the walls and make any necessary adjustments before moving forward.
Connecting the Plumbing Fixtures
With the shower walls securely in place, it’s time to connect the plumbing fixtures to complete the installation process. Follow these steps:
- Connect the showerhead to the main water supply line, ensuring a tight and leak-free connection.
- Attach the shower handles or knobs to the corresponding valves, making sure they are aligned correctly.
- Test the fixtures to check for any leaks or issues. Make any necessary adjustments or repairs as needed.
Remember to turn off the main water supply before connecting the plumbing fixtures to prevent any accidents or water damage. Once everything is connected and functioning correctly, turn on the water and check for any leaks.
Congratulations! You have successfully installed your shower insert. The hard work and careful attention to detail will pay off as you enjoy your new and improved showering experience.
Step 3.1: Attaching The Shower Walls
Installing a shower insert is an essential step in transforming your bathroom into a spa-like oasis. Once you have completed the previous steps of prepping the shower base and assembling the shower walls, it’s time to move on to attaching the walls securely. This step involves aligning the shower walls properly and then securing them using screws or adhesive. Let’s dive into the details of how to complete this crucial part of the installation process.
Aligning the shower walls properly
Proper alignment of the shower walls is crucial for a sturdy and seamless installation. To ensure the walls are aligned correctly, follow these steps:
- Begin by placing the first wall into position, aligning it with the edges of the shower base. Use a level to check if the wall is plumb vertically and adjust as necessary.
- Once the first wall is properly aligned, move on to the adjacent wall. Slide it into place, ensuring it sits flush against the first wall.
- Check the alignment of the second wall using a level, ensuring it is plumb both vertically and level horizontally. Adjust if needed.
- Continue the same process for any additional walls.
- Check the alignment of all the walls together, ensuring they are flush and level in all directions. Make any necessary adjustments before proceeding.
Securing the walls using screws or adhesive
After aligning the shower walls, it’s time to secure them in place. The method you choose for securing the walls depends on the specific instructions provided by the manufacturer of your shower insert. Here are two common methods:
1. Screws: This method typically involves drilling pilot holes into the shower walls and then screwing them into the studs behind the walls. Follow these steps to secure the walls using screws:
- Use a drill to create pilot holes into the shower walls at the predetermined locations specified by the manufacturer.
- Position the walls against the studs and insert screws through the pre-drilled holes, making sure they penetrate into the studs securely.
- Tighten the screws until the walls sit firmly against the studs, but be careful not to overtighten, as it may damage the walls.
- Repeat the process for all the walls, ensuring each one is securely fastened.
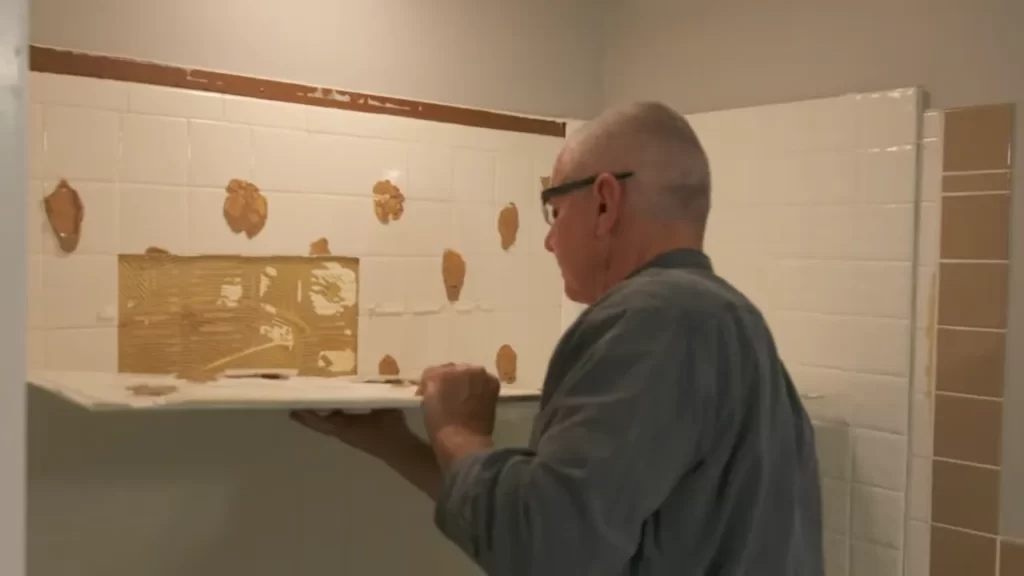
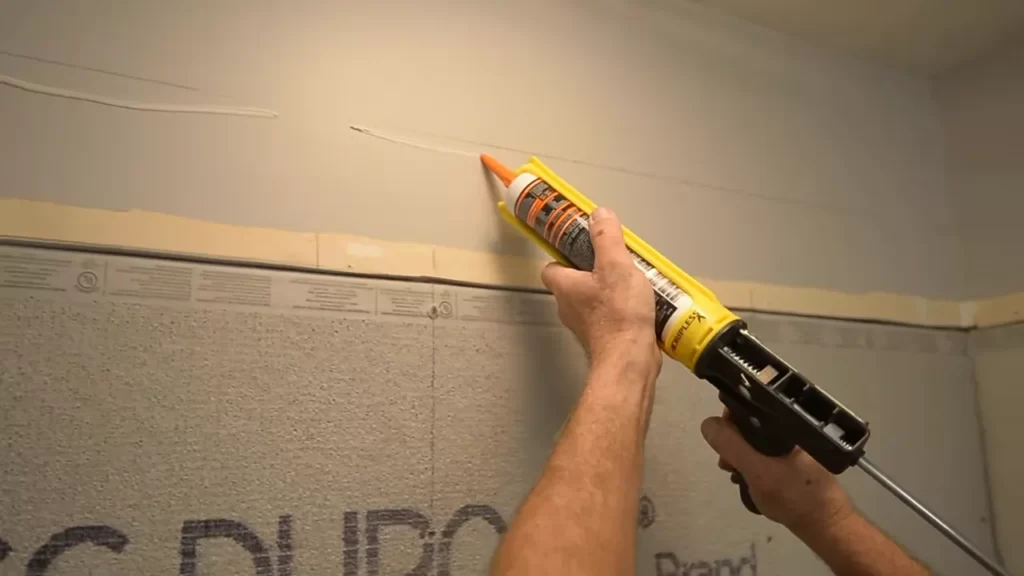
2. Adhesive: Some shower inserts come with an adhesive backing, eliminating the need for screws. The adhesive method involves:
- Clean the surface of the shower base and the corresponding area of the shower walls using a recommended cleaner. This step ensures optimal adhesion.
- Apply the adhesive according to the manufacturer’s instructions, usually by removing the backing on the adhesive and pressing the walls firmly against the shower base and adjacent walls.
- Hold the walls in place for a specified period as directed by the manufacturer to allow the adhesive to bond properly.
- Ensure each wall is securely attached by gently pressing along the edges and corners.
Once you have secured the shower walls using screws or adhesive, take a moment to verify their stability by applying gentle pressure. Ensure they are firmly in place before moving on to the next steps of finishing the shower installation. With the walls properly aligned and secured, you’re one step closer to enjoying a rejuvenating showering experience in your newly installed shower insert.
Step 3.2: Installing The Shower Pan
Once you have properly prepared the shower area and installed the shower liner, it’s time to move on to the next step: installing the shower pan. The shower pan is an essential component as it acts as the base for your shower, ensuring that any water is properly drained away. In this step, you will learn how to place the shower pan in position and connect the drain pipe and trap.
Placing the Shower Pan in Position
Before placing the shower pan, make sure you have double-checked your measurements to ensure a perfect fit. Once you are certain, proceed with the following steps:
- Carefully lower the shower pan into the designated area, making sure it aligns with the shower walls, curb, and drainpipe location.
- Check that the shower pan is level and even. You can use a spirit level to ensure accuracy.
- If necessary, adjust the position of the shower pan by gently shifting it until it is perfectly aligned.
- Once you are satisfied with the placement, mark the position of the shower pan on the subfloor using a pencil or marker. This will serve as a reference for the next step.
Connecting the Drain Pipe and Trap
The proper installation of the drain pipe and trap is crucial to prevent any potential leaks and ensure the efficient drainage of water. Follow these steps to connect them securely:
- Using a hacksaw or PVC pipe cutter, cut the drainpipe to the appropriate length. Remember to measure twice and cut once for accuracy.
- Attach the drainpipe carefully to the shower pan’s drain hole, ensuring a tight fit.
- Apply plumber’s putty or silicone caulk around the drain strainer on the shower pan to provide a watertight seal. This step is essential to prevent any water from seeping through.
- Connect the other end of the drainpipe to the trap. Ensure the connection is secure by using PVC primer and cement according to the manufacturer’s instructions.
- Double-check all connections and tighten them if necessary.
Once you have completed the above steps, you have successfully installed the shower pan and connected the drain pipe and trap. This ensures a sturdy and efficient base for your shower. In the next step, you will move on to installing the shower walls.
Step 4: Sealing And Finishing Touches
Once you have installed the shower insert and secured it in place, it’s time to move on to the crucial step of sealing and adding those finishing touches. This step not only ensures a water-tight seal but also gives your shower a polished and attractive appearance. Let’s dive into the specific tasks you need to complete to achieve a functional and visually appealing shower.
Applying sealant around the shower walls
One of the most important tasks is applying sealant around the shower walls. This step ensures that water doesn’t leak through the joints and protects the underlying structure from damage. To do this, you’ll need a high-quality silicone sealant that is compatible with your shower material. Here’s a step-by-step guide on how to apply the sealant:
- Clean the area around the joints using a mild detergent and warm water. Make sure there is no dirt, debris, or old sealant left.
- Using a caulking gun, apply a thin and even bead of sealant along the joints between the shower walls and the shower base. Be careful not to apply too much pressure, as it can cause the sealant to ooze out excessively.
- Smooth the sealant using a caulk smoothing tool or your finger dipped in soapy water. This will give a neat and professional finish.
- Allow the sealant to dry completely before using the shower. Refer to the manufacturer’s instructions for the recommended drying time.
Installing the shower door or curtain
Next, it’s time to install the shower door or curtain to provide privacy and prevent water splashes outside the shower area. Follow these steps to complete this task:
- If you are installing a shower door, carefully measure the dimensions and ensure it fits perfectly. Follow the manufacturer’s instructions for the specific installation process.
- For a shower curtain, attach the curtain rod securely to the shower walls. Make sure it is level and at an appropriate height.
- Hang the shower curtain on the rod, ensuring it covers the entire width of the shower area and reaches the floor to prevent water from escaping.
- Lastly, test the door or curtain by opening and closing it to ensure it operates smoothly and there are no obstructions.
Checking for any leaks or issues
Before considering your shower installation complete, it’s vital to check for any leaks or potential issues. Here’s how you can do that:
- Turn on the shower and let the water run for a few minutes.
- Thoroughly inspect the joints, corners, and connections for any signs of leakage.
- If you notice any leaks, immediately address them by applying more sealant or tightening the connections.
- Additionally, ensure that the showerhead, knobs, and faucets are functioning properly without any leaks.
- Once you are satisfied with the results and there are no leaks or issues, you can confidently enjoy your newly installed shower.
By following these steps to seal your shower walls, install the shower door or curtain, and check for leaks, you can ensure that your shower insert is not only secure but also aesthetically pleasing. Taking the time to complete these finishing touches will result in a functional and enjoyable showering experience for years to come.
Step 4.1: Caulking And Sealing
Once the shower insert is securely in place and all the surrounding parts are properly attached, it’s time to focus on the crucial step of caulking and sealing. This step is essential for creating a watertight and durable seal, preventing any leaks or water damage in the future. Follow these instructions to ensure a successful caulk and seal application.
Applying caulk to seal gaps and seams
The first step in achieving a watertight seal is to apply the caulk to seal any gaps and seams in the shower insert. Caulk is a versatile material that provides both adhesion and sealing properties, ensuring long-lasting protection against water penetration. To apply caulk:
- Clean the surrounding area to remove any dust or debris that could interfere with the adhesion of the caulk.
- Cut the tip of the caulk tube at a 45-degree angle to create a small opening.
- Insert the caulk tube into a caulk gun and apply even pressure to start dispensing caulk.
- In a smooth and continuous motion, apply a thin bead of caulk along the gaps and seams, filling them completely.
- Use a caulk smoothing tool or your finger to smooth out the caulk, ensuring a neat and tidy finish.
Remember to work efficiently, as caulk tends to dry quickly. It’s best to divide the area into smaller sections and complete one section at a time to ensure proper application.
Ensuring a watertight seal
After applying the caulk to seal the gaps and seams, it’s essential to ensure a watertight seal to prevent any potential leaks. Here are some crucial points to consider:
- Check for any missed gaps or areas that require additional caulk and apply it accordingly.
- Make sure the caulk is evenly applied, with no gaps or breaks in the seal.
- Inspect the entire area thoroughly, paying close attention to corners, edges, and areas where the insert meets the walls or floor.
- Wipe away any excess caulk using a damp cloth to maintain a clean and professional appearance.
By following these steps, you can ensure a secure and watertight seal, providing peace of mind and ensuring the longevity of your shower insert. Proper caulking and sealing is essential for keeping your bathroom free from leaks and water damage.
Step 4.2: Adding Final Touches
Now that you have successfully installed your shower insert and ensured that everything is secure and watertight, it’s time to add those final touches that will transform your shower into a functional and stylish space. In this step, we will focus on installing the shower fixtures and accessories, as well as cleaning up the bathroom area to give it a polished look.
Installing the Shower Fixtures and Accessories
First, let’s tackle the installation of your shower fixtures and accessories. These include items like the showerhead, faucets, handles, and any other accessories you may have chosen to enhance your shower experience.
To begin, you will need to connect the plumbing fixtures to the water supply lines. Ensure that you tightly secure the connections using a wrench or pliers to avoid any potential leaks.
Next, carefully attach the showerhead to the shower arm, ensuring a snug fit. You may need to use some thread seal tape to create a watertight seal.
If you have chosen to install additional accessories such as a soap dispenser or a shower caddy, refer to the manufacturer’s instructions for specific installation steps.
Remember to test each fixture and accessory for proper functionality before proceeding to the next step. This will ensure that everything is in working order and ready for use.
Cleaning up the Bathroom Area
With the shower fixtures and accessories in place, it’s time to shift our focus to cleaning up the surrounding bathroom area. This step will not only make your shower installation look neat and inviting, but it will also serve as the finishing touch to your project.
Start by wiping down all surfaces, including the shower walls, vanity, mirror, and flooring. Use a mild cleaning solution and a microfiber cloth to avoid any potential damage to the materials.
Next, remove any construction debris, such as excess caulking or adhesive, using a scraper or a suitable tool. Be careful not to scratch or damage any surfaces while doing this.
Lastly, take the time to organize and arrange your bathroom essentials, such as towels, toiletries, and bath accessories. Consider using storage solutions like baskets or shelves to keep everything within reach and maintain a clutter-free environment.
In conclusion, the final touches of installing your shower insert involve attaching the shower fixtures and accessories and ensuring a clean and organized bathroom area. By following these steps, you’ll be able to complete your shower installation with a professional touch and create a relaxing and functional space for your daily routines.
Frequently Asked Questions
What Do You Put Behind A Shower Insert?
You can put a waterproofing material like cement board or a vapor barrier behind a shower insert. These materials protect the surrounding walls from water damage and help ensure a secure installation.
How Long Does It Take To Install A Shower Insert?
Typically, the installation of a shower insert takes about 2-3 hours. Make sure to prepare the area before starting the installation process to ensure a smooth and efficient installation.
What Kind Of Adhesive To Use For A Shower Surround?
Use a waterproof adhesive specifically designed for shower surrounds. It should have strong bonding capabilities, withstand moisture, and be resistant to mold and mildew. Choose a reliable brand, following the manufacturer’s instructions. A high-quality adhesive will ensure a durable and long-lasting installation.
Can I Install A Shower Myself?
Yes, you can install a shower yourself. Just follow these guidelines: 1. Plan the layout and measure the space accurately. 2. Gather the necessary tools and materials. 3. Familiarize yourself with the installation process by reading manuals or watching tutorials. 4.
Take safety precautions and turn off the water supply before starting. 5. Follow the instructions carefully and seek professional help if needed.
Conclusion
Installing a shower insert can transform your bathroom and provide a convenient and stylish bathing experience. By following the steps outlined in this guide, you can successfully complete the installation process. From preparing the area to securing the insert and ensuring proper drainage, each step is crucial for a successful result.
Remember to take your time, use the right tools, and seek professional help if needed. With the right approach, you can enjoy a beautiful and functional shower for years to come.