
To install a Moen shower faucet, follow these steps: Turn off the water supply, remove the old fixture, clean the area, attach the valve, connect the water supply lines, and secure the faucet handle.
Understanding The Components Of A Moen Shower Faucet
When it comes to installing a Moen shower faucet, it is essential to have a good understanding of its various components. By familiarizing yourself with the different parts, you can ensure a successful installation and enjoy a fully functional and stylish shower.
Differentiating between the handle, valve, and showerhead
The Moen shower faucet consists of three main components: the handle, valve, and showerhead. Let’s take a closer look at each one:
The Handle:
The handle is the part of the faucet that allows you to control the water flow and temperature. It is usually located on the front of the faucet and can be turned or pulled to adjust the settings. Moen offers a range of handle styles, including single-handle and double-handle options, providing you with flexibility in choosing the design that suits your preferences.
The Valve:
The valve is the mechanism that controls the flow of water. It is responsible for regulating the temperature and diverting water between the faucet and showerhead. Moen incorporates advanced valve technologies, such as the Moentrol and Posi-Temp, in their shower faucets to ensure a smooth and consistent water experience.
The Showerhead:
The showerhead is the part of the faucet that sprays water. Moen offers an extensive range of showerhead styles, including fixed, handheld, and rain shower options, allowing you to personalize your showering experience. Additionally, Moen’s showerheads come in various finishes, such as chrome, brushed nickel, and bronze, ensuring compatibility with your bathroom decor.
Exploring the various styles and finishes available
In addition to understanding the core components of a Moen shower faucet, it is important to explore the various styles and finishes available. Moen offers a wide selection of faucet designs, ranging from contemporary to traditional, enabling you to find the perfect match for your bathroom aesthetics. Moreover, Moen provides finishes that not only enhance the faucet’s appearance but also offer durability and resistance to corrosion.
Here are some popular finishes offered by Moen:
| Finish | Description |
|---|---|
| Chrome | A classic and versatile choice that is easy to clean and maintain. |
| Brushed Nickel | A modern and sophisticated finish with a subtle matte appearance. |
| Bronze | A warm, rich finish that adds an elegant touch to your shower. |
By exploring the various styles and finishes available, you can ensure that your Moen shower faucet not only functions flawlessly but also complements your bathroom decor.
Now that you have a better understanding of the components of a Moen shower faucet, as well as the different styles and finishes available, you are well-equipped to install a Moen shower faucet that meets your needs and preferences.
Gathering The Necessary Tools And Materials
Before you begin installing your new Moen shower faucet, it’s important to gather all the necessary tools and materials. Having everything you need at hand will make the installation process smoother and more efficient. In this section, we will list the essential tools and discuss the specific materials required for Moen shower faucet installation.
Listing the Essential Tools Needed for the Installation Process
Here is a comprehensive list of the tools you will need for installing your Moen shower faucet:
| Tools | Description |
|---|---|
| Adjustable wrench | A versatile tool for tightening and loosening various parts of the faucet. |
| Plumber’s tape | Used to create a watertight seal between threaded connections. |
| Phillips screwdriver | For removing or tightening screws. |
| Allen wrench | Typically used for set screws in certain Moen shower faucet models. |
| Plumbers putty | Seals gaps and prevents leaks around the faucet base. |
| Bucket | To catch any excess water during the removal process. |
| Rags | For cleaning and drying surfaces. |
| Needle-nose pliers | Used for various tasks, such as removing small parts or gripping tight spaces. |
| Teflon tape | Similar to plumber’s tape, it creates a watertight seal but is specifically designed for threaded connections. |
| Pipe cutter | If necessary, used to cut and remove sections of pipe. |
Discussing the Specific Materials Required for Moen Shower Faucet Installation
In addition to the tools listed above, you will also need the following materials specifically designed for Moen shower faucet installation:
- Moen shower faucet kit – Ensure you have the correct model that matches your existing plumbing.
- Replacement cartridge – If your current shower faucet cartridge is damaged or worn out, it’s recommended to replace it during the installation process.
- Plumbing tape – Apart from the plumber’s tape mentioned earlier, you will also need plumbing tape specifically designed to seal the connections between the shower faucet and the water supply lines.
- Moen faucet handle – If your new faucet kit does not include a handle or if you prefer a different style, make sure to purchase a compatible handle separately.
- Showerhead and shower arm – Some Moen shower faucet kits come with a showerhead and shower arm, but if not, you will need to purchase these separately.
With these tools and materials, you are now ready to proceed with the installation of your Moen shower faucet. In the next section, we will guide you through the step-by-step process to ensure a successful installation.
Shutting Off The Water Supply
Before you begin installing your new Moen shower faucet, it is essential to shut off the water supply to prevent any leaks or accidents. This step is crucial for your safety and the proper function of the faucet. In this section, we will guide you through the process of locating the main water supply valve and turning off the water to the shower.
Locating the main water supply valve
The first step in shutting off the water supply is to locate the main water supply valve. This valve is usually located near the water meter or in the basement of your home. If you are unsure about the location of the valve, you can refer to your home’s plumbing diagram or contact a professional plumber for assistance.
Turning off the water to the shower
Once you have located the main water supply valve, follow the steps below to turn off the water to the shower:
- Locate the shut-off valve for your shower. This valve is typically located near the shower or behind an access panel.
- Turn the valve clockwise until it is fully closed. This will shut off the water supply to the shower.
It is important to ensure that the valve is fully closed to prevent any water from flowing to the shower. This will help you avoid any unexpected leaks or water damage during the installation process.
Remember to test the water supply by turning on a faucet in another part of your home to make sure the water is indeed shut off. Once you have confirmed that the water is off, you can proceed with the installation of your Moen shower faucet.
By following these steps and taking the necessary precautions, you can safely shut off the water supply for your shower and proceed with the installation process. Stay tuned for the next section, where we will guide you through the steps to remove the old shower faucet.
Removing The Existing Shower Faucet
Removing an old shower faucet may seem like a daunting task, but it’s actually a straightforward process that can be done with a few basic tools. Before you can install a new Moen shower faucet, you’ll need to remove the old one. In this guide, we’ll take you through the steps to successfully remove the existing shower faucet.
Assessing the type of existing faucet
The first step in removing the existing shower faucet is to assess the type of faucet you have. This will help you determine what tools and techniques you’ll need for the removal process. There are different types of shower faucets, including single-handle and double-handle faucets, as well as different models and brands. Take a moment to closely examine your faucet and make note of its features.
Detaching the handle, escutcheon plate, and trim from the wall
Once you’ve determined the type of faucet you have, you can start detaching the various components from the wall. To do this, you’ll need a set of basic tools, including a screwdriver and pliers. Here’s a step-by-step guide to help you through the process:
- Start by turning off the water supply to the shower faucet. This is usually done by shutting off the main water valve for your entire house.
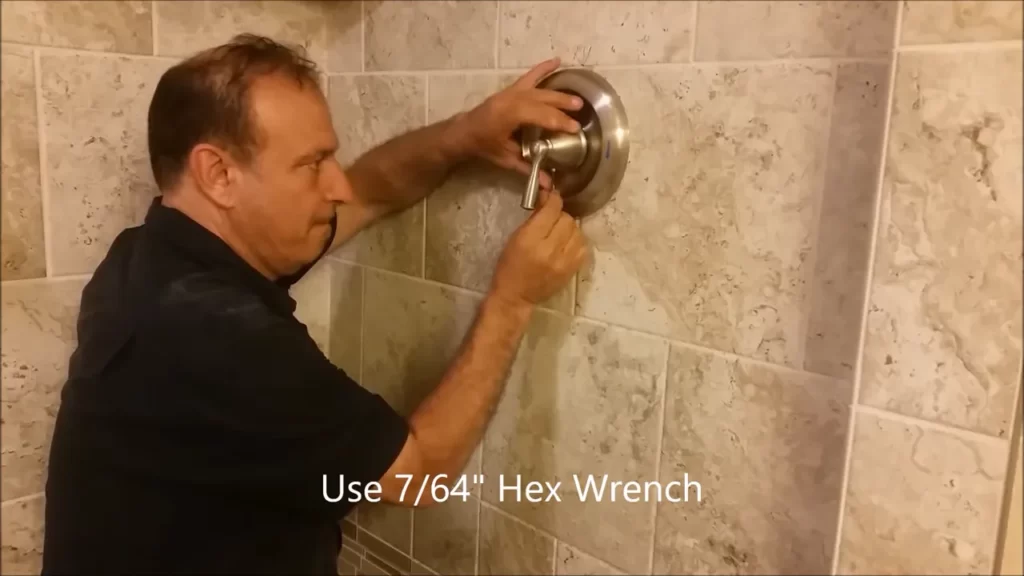
- Remove the handle of the faucet by locating the small set screw on the handle. Use an Allen wrench to loosen and remove the set screw, and then pull the handle off the stem.
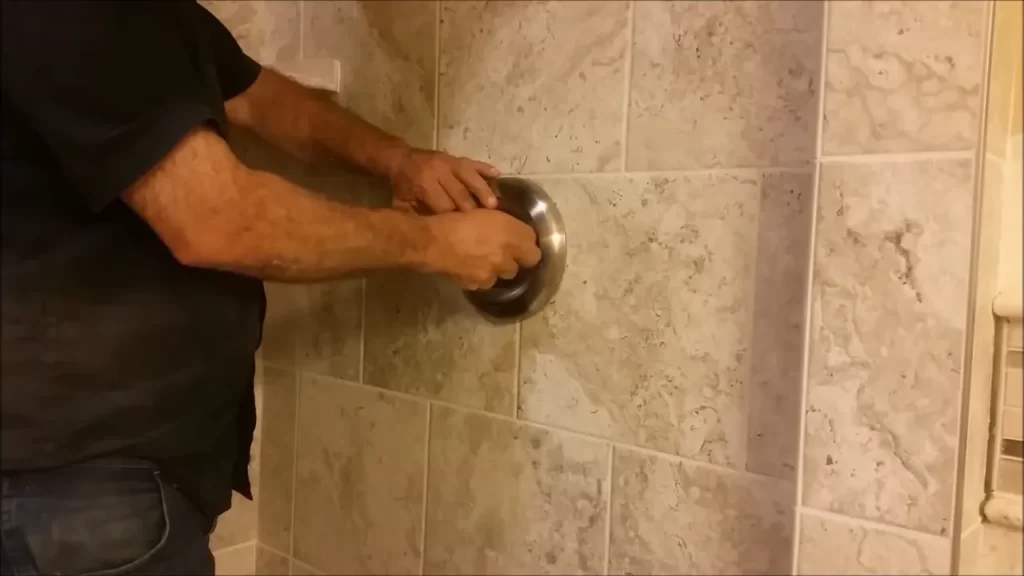
- Next, remove the escutcheon plate from the wall. The escutcheon plate is the cover that surrounds the shower valve. It is typically held in place by a few screws. Use a screwdriver to remove these screws and carefully pull the escutcheon plate away from the wall.
- With the escutcheon plate removed, you can now access the trim of the faucet. The trim is the decorative part of the faucet that covers the valve. Depending on the model, the trim may be held in place by screws or clips. Use the appropriate tools to detach the trim from the wall.
By following these steps, you’ll be able to remove the existing shower faucet and prepare the space for the installation of your new Moen shower faucet. Remember to take your time and be gentle during the removal process to avoid causing any damage to the plumbing or the wall.
Choosing The Appropriate Moen Shower Valve
When it comes to installing a Moen shower faucet, one of the most critical decisions you’ll need to make is choosing the right shower valve. The shower valve controls the flow of water and temperature, so it’s essential to select the appropriate one for your installation. In this article, we’ll walk you through the process of understanding the different types of Moen shower valves available and selecting the right valve for your specific needs.
Understanding the different types of Moen shower valves available
Before diving into the selection process, let’s take a moment to explore the various types of Moen shower valves that are available. Moen offers several valve options, each with its own unique features and advantages. Here’s a brief overview of the most common types:
| Valve Type | Description |
|---|---|
| Moen Posi-Temp Valve | This valve is designed to maintain consistent water temperature, preventing sudden and unexpected temperature fluctuations. |
| Moen Moentrol Valve | The Moentrol valve allows for precise control over both water flow and temperature, ensuring a customized and comfortable shower experience. |
| Moen ExactTemp Valve | If you’re looking for ultimate control over water temperature, the ExactTemp valve provides precise temperature adjustment with thermostatic technology. |
While these are the most common types of Moen shower valves, there may be other specialized options available depending on your specific needs and preferences. It’s always a good idea to consult with a professional or refer to Moen’s official documentation for more information.
Selecting the right valve for your installation
Now that you have a basic understanding of the different types of Moen shower valves, it’s time to select the right valve for your installation. Consider the following factors to ensure you choose the valve that best suits your needs:
- Shower System Compatibility: Determine whether you have a single-handle or dual-handle shower system, as different valves may be required for each.
- Desired Features: Think about the specific features you want, such as temperature control, pressure balance, or thermostatic technology. Identify the valve that offers the functionalities you desire.
- Plumbing Requirements: Take into account your existing plumbing setup and ensure that the selected valve is compatible. If you’re unsure, consult with a professional plumber for guidance.
By considering these factors, you can confidently choose the right Moen shower valve that meets your exact requirements. Remember, proper valve selection is essential for a functional and enjoyable shower experience.
Now that you understand the different types of Moen shower valves available and how to select the appropriate one, you’re ready to move forward with the installation process. In the next section of our guide, we’ll walk you through the step-by-step instructions on installing the Moen shower faucet and valve.
Preparing The Valve For Installation
Before installing your Moen shower faucet, it’s essential to properly prepare the valve. This crucial step ensures that your faucet functions correctly and prevents any leaks or damage in the long run. In this section, we will guide you through two important steps to take when preparing the valve for installation: applying plumber’s tape to the valve threads and installing the valve support bracket or escutcheon plate.
Applying plumber’s tape to the valve threads
One of the key aspects of preparing the valve for installation is applying plumber’s tape to the valve threads. This simple yet effective task helps create a watertight seal and prevents any possible leaks. To apply the tape:
- Start by cleaning the valve threads with a clean cloth to remove any debris or residue.
- Take the plumber’s tape and wrap it clockwise around the male threads of the valve. Ensure that the tape is snugly wrapped and covers the entire threaded area.
- Once the tape is in place, use your fingers to press it firmly, ensuring it adheres properly to the threads.
Remember, applying plumber’s tape to the valve threads is a crucial step in the installation process, as it creates a tight seal that helps prevent any leaks in the future.
Installing the valve support bracket or escutcheon plate
Next, let’s discuss installing the valve support bracket or escutcheon plate. This component not only provides support but also enhances the overall aesthetic of the shower faucet. Follow these steps for a successful installation:
- Start by aligning the bracket or escutcheon plate with the valve opening.
- Insert the screws provided into the designated holes and tighten them using a screwdriver.
- Ensure that the bracket or plate is securely fastened to the wall, providing stability and support for the valve.
Installing the valve support bracket or escutcheon plate is an essential step that guarantees the proper functioning and stability of your Moen shower faucet.
By following these steps to prepare the valve for installation, you are setting yourself up for a successful and leak-free experience with your Moen shower faucet.
Connecting The Water Supply Lines To The Valve
Attaching the hot and cold water supply lines to the valve
Connecting the water supply lines to the valve is a crucial step in installing a Moen shower faucet. By properly attaching the hot and cold water supply lines, you ensure a leak-free and efficient showering experience. In this section, we will guide you through the process of connecting the water supply lines to the valve, using the appropriate fittings and adapters.
To begin, gather the necessary materials for this step, including a wrench, plumber’s tape, and the hot and cold water supply lines that are suitable for your Moen shower faucet. It is important to ensure that the water supply lines are the correct size and have the proper ends to fit the valve.
Using the appropriate fittings and adapters
Before attaching the water supply lines to the valve, double-check if you have the correct fittings and adapters. These components ensure a secure and leak-free connection between the valve and the supply lines. Refer to the manufacturer’s instructions or consult a plumbing professional for guidance on the specific fittings and adapters required for your Moen shower faucet model.
Apply plumber’s tape to the threaded ends of the fittings and adapters to provide a tight seal. The plumber’s tape helps prevent water leaks by filling any gaps or irregularities in the threads, ensuring a watertight connection.
Attaching the hot and cold water supply lines to the valve
Once you have the correct fittings and plumbers tape in place, it’s time to attach the hot and cold water supply lines to the valve. Start by locating the appropriate ports on the valve for each supply line.
1. Unscrew the nut on one end of the supply line and slide it onto the corresponding port of the valve. Ensure that the fitting or adapter is securely connected.
2. Use a wrench to tighten the nut onto the valve, being careful not to overtighten as it may damage the valve or cause it to leak.
3. Repeat the same process for the other supply line, making sure to connect the hot supply line to the designated hot water port and the cold supply line to the cold water port on the valve.
4. Double-check the connections to ensure they are secure and properly aligned. Inspect for any signs of leaks or loose connections. If necessary, use the wrench to make any adjustments for a snug fit.
By following these steps and using the appropriate fittings and adapters, you can confidently connect the hot and cold water supply lines to the valve of your Moen shower faucet. This ensures a reliable water flow and enhances the overall functionality of your showering experience. Once the connections are secure, proceed to the next steps in the installation process to complete your shower faucet setup.
Attaching The Handle And Escutcheon Plate
Once you have successfully installed the Moen shower valve, it’s time to move on to the next crucial step: attaching the handle and escutcheon plate. This step not only completes the look of your shower faucet but also ensures smooth operation of the faucet handle. In this section, we will guide you through the process of positioning the handle and escutcheon plate on the valve and securing them with screws or mounting hardware.
Positioning the handle and escutcheon plate on the valve
To begin, you need to position the handle and escutcheon plate on the Moen shower valve. The handle is usually designed to fit securely on the valve stem, ensuring it operates smoothly. Here’s how you can do it:
- Carefully place the handle onto the valve stem, ensuring it is aligned properly.
- Make sure the handle is facing the correct direction. Refer to the manufacturer’s instructions if you are unsure.
- Gently slide the handle onto the valve stem, pushing it all the way until it is snugly in place.
- Give the handle a quick test to ensure it moves smoothly and without any obstructions.
Securing them with screws or mounting hardware
Now that the handle is in position, it’s time to secure it and the escutcheon plate using screws or mounting hardware. Follow these steps:
- Locate the screw holes on the handle and escutcheon plate. These holes are usually pre-drilled and marked for easy installation.
- Insert the screws through the holes on the escutcheon plate and align them with the corresponding holes on the handle.
- Tighten the screws using a screwdriver or an appropriate tool. Be careful not to overtighten them, as it may damage the handle or escutcheon plate.
- Ensure each screw is tightened evenly to achieve a secure and balanced installation.
Once you have secured the handle and escutcheon plate, give them a final check to ensure they are stable and properly aligned. This step is crucial to ensure the handle operates smoothly and there are no loose parts that may cause leaks or malfunctions.
Attaching the handle and escutcheon plate is an essential part of installing a Moen shower faucet. By following the above steps, you can complete this step with ease and enjoy the functional and aesthetically pleasing shower faucet in your bathroom.
Installing The Showerhead And Trim Kit
Once you have successfully connected the valve, it’s time to move on to installing the showerhead and trim kit. This step is crucial as it completes the installation process and allows you to enjoy a refreshing shower experience. In this section, we will walk you through the necessary steps to connect and test the functionality of the faucet and showerhead. Let’s get started!
Connecting the showerhead and trim kit to the valve
To begin, locate the showerhead and trim kit that you have chosen for your Moen shower faucet. Make sure you have all the necessary components such as the showerhead, shower arm, escutcheon plate, and any additional trim pieces. Once you have gathered all the parts, follow these simple steps to connect them to the valve:
- Tightly screw the shower arm onto the threaded outlet at the valve.
- Attach the escutcheon plate over the shower arm, ensuring it is flush against the wall.
- Slide the trim pieces onto the shower arm, following the manufacturer’s instructions.
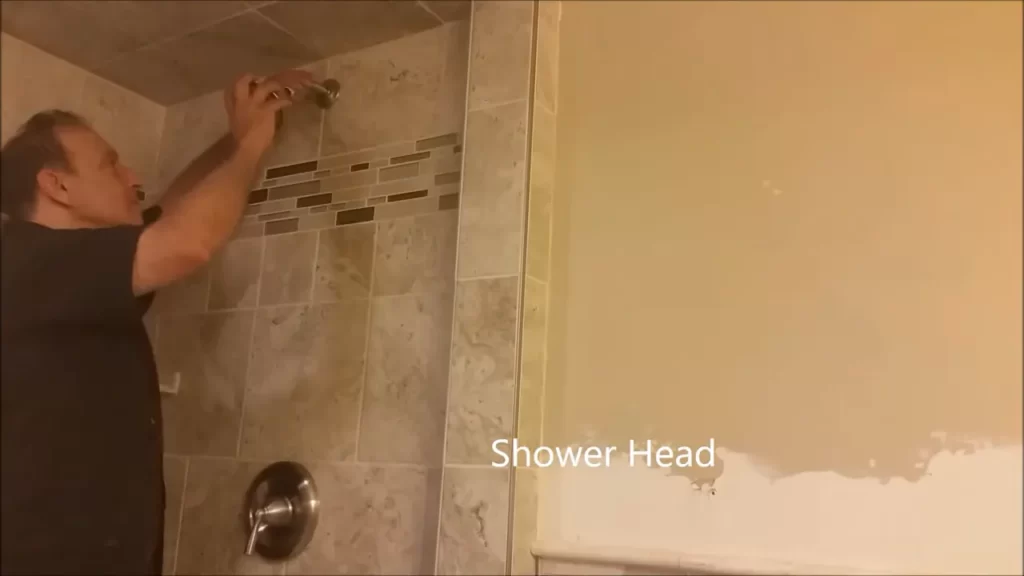
- Securely fasten the showerhead onto the end of the shower arm.
Testing the functionality of the faucet and showerhead
Now that you have connected the showerhead and trim kit to the valve, it’s time to test the functionality and ensure everything is working perfectly. Follow these steps to test your Moen shower faucet:
- Turn on the water supply by gently opening the shut-off valve or main water valve.
- Check for any leaks around the connections. If you notice any leaks, try tightening the connections or applying plumber’s tape as necessary.
- Turn the shower diverter valve to the “Shower” position and let the water flow through the showerhead.
- Adjust the water temperature and pressure to your liking using the faucets and handles.
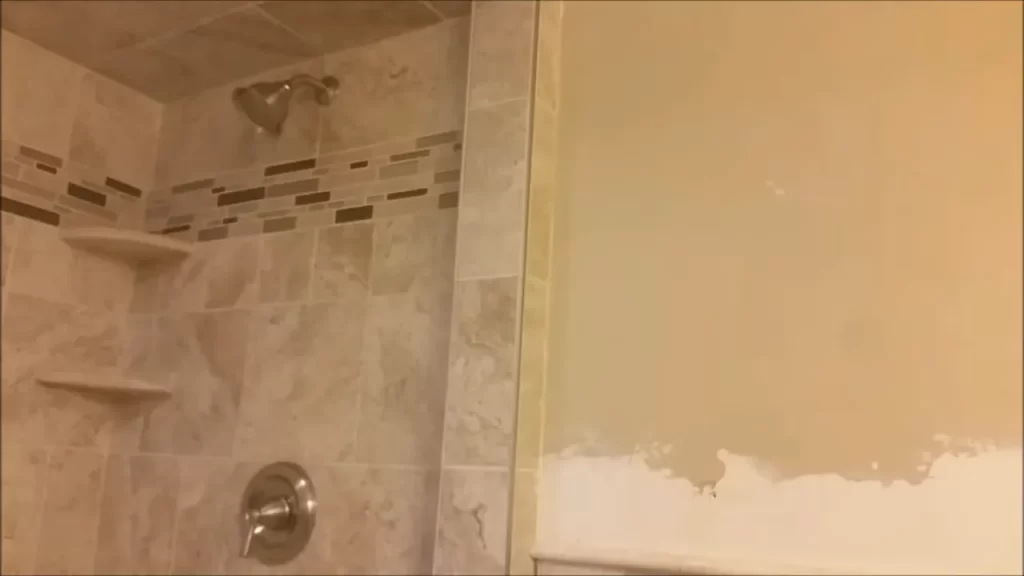
- Inspect the showerhead for proper water flow and make sure the spray pattern suits your preferences.
Congratulations! You have successfully installed your Moen shower faucet and tested its functionality. Now you can enjoy a refreshing and invigorating shower experience with your newly installed showerhead and trim kit.
Testing And Troubleshooting
Testing and Troubleshooting are essential steps when installing a Moen Shower Faucet to ensure proper functionality and prevent any potential issues. In this section, we will discuss how to check for leaks and proper water flow as well as troubleshoot any issues that may arise during the installation process.
Checking for leaks and proper water flow
Once you have successfully installed your Moen Shower Faucet, it is crucial to check for any leaks and ensure that there is a proper water flow. Follow these steps to complete this essential testing process:
- Turn off the water supply: Before you begin, make sure to shut off the water supply to the shower. This can usually be done by turning off the main water valve for your entire house.
- Inspect connections: Carefully inspect all the connections and fittings for any signs of leaking. Check the cartridge, valve, and showerhead connections for any visible moisture or dripping.
- Run a water test: With the water supply turned back on, turn on the shower and let it run for a few minutes. Pay close attention to the showerhead, valves, and any other connection points to check for any leaks or drips. Look for steady water flow without any interruptions or abnormal noises.
- Check for proper water temperature and pressure: While the water is running, test the hot and cold water controls to ensure that the temperature and pressure can be adjusted with ease. Make sure that the water reaches the desired temperature and maintains steady pressure.
- Inspect caulking: Finally, inspect the caulking around the shower faucet and handles. Look for any gaps or cracks that may allow water to seep through.
By diligently checking for leaks and proper water flow, you can address any issues before they lead to further damage or inconvenience.
Troubleshooting any issues that may arise during installation
During the installation process, it’s possible to encounter certain issues. Here are some common problems that may arise and effective troubleshooting techniques:
- Leaking connections: If you notice any leaks at the connections, ensure that the fittings are securely tightened. If tightening doesn’t resolve the issue, you may need to replace the faulty part or apply plumber’s tape on the threads for a better seal.
- Water flow issues: In case of low water flow, check for any blockages in the supply lines or showerhead. Clean or remove any debris that may be causing the obstruction.
- Inconsistent temperature: If the water temperature fluctuates dramatically or fails to reach the desired level, it could be due to a faulty cartridge or incorrect installation. Consider adjusting the temperature limit stop or consulting the instruction manual for troubleshooting guidance.
- Unusual noises: If you hear unusual noises such as rattling or squealing when the shower is in use, it could indicate a problem with the water pressure or valve. Check the water pressure regulator and ensure it is functioning correctly. If the issue persists, consulting a professional plumber may be necessary.
Remember, testing and troubleshooting are crucial steps to ensure the successful installation of your Moen Shower Faucet. By following these guidelines and promptly addressing any issues, you can enjoy a reliable and satisfying shower experience.
Frequently Asked Questions
How Do You Install A Moen Shower Valve?
To install a Moen shower valve, follow these steps: 1. Shut off the water supply. 2. Remove the old valve. 3. Install the new valve by connecting the pipes and securely fastening. 4. Turn on the water supply to test for any leaks.
5. Enjoy your new Moen shower valve.
How Do You Install A Moen 2 Handle Bathroom Faucet?
To install a Moen 2 handle bathroom faucet, follow these steps: 1. Shut off the water supply. 2. Remove the old faucet. 3. Install the new faucet, connecting the handles and the spout. 4. Tighten the connections with a wrench. 5.
Turn on the water supply and test for any leaks.
How Do You Install A Moen Handheld Shower Head?
To install a Moen handheld shower head, follow these steps: 1. Remove the existing shower head by twisting it counterclockwise. 2. Wrap Teflon tape around the shower arm threads to prevent leaks. 3. Connect the handheld shower head bracket to the shower arm.
4. Attach the handheld shower head to the bracket and tighten it. 5. Turn on the water to test for any leaks.
How Far Should A Moen Shower Valve Be From The Wall?
A Moen shower valve should be installed about 1. 5 to 3 inches from the finished wall.
Conclusion
Installing a Moen shower faucet may seem intimidating at first, but with the right tools and techniques, it can be a straightforward process. By following the step-by-step instructions outlined in this blog post, you can successfully complete the installation on your own.
Remember to turn off the water supply before starting and double-check your work for any leaks or issues. With a little patience and attention to detail, you’ll have a fully functioning Moen shower faucet in no time. Say goodbye to those old, unreliable fixtures and enjoy the convenience and luxury of a brand new shower faucet!