
To install glass mosaic tile with mesh backing, simply apply the adhesive to the wall or surface and press the tiles into place. Start with a clean and smooth surface for best results.
Glass mosaic tiles with mesh backing are a popular choice for many homeowners due to their ease of installation and versatility in design. Whether you are planning to tile a kitchen backsplash or a bathroom wall, using glass mosaic tiles with mesh backing can add a unique and stylish touch to your space.
With the right tools and a little bit of patience, you can easily create a beautiful mosaic tile installation that will enhance the aesthetic appeal of any room in your home.
Choosing The Right Glass Mosaic Tile: Factors To Consider
When it comes to installing glass mosaic tile with mesh backing, choosing the right tile is a crucial step. Not only does it affect the overall look and feel of your space, but it also plays a role in the installation process itself. To help you make an informed decision, we’ll explore some key factors to consider when selecting your glass mosaic tile.
Consider the Space and Design Style
The first factor to consider when choosing a glass mosaic tile is the space in which it will be installed. Each room has its own unique features and design elements that should be taken into account. Think about the existing color scheme, furniture, and overall style. Are you looking to create a bold and vibrant statement or a subtle and understated design? The tile you choose should complement and enhance the existing style of the room.
Selecting the Right Size and Shape
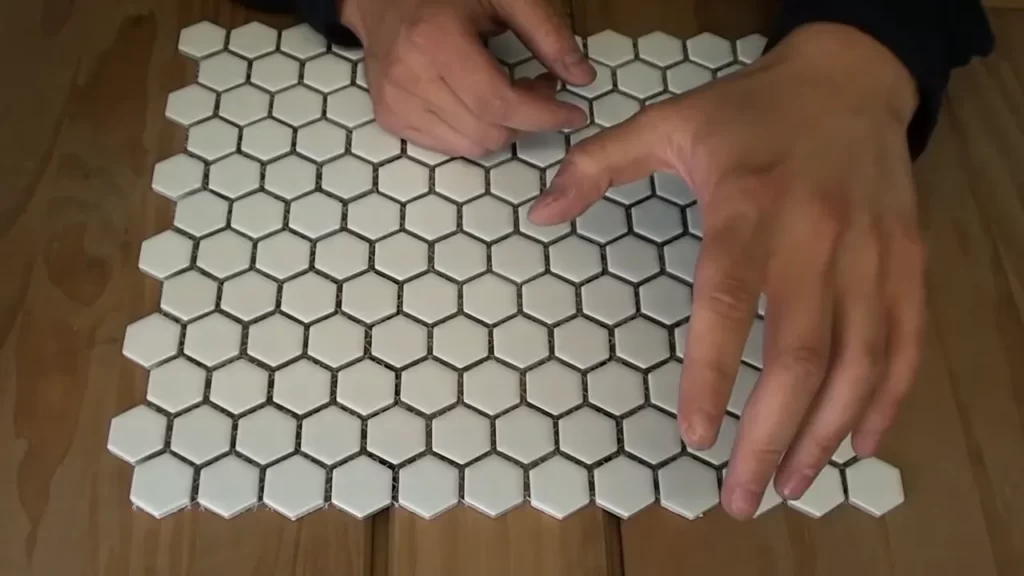
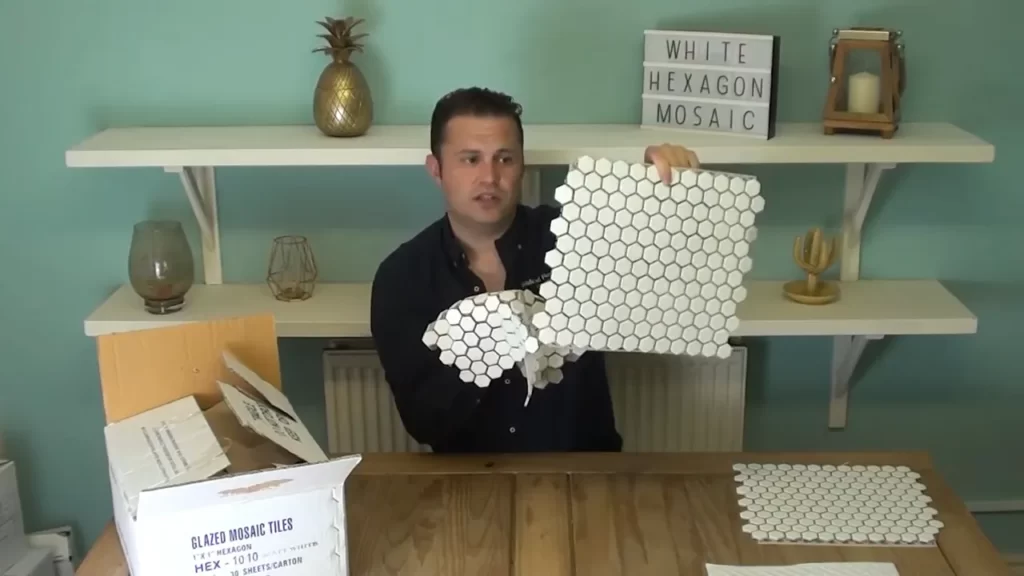
The size and shape of the glass mosaic tile is another important consideration. It’s essential to select a tile that fits the dimensions of the area you’re planning to tile. While larger tiles can create a more seamless and visually impactful look, smaller tiles allow for more intricate designs and patterns. Additionally, the shape of the tile can add a unique touch to your space. From classic squares and rectangles to hexagons and triangles, the options are endless.
Evaluating the Color and Finish Options
The color and finish of the glass mosaic tile are also factors that require careful evaluation. The color should harmonize with the overall color palette of the room, creating a cohesive look. Consider whether you want a bold and vibrant hue or a more neutral and calming shade. Additionally, the finish of the tile can affect the overall appearance and texture. Choose from options such as glossy, matte, iridescent, or textured finishes based on your desired aesthetic outcome.
In conclusion, when it comes to choosing the right glass mosaic tile with mesh backing, it’s essential to consider the space and design style, select the appropriate size and shape, and evaluate the color and finish options. By taking these factors into account, you can ensure that the tile you choose enhances the overall look and feel of your space and creates a stunning visual impact.
Preparing The Surface For Tile Installation: Necessary Steps
Cleaning and Removing Any Existing Tile or Adhesive
To ensure a successful installation of glass mosaic tiles with mesh backing, it is essential to start with a clean and smooth surface. Begin by thoroughly cleaning the area where you plan to install the tiles. Remove any existing tile and adhesive using a scraper or chisel, ensuring all remnants are completely removed. This will provide a clean slate for your new tile installation and minimize the risk of tile detachment or irregularities in the final result.
Ensuring a Smooth and Level Surface
With the old tile and adhesive removed, it is important to assess the condition of the surface. Inspect for any unevenness, cracks, or bumps that might negatively impact the adhesion and appearance of the glass mosaic tiles. Use a straightedge or level tool to ensure the surface is level. If you discover uneven areas, you may need to apply a leveling compound to create a smooth and level surface for tile installation. This step is crucial to ensure the tiles adhere properly and result in a professional finish.
Applying a Suitable Primer if Required
Depending on the type of surface you are working with, it may be necessary to apply a primer before installing the glass mosaic tiles. A primer helps improve the bond between the surface and the adhesive, ensuring a long-lasting installation. Check the product instructions or consult with a professional to determine if a primer is required for your specific surface. Apply the primer according to the manufacturer’s instructions, ensuring even coverage across the entire surface. Allow sufficient drying time before proceeding with the tile installation process.
In conclusion, proper preparation of the surface is essential for a successful installation of glass mosaic tiles with mesh backing. Cleaning and removing any existing tile or adhesive, ensuring a smooth and level surface, and applying a suitable primer if required, are necessary steps to achieve a professional and long-lasting tile installation.
Step-By-Step Guide To Installing Glass Mosaic Tile With Mesh Backing
Installing glass mosaic tile with mesh backing can be a great way to add a stunning and unique touch to your home. With their intricate patterns and reflective surfaces, these tiles can transform any space into a work of art. If you’re ready to tackle this DIY project, follow this step-by-step guide to ensure a successful and professional-looking installation.
Preparing the mortar or adhesive
Before you begin installing the glass mosaic tiles, it’s crucial to prepare the mortar or adhesive that will hold them in place. Here’s how you can do it:
- Start by gathering all the necessary materials, including the mortar or adhesive, mixing paddle, and a clean bucket for mixing.
- Read the instructions on the packaging of the mortar or adhesive carefully. Different products may have different mixing ratios and application methods.
- Pour the appropriate amount of mortar or adhesive powder into the bucket.
- Add water gradually while mixing with the paddle. Aim for a smooth and creamy consistency.
- Let the mixture sit for a few minutes, allowing it to hydrate and thicken slightly.
Applying the mortar or adhesive onto the surface
Once your mortar or adhesive is properly mixed, it’s time to apply it onto the surface where you’ll be installing the glass mosaic tiles. Follow these steps:
- Use a trowel or a notched trowel to scoop up a small amount of mortar or adhesive.
- Apply the mortar or adhesive onto the surface in even, sweeping motions. Make sure to cover a manageable area at a time.
- Hold the trowel at a 45-degree angle and create ridges in the mortar or adhesive using the notched side of the trowel. This will improve the adhesion of the tiles while providing an even surface for installation.
Pressing the mesh-backed mosaic tile onto the mortar or adhesive
Now that the mortar or adhesive is ready and applied, it’s time to install the glass mosaic tiles. Follow these steps:
- Carefully place the mesh-backed mosaic tile onto the surface, starting at the desired starting point.
- Press the tile firmly onto the mortar or adhesive, ensuring it sticks securely.
- If necessary, adjust the position of the tile to align it with neighboring tiles or to achieve the desired pattern.
- Continue this process, working in small sections, until all the tiles are installed.
Grouting and sealing the tile
Once you’ve successfully installed the glass mosaic tiles, the final step is to grout and seal the tile, ensuring its longevity and maintaining its appearance. Follow these steps:
- Mix the grout according to the manufacturer’s instructions. Ensure that you have chosen a grout color that complements the glass mosaic tile.
- Apply the grout using a rubber grout float, pressing it firmly into the gaps between the tiles at a 45-degree angle.
- After about 15-20 minutes, once the grout has slightly set, remove the excess grout from the tile surface using a damp sponge.
- Allow the grout to fully cure for the recommended time before sealing.
- Once the grout has cured, seal the tile using a suitable tile sealer to protect the grout and tile surface.
Congratulations! You have successfully installed glass mosaic tile with mesh backing. Enjoy the beautiful and unique addition to your home.
Step 1: Preparing The Mortar Or Adhesive
Gathering the necessary tools and materials
Before you start installing your glass mosaic tile with mesh backing, it’s essential to gather all the necessary tools and materials. By having everything at hand, you can ensure a smooth and efficient installation process.
Here’s a list of tools and materials you’ll need:
- Glass mosaic tiles with mesh backing
- Mortar or adhesive (check the manufacturer’s instructions for the specific type to use)
- Trowel
- Grout float
- Bucket
- Water
- Stirring stick or mixing paddle
- Level
- Tile spacers
- Thin-set mortar
- Utility knife or tile cutter
- Sponge or rag
- Grout
- Grout sealer
- Caulk
Mixing the mortar or adhesive according to the manufacturer’s instructions
Once you have gathered all the necessary tools and materials, it’s time to mix the mortar or adhesive. Follow the manufacturer’s instructions on the packaging to ensure the correct mixing ratio and technique.
Typically, the process involves:
- Fill a bucket with water according to the manufacturer’s specifications.
- Add the mortar or adhesive gradually while continuously stirring with a stirring stick or mixing paddle.
- Mix until you achieve a smooth and consistent texture, free from lumps.
Remember to mix only the amount of mortar or adhesive that you can use within its recommended working time. This prevents the mixture from drying out and becoming ineffective.
Achieving the desired consistency for optimal adhesion
Obtaining the right consistency for your mortar or adhesive is crucial to ensure optimal adhesion of the glass mosaic tiles. It should be neither too dry nor too wet.
Here’s how you can achieve the desired consistency:
- Start with the recommended mixing ratio provided by the manufacturer.
- Add more water or mortar as needed, depending on the specific instructions, until you obtain a paste-like consistency that holds its shape but is still workable.
The goal is to create a mortar or adhesive that allows you to spread it easily on the wall while providing sufficient grip to hold the tiles securely in place. Avoid making the mixture too runny as it can weaken the bonding strength, while an excessively dry mixture may hinder the tiles’ adhesion.
By following the manufacturer’s instructions and achieving the desired consistency, you’ll create a strong bond between the glass mosaic tiles and the wall, ensuring a successful installation.
Step 2: Applying The Mortar Or Adhesive Onto The Surface
Ensuring an Even Coverage of Mortar or Adhesive
One crucial step in installing glass mosaic tile with mesh backing is to ensure an even coverage of mortar or adhesive onto the surface. This will help create a strong bond between the tile and the surface, ensuring a long-lasting and beautiful finish. Here’s how you can achieve an even coverage:
- Prepare the mortar or adhesive: Start by carefully following the manufacturer’s instructions to mix the mortar or adhesive. Make sure it has a smooth consistency, free from lumps or clumps.
- Use a notched trowel: A notched trowel is a handy tool that helps spread the mortar or adhesive evenly onto the surface. Choose a trowel with the appropriate size notches for the size of the glass mosaic tiles.
- Hold the trowel at a 45-degree angle: When applying the mortar or adhesive, hold the notched trowel at a 45-degree angle to the surface. This angle allows for better control and helps create ridges in the mortar or adhesive, which aids in adhesion.
- Apply the mortar or adhesive: Start by spreading a thin layer of mortar or adhesive onto the surface using the flat side of the trowel. Make sure to cover an area that you can complete within a reasonable timeframe to prevent drying out.
Spreading the Mortar or Adhesive with a Notched Trowel
The next step in the installation process is spreading the mortar or adhesive with a notched trowel. This technique ensures an even distribution of the adhesive, allowing for proper tile adhesion and preventing any potential issues later on. Follow these steps for a successful tile installation:
- Hold the notched trowel at a 45-degree angle: When spreading the mortar or adhesive, hold the notched trowel at a 45-degree angle to the surface. This angle allows for consistent ridges, which enhance the bonding of the tile.
- Press down firmly and drag the trowel: Apply even pressure on the trowel as you spread the mortar or adhesive onto the surface. Drag the trowel through the material, creating uniform ridges.
- Comb in one direction: To ensure an even spread, comb the mortar or adhesive in one direction. Avoid back and forth motions that can disrupt the ridges.
- Check for even coverage: After spreading the mortar or adhesive, check to make sure the entire area has an even distribution of ridges. This confirms that the tile will adhere properly.
Working in Small Sections to Prevent Drying Out
When installing glass mosaic tile with mesh backing, working in small sections is crucial to prevent the mortar or adhesive from drying out before the tiles are applied. The following steps will help you maintain an efficient and successful installation:
- Divide the surface into manageable sections: Before starting, divide the surface into smaller workable sections. This allows you to focus on one area at a time, ensuring proper tile placement and preventing drying out of the adhesive.
- Apply the mortar or adhesive to a small section: Begin by applying the mortar or adhesive to a small section of the surface. Only spread the material on an area that you can complete within a reasonable time frame.
- Attach the mosaic tiles: Once the mortar or adhesive is applied, gently press the glass mosaic tiles onto the surface. Make sure to align the tiles properly and press them firmly to create a strong bond.
- Repeat the process for each section: Work systematically, applying the mortar or adhesive and attaching the tiles to each small section until the entire surface is covered.
By following these steps, you’ll ensure an even coverage of mortar or adhesive, spread it effectively with a notched trowel, and work in small sections to prevent drying out. This will result in a successful installation of glass mosaic tile with mesh backing, creating a stunning and durable finish for your project.
Step 3: Pressing The Mesh-Backed Mosaic Tile Onto The Mortar Or Adhesive
Now that you have prepared the mortar or adhesive and the mesh-backed mosaic tiles, it’s time to start installing them onto the surface. This step is crucial in ensuring a secure and visually appealing tile installation. Let’s dive into the details of how to press the mesh-backed mosaic tile onto the mortar or adhesive.
Aligning the first tile and gently pressing onto the mortar or adhesive
Begin by aligning the first tile in the desired position on the surface. Ensure that it is straight and in line with your preferred design pattern. Once you have it positioned correctly, gently press the tile onto the mortar or adhesive using a slight twisting motion. This ensures maximum contact between the tile and the surface, promoting better adhesion.
Ensuring proper spacing and alignment with tile spacers or your preferred method
After placing the first tile, it’s essential to maintain proper spacing and alignment for a professional-looking installation. To achieve this, use tile spacers or your preferred method of keeping consistent gaps between the tiles. These spacers are available in various sizes, allowing you to choose the spacing that suits your design. Place the spacers on the corners of the tile, ensuring equal distances for a symmetrical appearance.
If you prefer not to use spacers, make sure to visually align each tile carefully with the previous ones, adjusting as necessary. Take your time during this step, as it significantly impacts the overall result of your installation.
Continuing the process for the remaining tiles, following the design pattern
Now that you have the first tile in place, continue the installation process for the remaining tiles, following your chosen design pattern. Remember to align each tile accurately and use spacers or your preferred method to maintain uniform spacing. Working in smaller sections can be helpful to ensure that the mortar or adhesive does not dry out before you place the tiles.
As you progress, periodically check the alignment of the tiles and make any necessary adjustments. This meticulous attention to detail will result in a visually stunning mosaic tile installation that adds beauty and elegance to your space.
Continue pressing the mesh-backed mosaic tiles onto the mortar or adhesive until you have covered the desired area. Take care to avoid smudging or displacing any installed tiles during the process. Once you have completed the installation, allow the mortar or adhesive to cure according to the manufacturer’s instructions before proceeding to the next steps of grouting and sealing.
Now you know how to press the mesh-backed mosaic tile onto the mortar or adhesive. Follow these instructions diligently, and you’ll achieve a professional-looking tile installation that enhances the aesthetic appeal of your space.
Step 4: Grouting And Sealing The Tile
Once you have successfully installed the glass mosaic tiles with mesh backing on your desired surface, it’s time to move on to the next crucial step – grouting and sealing. This step ensures the durability and stain resistance of the tiles, enhancing their overall appearance and longevity.
Waiting for the mortar or adhesive to dry completely
Before you can start grouting, it is imperative to ensure that the mortar or adhesive used to install the tiles has dried completely. Depending on the type of mortar or adhesive used, this drying period can vary. It is important to follow the manufacturer’s instructions and allow ample time for the drying process to be completed.
Removing excess mortar or adhesive from the tile surface
Once the mortar or adhesive has dried, you’ll want to carefully inspect the tile surface for any excess material. This excess must be removed to ensure a clean and polished final result. Utilize a grout float, putty knife, or any other suitable tool to gently scrape away any remaining mortar or adhesive. Be cautious while doing this to avoid damaging the tile surface or grout lines.
Applying grout and smoothing it into the tile joints
Now that your tile surface is clean and ready, it’s time to apply grout. Grout not only fills the gaps between the tiles but also adds structural support and prevents moisture from seeping in. Select a grout color that complements your glass mosaic tiles, as this can significantly enhance the overall aesthetic appeal of your installation. Use a grout float to apply the grout at a 45-degree angle, ensuring the grout fills the entire joint. Once applied, use the float to smooth the grout into the joints, removing any excess along the way.
Sealing the grout for long-lasting durability and stain resistance
To ensure long-lasting durability and stain resistance, it is recommended to seal the grout once it has cured. Grout sealers are available in different types, such as penetrating sealers and topical sealers. Penetrating sealers are absorbed by the grout, offering better protection against stains. Topical sealers, on the other hand, form a protective layer on top of the grout. Follow the manufacturer’s instructions to apply the sealer, ensuring all grout lines are properly coated. This step will help maintain the beauty of your glass mosaic tile installation for years to come.
Maintaining And Cleaning Glass Mosaic Tile: Essential Tips
Proper maintenance and regular cleaning of glass mosaic tile are essential to preserve its beauty and longevity. By following a few simple tips, you can keep your glass mosaic tile looking pristine and ensure its durability for years to come.
Regular cleaning and maintenance routine
Creating a regular cleaning and maintenance routine for your glass mosaic tile is crucial in keeping it in pristine condition. Here are a few steps you can follow:
- Start by sweeping or vacuuming the area to remove any loose dirt or debris that can scratch the surface of the tile.
- Mix a mild detergent with warm water in a bucket.
- Dip a soft cloth or mop into the soapy water and gently clean the tile surface. Pay extra attention to any grout lines or areas with stubborn stains.
- Rinse the tile thoroughly with clean water to remove any soap residue.
- Use a soft, lint-free cloth to dry the tile surface and prevent streaks or water spots.
Avoiding harsh chemicals and abrasive materials
Using harsh chemicals or abrasive materials can damage the surface of glass mosaic tile. Here’s what you should avoid:
- Avoid using acidic or bleach-based cleaners as they can etch or discolor the tile.
- Avoid scrubbing the tile with abrasive pads or brushes that can leave scratches.
- Instead, opt for mild cleaners specifically formulated for glass surfaces.
- Always test any cleaning product on a small, inconspicuous area of the tile before applying it to the entire surface.
Preventing water damage and maintaining sealant integrity
Water damage can weaken the bond between the tiles and compromise the sealant, leading to potential problems. Here are some tips to prevent water damage and maintain the integrity of the sealant:
- Avoid excessive water exposure, especially in areas prone to splashes or high humidity, such as bathrooms or kitchen backsplashes.
- Wipe up any spills or water immediately to prevent prolonged exposure.
- Inspect the sealant regularly and repair any cracks or gaps promptly to prevent water from seeping behind the tiles.
- Consider reapplying a tile sealant every few years to maintain its effectiveness.
Maintaining and cleaning glass mosaic tile is a straightforward process if you follow these essential tips. By incorporating regular cleaning into your routine, avoiding harsh chemicals, and preventing water damage, you can keep your glass mosaic tile looking stunning for many years.
Frequently Asked Questions
How Do You Install Glass Mosaic Tile With Paper Backing?
To install a glass mosaic tile with paper backing, follow these steps: 1. Clean the surface thoroughly and let it dry. 2. Peel off the paper backing from the tile sheets. 3. Apply a thin layer of adhesive on the surface using a trowel.
4. Press the tile sheets firmly onto the adhesive, ensuring even spacing between them. 5. Allow the adhesive to dry completely before grouting the tiles.
Do I Need Spacers With Mesh Backed Tile?
No, spacers are not required with mesh-backed tile. The mesh backing helps maintain consistent spacing between tiles.
How Are Tiles Attached To Mesh?
Tiles are attached to mesh using a strong adhesive. The adhesive is applied to the back of the tile, and then the tile is pressed onto the mesh surface, ensuring proper alignment. This method helps to keep the tiles in place during installation and allows for easy cutting and shaping.
Do You Need To Back Butter Mesh Tile?
No, back buttering mesh tile is not necessary.
Conclusion
Installing glass mosaic tile with mesh backing can be a simple and rewarding DIY project. By following the step-by-step process outlined in this guide, you can achieve professional-looking results in no time. From preparing the surface and applying the adhesive to grouting and sealing, every detail is important for a successful installation.
Remember to take your time, follow the instructions, and be patient. With the right tools and techniques, you can transform any space with beautiful glass mosaic tile. Happy tiling!