
To install a waterfall shower head, remove the old shower head and clean the pipe threads, then apply plumber’s tape to the pipe before attaching the new shower head. Looking to enhance your shower experience with a soothing and luxurious waterfall effect?
Installing a waterfall shower head can be a great solution. Not only does it provide a refreshing and invigorating shower experience, but it also adds elegance and style to your bathroom decor. In this guide, we will walk you through the simple steps to install a waterfall shower head in your bathroom.
So, let’s get started and transform your daily shower routine into a spa-like retreat.
The Benefits Of A Waterfall Shower Head
A waterfall shower head is not only a luxurious addition to your bathroom, but it also offers a range of benefits that can enhance your showering experience. From improved relaxation and stress relief to enhanced water flow and coverage, this type of shower head can transform your daily routine into a spa-like retreat.
Enhanced Relaxation and Stress Relief
One of the key benefits of a waterfall shower head is the enhanced relaxation it provides. The gentle, cascading water mimics the soothing effect of natural waterfalls, enveloping you in a serene and tranquil atmosphere. As the water gently envelopes your body, you can feel your stress and tension melt away.
Imagine stepping into your bathroom after a long day at work, and being greeted by the sound of softly falling water as you indulge in a cascading downpour. The sensation is not only incredibly relaxing, but it can also help to alleviate stress and anxiety.
Improved Water Flow and Coverage
Another advantage of a waterfall shower head is the improved water flow and coverage it offers. Unlike traditional shower heads that emit a concentrated stream of water, the waterfall shower head disperses the water in a wider and more even pattern.
This wider coverage ensures that every part of your body is thoroughly drenched, providing a more satisfying and indulgent showering experience. You no longer have to worry about adjusting your body to find the sweet spot where the water hits just right – with a waterfall shower head, the water envelops you from head to toe.
Additionally, the improved water flow can help to rinse away shampoo and soap more efficiently, saving you time and ensuring a thorough clean.
Experience the joy of standing beneath a waterfall every time you step into the shower with a waterfall shower head. Not only will it add a touch of luxury to your bathroom, but it will also provide enhanced relaxation, stress relief, and improved water flow and coverage.
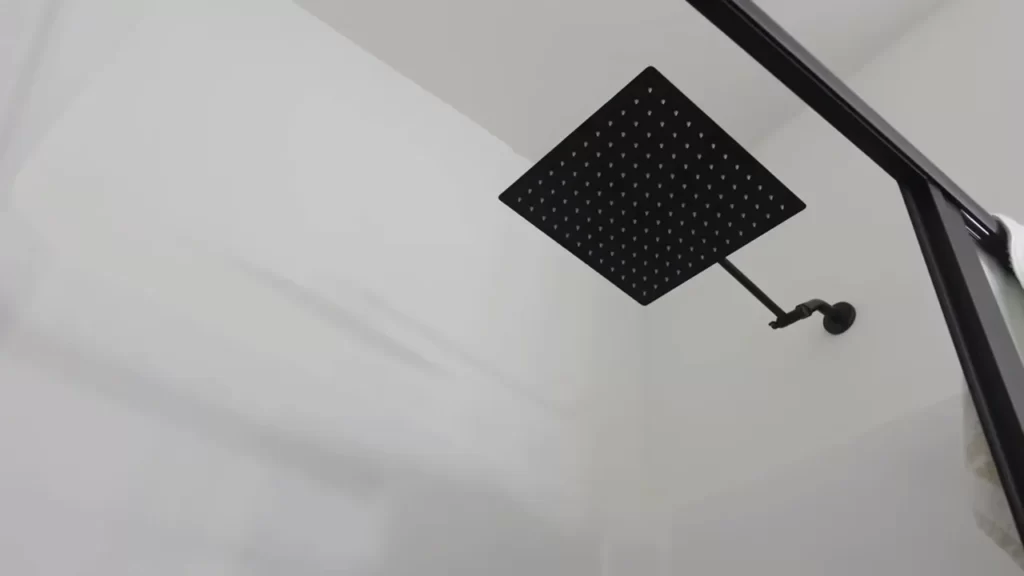
Understanding Waterfall Shower Heads
How they work
Waterfall shower heads provide a luxurious and immersive showering experience, simulating the sensation of standing under a natural waterfall. These innovative shower heads are designed to distribute the water in a unique way, enveloping your entire body in a gentle cascade of water.
The mechanics behind a waterfall shower head are quite fascinating. Unlike traditional shower heads that spray water at various angles, these shower heads rely on a large stream of water that flows from a single point. The water flows down from the shower head, creating a soothing and relaxing waterfall effect.
Different types available
There are several types of waterfall shower heads available in the market, each offering its own unique features and aesthetic appeal. Here are some of the common types:
- Wall-mounted waterfall shower heads: These shower heads are fixed to the wall and are a popular choice for homeowners who prefer a sleek and minimalist look.
- Ceiling-mounted waterfall shower heads: As the name suggests, these shower heads are installed on the ceiling, providing a rain-like experience. They are perfect for those who want to create a spa-like atmosphere in their bathroom.
- Handheld waterfall shower heads: For added convenience and flexibility, handheld waterfall shower heads allow you to direct the water flow wherever you desire. They are a great option for those who prefer a more targeted showering experience.
Factors to consider when choosing one
When selecting a waterfall shower head, there are a few key factors to consider to ensure you choose the right one for your needs. Here are some important considerations:
- Water pressure: Before purchasing a waterfall shower head, it’s essential to check your home’s water pressure. Different models require different water pressure to function optimally, so make sure your home can accommodate the specific shower head you desire.
- Size and design: Think about the size and design of the shower head that will best complement your bathroom decor. Consider the space available, aesthetics, and the overall style you want to achieve.
- Material and durability: Look for a waterfall shower head made from high-quality materials that are resistant to corrosion and limescale buildup. This ensures longevity and ease of maintenance.
- Flow rate and water consumption: Consider the flow rate and water consumption of the shower head to ensure you’re selecting an eco-friendly option. Opt for a shower head that delivers both a luxurious experience and conserves water.
By taking these factors into account, you’ll be able to choose a waterfall shower head that not only enhances your showering experience but also fits seamlessly into your bathroom aesthetics.
Assessing Your Current Shower Setup
Assessing Your Current Shower Setup
Before diving into the installation process of a waterfall shower head, it’s important to assess your current shower setup to determine compatibility and ensure a seamless installation. This step will save you time and frustration down the line. Let’s break it down into two crucial aspects: determining compatibility with a waterfall shower head and checking water pressure.
Determining compatibility with a waterfall shower head
Not all showers are created equal, and not every showerhead is designed to be compatible with a waterfall shower head. To determine compatibility, you’ll need to consider a few key factors:
- Piping system: Check if your shower has a separate hot and cold water line or a mixed water line.
- Shower arm: Assess the length, height, and angle of your existing shower arm. This will determine if it can accommodate a waterfall shower head.
- Mounting options: Take note of the available mounting options in your shower. Some waterfall shower heads require specific mounting configurations.
By carefully assessing these factors, you can ensure that your current shower setup is compatible with a waterfall shower head.
Checking water pressure
Water pressure plays a crucial role in the functionality of a waterfall shower head. Before proceeding with the installation, it’s crucial to check the water pressure in your bathroom. Here’s how:
- Turn off all other faucets and appliances that use water in your home.
- Remove the existing showerhead and attach a pressure gauge to the shower arm.
- Turn the water on to its maximum, and observe the pressure reading on the gauge.
Most waterfall shower heads require a minimum water pressure of 40-60psi for optimal performance. If the pressure is too low, you may need to install a booster pump or consider other options to increase water pressure.
By assessing your current shower setup and determining compatibility as well as checking water pressure, you’ll be well-prepared for the installation of your new waterfall shower head. In the next section, we’ll guide you through the step-by-step installation process, ensuring a refreshing and luxurious shower experience.
Gathering The Necessary Tools And Supplies
Before you can install your beautiful new waterfall shower head, it’s important to gather all the necessary tools and supplies. This will ensure a smooth and hassle-free installation process. Below, you’ll find a list of the required tools and recommended supplies to help get you started.
List of Required Tools:
Make sure you have the following tools on hand before you begin the installation:
- A wrench
- Plumber’s tape
- Adjustable pliers
- A drill with appropriate bits
- A screwdriver
- Measuring tape
- A level
Having these tools readily available will make the installation process much easier and more efficient.
Recommended Supplies for Installation:
In addition to the required tools, there are a few supplies that are highly recommended for a successful installation:
- Waterproof sealant
- Extra plumbing connectors (if needed)
- Bucket or container to catch any excess water
- Cleaning supplies (to remove any debris or residue)
- A towel or cloth for drying
While not absolutely necessary, these supplies can greatly enhance the installation process and ensure a professional result.
Now that you have your tools and supplies gathered, you’re ready to move on to the next steps of installing your waterfall shower head. In the next section, we’ll guide you through preparing the shower area for installation.
Preparing The Shower Area
Preparing the shower area is an essential step before installing a waterfall shower head. This involves removing the existing shower head, cleaning the shower pipe, and assessing any necessary repairs or modifications. Let’s dive into each of these steps in detail.
Removing the existing shower head
The first step is to remove the existing shower head from the shower pipe. This can usually be done by twisting the shower head counterclockwise until it loosens and then pulling it off. If the shower head is stuck or difficult to remove, you can use a pair of pliers to give you some extra leverage. Just be careful not to damage the shower pipe in the process.
Cleaning the shower pipe
Once the old shower head is removed, it’s important to clean the shower pipe thoroughly. Over time, mineral deposits and debris can build up inside the pipe, which can affect the water flow of your new waterfall shower head. To clean the pipe, you can use a small brush or toothbrush to scrub away any dirt or residue. Alternatively, you can soak the shower pipe in a mixture of vinegar and water to dissolve the mineral deposits. After cleaning, rinse the pipe thoroughly to ensure all the dirt and cleaning solution is removed.
Assessing any necessary repairs or modifications
Before installing the new waterfall shower head, take a moment to assess the shower area for any necessary repairs or modifications. Check for any leaks or cracks in the shower pipe and address them accordingly. If there are any issues with the water supply or excessive water pressure, you may need to install a pressure regulator or consult a professional plumber for assistance. Making these repairs and modifications beforehand will ensure that your new waterfall shower head functions properly and provides a satisfying shower experience.
Shutting Off The Water And Preparing The Shower Pipe
Before you can install your waterfall shower head, it’s crucial to shut off the water supply and properly prepare the shower pipe. This step ensures a smooth and hassle-free installation process. In this section, we will guide you through the necessary steps to locate and shut off the water supply, as well as draining any existing water from the shower pipe.
1. Locating and shutting off the water supply
The first step is to locate the water supply valve for your shower. Usually, you can find this valve near the shower or in the basement if it is a multi-story building. It may be labeled or have the shape of a lever or knob. Once you’ve located the valve, turn it clockwise to shut off the water supply to your shower. This will prevent any water flow during the installation process, allowing you to work safely and reduce the risk of any leaks.
2. Draining any existing water
After shutting off the water supply, it’s essential to drain any remaining water from the shower pipe. To do this, turn on the shower faucet and let the water run until it stops completely. This step helps prevent water from flowing out when you remove the existing showerhead and enables a clean and efficient installation.
Note: If your shower has a separate shut-off valve, you can turn it on briefly to force out any residual water.
Once you’ve followed these steps and confirmed that the water has been shut off and drained, you’re ready to move on to the next stage of installing your waterfall shower head. Stay tuned for the upcoming section on attaching the new shower head to complete the installation process.
Applying Thread Seal Tape
Explaining the Purpose of Thread Seal Tape
Thread seal tape, also known as plumber’s tape or PTFE tape, is a crucial component when it comes to installing a waterfall shower head. Its main purpose is to create a watertight seal between the shower pipe and the shower head, preventing any leakage that may occur due to the connection.
How to Correctly Apply Thread Seal Tape to the Shower Pipe
Properly applying thread seal tape is essential to ensure a tight and secure connection between the shower pipe and the waterfall shower head. Follow these simple steps to apply thread seal tape correctly:
- Clean the pipe: Before applying the tape, make sure the shower pipe is clean and free of any debris. This will help the tape adhere better and create a stronger seal.
- Wrap the tape clockwise: Start at the end of the shower pipe and hold the tape firmly against the threads. Begin wrapping the tape around the threads in a clockwise direction, overlapping the tape slightly as you go along.
- Apply tension: As you wrap the tape, make sure to apply slight tension to create a tight seal. However, be careful not to apply too much tension, as it may cause the tape to tear or break.
- Complete the wrapping: Continue wrapping the thread seal tape until you reach the end of the pipe. Ensure that the tape covers all the exposed threads evenly, without any gaps.
- Secure the end: Once you reach the end of the pipe, press the tape firmly against the threads to secure it in place. This will prevent the tape from unraveling during the installation process.
Remember, it’s important to apply the thread seal tape correctly in order to achieve a proper seal. Taking the time to do it right will save you from any potential hassle or issues in the long run.
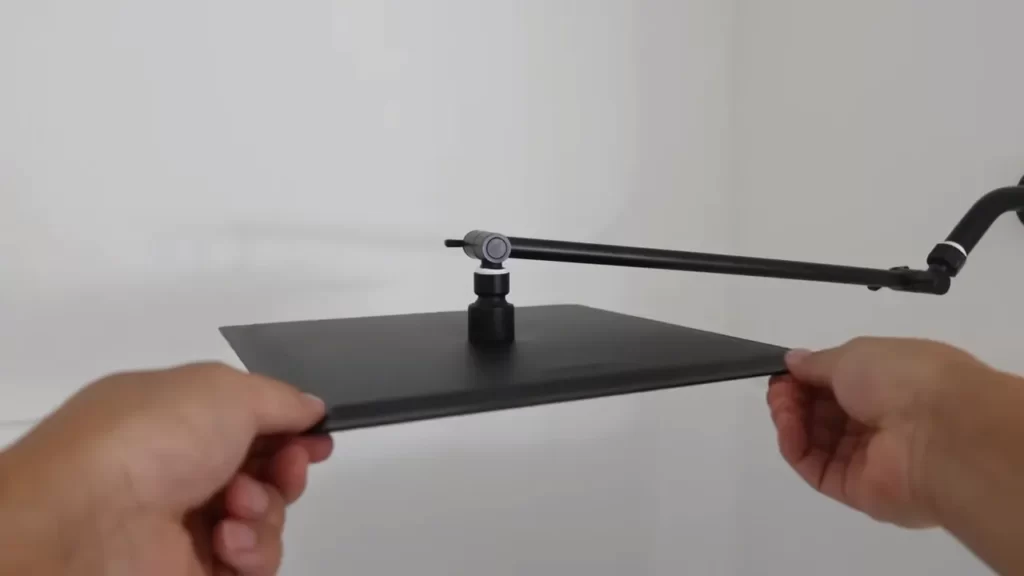
Attaching The Mounting Bracket
Now that you have gathered all the necessary tools and materials, it’s time to attach the mounting bracket for your new waterfall shower head. The mounting bracket serves as the foundation that holds the shower head securely in place. Ensuring a secure installation is essential to avoid any mishaps and ensure that the shower head functions optimally. Here’s how you can go about installing the bracket securely.
Installing the bracket securely
The first step in attaching the mounting bracket is to locate the ideal position for it in your shower. This placement is crucial, as it determines the position of the waterfall shower head and ensures proper water flow. Make sure to take into consideration the height and reach of the shower head, as well as any potential obstacles that might hinder its performance.
Once you have identified the perfect spot, use a pencil or a marker to mark the exact location where the bracket will be attached. This marking will serve as your guide throughout the installation process.
Next, grab the mounting bracket and position it over the marked spot. Ensure that it is level with the floor or the wall, depending on where you are mounting it. Use a carpenter’s level to double-check the alignment and make any necessary adjustments.
Once you are satisfied with the alignment, take your drill and a suitable-sized drill bit. Carefully drill pilot holes at the marked locations, ensuring that the drill remains perpendicular to the surface at all times. These pilot holes will provide a starting point for the screws that will secure the bracket in place.
Now, it’s time to insert the screws into the pilot holes. Use a screwdriver or a power drill to tighten the screws, but be cautious not to overtighten them as it could damage the bracket or the surrounding area.
With the bracket securely attached, give it a gentle tug to check its stability. It should feel firm and immovable. If you notice any wobbling or instability, revisit the previous steps to ensure that the bracket is properly aligned and the screws are tightened adequately.
Ensuring proper alignment for the shower head
After installing the bracket securely, it’s essential to ensure proper alignment for the shower head. A misaligned shower head can lead to uneven water distribution and a subpar showering experience. Here’s how you can achieve the perfect alignment:
- Take your waterfall shower head and position it over the mounting bracket.
- Check for any alignment indicators such as arrows or markings on the shower head or the bracket.
- Adjust the shower head’s angle to align it with the mounting bracket. It should fit snugly and be parallel to the floor or the wall.
- Once you have achieved the desired alignment, tighten the connecting nut or screw to secure the shower head in place.
By following these steps, you can ensure that your waterfall shower head is securely attached and properly aligned, delivering a luxurious and rejuvenating shower experience every time.
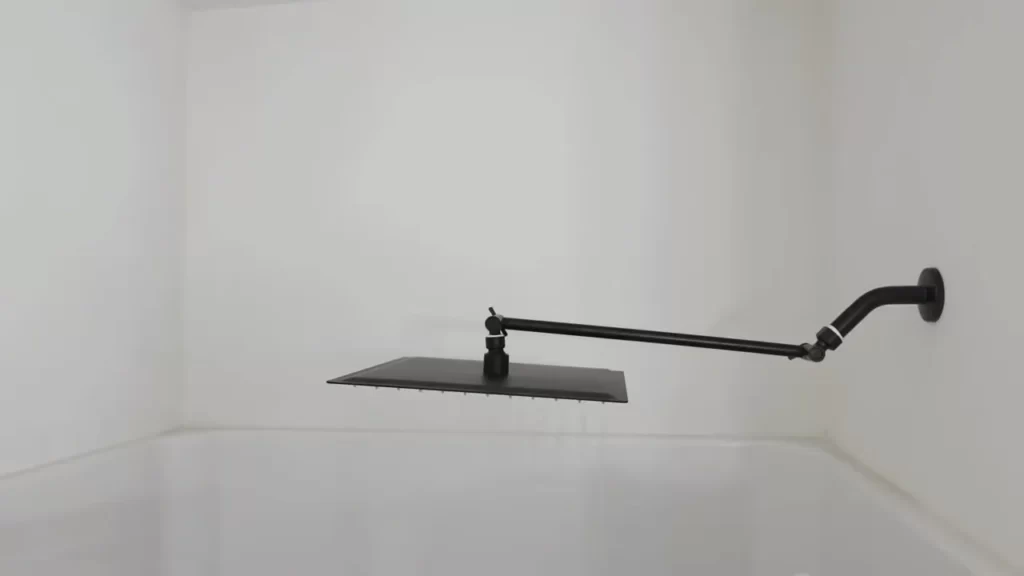
Connecting The Waterfall Shower Head
Installing a waterfall shower head can add a luxurious touch to your bathroom experience. Once you have secured the mounting bracket in place, it’s time to connect the shower head and make the necessary adjustments. In this section, we will guide you through the process of attaching the shower head to the mounting bracket, testing for leaks, and adjusting the water flow to ensure a perfect shower experience.
< h3 id=”attaching-the-shower-head-to-the-mounting-bracket”>Attaching the shower head to the mounting bracket
The first step is to attach the shower head to the mounting bracket securely. Use the following steps to complete this process:
- Ensure that the mounting bracket is tightly secured to the wall or ceiling, depending on the type of installation.
- Take the waterfall shower head and align it with the mounting bracket.
- Twist the shower head clockwise onto the mounting bracket until it is firmly in place. Be careful not to overtighten to avoid damaging the shower head or the bracket.
- Ensure that the shower head is facing the right direction to provide the desired water flow. Adjust it if necessary before proceeding to the next step.
< h3 id=”testing-for-leaks-and-adjusting-water-flow”>Testing for leaks and adjusting water flow
After securing the shower head to the mounting bracket, it’s essential to test for leaks and make any necessary adjustments to the water flow. Here’s how you can do that:
- Turn on the water supply to the shower head.
- Closely inspect the connecting points between the shower head and the mounting bracket for any signs of leakage.
- If you notice any leaks, use a wrench or pliers to tighten the connections just enough to stop the leakage without damaging the fixtures.
- Once you have resolved any leaks, turn on the shower and assess the water flow. If it’s too weak or too strong, you can make adjustments using the shower head control or a flow restrictor.
- Keep testing and adjusting the water flow until you achieve the desired level of comfort and relaxation.
By following these steps, you can easily connect your waterfall shower head to the mounting bracket, ensuring a secure and leak-free installation. Remember to take your time in making adjustments to the water flow to personalize your shower experience. Enjoy the soothing cascade of water as you indulge in your new luxurious shower oasis.
Cleaning And Care Of Your Waterfall Shower Head
Proper cleaning techniques for different materials
Keeping your waterfall shower head clean is essential to ensure optimal performance and hygiene. However, it’s important to note that different materials require different cleaning techniques to avoid damage or discoloration. Here are some proper cleaning techniques for common materials found in waterfall shower heads:
Stainless steel
If your waterfall shower head is made of stainless steel, you’re in luck because it’s a durable and low-maintenance material. To clean it:
- Mix a solution of warm water and mild dish soap.
- Dampen a soft cloth or sponge in the soapy water.
- Gently wipe the surface of the shower head, making sure to remove any soap residue.
- Rinse thoroughly with clean water.
- Finally, dry the shower head with a clean, dry cloth to prevent water spots.
Plastic
Plastic shower heads are lightweight and durable. Here’s how to clean them effectively:
- Start by removing the shower head from the arm or hose.
- Fill a bucket or sink with warm water and a few drops of mild dish soap.
- Submerge the shower head in the soapy water and let it soak for a few minutes.
- Use a soft brush, such as a toothbrush, to gently scrub the surface of the shower head, paying attention to any stubborn dirt or mineral buildup.
- Rinse the shower head thoroughly with clean water to remove any soap residue.
- Dry the shower head completely before reattaching it to the arm or hose.
Preventing mineral buildup and clogs
Mineral buildup can affect the water pressure and flow of your waterfall shower head. To prevent this, follow these simple steps:
- Regularly clean your shower head using the appropriate techniques mentioned above.
- Use a soft toothbrush to gently scrub away any mineral deposits that may accumulate over time.
- If your area has hard water, consider installing a water softener or using a water filter to reduce mineral content.
- Periodically remove and soak the shower head in a vinegar solution to dissolve stubborn mineral buildup.
By following these cleaning and maintenance tips, you can ensure that your waterfall shower head stays clean, clog-free, and functioning at its best for a refreshing and invigorating shower experience every time.
Troubleshooting Common Installation Issues
Addressing Leaks or Drips
If you notice leaks or drips after installing a waterfall shower head, don’t worry! This is a common issue that can be easily resolved. The following troubleshooting tips will help you fix any leaks or drips you may encounter:
- Check the connections: Start by inspecting the connections between the shower arm, showerhead, and any additional fittings. Ensure that these connections are tight and properly sealed. If you find any loose connections, use a wrench to tighten them, ensuring a snug fit.
- Remove and clean the showerhead: Over time, mineral deposits or debris can accumulate inside the showerhead, causing leaks or drips. To resolve this issue, unscrew the showerhead from the shower arm and soak it in a solution of vinegar and water for about 30 minutes. Afterward, use a brush to gently scrub away any deposits. Rinse the showerhead thoroughly before reattaching it.
- Apply plumber’s tape: If the showerhead is still leaking, try applying plumber’s tape to the threads of the shower arm before attaching the showerhead. This will create a tighter seal and help prevent leaks.
By following these simple steps, you should be able to address and eliminate any leaks or drips that may occur during the installation of your waterfall shower head.
Adjusting Water Pressure and Flow
Ensuring the right water pressure and flow is crucial for a satisfying waterfall shower experience. If you encounter issues with water pressure or flow after installing your new showerhead, try the following troubleshooting tips:
- Check the water supply: Verify that the water supply valve is fully open. Sometimes, it may have been accidentally adjusted, leading to reduced water pressure. Make sure the valve is fully turned on to allow proper water flow.
- Inspect the showerhead settings: Some waterfall shower heads come with adjustable settings that allow you to control the water pressure and flow. Check if your showerhead has different settings and adjust them to your preference.
- Remove and clean the flow restrictor: In some cases, the showerhead’s flow restrictor may be clogged with debris, leading to reduced water flow. To solve this problem, unscrew the showerhead from the shower arm and locate the flow restrictor (a small plastic piece) inside it. Take it out and clean it thoroughly to remove any obstructions. Reattach the flow restrictor and the showerhead.
- Consult a professional: If you have tried the above steps and still experience issues with water pressure or flow, it may be advisable to consult a professional plumber. They can assess the situation and provide further solutions to ensure optimal water pressure and flow.
Following these troubleshooting tips will help you address common installation issues related to leaks or drips, as well as water pressure and flow. Enjoy your new waterfall shower head without any hassle!
Enjoying Your Upgraded Bathroom Experience
Upgrade your showering experience with a beautiful waterfall shower head. Not only does it enhance the aesthetic appeal of your bathroom, but it also provides a soothing and relaxing sensation that makes you feel like you’re bathing under a serene and gentle waterfall. With its unique design and functionality, a waterfall shower head brings luxury and spa-like vibes right into your own home. In this article, we will guide you step-by-step on how to install a waterfall shower head, so you can enjoy the ultimate bathroom experience.
Relish in the relaxation and aesthetic appeal of your new waterfall shower head.
Once you’ve successfully installed your waterfall shower head, get ready to immerse yourself in pure relaxation. Here are some of the advantages and benefits that you can enjoy:
- Calming waterfall effect: The cascading water from the shower head creates a gentle and calming waterfall effect that instantly transports you to a place of tranquility and bliss.
- Relief from stress and tension: Let the soothing water flow wash away your stress and tension, leaving you feeling refreshed and rejuvenated.
- Enhanced shower experience: With its wide, rain-like spray pattern, a waterfall shower head provides full coverage, enveloping your entire body in water for a truly indulgent shower experience.
- Aesthetic appeal: Apart from its functionality, a waterfall shower head adds a touch of elegance and sophistication to your bathroom with its contemporary design and sleek finish.
- Water efficiency: Many waterfall shower heads are designed to be water-efficient, allowing you to enjoy a luxurious shower experience while being mindful of your water consumption.
With all these advantages, your upgraded bathroom experience will be nothing short of extraordinary.
Frequently Asked Questions
Do Waterfall Shower Heads Use More Water?
Yes, waterfall shower heads do use more water compared to traditional shower heads. This is because they are designed to provide a luxurious and immersive shower experience with a higher flow rate.
Can You Put A Rain Shower Head To Existing Shower?
Yes, you can easily install a rain shower head to your existing shower. It’s a simple process that requires removing the existing shower head and replacing it with the rain shower head. Enjoy a luxurious and relaxing shower experience with the rain shower head.
How Much Does It Cost To Install A Waterfall Shower?
The cost of installing a waterfall shower varies depending on factors like materials, design, and labor. Expect to spend anywhere from $800 to $3,000 on average for installation. Prices may increase if additional plumbing or structural modifications are required.
How High Should Waterfall Shower Head Be?
The height of a waterfall shower head should be based on personal preference and the height of the users. It is generally recommended to install it at a height between 80 to 90 inches from the shower floor for optimum coverage and comfort.
Conclusion
To sum it up, installing a waterfall shower head can drastically transform your shower experience. With the right tools and steps outlined in this blog post, you can easily upgrade your bathroom and create a luxurious oasis. Remember to check for leaks and adjust the water pressure to your liking.
By following these simple instructions, you’ll be enjoying the soothing flow of water in no time. Happy showering!