To install glass blocks in a shower, measure and mark the placement, apply adhesive, position the blocks, and allow them to set securely. Installing glass blocks in a shower can add a touch of elegance and functionality to your bathroom.
Glass blocks not only allow natural light to filter through but also provide privacy and a modern aesthetic. However, the installation process requires attention to detail and careful execution. We will guide you through the steps to install glass blocks in your shower.
From measuring and marking the placement to applying adhesive and positioning the blocks, we will ensure that your glass block installation is successful. So, let’s dive in and learn how to install glass blocks in a shower!
Materials Needed For Glass Block Installation
Are you planning to give your shower a modern and stylish look? Installing glass blocks is a fantastic way to achieve that! Glass blocks not only add a touch of elegance to your shower space but also offer privacy and natural light. However, before you dive into the installation process, it’s crucial to gather all the necessary materials. Having the right materials on hand will make your glass block installation go smoothly and ensure a successful outcome. Here are the materials you will need:
Glass Blocks
The most essential component of your glass block installation is, of course, the glass blocks themselves. These blocks come in various sizes, patterns, and colors, allowing you to select the ones that best suit your style and preference. Ensure you purchase enough blocks to cover the desired area of your shower.
Frame
A frame provides support and stability to the glass blocks. It holds them securely in place and prevents any shifting or movement. When choosing a frame, opt for a material that is durable, water-resistant, and compatible with glass blocks. Metal frames or vinyl frames are common choices for this purpose.
Mortar
To adhere the glass blocks to the frame, you will need mortar. Mortar acts as a strong adhesive and ensures that the blocks are firmly attached. It is important to use a mortar specifically designed for glass block installation. This type of mortar has excellent bonding properties and is resistant to water and moisture.
Spacers
Spacers play a crucial role in maintaining consistent spacing between glass blocks. They ensure that the gaps between blocks are uniform and provide a professional and polished look to your installation. Spacers come in different thicknesses, so choose the ones that match your desired spacing.
Caulk
Caulk is used to seal the gaps between the glass blocks and prevent water leakage. It provides a watertight seal and protects the installation from moisture damage. Select a high-quality caulk specifically designed for indoor wet areas, ensuring its durability and mold resistance.
Trowel
A trowel is necessary for applying the mortar evenly and smoothly onto the frame and glass blocks. Look for a trowel with a comfortable grip and a flat, rectangular blade. Having the right trowel will make the application process much easier and efficient.
Level
A level is crucial to ensure that your glass block installation is perfectly plumb and level. It helps you identify any unevenness and adjust accordingly. Using a level during the installation process will result in a visually appealing and structurally sound final product.
Rubber Mallet
A rubber mallet is used to tap the glass blocks gently into place, ensuring they are firmly seated in the mortar. It helps to achieve a tight and secure fit between the blocks and the frame. The rubber mallet is preferred over a regular hammer to avoid any damage to the glass blocks during installation.
Now that you know the materials needed for glass block installation, you can proceed with confidence. With these essential components, you’ll be well-equipped to create a stunning glass block shower that adds elegance and sophistication to your bathroom.

Preparing Your Shower For Glass Block Installation
Before you can start installing glass blocks in your shower, it’s important to prepare the area properly. This involves several steps, including measuring the area, cleaning the shower walls, removing old tiles or fixtures, and applying a moisture barrier. By following these steps, you can ensure a smooth and successful glass block installation.
Measuring the area
The first step in preparing your shower for glass block installation is to accurately measure the area where the blocks will be installed. This will help you determine the number of blocks you’ll need and ensure a precise fit. Using a measuring tape, measure the height, width, and depth of the shower walls. Make sure to take into account any irregularities or protrusions that may affect the measurement. Once you have the measurements, you can determine the layout of the glass blocks and plan accordingly.
Cleaning the shower walls
Next, you’ll need to thoroughly clean the shower walls to create a clean and smooth surface for the glass blocks. Start by removing any dirt, grime, or soap scum using a mild cleaner and a sponge or scrub brush. Pay special attention to the corners and edges of the walls. Rinse the walls thoroughly with water and allow them to dry completely before proceeding.
Removing old tiles or fixtures
If your shower walls have old tiles or fixtures, they will need to be removed before installing the glass blocks. Use a chisel, hammer, or tile scraper to carefully remove the tiles or fixtures, taking care not to damage the surrounding area. Work in small sections at a time and remove any adhesive or grout left behind. Once the old tiles or fixtures are removed, ensure the walls are clean and smooth.
Applying a moisture barrier
Before installing the glass blocks, it’s essential to apply a moisture barrier to protect against water damage. This barrier will help to prevent water from seeping through the walls and causing mold or mildew growth. Apply a waterproofing membrane or paint specifically designed for showers according to the manufacturer’s instructions. Make sure to cover the entire shower walls, including corners and edges, and allow the moisture barrier to dry completely before proceeding with the glass block installation.
By taking the time to prepare your shower properly, you can ensure a successful glass block installation and enjoy a beautiful, durable, and water-resistant shower space for years to come.
Step 1: Creating The Layout
Installing glass blocks in your shower can transform the entire look and feel of your bathroom. Not only do they add a touch of elegance and sophistication, but they also provide privacy and allow natural light to filter through. However, before you can start the installation process, you need to create the right layout. Here is how you can do it:
Determining the block pattern
The first step in creating the layout for your glass blocks is to determine the block pattern you want to use. Glass blocks can be arranged in various patterns, such as horizontal or vertical bands, a grid-like pattern, or even a random arrangement. The choice of pattern depends on your personal preference and the overall design aesthetic of your bathroom. Once you have decided on the pattern, you can move on to marking the layout on the walls.
Marking the layout on the walls
To ensure a precise and visually pleasing layout, it is crucial to mark the position of the glass blocks on the walls. Start by measuring the dimensions of your shower area and dividing it equally based on the desired block size. Use a pencil and a level to mark straight vertical and horizontal lines on the walls. These lines will serve as your reference points for placing the glass blocks.
Next, determine the starting point for your glass block installation. This is typically a corner or an edge of the shower area. From the starting point, use a tape measure and mark the positions of the glass blocks along the reference lines. Make sure to evenly space the marks to create a balanced and symmetrical layout. Additionally, consider leaving enough space between each block for the grout lines.
Once you have marked the layout on the walls, step back and take a moment to ensure that the arrangement is visually appealing and aligns with your design vision. Make any necessary adjustments before moving on to the next step of the installation process.
Creating the layout for your glass block shower is an essential first step in achieving a stunning end result. By determining the block pattern and marking the layout on the walls with precision, you can ensure a seamless installation and transform your shower into a stylish focal point within your bathroom. Now that you have completed Step 1, you are ready to move on to the next step in the installation process.
Step 2: Mixing Mortar And Applying Spacers
Now that you have prepared the shower area for glass block installation, it’s time to move on to the next step: mixing mortar and applying spacers. This crucial step ensures a solid and level foundation for your glass blocks. Follow the instructions below to get started.
Mixing the Mortar According to Instructions
The first part of this step involves mixing the mortar according to the manufacturer’s instructions. Pour the mortar mix into a large bucket and gradually add water while stirring. It’s important to achieve a smooth, creamy consistency that will make it easier to work with. Make sure to wear protective gloves and eyewear while handling the mortar.
Note: Mortar mixing ratios may vary, so always check the product packaging for specific instructions.
Applying Spacers to the Wall
Next, it’s time to apply spacers to the wall. Spacers help maintain proper spacing and alignment between the glass blocks, ensuring a professional finish. Start by placing the first spacer at the bottom of the shower wall, using a level to ensure it’s perfectly horizontal.
Tip: Use a pencil to lightly mark the position of each spacer on the wall, as this will help you stay organized throughout the installation process.
Continue placing spacers along the wall, making sure they are evenly spaced. You can use either plastic or metal spacers, depending on your preference. Plastic spacers are easier to adjust, while metal spacers offer greater durability.
Ensuring the Spacers are Level
Once you have applied the spacers, it’s crucial to ensure they are perfectly level. This step is essential in achieving a professional-looking glass block wall. Carefully place the level on top of each spacer and adjust as necessary, making sure they are both horizontally and vertically aligned.
Expert tip: Take your time during this step, as properly leveled spacers will make the glass block installation process smoother and more precise.
Now that you have mixed the mortar and applied the spacers, your shower wall is ready for the glass block installation. In the next step, we will explore the process of placing the glass blocks securely in place. Stay tuned for Step 3: Installing Glass Blocks in Shower.
Step 3: Installing The Glass Blocks
Once you have prepared the shower area and laid out the foundation, it’s time to start installing the glass blocks. This step requires careful attention to detail to ensure a sturdy and visually appealing finished result.
Applying mortar to the first block
Before placing the first glass block, you’ll need to apply mortar to its bottom surface. This mortar acts as an adhesive, securing the block in place and providing stability. Start by mixing a batch of mortar according to the manufacturer’s instructions. Once the mortar has reached the desired consistency, use a notched trowel to spread a thin layer evenly over the bottom surface of the first glass block. Make sure to cover the entire surface to maximize adhesion.
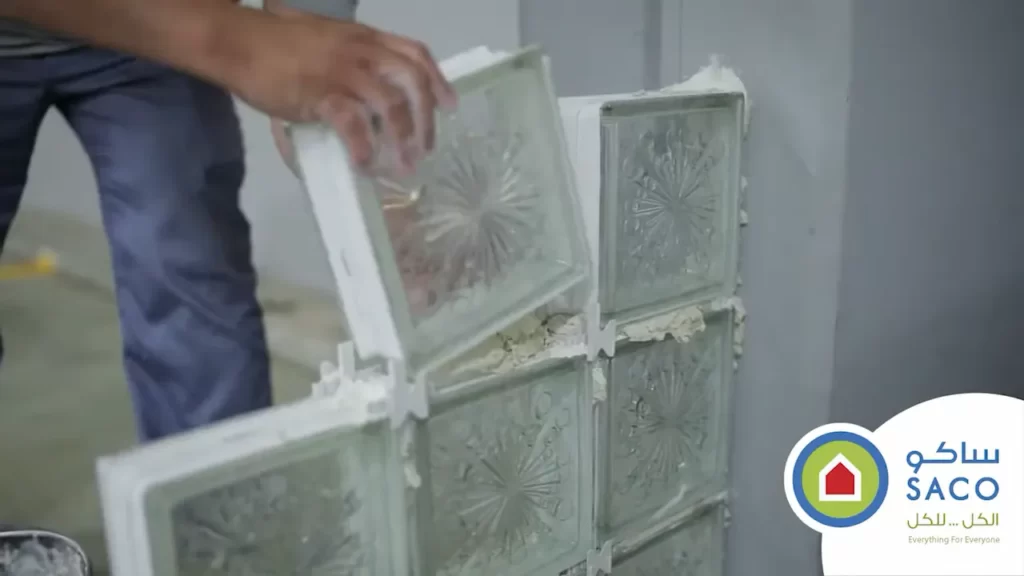
Placing the block in position
With the mortar applied, it’s time to place the first glass block in its designated position. Carefully lift the block and align it with the previously laid out guide lines. Slowly lower the block onto the mortar, applying gentle pressure to ensure proper adhesion. It’s important to be cautious during this step to prevent any accidental breakage or damage to the block. Use a slight twisting motion as you set the block down to create a snug fit.
Checking for level and aligning with spacers
After placing the first block, it’s crucial to check for level to maintain an even and visually appealing wall of glass blocks. Place a level on top of the block, ensuring it is perfectly horizontal. If adjustments are needed, gently tap the block with a rubber mallet until it is level. In addition to being level, proper alignment is important for the overall aesthetics. Insert plastic spacers between the blocks to maintain consistent spacing and to align them perfectly. These spacers will help you achieve a professional finish.
Repeating the process for the remaining blocks
Once you are satisfied with the position of the first glass block, you can proceed to install the remaining blocks in the same manner. Apply a layer of mortar to the bottom surface of each block, place it in position, check for level with the level tool, align it with spacers, and repeat the process. Take your time during this step to ensure each glass block is properly set and aligned. Remember to check for level and alignment periodically as you continue installing the blocks.
By following these steps, you will be able to properly install glass blocks in your shower, creating a beautiful and functional addition to your bathroom. Remember to refer to the manufacturer’s instructions for any specific guidelines and recommendations regarding the installation process.
Step 4: Sealing And Finishing
Once you have successfully installed the glass blocks in your shower, it’s important to seal and finish the installation properly. This step ensures that your glass block shower is not only secure but also water and moisture-proof. Follow these essential steps to complete the sealing and finishing process:
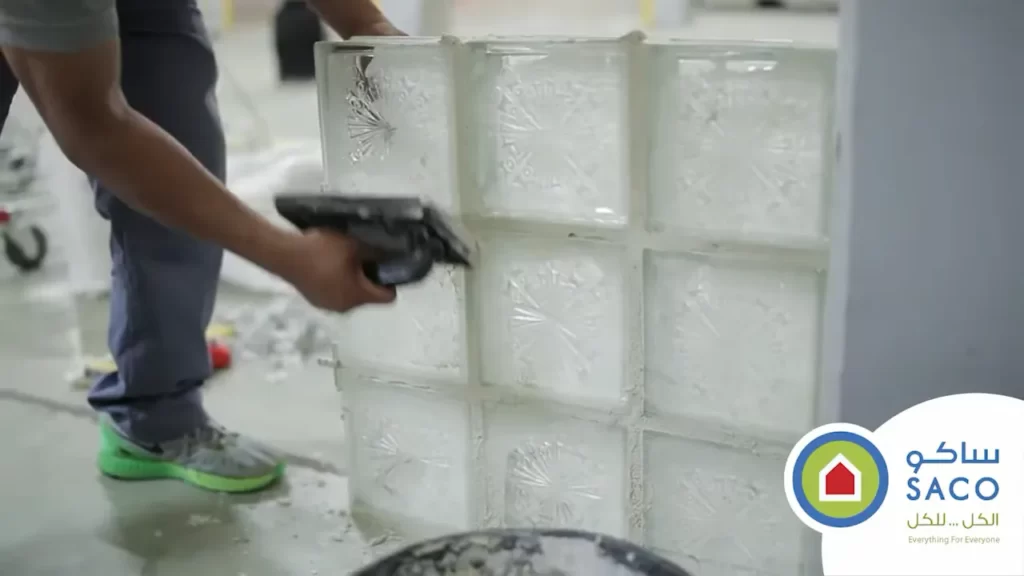
Filling in the gaps with mortar
First, you’ll need to fill in the gaps between the glass blocks using mortar. Mortar is a thick and adhesive mixture that bonds the blocks together, creating a strong and durable finish. Here’s how to do it:
- Carefully apply the mortar in between each glass block using a trowel. Make sure to fill the gaps evenly and thoroughly to ensure a uniform finish.
- Press the mortar into the gaps, ensuring it reaches the bottom of each gap. This step is crucial for a solid and secure installation.
- Continue filling in all the gaps until every space between the glass blocks is completely filled.
Smoothing the mortar with a trowel
Once all the gaps are filled with mortar, it’s time to smooth the surface for a polished and professional look. Follow these steps to achieve a smooth finish:
- Using a trowel, carefully run it over the surface of the mortar, applying gentle pressure. This process helps to even out the mortar and remove any excess.
- Ensure that the surface is smooth and level by running the trowel in both horizontal and vertical directions.
- Take your time during this step to achieve a clean and flawless finish.
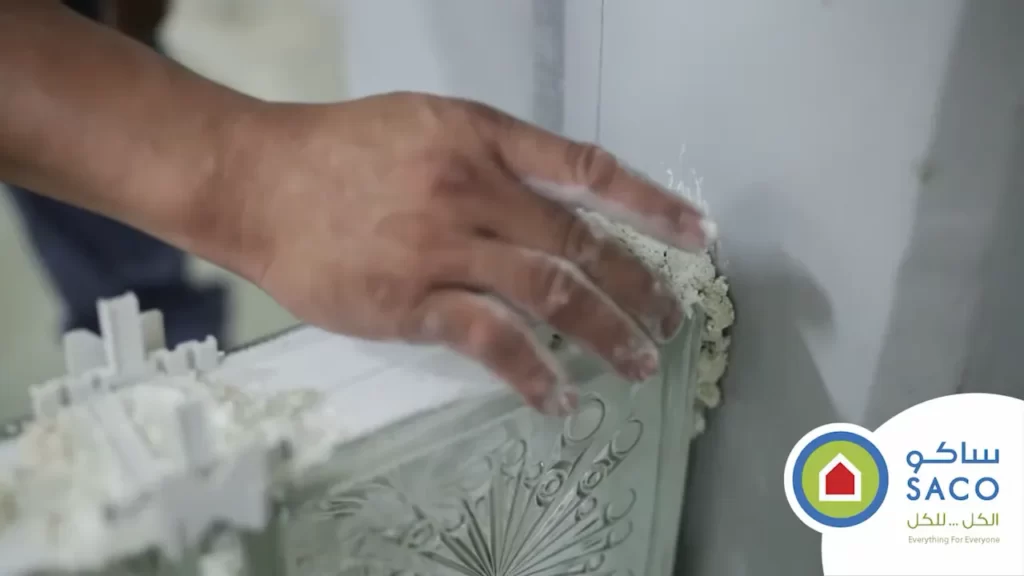
Removing excess mortar
While smoothing the mortar, it’s common to have some excess on the surface. To ensure a neat and tidy appearance, follow these steps to remove the excess mortar:
- Wait for the mortar to dry for approximately 20 minutes, or until it is firm to the touch.
- Carefully scrape off the excess mortar from the surface using a putty knife or trowel.
- Be gentle while scraping to prevent any damage to the glass or mortar joints.
- Dispose of the excess mortar properly to keep your work area clean.
Allowing the installation to dry
Finally, allow the glass block shower installation to dry completely before using the shower. This drying process ensures that the mortar is fully set and the installation is secure. Follow these guidelines to allow for proper drying:
- Avoid using the shower for at least 24 to 48 hours to allow the mortar to cure completely.
- Keep the area well-ventilated to promote faster drying.
- Inspect the installation for any cracks or gaps after the drying period. If necessary, apply additional mortar to fill in any imperfections.
By following these steps, you’ll achieve a professional and watertight glass block shower installation that provides both functionality and aesthetic appeal. Now that your shower is sealed and finished, it’s time to enjoy the beauty and benefits of your newly installed glass blocks!
Cleaning And Maintenance Tips
Cleaning and maintaining your glass blocks in the shower is essential for keeping them looking their best and ensuring their longevity. By regularly cleaning the glass blocks, using gentle cleaners and non-abrasive tools, and checking for leaks and resealing as needed, you can keep your shower beautiful and functional for years to come. Read on to learn more about these important cleaning and maintenance tips.
Regularly cleaning the glass blocks
To maintain the pristine appearance of your glass blocks, it’s important to clean them regularly. This will help to remove any soap scum, dirt, and grime that may accumulate over time. Here are some tips for cleaning the glass blocks:
- Start by wetting the glass blocks with water to loosen any dirt or debris.
- Use a gentle, non-abrasive cleaner specifically designed for glass surfaces.
- Apply the cleaner to a soft cloth or sponge and gently scrub the glass blocks.
- Rinse the blocks thoroughly with clean water to remove any remaining cleaner.
- Dry the glass blocks with a soft, lint-free cloth to prevent water spots.
Using mild cleaners and non-abrasive tools
When cleaning your glass blocks, it’s important to use mild cleaners and avoid abrasive tools that could scratch or damage the surface. Here are some guidelines to follow:
- Choose a mild, non-abrasive cleaner that is safe for use on glass.
- Avoid using harsh chemicals, such as bleach or ammonia, as these can damage the glass.
- Use a soft cloth, sponge, or non-abrasive brush to gently clean the glass blocks.
- Never use abrasive pads or scrub brushes with stiff bristles, as these can scratch the glass.
Checking for leaks and resealing as needed
Over time, the sealant around your glass blocks may wear down or become damaged, potentially leading to leaks. It’s important to regularly check for leaks and reseal the glass blocks as needed. Follow these steps:
- Inspect the perimeter of the glass blocks for any signs of leaking, such as water stains or moisture.
- If you notice any leaks, remove the old sealant using a scraper or a utility knife.
- Clean the area thoroughly with a mild cleaner and allow it to dry completely.
- Apply a new bead of silicone sealant around the edges of the glass blocks, making sure to seal any gaps or cracks.
- Smooth out the sealant using a caulk tool or your finger, ensuring a tight seal.
By following these cleaning and maintenance tips, you can keep your glass blocks in the shower looking their best and ensure their longevity. Regular cleaning, using gentle cleaners and non-abrasive tools, and checking for leaks and resealing as needed will help to maintain the beauty and functionality of your glass block shower for years to come.
Dealing With Common Issues
Installing glass blocks in your shower can greatly enhance the overall aesthetics and functionality of your bathroom. However, like any home improvement project, there are potential issues that may arise. In this section, we will address three common problems that you may encounter during or after the installation process.
Repairing cracked or broken glass blocks
Cracked or broken glass blocks in your shower can be a major concern both in terms of appearance and safety. Ignoring this issue can lead to leaks, water damage, and even accidents. Fortunately, repairing cracked or broken glass blocks can be a straightforward process, if dealt with promptly and correctly.
To repair cracked or broken glass blocks:
- Carefully remove the damaged block from the shower wall. Ensure you wear gloves and protective eyewear to avoid any injuries.
- Clean the area around the damaged block using a mild detergent and a soft brush.
- Apply a high-quality glass block adhesive to the replacement block and carefully insert it into the empty space left by the damaged one.
- Press the replacement block firmly to ensure proper adhesion.
- Allow the adhesive to dry completely before using the shower.
Addressing mold or mildew growth
Mold or mildew growth in your glass block shower can not only be unsightly but also pose health risks. To effectively address this issue and prevent future growth, follow these steps:
- Start by wearing protective gloves and a face mask to avoid direct contact with the mold or mildew.
- Thoroughly clean the affected area using a mixture of equal parts white vinegar and water. Scrub gently with a soft brush or sponge.
- Rinse the area with clean water and wipe it dry with a clean cloth.
- Apply a mold-resistant sealant to the grout lines between the glass blocks to prevent moisture and mold from penetrating.
- Ensure sufficient ventilation in the bathroom to reduce humidity.
Fixing loose or shifting blocks
Over time, the glass blocks in your shower may become loose or shift, compromising the stability and appearance of the installation. To fix loose or shifting blocks and restore the integrity of your glass block shower, follow these steps:
- Carefully remove the loose or shifting blocks from the wall, using caution to avoid any damage to the surrounding blocks.
- Clean the area thoroughly, removing any debris or excess adhesive.
- Apply a fresh layer of glass block mortar to the wall.
- Reposition the blocks, ensuring they fit snugly against each other and the surrounding blocks.
- Allow the mortar to dry completely before using the shower.
By following these steps and addressing common issues such as repairing cracked or broken glass blocks, addressing mold or mildew growth, and fixing loose or shifting blocks, you can ensure the longevity and beauty of your glass block shower. Remember to consult a professional if you encounter any major issues or feel unsure about tackling them yourself.
Enhancing The Glass Block Shower Aesthetics
When it comes to shower design, glass blocks offer a modern and elegant touch that instantly elevates the aesthetics of any bathroom. While the installation of glass blocks in a shower is already a striking feature, there are additional enhancements you can make to take your glass block shower to the next level. By incorporating accent lighting, decorative tile borders, and colored or textured glass blocks, you can create a shower that is not only functional but also visually appealing.
Installing Accent Lighting
One effective way to enhance the aesthetics of your glass block shower is by installing accent lighting. With carefully placed lighting, you can highlight the beauty of your glass blocks and create a soothing ambiance in your bathroom. Here’s how you can achieve this effect:
- Choose LED strip lights that are waterproof and designed for wet areas.
- Install the lights along the edges of the glass blocks or behind them for a subtle glow.
- Consider using color-changing lights to add variety and create a captivating visual experience.
- Test the lighting setup before permanently securing the lights to ensure the desired effect is achieved.
By adding accent lighting to your glass block shower, you can create a mesmerizing display that enhances the overall ambiance of your bathroom.
Adding Decorative Tile Borders
Another way to enhance the aesthetics of your glass block shower is by adding decorative tile borders. These borders not only serve as a beautiful frame for your glass blocks but also allow you to customize the design according to your preferences. Here’s how you can add decorative tile borders:
- Select tiles that complement the overall style of your bathroom.
- Measure and mark the desired border width on the walls surrounding your glass block shower.
- Apply tile adhesive to the marked area and carefully install the tiles, ensuring they are leveled and aligned.
- Allow the adhesive to dry completely before grouting the tile borders.
- Seal the grout to prevent water damage and keep the borders looking pristine.
With decorative tile borders, your glass block shower becomes a true centerpiece, as it seamlessly integrates with the rest of your bathroom’s design.
Utilizing Colored or Textured Glass Blocks
While traditional clear glass blocks offer a classic look, incorporating colored or textured glass blocks can take your shower aesthetics to new heights. These blocks add visual interest and allow you to play with light and shadows, creating a unique shower experience. Here’s how you can utilize colored or textured glass blocks:
- Choose glass blocks with colors that complement your bathroom’s color scheme or reflect your personal style.
- Consider using textured glass blocks to add dimension and visual intrigue.
- Install the colored or textured glass blocks strategically to create focal points or patterns within your shower.
- Combine clear and colored or textured glass blocks to achieve a captivating and personalized look.
By incorporating colored or textured glass blocks, you can transform your glass block shower into a work of art that draws attention and impresses anyone who enters your bathroom.
With these enhancements, you can truly elevate the aesthetics of your glass block shower. By integrating accent lighting, decorative tile borders, and colored or textured glass blocks, you can create a visually stunning and unique shower space that is bound to be the envy of anyone who steps foot inside your bathroom.
Frequently Asked Questions
What Do You Lay Glass Blocks With?
You lay glass blocks using a special adhesive called glass block mortar.
Is Silicone Or Mortar Better For Glass Block?
Silicone is better for glass block installation compared to mortar due to its flexibility and waterproofing properties. Unlike mortar, silicone adhesive allows for easier and more precise application, ensuring a secure and long-lasting bond. Additionally, silicone reduces the risk of cracking or damaging the glass blocks during installation or movement.
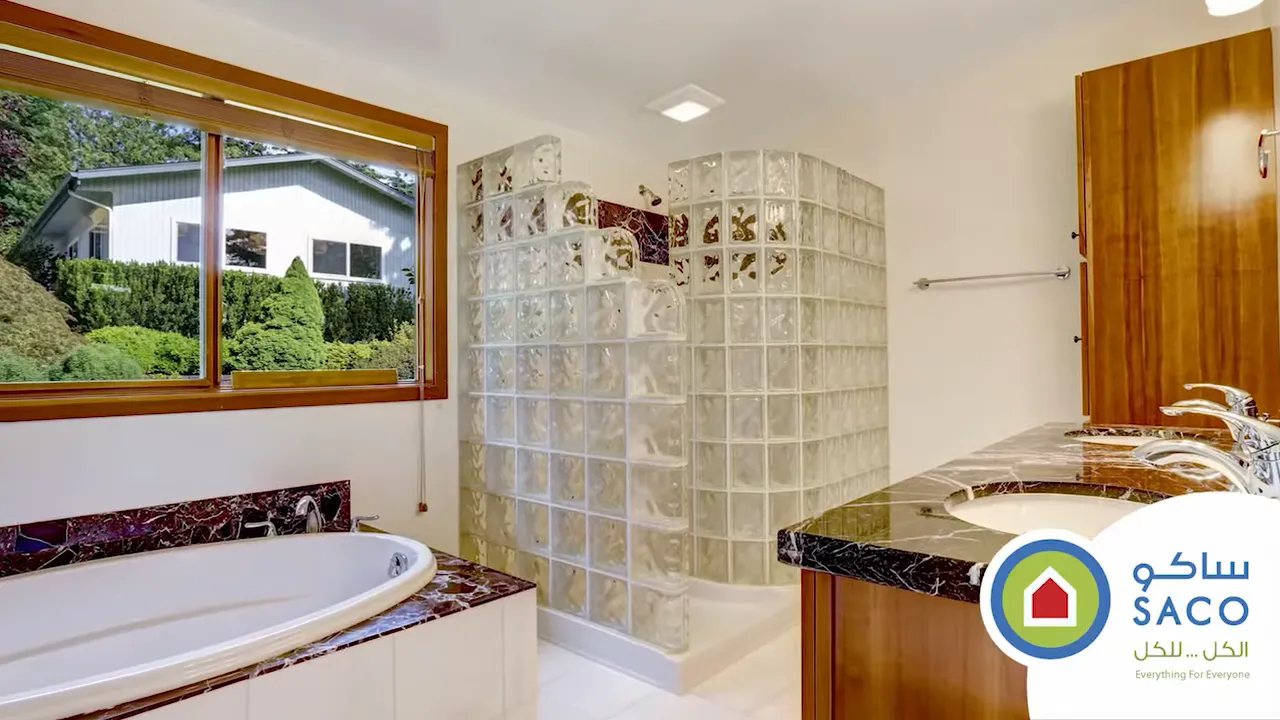
Can You Put A Glass Block Window In A Shower?
Yes, you can install a glass block window in a shower. It adds a stylish and modern touch to your bathroom while allowing natural light in. Make sure to choose the right type of glass block for optimal privacy and durability in a wet environment.
How Do You Seal Glass Blocks In A Shower?
To seal glass blocks in a shower: 1. Clean the area surrounding the blocks thoroughly. 2. Apply a silicone adhesive or caulk to the joints between the blocks. 3. Smooth out the sealant using a putty knife or your finger. 4.
Allow the sealant to dry completely before using the shower. 5. Regularly check and reapply sealant if necessary to prevent water leakage.
Conclusion
Installing glass blocks in your shower can enhance the overall aesthetics and functionality of the space. With the right tools and a step-by-step guide, you can successfully complete the installation process. Remember to measure accurately, prepare the surface properly, and use an adhesive specifically designed for glass blocks.
By following these instructions, you’ll be able to create a stunning and durable shower enclosure that will last for years to come.