Installing a tub spout involves a few simple steps: remove the old spout, apply plumber’s tape to the pipe, and attach the new spout tightly to the pipe. This ensures a secure and leak-free connection.
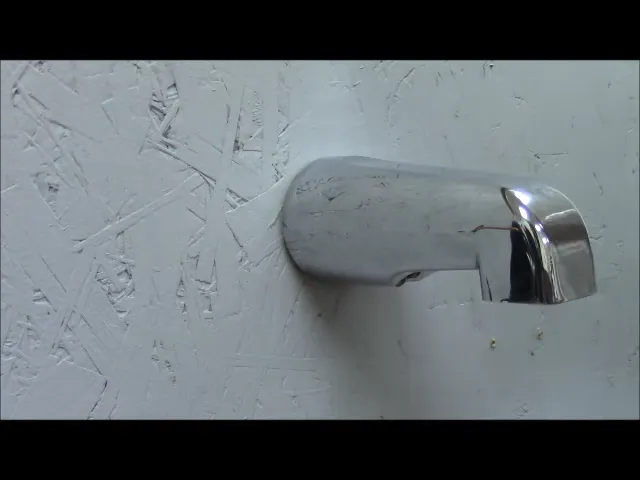
Now, let’s delve into the installation process in more detail. A tub spout is a fixture located at the end of the bathtub where water flows out from. Over time, it may become worn out or damaged, requiring replacement. Luckily, with a little DIY know-how, you can easily install a new tub spout on your own.
In this guide, we will walk you through the step-by-step process of installing a tub spout, ensuring a successful and hassle-free installation.
Tub Spout Installation Basics: A Quick Overview
Installing a tub spout may seem like a simple task, but it requires attention to detail to ensure a proper installation. In this section, we will provide a quick overview of the tub spout installation process, highlighting the importance of installing it correctly and the common issues that can arise from improper installation. By following these guidelines, you can avoid future problems and enjoy a properly functioning tub spout.
Importance of a properly installed tub spout
A properly installed tub spout is essential for the efficient operation of your bathtub. It not only enhances the overall aesthetics of your bathroom but also plays a significant role in controlling the water flow. When a tub spout is correctly installed, it ensures a steady and uninterrupted flow of water, allowing you to enjoy a relaxing and comfortable bathing experience.
Moreover, a properly installed tub spout prevents water leakage, which can lead to costly damages such as water stains, mold growth, and structural issues in your bathroom. By taking the time to install your tub spout correctly, you can avoid these potential issues and maintain the longevity of your tub and surrounding fixtures.
Common issues that can arise from incorrect installation
Incorrect installation of a tub spout can result in various problems that may compromise your bathing experience and cause unnecessary frustration. Here are some common issues that can occur due to improper installation:
- Water leakage: One of the most common issues is water leakage from the tub spout connection, which can occur if the spout is not tightly secured to the pipe. This can result in constant dripping or inconsistent water flow, wasting water and potentially causing damage to your bathroom.
- Weak water flow: Another problem that can arise from incorrect installation is weak water flow. This can happen if the tub spout is not aligned correctly with the water supply pipe, hindering the water pressure and reducing the effectiveness of your bathing experience.
- Difficulties in temperature control: If the tub spout is not installed properly, it may affect the mixing of hot and cold water, making it challenging to achieve the desired water temperature. This inconvenience can impact your bathing comfort and relaxation.
To avoid these common issues, it is crucial to follow the proper installation process, ensuring that the tub spout is securely attached and aligned with the water supply pipe.
By understanding the importance of a properly installed tub spout and being aware of the potential issues that can arise from incorrect installation, you can now proceed with confidence to install your tub spout and enjoy a hassle-free bathing experience.
Assessing Your Existing Tub Spout
Before you begin the installation process, it’s important to assess your existing tub spout to ensure a smooth and successful installation. By identifying the type of tub spout you currently have, you’ll be able to gather the necessary tools and materials needed for the job. Let’s start by understanding how to identify the type of tub spout you have.
When it comes to tub spouts, there are various types available in the market today. The most common types include:
| Diverter tub spout | A diverter tub spout is equipped with a built-in diverter valve that allows you to divert water from the tub spout to the showerhead. |
| Slip-on tub spout | A slip-on tub spout slides onto a pipe and is secured using a set screw or a threaded collar. |
| Threaded tub spout | A threaded tub spout screws onto a pipe and is secured using a threaded collar. |
Identifying the type of tub spout you have is crucial because it determines the installation method you’ll be using. To identify your tub spout, take a closer look at its design and check for any visible screws or collars.
Checking for any signs of damage or wear
Once you have identified the type of tub spout you currently have, the next step is to check for any signs of damage or wear. Over time, tub spouts can become worn out or damaged, affecting their functionality and overall appearance. Here’s what you need to look out for:
- Cracks or chips in the tub spout
- Rust or corrosion
- Loose or wobbly parts
- Leaking or dripping
If you notice any of these issues, it’s essential to address them before proceeding with the installation. Repairing or replacing a damaged tub spout ensures a secure and reliable installation and prevents any further damage. Depending on the severity of the damage, you may need to consult a professional plumber for assistance.
By assessing your existing tub spout and checking for any signs of damage or wear, you’ll be well-prepared for the installation process. Remember, identifying the type of tub spout and addressing any issues beforehand will help ensure a successful installation and a fully functional tub spout for your bathing needs.
Gathering The Necessary Tools And Materials
Gathering the necessary tools and materials is the first step to successfully installing a tub spout. Having the right tools and materials ready beforehand will ensure a smooth and efficient installation process. In this section, we will provide you with a list of tools required for an effective installation as well as recommend materials for a long-lasting tub spout.
List of tools required for an effective installation
Before you start installing your tub spout, make sure you have the following tools:
- Pipe wrench
- Adjustable wrench
- Teflon tape
- Plumber’s putty
- Caulk gun
- Utility knife
- Screwdriver
These tools will help you loosen and tighten connections, seal joints, and perform any necessary adjustments during the installation process.
Recommended materials for a long-lasting tub spout
Choosing the right materials for your tub spout is crucial for its longevity and durability. Here are some recommended materials:
| Material | Description |
|---|---|
| Brass | Brass tub spouts are highly durable and resistant to corrosion, making them a popular choice for long-lasting installations. |
| Stainless Steel | Stainless steel tub spouts are also corrosion-resistant and offer a sleek and modern look to your bathroom. |
| Chrome | Chrome tub spouts not only provide a shiny and aesthetic appeal but also offer excellent durability and resistance to wear and tear. |
When selecting your tub spout, ensure that it is made of high-quality materials to withstand the constant exposure to water and maintain its functionality over time.
By gathering the necessary tools and materials, you are setting yourself up for a successful tub spout installation. Now that you have everything ready, it’s time to move on to the next step of the installation process.
Removing The Old Tub Spout
Step-by-step guide on safely removing the old tub spout
If you’re looking to give your bathroom a fresh update or simply need to replace a worn-out tub spout, it’s important to know how to properly remove the old one. This step-by-step guide will make the process easy and straightforward, allowing you to remove the old tub spout safely and efficiently.
- Shut off the water supply: Before you begin the removal process, it’s crucial to turn off the water supply to your bathtub. Look for the shut-off valves located near the tub or in your basement. Turn them clockwise until they are fully closed to stop the water flow.
- Identify the type of tub spout: Depending on the make and model of your tub spout, the removal process may vary. Look for any screws, around the base or on the underside of the spout, that need to be unscrewed before attempting to pull it off.
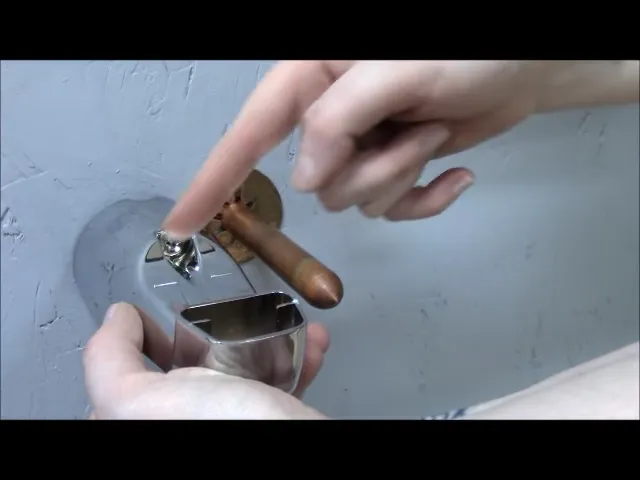
- Loosen the set screw (if applicable): Some tub spouts have a set screw that holds them in place on the bathtub pipe. If yours has a set screw, use an Allen wrench or a screwdriver to loosen it before proceeding with the removal.
- Apply penetrating oil (if necessary): Stubborn or corroded tub spouts can be challenging to remove. If you’re facing resistance, applying a few drops of penetrating oil to the connection point between the spout and the pipe can help loosen any rust or debris.
- Twist and pull: Once you’ve loosened any screws or set screws, it’s time to remove the old tub spout. Grip the spout firmly and twist it counterclockwise. Apply steady pressure and give it a gentle tug to separate it from the pipe. If necessary, use a pair of pliers or a pipe wrench for additional leverage.
Tips for dealing with stubborn or corroded spouts
Dealing with stubborn or corroded tub spouts can be frustrating, but with these tips, you can tackle the challenge head-on:
- Use a pipe wrench: If the tub spout is particularly stubborn and refuses to budge, a pipe wrench can be your best friend. Wrap a cloth around the spout to protect it from scratches, then use the pipe wrench to apply more torque while twisting and pulling.
- Apply heat: Heat can help loosen stubborn connections. Use a hairdryer or a heat gun to gently warm the area around the spout before attempting to remove it. Be careful not to overheat the pipes or damage any surrounding fixtures.
- Try vinegar or lime juice: For spouts that are corroded due to mineral deposits, soaking them in vinegar or lime juice overnight can help dissolve the buildup. After soaking, rinse the spout thoroughly and try removing it again.
- Call a professional: If all else fails, don’t hesitate to reach out to a professional plumber who has experience dealing with stuck or stubborn tub spouts. They have the tools and expertise to safely remove the old spout without causing any damage to your plumbing system.
By following this step-by-step guide and utilizing these tips, you’ll be able to remove the old tub spout with ease, making way for a brand new and functional spout that will enhance your bathing experience.
Choosing The Right Replacement Tub Spout
When it comes to updating your bathroom, replacing the tub spout is a simple yet effective way to modernize the overall look and functionality. Whether you want to enhance your bathing experience or fix a leaky tub spout, choosing the right replacement is crucial. In this section, we will discuss the different types and styles available, as well as the factors you should consider when selecting a replacement tub spout.
Understanding the different types and styles available
Before diving into the selection process, it’s important to understand the different types and styles of tub spouts that are available in the market. Here are some popular options:
- Diverter Tub Spout: This type of tub spout is commonly found in shower-bathtub combos. It diverts water flow between the showerhead and tub spout, allowing you to easily switch between the two.
- Slip-On Tub Spout: As the name suggests, these tub spouts are designed to slip onto the plumbing pipe. They are relatively easy to install and come in various styles and finishes.
- Threaded Tub Spout: Threaded tub spouts screw onto the plumbing pipe, providing a secure and leak-free connection. They are popular for their durability and stability.
Factors to consider when selecting a replacement tub spout
Now that you know the different types and styles, it’s time to consider the factors that should guide your decision-making process. Here are some important factors to take into account:
- Compatibility: Ensure that the replacement tub spout is compatible with your existing plumbing system. Measure the diameter and length of the plumbing pipe to find a tub spout that fits correctly.
- Style and Finish: Consider the overall aesthetic of your bathroom and choose a tub spout that complements it. Whether you prefer a classic, modern, or contemporary look, there are numerous styles and finishes available, such as chrome, brushed nickel, and oil-rubbed bronze.
- Water Flow: Pay attention to the flow rate of the tub spout to ensure it meets your preferences. Some tub spouts offer a regular flow, while others have built-in features like aerators for a more efficient and soothing bathing experience.
- Budget: Set a budget for your tub spout replacement project. Prices can vary depending on the brand, style, and features, so it’s important to establish your spending limit before starting your search.
By considering these factors and understanding the different types and styles available, you’ll be well-equipped to choose the right replacement tub spout for your bathroom. Remember to take measurements, prioritize compatibility and style, and stay within your budget. With a little research and careful consideration, you can easily upgrade your bathroom’s functionality and aesthetics.
Preparing The Installation Area
Before installing a tub spout, it is important to properly prepare the installation area to ensure a smooth and successful installation. This involves cleaning and prepping the tub spout installation spot, as well as ensuring proper measurements and alignment. Follow these steps to prepare the installation area for your tub spout:
Cleaning and Prepping the Tub Spout Installation Spot
The first step in preparing the installation area is to clean and prep the tub spout installation spot. This ensures that the area is free from any dirt, debris, or residue that may prevent a proper installation. Here’s what you need to do:
- Start by turning off the water supply to the tub. This will prevent any water from accidentally coming out during the installation process.
- Next, use a damp cloth or sponge to wipe down the installation spot, removing any dirt or grime. Make sure to remove any soap scum or mineral deposits that may have built up over time.
- For stubborn stains or residue, you can use a mild cleaner or a mixture of vinegar and water. Simply apply the cleaner to a cloth or sponge and scrub the area gently until the stains or residue are removed.
- Once the installation spot is clean, dry it thoroughly with a clean towel or cloth. This will ensure that the tub spout adheres properly to the surface.
Ensuring Proper Measurements and Alignment
After cleaning and prepping the tub spout installation spot, it’s important to ensure proper measurements and alignment. This will help ensure that the tub spout fits correctly and functions properly. Here’s what you need to do:
- Measure the distance between the tub wall and the water pipe. This will help determine the length of the tub spout you need to install.
- Use a tape measure to accurately measure the distance, making sure to account for any obstructions or fixtures that may affect the installation.
- Once you have the measurements, compare them to the specifications of the tub spout you are installing. Ensure that the tub spout is the correct length and will fit properly in the installation spot.
- Additionally, make sure the tub spout is properly aligned with the water pipe. This will prevent any leaks or misalignment issues. You can use a level or a straight edge to ensure the tub spout is straight and aligned.
By properly cleaning and prepping the installation spot and ensuring proper measurements and alignment, you can ensure a successful installation of your tub spout. With these steps completed, you are now ready to move on to the next phase of the installation process.
Installing The New Tub Spout
Step-by-step instructions for a successful installation:
Installing a new tub spout is a quick and simple process that can significantly improve the functionality and aesthetics of your bathroom. Follow these step-by-step instructions to ensure a successful installation:
- Begin by removing the old tub spout. This can typically be done by twisting it counterclockwise or by loosening a small set screw located on the underside of the spout. Use a wrench or pliers if necessary, being careful not to damage the pipe or surrounding tiles.
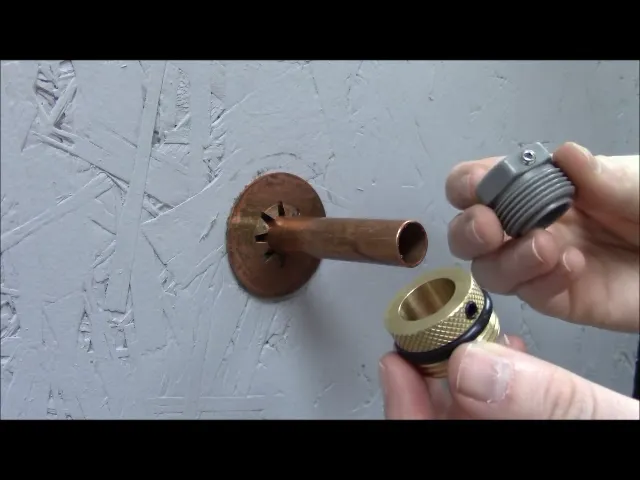
- Once the old spout is removed, clean the pipe threads and inspect for any damage or debris. Wipe off any dirt or residue that may have accumulated over time.
- Next, apply plumber’s tape to the exposed threads of the pipe. This helps create a secure and watertight seal when the new tub spout is installed. Wrap the tape around the threads in a clockwise direction, ensuring full coverage.
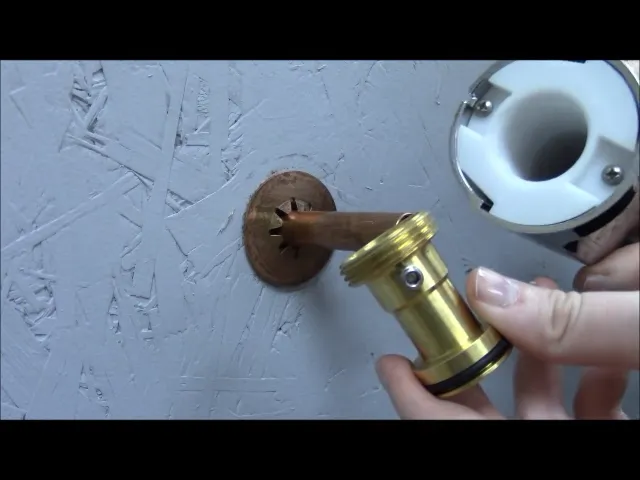
- Now it’s time to attach the new tub spout. Slide it onto the pipe and twist it clockwise until it is snugly in place. Make sure the spout is aligned properly and facing the desired direction.
- If your tub spout has a set screw, tighten it securely using an Allen wrench or screwdriver. This will help secure the spout in place and prevent it from coming loose over time.
- Finally, turn on the water supply to test the new tub spout for leaks. Check for any signs of water leakage around the connections and ensure the water flow is smooth and even.
Tips for ensuring a tight and secure fit:
Follow these tips to ensure a tight and secure fit for your new tub spout:
- When applying plumber’s tape, wrap it around the threads in a clockwise direction to ensure a proper seal.
- Ensure the spout is aligned correctly and facing the desired direction before tightening it in place.
- If your tub spout has a set screw, make sure it is tightened securely to prevent any movement or loosening of the spout.
- If you encounter any resistance or difficulties during the installation process, consult a professional plumber to avoid any potential damage or complications.
By following these step-by-step instructions and tips, you can successfully install a new tub spout and enjoy a functional and visually appealing bathroom. Whether you’re looking to upgrade your current spout or replace a worn-out one, this installation process is a DIY-friendly task that can be accomplished with just a few basic tools.
Testing And Troubleshooting
Once you have successfully installed your tub spout, it is essential to perform some tests and troubleshoot any potential issues that may arise. This step will ensure that your tub spout functions properly and there are no leaks. In this section, we will cover two important aspects: checking for leaks and proper functionality and troubleshooting common issues during the installation process.
Checking for leaks and proper functionality
To begin, it is crucial to check for any signs of leaks or improper functionality. Even a small leak can lead to water damage if left unchecked. Follow these steps to ensure the proper performance of your tub spout:
- Close the main water valve to your bathtub. This will prevent water flow during the testing process.
- Inspect the connection between the tub spout and the wall pipe. Look for any visible signs of leaks or cracks.
- Turn on the water supply to the bathtub, allowing water to flow through the spout. Check for any leaks around the connection area.
- If there are no visible leaks, remove the tub stopper and fill the tub with water. Observe if there are any leaks while the tub is filling.
- Once the tub is full, drain the water and check for leaks again. Leaks may occur when the water pressure changes, so this step is crucial in ensuring the tub spout functions properly in all scenarios.
If you notice any leaks during the testing process, it is essential to address them immediately. Tighten any loose connections and replace any damaged parts or seals that may be causing the leaks. Remember, a leak-free tub spout not only prevents water damage but also ensures efficient water usage.
Troubleshooting common issues during the installation process
During the installation process, you may encounter some common issues that can hinder the proper functioning of your tub spout. Here are some troubleshooting tips to help you overcome these problems:
- If you notice weak water flow or inconsistent water pressure, check for any blockages in the spout or the supply lines. Remove any debris or sediment that may be obstructing the water flow.
- In case the tub spout is not diverting water from the showerhead to the tub, ensure that the diverter mechanism is working correctly. Sometimes, the diverter valve may get stuck or become defective. In such cases, consider replacing the diverter mechanism.
- If the tub spout is loose or wobbly, check if the mounting hardware is properly tightened. Use a wrench or pliers to ensure a secure fit.
- In scenarios where there is no water flow from the tub spout, make sure the main water valve to the bathtub is fully open. Sometimes, the valve may not be fully turned on, restricting water flow.
- If you have followed the installation instructions thoroughly and are still experiencing issues, consider seeking professional help. Sometimes, a complex plumbing system or underlying problems may require expert assistance.
By following these testing and troubleshooting steps, you can ensure that your tub spout is properly installed and functions without any issues. Remember, regular maintenance and periodic checks will help prolong the lifespan of your tub spout and minimize potential problems in the long run.
Maintenance And Care Tips For Your Tub Spout
Proper maintenance and care of your tub spout can significantly extend its lifespan and ensure it continues working optimally. By following some best practices and implementing effective cleaning methods, you can keep your tub spout in excellent condition and enjoy a relaxing bathing experience every time. In this article, we will explore the best practices for keeping your tub spout in optimal condition, as well as cleaning methods and preventative measures you can take to extend its lifespan.
Best Practices for Keeping Your Tub Spout in Optimal Condition
To ensure your tub spout functions properly and lasts for years to come, it’s important to adhere to these best practices:
- Regularly inspect your tub spout for any signs of wear, damage, or leaks. If you notice any issues, address them promptly to prevent further damage.
- Check the water pressure and temperature regularly to avoid any sudden fluctuations that may impact the tub spout.
- Ensure proper installation of the tub spout by following the manufacturer’s instructions. This will help prevent any loose fittings or misalignments that could lead to leaks or inefficiency.
- Use a high-quality tub spout that is suitable for your specific tub and bathroom setup. A durable and well-designed spout will perform better and require less maintenance.
- Avoid hanging or placing heavy objects on the tub spout, as this can cause strain and damage over time.
Cleaning Methods and Preventative Measures to Extend Its Lifespan
To keep your tub spout clean and extend its lifespan, consider implementing the following cleaning methods:
- Regularly clean the tub spout: Use a mild soap or detergent and a soft cloth to gently clean the spout. Avoid using abrasive cleaning agents or tools that could scratch or damage the surface.
- Remove mineral deposits: Over time, mineral deposits can build up on the tub spout, affecting its performance. To remove these deposits, soak a cloth in white vinegar and wrap it around the spout, leaving it for a few hours. Then, scrub gently to remove the residue.
- Prevent future mineral buildup: Consider installing a water softener or using a filter to reduce the mineral content in your water. This can help minimize the accumulation of deposits on your tub spout.
- Inspect and replace worn-out parts: Regularly inspect the tub spout for any worn-out or damaged parts, such as the O-rings or gaskets. Replace these as needed to maintain the spout’s efficiency and prevent leaks.
By following these best practices and cleaning methods, you can ensure the longevity and optimal performance of your tub spout. So, take the time to care for your tub spout regularly, and you’ll enjoy many rejuvenating baths to come.
Frequently Asked Questions
How Do You Install A Slip Fit Tub Spout?
To install a slip fit tub spout, first remove the old spout by turning it counterclockwise. Clean and lubricate the pipe threads, then slide the new spout over the pipe and tighten it clockwise. Ensure a snug fit, and test the water flow for any leaks.
How Do I Know If My Tub Spout Is Slip-On Or Threaded?
To determine if your tub spout is slip-on or threaded, look at the connection where it attaches to the water pipe. If it slides on and is secured with a set screw, it is slip-on. If it screws onto the pipe, it is threaded.
How Far Should Tub Spout Hang Over Tub?
The tub spout should hang over the tub by about 4 to 6 inches to ensure proper water flow and to prevent splashing outside the tub.
How Far Below Valve Should Tub Spout Be?
Tub spouts should be about 4 inches below the valve.
Conclusion
Installing a tub spout is a straightforward process that can greatly improve your bathing experience. With just a few simple steps, you can effortlessly replace or upgrade your existing tub spout. By following the instructions provided and using the right tools, you can quickly install a tub spout without any hassle.
Remember to read the manufacturer’s instructions carefully to ensure a proper installation. Enjoy your newly installed tub spout and the satisfying showers it will provide.