
To install a garden tub, first, prepare the area by making sure the plumbing connections are in place and the access panel is easily accessible. Then, position the tub in the desired location, making sure it is level and secure.
Understanding Garden Tubs
Understanding Garden Tubs
Garden tubs are a luxurious addition to any bathroom, offering a spa-like experience right in the comfort of your own home. These oversized tubs are typically freestanding and designed to accommodate multiple bathers. If you’re considering installing a garden tub in your bathroom, it’s important to understand their features and the key considerations when choosing the right tub for your space.
Overview of Garden Tubs and their Features
Garden tubs are larger and deeper than standard bathtubs, providing ample space for soaking and relaxation. They often have a wide, oval-shaped design, allowing you to stretch out and fully immerse yourself in warm, soothing water. Additionally, garden tubs are typically made from high-quality materials such as acrylic or cast iron, ensuring their durability and longevity.
When it comes to features, garden tubs offer a range of luxurious options. Many tubs include whirlpool or jet systems, providing a therapeutic massage experience. These systems use jets to release a soothing stream of water or air bubbles, targeting your muscles and helping to relieve stress and tension.
Key Considerations when Choosing a Garden Tub
Selecting the right garden tub for your space requires careful consideration of several factors. Here are some key things to keep in mind:
1. Size: Measure your bathroom to determine the maximum dimensions your garden tub can accommodate. Consider not only the length and width but also the depth of the tub.
2. Style: Garden tubs come in various styles, from modern and sleek to more traditional designs. Choose a style that complements your bathroom decor and personal preferences.
3. Material: Consider the material of the tub, taking into account factors such as durability, ease of maintenance, and heat retention. Acrylic tubs are lightweight and easy to clean, while cast iron tubs are known for their exceptional heat retention.
4. Installation: Before purchasing a garden tub, assess the feasibility of installation in your bathroom. You’ll need to ensure that there is appropriate plumbing and enough space to maneuver the tub into place.
5. Budget: Set a budget for your garden tub project, considering the cost of the tub itself, as well as any installation or renovation expenses. Keep in mind that additional features such as whirlpool systems may increase the overall cost.
By understanding the features of garden tubs and considering important factors like size, style, material, installation, and budget, you can make an informed decision when choosing the perfect garden tub for your bathroom. With a garden tub in your home, you’ll be able to enjoy the ultimate relaxation experience whenever you desire.
Preparing For Installation
Before you start installing your garden tub, it’s crucial to adequately prepare for the project. Taking the time to measure the space and check the plumbing requirements will ensure a smooth installation process and prevent any unnecessary hiccups along the way. In this section, we will discuss two vital steps: measuring the space and checking for plumbing requirements.
Measuring the space
It’s essential to measure the space where you plan to install your garden tub to ensure that it fits perfectly. Doing so will help you determine whether any modifications or adjustments are needed. Here’s a step-by-step guide on how to measure the space:
- Clear the area: Remove any existing fixtures or objects that may hinder your measurement.
- Locate the ideal position: Identify the spot where you want to install your garden tub, keeping in mind factors such as accessibility and design aesthetics.
- Measure the length and width: Use a measuring tape to measure the length and width of the designated area. Write down these measurements for future reference.
- Consider clearance: Take note of any obstructions, such as walls or fixtures, that could affect the installation. Ensure that there is enough clearance for the tub to fit comfortably.
Checking for plumbing requirements
Another crucial step in preparing for the installation of your garden tub is to check the plumbing requirements. This includes ensuring that the necessary plumbing connections are in place and in good condition. Here are some tasks to undertake when checking the plumbing requirements:
- Inspect existing plumbing: Examine the current plumbing system to ensure that it meets the specifications for the garden tub installation. Check for leaks, damages, or any other issues that might need attention.
- Assess the water supply: Determine if your existing water supply can handle the additional demand of the garden tub. If necessary, consult a professional to make any necessary adjustments or upgrades.
- Examine drainage: Make sure that the drainage system in your bathroom can accommodate the garden tub. Verify that proper drainage is in place to prevent water buildup and potential damages.
- Consider the need for additional fixtures: Assess if you need to install additional fixtures, such as faucets or showerheads, to complement your garden tub. Plan accordingly and factor these requirements into your installation process.
By carefully measuring the space and checking the plumbing requirements beforehand, you’ll be well-prepared for a successful garden tub installation. These initial steps will set the foundation for a smooth and hassle-free process, ensuring that you can enjoy your beautiful garden tub without any unexpected surprises along the way.
Gathering Tools And Materials
Before you embark on installing a garden tub, it’s important to gather all the necessary tools and materials. By having everything you need at your disposal, you’ll ensure a seamless installation process. In this section, we’ll cover the essential tools and required materials for the project.
Essential tools for a seamless installation
Having the right tools will make your garden tub installation much easier. Here are the essential tools you’ll need:
- Adjustable wrench
- Drill
- Screwdriver set
- Measuring tape
- Pipe wrench
- Plumber’s tape
- Level
- Caulking gun
- Utility knife
- Tub surround adhesive
These tools will help you with tasks such as tightening fittings, drilling holes, measuring dimensions, leveling the tub, applying caulk, and more. Ensure you have these essentials on hand before starting your installation.
Required materials and supplies for the project
In addition to the tools, you’ll need specific materials and supplies to complete the garden tub installation. The following list covers everything you’ll require:
- Garden tub
- Tub surround
- Plumbing fittings
- Teflon tape
- Drain assembly
- Caulk
- Drywall screws
- Waterproofing membrane
- Construction adhesive
- Shims
These materials are crucial for ensuring a secure and watertight installation. The garden tub itself, tub surround, plumbing fittings, and drain assembly, among others, are essential components for a successful project. Don’t forget to gather all the necessary materials before getting started.
With the essential tools and required materials in hand, you are now ready to move forward with installing your garden tub. In the next section, we will cover the step-by-step process to ensure a professional installation.
Removing The Old Tub
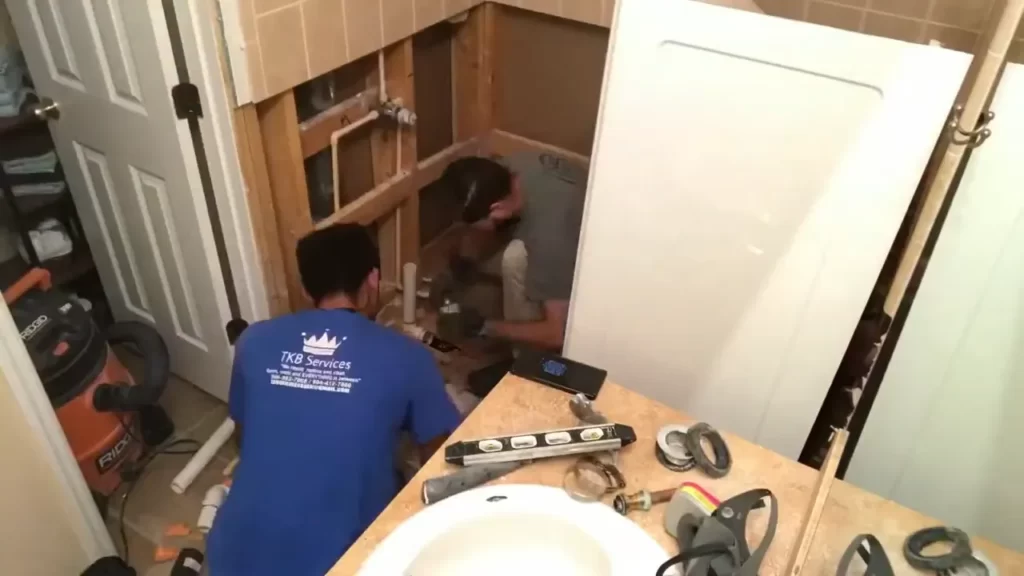
How to safely disconnect and remove the existing bathtub
When it comes to installing a garden tub, the first step is removing the old tub. This process requires careful disconnection of the existing bathtub and ensuring that it is safely removed from the bathroom.
To safely disconnect the old tub, here is a step-by-step guide:
- Turn off the water supply: Start by shutting off the water supply to the bathtub. Locate the water shut-off valve and turn it clockwise until the water flow stops.
- Remove the drain assembly: The next step is to remove the drain assembly. Using a wrench, loosen the drain by turning it counterclockwise, and then disconnect it from the plumbing below.
- Disconnect the water supply lines: Locate the hot and cold water supply lines connected to the tub. Use a wrench to loosen the nuts connecting the lines to the bathtub’s faucet. Once loosened, carefully disconnect the water supply lines.
- Disconnect the overflow drain: If your bathtub has an overflow drain, disconnect it from the plumbing beneath the tub. Use a wrench to loosen the overflow drain connection and remove it.
- Detach the tub from the walls: Before removing the tub, check if it is attached to the surrounding walls. If so, carefully detach it using a utility knife to cut through any caulking or adhesive. This will ensure a clean removal without causing damage to the walls.
- Enlist help: Removing a bathtub can be physically demanding and often requires additional hands. Enlist the help of a friend or family member to assist you in lifting and maneuvering the tub out of the bathroom.
Proper disposal of the old tub
Once the old tub is safely removed from the bathroom, it is essential to properly dispose of it. Improper disposal can harm the environment and may even be against local regulations. Here are some guidelines for disposing of your old tub:
- Check local regulations: Before disposal, check with your local waste management facility or municipality to ensure compliance with any specific regulations or guidelines for disposing of bulk items like bathtubs.
- Contact recycling centers: Research local recycling centers that may accept old tubs. Some recycling centers specialize in accepting and processing large items like bathtubs, ensuring they are recycled and repurposed rather than ending up in a landfill.
- Arrange for pickup or drop-off: Once you have identified a suitable recycling center, make arrangements for either their pickup service or drop-off at their facility. Follow their instructions for preparing the tub for disposal to ensure a smooth and responsible process.
- Consider donating: If the old tub is in good condition, you might also explore the option of donating it. Reach out to local charities or organizations that accept used building materials to see if they accept tub donations. This can provide a second life for the tub and benefit someone in need.
By following these steps and guidelines, you can safely disconnect and remove the old tub, ensuring responsible disposal. With the old tub out of the way, you’re one step closer to installing your brand new garden tub and transforming your bathroom into your own personal oasis.
Preparing The Site
Before installing a garden tub, it is crucial to properly prepare the site by clearing the area and making necessary adjustments to the bathroom layout. By following these steps, you can ensure a smooth and successful installation process.
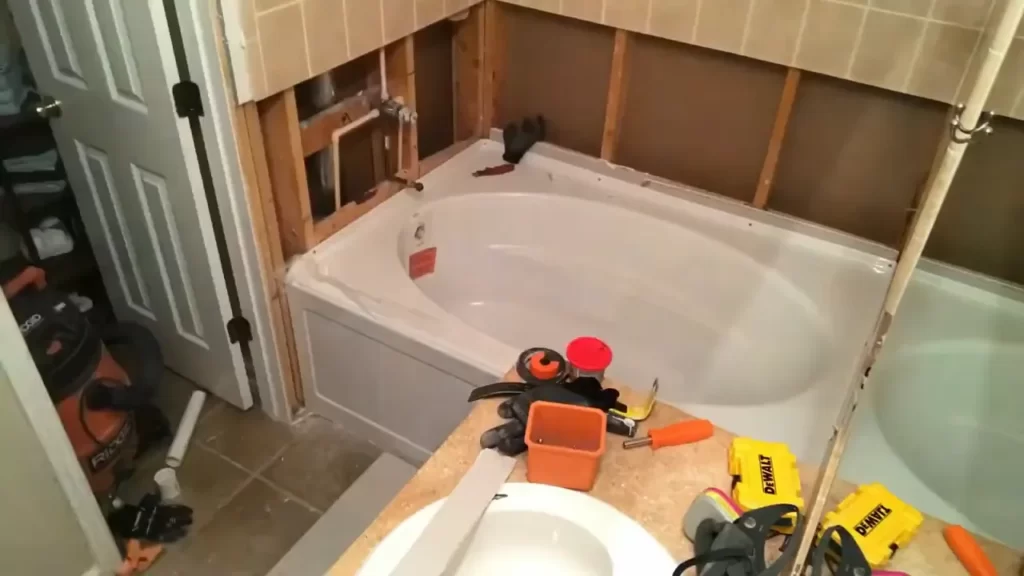
Clearing the area
The first step in preparing the site is to clear the area where the garden tub will be installed. Remove any existing fixtures or furniture that may be in the way, such as cabinets or shelving units. Make sure to also clear out any debris or clutter to create a clean and open space for the tub installation.
Additionally, it is important to measure the dimensions of the garden tub and ensure that the cleared area is large enough to accommodate it. Take precise measurements and compare them to the tub’s specifications to ensure a proper fit.
Making necessary adjustments to the bathroom layout
After clearing the area, it may be necessary to make adjustments to the bathroom layout to accommodate the garden tub. This may involve moving existing plumbing connections or adjusting the position of other fixtures. It is vital to consult a professional plumber or contractor to ensure that any necessary adjustments are done correctly and according to local building codes.
When it comes to adjusting the bathroom layout, it is important to create a detailed plan before starting any work. Consider factors such as the placement of the tub in relation to other fixtures, the location of plumbing connections, and the overall aesthetics of the bathroom. By having a well-thought-out plan in place, you can minimize the chances of encountering issues during the installation process.
Moreover, it is essential to consider the structural integrity of the floor. Garden tubs can be quite heavy when filled with water, so it is crucial to ensure that the floor can support the weight. If needed, additional supports can be installed to reinforce the floor and prevent any potential damage.
In conclusion, preparing the site for a garden tub installation is a crucial step in ensuring a successful and visually appealing outcome. By clearing the area and making necessary adjustments to the bathroom layout, you can create a suitable space for your garden tub. Remember to consult professionals if needed and to carefully plan out the installation process to achieve the desired results.
Installing The Garden Tub
Installing a garden tub can be a great addition to any backyard or outdoor space. Not only does it add a touch of luxury and relaxation, but it also provides a cozy spot to unwind and enjoy the beauty of nature. If you’re thinking of installing a garden tub in your own backyard, follow this step-by-step guide to ensure a seamless and secure installation.
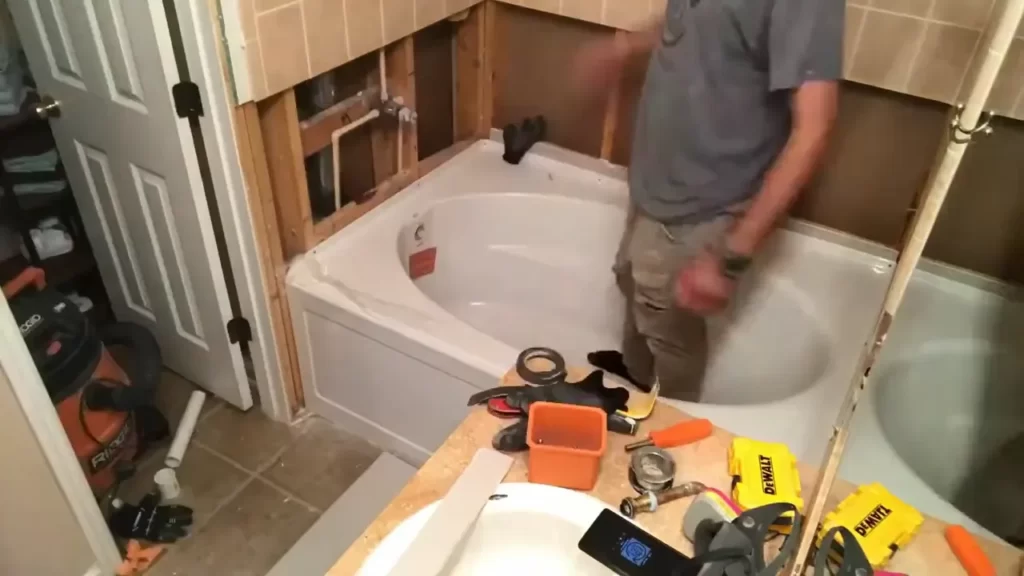
Step-by-step guide for placing and securing the garden tub
- First, choose a suitable location for your garden tub. Ensure that the area is level and free from any obstructions.
- Measure the dimensions of the tub and mark the layout on the ground using stakes or spray paint.
- Prepare the ground by removing any grass, rocks, or debris. This will provide a clean base for the tub and prevent any potential damage.
- Next, dig a hole according to the dimensions of the tub. The hole should be slightly larger than the tub to allow room for placement and leveling.
- Carefully lower the garden tub into the hole, ensuring that it is centered and level. Use a spirit level to check the alignment from all sides.
- Secure the tub in place by backfilling the hole with a mixture of soil and gravel. This will provide stability and prevent the tub from shifting.
- Once the tub is securely in place, create a border around it using pavers or decorative stones. This will enhance the aesthetic appeal of the tub and create a cohesive look.
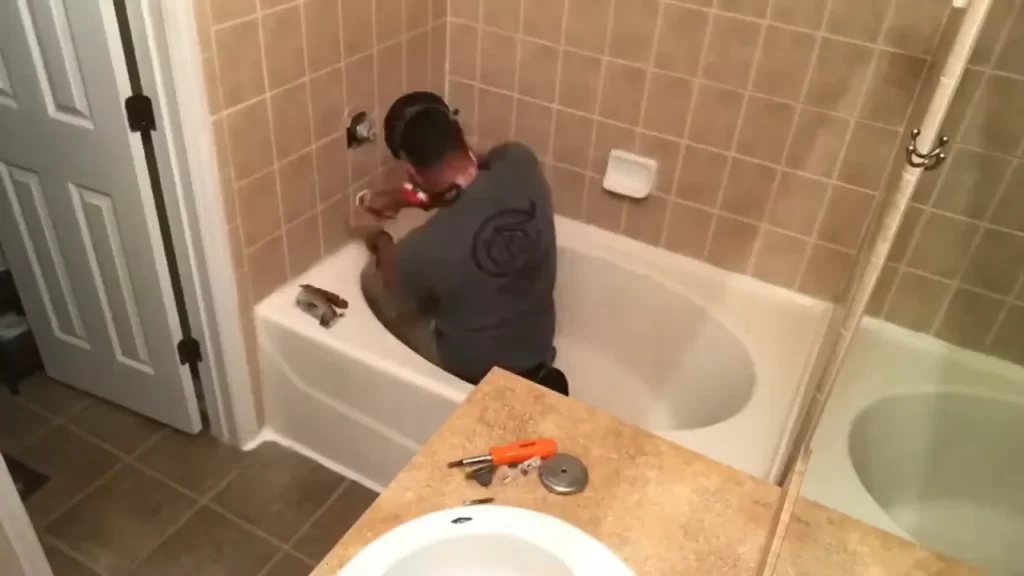
Connecting the plumbing fixtures and ensuring proper water flow
Now that the garden tub is in position and secured, it’s time to connect the plumbing fixtures to ensure proper water flow. Follow these steps:
- Start by connecting the water supply lines to the tub. Ensure that the connections are tight and secure.
- Install a drain system for the tub to prevent water buildup and potential damage. Make sure the drain is positioned correctly for efficient water flow.
- Check for any leaks or drips by turning on the water supply. Repair or replace any faulty connections or fixtures.
- Once you have confirmed that the plumbing is working properly, pour water into the tub to test the water flow and drainage.
- Adjust the water flow and temperature if necessary, according to your preference.
Now that your garden tub is installed and the plumbing fixtures are connected, you’re ready to enjoy a relaxing soak in the comfort of your own backyard. Remember to regularly maintain and clean your tub to ensure its longevity and proper functioning.
Sealing And Finishing Touches
Proper sealing and finishing touches are essential to ensure that your garden tub installation is not only functional but also visually appealing. In this section, we will guide you on how to apply proper seals and caulking around the tub, as well as adding decorative elements and final touches to enhance its appearance. Let’s dive in!
Applying Proper Seals and Caulking Around the Tub
One of the crucial steps in installing a garden tub is to apply proper seals and caulking to prevent water leakage and damage. Follow these steps to ensure a watertight seal:
- Preparation: Before applying any seals or caulking, make sure the area around the tub is clean and dry. Remove any debris, dirt, or old caulking.
- Selecting the Right Sealant: Choose a high-quality silicone-based sealant that is specifically designed for bathroom and wet environments. This type of sealant offers excellent adhesion and durability.
- Applying the Sealant: Carefully apply a continuous bead of sealant along the joint between the tub and the surrounding tiles or walls. Use a caulking gun for precise application.
- Smoothing the Sealant: Use a wet finger or a caulking smoothing tool to smooth out the sealant, ensuring a neat and clean finish.
- Drying Time: Allow the sealant to dry according to the manufacturer’s instructions. Avoid using the tub until the sealant is fully cured to achieve optimal results.
Adding Decorative Elements and Final Touches
Once you have ensured a proper seal around the garden tub, it’s time to focus on enhancing its aesthetic appeal. Here are some decorative elements and final touches you can add:
- Tile Surround: Consider adding a tile surround to the walls around the tub for a polished and luxurious look. Choose tiles that complement the overall style of your bathroom.
- Accessories: Incorporate decorative accessories such as soap dispensers, candles, or plants to personalize your garden tub area and create a relaxing ambiance.
- Lighting: Install appropriate lighting fixtures or consider adding LED strip lights to create a warm and inviting atmosphere around the tub.
- Towel Bars and Hooks: Install towel bars and hooks near the tub to keep towels and robes within easy reach. Opt for stylish options that match your bathroom’s overall design.
- Bathmat or Rug: Place a soft and absorbent bathmat or rug near the tub to add comfort and prevent slipping.
By following these steps and incorporating these finishing touches, you can transform your garden tub into a beautiful and relaxing oasis within your bathroom. Enjoy the soothing and rejuvenating experience it brings!
Testing And Checking For Leaks
Important tests to ensure a properly functioning garden tub
Before completing the installation of your garden tub, it is crucial to conduct a series of tests to ensure it functions properly. This step is essential to prevent any potential leaks or issues that may arise later on. By following these important tests, you can have peace of mind knowing that your garden tub is installed correctly and will provide a relaxing and enjoyable experience.
- Fill test: The first test you should perform is the fill test. Simply fill the tub with water and check for any leaks around the drain or the sides. This test will help you identify any potential issues with the tub’s drainage system.
- Overflow test: After filling the tub, it is important to check the overflow drain. Fill the tub with water to a level just below the overflow drain. Observe if water is overflowing or leaking from the overflow drain. If you notice any leaks, it may indicate a problem with the overflow drain, and it should be addressed before completing the installation.
- Jet test: If your garden tub is equipped with jets, it is crucial to test them as well. Turn on the jets and observe if there are any leaks or abnormal noises. Run the jets for a few minutes to ensure they are functioning properly. Address any issues immediately to prevent further complications.
- Drainage test: To check if the drainage system is functioning effectively, drain the tub completely and observe if the water flows out smoothly without any obstructions. Any slow drainage or pooling water could indicate a blocked or faulty drainage system that needs attention.
How to identify and fix any potential leaks or issues
If during the testing phase, you identify any leaks or issues, it is vital to take immediate action to prevent further damage. Here are the necessary steps to follow:
- Identify the source: Carefully inspect the area where the leak is occurring and try to determine its source. It could be anything from a damaged pipe, loose connection, or a faulty seal.
- Fixing minor leaks: If the leak is minor, you can try fixing it yourself. Use plumber’s tape or sealant to seal any small leaks around the pipe connections or drain. Ensure that all connections are tight and secure.
- Calling a professional: If the leak or issue is more significant and beyond your expertise, it is best to call a professional plumber. They have the skills and knowledge to diagnose the problem accurately and provide a lasting solution.
- Regular maintenance: To prevent future leaks or issues, it is essential to perform regular maintenance on your garden tub. Inspect the tub’s components for any signs of wear or damage, such as cracked seals or loose connections, and address them promptly.
By conducting thorough testing and promptly addressing any leaks or issues, you can ensure that your garden tub installation is successful and enjoy many relaxing soaks in your new oasis. Remember, prevention is key when it comes to maintaining the longevity and functionality of your garden tub.
Maintenance And Care Tips
Tips for Cleaning and Maintaining Your Garden Tub
Maintaining and cleaning your garden tub is crucial to ensure its longevity and performance. Here are some useful tips to keep your garden tub in great condition:
Troubleshooting Common Problems and Addressing Them Promptly
Even with proper maintenance, your garden tub may encounter some common problems. It’s important to identify and address these issues promptly to avoid further damage. Here are some common problems you may face and how to tackle them:
Leaking Faucets
Leaking faucets can waste water and result in water damage if not addressed promptly. Here’s what you can do to fix a leaking faucet:
- Turn off the water supply to the tub.
- Inspect the faucet for any loose connections or worn-out parts.
- Replace any faulty parts, such as O-rings or washers.
- Turn the water supply back on and check if the leak persists. If it does, you may need to consult a professional plumber.
Clogged Drains
A clogged drain can lead to water backup and inconvenience. To unclog your garden tub drain, follow these steps:
- Use a plunger to create suction and dislodge the blockage.
- If the plunger doesn’t work, try using a drain snake to remove the clog manually.
- Alternatively, you can make a DIY drain cleaner by mixing baking soda and vinegar. Pour this mixture down the drain and let it sit for about 30 minutes before flushing with hot water.
- If the clog persists, it’s best to seek professional assistance to prevent further damage.
Stained Surface
Over time, your garden tub’s surface may develop stains that can be unsightly. Here’s how you can remove stains from your garden tub:
- Mix baking soda with water to form a paste.
- Apply the paste to the stained area and let it sit for a few minutes.
- Gently scrub the surface using a soft brush or sponge.
- Rinse the area thoroughly with water.
- For stubborn stains, you can use a mild abrasive cleaner, but be cautious not to damage the tub’s surface.
By following these maintenance and care tips, you can keep your garden tub in excellent condition for years to come. Regular cleaning and prompt troubleshooting will help you prevent major issues and ensure a relaxing bath experience every time.
Final Thoughts
Recap of key steps and considerations for a successful garden tub installation
Installing a garden tub can be a rewarding project that adds both beauty and relaxation to your outdoor space. However, it’s important to follow the proper steps and consider certain factors to ensure a successful installation. Here is a recap of the key steps and considerations:
- Choose the right location: Before installing a garden tub, carefully select the location where you want it to be placed. Consider factors such as accessibility, privacy, and the overall aesthetics of your outdoor area.
- Preparation: Prepare the area by clearing it of any debris, rocks, or vegetation. Level the ground and ensure a stable surface for the tub to rest on.
- Measurements and digging: Take precise measurements of the garden tub and mark the area where it will be installed. Dig a hole according to the dimensions, ensuring it is deep enough to accommodate the tub.
- Foundation: Create a solid foundation for the tub by adding a layer of gravel to the bottom of the hole. This will provide drainage and prevent water accumulation.
- Tub placement: Carefully lower the garden tub into the prepared hole, ensuring it is level and centered. Make any necessary adjustments or additions to secure the tub in place.
- Connect plumbing and electrical: If your garden tub includes plumbing or electrical components, hire a professional to connect them properly. This will ensure safety and functionality.
- Backfilling and finishing touches: Fill the gaps around the garden tub with soil or gravel, ensuring it is compacted to provide stability. Add any desired finishing touches, such as landscaping or paving around the tub, to enhance its appearance.
Highlighting the benefits of a professionally installed garden tub
While installing a garden tub yourself can be a rewarding DIY project, there are several benefits to having it professionally installed:
- Expertise: Hiring a professional ensures that your garden tub is installed correctly and safely. Professionals have the necessary knowledge and experience to handle the installation process efficiently.
- Time-saving: Installing a garden tub can be time-consuming, especially if you’re not familiar with the process. By hiring a professional, you can save valuable time and focus on other tasks or activities.
- Quality assurance: Professionals are trained to deliver high-quality workmanship. They have access to the right tools, materials, and techniques to ensure that your garden tub is installed to the highest standard.
- Warranty: Many professional installers offer warranties that cover their work. This gives you peace of mind knowing that if any issues arise after the installation, the professionals will take care of it.
- Certifications and permits: Depending on local regulations, certain installations may require permits or certifications. Hiring a professional ensures that all necessary paperwork is taken care of, avoiding any legal or compliance issues.
So, if you’re considering a garden tub installation, it’s worth considering the benefits of hiring a professional. They can provide you with a hassle-free and expertly executed installation that will enhance the beauty and functionality of your outdoor space.
Frequently Asked Questions
What Is The Difference Between A Garden Tub And A Soaking Tub?
A garden tub is a larger, decorative tub, often meant for relaxation and luxury, while a soaking tub is designed for the purpose of deep soaking in water.
Do You Have To Put Concrete Under A Tub?
Concrete is not necessary under a tub, but it is recommended to provide a solid and level base. This helps to support the weight of the tub and prevent any movement or damage. It also creates a sturdy and durable foundation for the tub installation.
What Do You Put Under A Tub When Installing?
When installing a tub, you can put a mortar bed or a foam or rubber pad underneath. This helps to provide support and stability for the tub.
How Do You Install A Corner Bathtub?
To install a corner bathtub, follow these steps: 1. Measure and mark the bathtub’s position on the floor. 2. Prepare the plumbing and drain connections. 3. Position the bathtub in the designated area. 4. Connect the plumbing and drain pipes.
5. Secure the bathtub to the wall and floor.
Conclusion
Installing a garden tub can be a great addition to your home, providing a luxurious and relaxing space. By following the steps outlined in this post, you can successfully complete the installation process. Remember to consider the necessary precautions and consult with professionals if needed.
With a garden tub in place, you can enjoy a serene oasis right in your backyard. So, go ahead and enhance your outdoor living experience with a beautiful garden tub installation.