
To install a walk-in shower kit, first, measure and mark the area for the shower base. Then, assemble and install the base according to the manufacturer’s instructions.
1. Planning The Installation
Before diving into the installation process of a walk-in shower kit, it is important to carefully plan your project. Proper planning will ensure a smooth installation process and that the end result meets your expectations. This section will guide you through the essential steps to consider during the planning phase of your walk-in shower kit installation.
Deciding on the Location
One of the first decisions you need to make is where to install your walk-in shower kit. Consider the following factors to help you determine the best location:
- Accessibility: Choose a location that allows for easy entry and exit, especially if the shower is intended for individuals with mobility issues.
- Space: Assess the available space in your bathroom and determine where the walk-in shower kit will fit most comfortably. Take into account the footprint of the shower kit, ensuring that it doesn’t interfere with other bathroom fixtures.
- Plumbing: Consider the existing plumbing connections and the proximity to the main drain lines. Choosing a location that is close to the existing plumbing will save you time and money during the installation process.
Measuring the Space
Accurate measurements are crucial to ensure a proper fit for the walk-in shower kit. Follow these steps to measure the space effectively:
- Measure the width, height, and depth of the area where the shower kit will be installed. Use a tape measure to record these dimensions accurately.
- Take note of any obstacles or obstructions that may affect the installation, such as electrical outlets or windows.
- Consider the clearance requirements for the walk-in shower kit, including door swing and space needed for comfortable movement within the shower.
- Perform a final check of your measurements to ensure their accuracy before moving on to the next planning step.
Choosing the Right Walk-In Shower Kit
Selecting the appropriate walk-in shower kit is crucial for a successful installation. Here are some points to consider when choosing the right kit:
- Size and Style: Ensure the dimensions of the kit align with the measurements taken earlier. Additionally, choose a style that complements the overall aesthetics of your bathroom.
- Materials: Look for durable, high-quality materials that will withstand the moisture and everyday use of the shower. Common options include acrylic, fiberglass, and tempered glass.
- Add-on Features: Consider any additional features you desire, such as built-in seating, grab bars, or showerheads with adjustable settings. These features can enhance the functionality and convenience of your walk-in shower.
- Budget: Set a realistic budget for your walk-in shower kit and explore different options within your price range. Remember to consider not only the initial cost but also the long-term durability and maintenance requirements.
By carefully considering these planning factors, you can prepare yourself for a successful walk-in shower kit installation. The next sections will walk you through the remaining steps, ensuring a smooth journey towards a beautiful and functional walk-in shower.
2. Gathering The Necessary Tools And Materials
Before you embark on the exciting journey of installing a walk-in shower kit, it’s essential to gather all the necessary tools and materials to ensure a smooth and efficient installation process. By having everything you need at your fingertips, you can save time and avoid any unnecessary trips to the hardware store.
Tools Needed for the Installation
Here are the tools you will need to successfully complete the installation of your walk-in shower kit:
| Tools | Description |
|---|---|
| Measuring tape | To accurately measure the dimensions of your bathroom space |
| Marker or pencil | To mark the areas where you will be installing the shower kit |
| Level | To ensure that the shower walls and floor are perfectly level |
| Drill | For drilling holes and attaching the necessary fixtures |
| Screwdriver | To tighten screws and bolts during the installation process |
| Hacksaw or reciprocating saw | To cut through any necessary materials or pipes |
| Trowel | For applying adhesive and grout during the installation |
Materials Required for the Installation
In addition to the tools, you will also need several materials to complete the installation of your walk-in shower kit:
- Shower kit: This typically includes the shower base, walls, and any necessary fixtures such as showerheads or handles. Ensure that you have chosen a kit that fits your bathroom space.
- Adhesive: You will need a strong adhesive to secure the shower walls and base in place.
- Grout: Grout is used to fill in the gaps between tiles, ensuring a waterproof seal.
- Waterproofing membrane: To protect the underlying structure from water damage, it’s important to use a waterproofing membrane before installing the shower kit.
- Screws and bolts: These will be used to secure the shower kit components together.
- Pipe fittings: If your walk-in shower kit requires any plumbing connections, you will need the appropriate pipe fittings.
- Sealant: To prevent leaks, you will need a high-quality sealant to seal the edges and corners of the shower kit.
By ensuring that you have all the necessary tools and materials before you begin the installation, you can ensure a successful and hassle-free experience. Now that you’ve gathered everything you need, it’s time to move on to the next step: preparing your bathroom for installation.
3. Preparing The Bathroom For Installation
3. Preparing the Bathroom for Installation
Before you can install your new walk-in shower kit, it’s important to prepare your bathroom properly. This involves clearing the area, removing the old shower or bathtub, repairing any damaged surfaces, and installing necessary plumbing. By taking these steps, you’ll ensure a smooth and successful installation process. Let’s dive into each task that needs to be completed in detail.
Clearing the Area
The first step in preparing your bathroom for the installation of a walk-in shower kit is to clear the area. Remove any items or furniture that might be in the way, such as shower curtains, bath mats, toiletries, and towels. This will provide you with the space you need to work efficiently and prevent any damage to your belongings. It’s also a good idea to cover any remaining fixtures or items with a plastic sheet or drop cloth to protect them from dust or debris during the installation process.
Removing the Old Shower or Bathtub
Once the area is cleared, it’s time to remove the old shower or bathtub. Start by turning off the water supply to the bathroom. Then, carefully disconnect the plumbing fixtures, such as the showerhead and faucets. If you’re removing a bathtub, you’ll need to disconnect the drain as well. Use appropriate tools, such as a wrench or pliers, to carefully remove these fixtures. Be sure to follow the manufacturer’s instructions and exercise caution to avoid any damage or injury during the process. Once the fixtures are disconnected, carefully remove the old shower or bathtub from the bathroom. You may need assistance or special equipment for this step, especially if the old unit is heavy or difficult to maneuver.
Repairing Any Damaged Surfaces
With the old shower or bathtub removed, it’s time to inspect the walls, floor, and any other surfaces for damage. Look for cracks, holes, or any other signs of wear and tear. If you identify any areas in need of repair, this is the time to fix them. Use a suitable repair material, such as spackling paste or waterproof sealant, to fill in cracks or holes. Smooth the surface with a putty knife, sandpaper, or any other appropriate tools. Allow the repaired areas to dry thoroughly before proceeding with the installation.
Installing Necessary Plumbing
Once the surfaces are repaired, it’s time to install the necessary plumbing for your walk-in shower kit. This may involve connecting new pipes, shower valves, or other fixtures. Refer to the manufacturer’s instructions for your specific kit to ensure the proper installation of the plumbing components. It’s important to use high-quality materials and follow standard plumbing practices to prevent leaks or other plumbing issues down the line. If you’re not confident in your plumbing skills, it’s recommended to hire a professional plumber to ensure the job is done correctly.
Now that you have completed the necessary preparations, you’re ready to move on to the next stage of installing your walk-in shower kit. Stay tuned for the next section of this blog post, where we will guide you through the actual installation process, step by step.
4. Installing The Base And Walls
Once you have prepared the area and gathered all the necessary tools and materials for your walk-in shower, it’s time to move on to the installation process. This involves installing the base and walls, which are key elements of your shower kit. Follow these steps to ensure a successful installation:
Preparing the Base
Before you start installing the base, make sure the floor is clean and free from any debris. This will provide a stable foundation for your shower kit. Additionally, check the subfloor for any structural issues and address them if needed. Once you have a solid and clean surface, you can proceed with the following steps:
- Positioning and Leveling the Base
The next step is to position and level the base of your walk-in shower kit. This is crucial to ensure proper drainage and stability. Follow these steps:
- Place the shower base in the desired position on the cleaned floor.
- Use a level to check if the base is level from all directions. Adjust as necessary by shimming the base.
- Once the base is level, mark the position of the drain on the subfloor.
- Drill a hole for the drain using the appropriate size drill bit.
- Attach the drain to the base according to the manufacturer’s instructions.
- Make sure the drain is properly sealed to prevent any leaks.
Attaching the Walls to the Base
Now that the base is securely in place, you can move on to attaching the walls. This step will complete the structure of your walk-in shower kit. Follow these steps for a successful installation:
- Fit the first wall panel into position, ensuring that it is aligned with the base and level. Use a level to double-check.
- Secure the wall panel to the studs using screws or adhesive, following the manufacturer’s instructions.
- Repeat the process for the remaining wall panels, making sure they are properly aligned and level.
- Use a sealant to fill any gaps between the wall panels and the base, as well as between the panels themselves.
- Allow the sealant to dry completely before moving on to the next steps of your walk-in shower installation.
By following these steps for installing the base and walls of your walk-in shower kit, you are well on your way to creating a functional and stylish shower space in your bathroom. Make sure to double-check all the connections, levelness, and sealing to ensure a sturdy and leak-free installation. In the next section, we will discuss the final steps of the installation process, including adding the showerhead, faucets, and finishing touches.
5. Installing The Plumbing Fixtures And Accessories
Now that you have laid the foundation, framed the walls, and waterproofed the area, it’s time to move on to the exciting part of installing the plumbing fixtures and accessories for your walk-in shower kit. This step involves connecting the shower head, installing the faucet and handles, and mounting the shower accessories to complete your shower oasis. Let’s dive in!
Connecting the Shower Head
Connecting the shower head is a relatively straightforward process that will bring you one step closer to enjoying a refreshing shower experience. Here’s a step-by-step guide:
- Start by wrapping plumber’s tape around the threaded end of the shower arm to ensure a tight seal.
- Gently screw the shower arm onto the threaded pipe in the wall, taking care not to overtighten.
- Attach the shower head to the other end of the shower arm, making sure it is secured firmly.
With the shower head successfully connected, you can now move on to installing the faucet and handles.
Installing the Faucet and Handles
The faucet and handles are essential components of your walk-in shower, as they allow you to control the water temperature and pressure. Follow these steps to complete this installation:
- Position the faucet in the desired location on the shower wall, ensuring it aligns with the pre-drilled holes.
- Insert the faucet handles into the pre-drilled holes, making sure they fit snugly.
- Tighten the nuts or screws provided with the faucet to secure it in place.
- Check for any leaks by turning on the water supply and testing the faucet.
Now that you have successfully installed the faucet and handles, it’s time to bring some final touches to your walk-in shower by mounting the shower accessories.
Mounting the Shower Accessories
Mounting the shower accessories, such as towel bars, soap dishes, and shelves, not only enhances the functionality of your walk-in shower but also adds to its aesthetic appeal. Here’s how you can do it:
- Choose the desired location for each accessory and mark it on the shower wall.
- Drill pilot holes at the marked spots using a drill bit suitable for your wall material.
- Securely attach the mounting brackets of each accessory to the pilot holes using screws or adhesive, following the manufacturer’s instructions.
- Attach the accessory to the corresponding mounting bracket, ensuring it is firmly in place.
Congratulations! You have successfully completed all the steps to install the plumbing fixtures and accessories for your walk-in shower kit. Now you can sit back, relax, and enjoy the luxurious bathing experience that awaits you!
6. Sealing And Waterproofing The Shower
One of the most crucial steps in installing a walk-in shower kit is the proper sealing and waterproofing of the shower area. A well-sealed and waterproof shower not only prevents water damage but also ensures the longevity of your shower installation. In this section, we will discuss the essential tasks involved in achieving a watertight seal for your walk-in shower.
Applying Sealant to the Base and Walls
To begin the sealing process, it is important to apply a high-quality sealant to both the shower base and walls. The sealant acts as a barrier, preventing any water from seeping through the gaps and causing damage.
Start by thoroughly cleaning the base and walls of any dirt, debris, or old sealant. Ensure that the surfaces are completely dry before proceeding. Apply the sealant in a continuous line along the joints between the shower base and walls. Use a caulking gun for precise and even application. Be careful not to leave any gaps or air pockets.
Smooth the sealant with a caulk smoothing tool or your finger to create a neat and uniform seal. Wipe away any excess sealant using a damp cloth. Allow the sealant to cure according to the manufacturer’s instructions before proceeding to the next step.
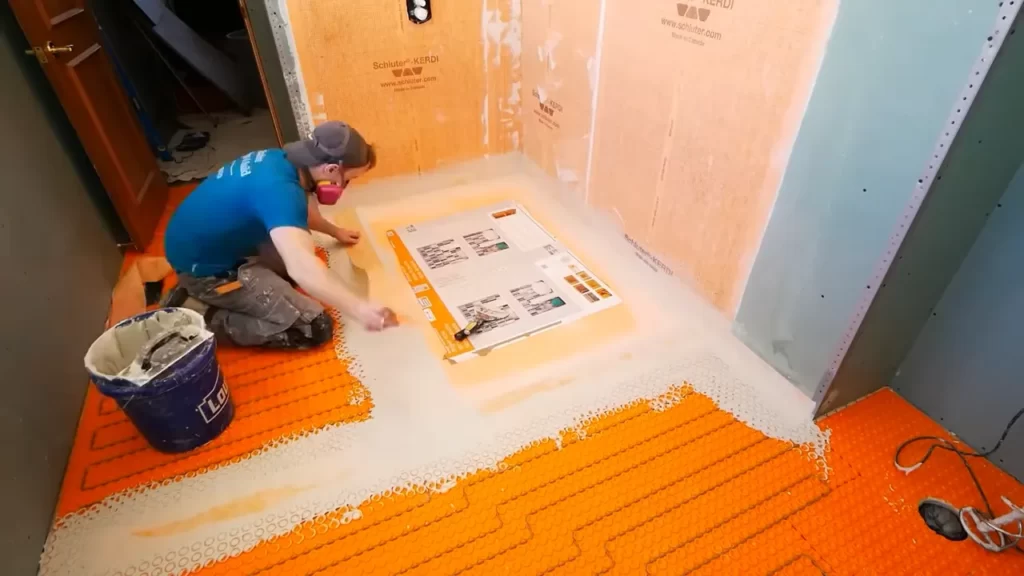
Adding a Waterproof Membrane
In addition to sealant, adding a waterproof membrane provides an extra layer of protection against water penetration. This membrane prevents any moisture from reaching the underlying structure of the shower, ensuring its durability over time.
There are various types of waterproofing membranes available, such as liquid membranes or sheet membranes. Follow the manufacturer’s instructions to apply the chosen membrane to the shower walls. Make sure to cover the entire surface area, including corners and joints, to create a watertight seal.
Smooth out any wrinkles or bubbles in the membrane to ensure proper adhesion. Allow the membrane to dry completely before moving on to the next step.
Ensuring Proper Drainage
Another critical aspect of waterproofing your walk-in shower is ensuring proper drainage. Improper drainage can lead to water pooling in the shower area, which can cause damage and mold growth.
Check that the drain is properly installed and functioning correctly. Ensure that the drain cover is securely in place and that there are no gaps or leaks around it. Additionally, ensure that the slope of the shower floor allows water to flow towards the drain efficiently.
Regularly clean the drain to prevent any blockages that may impede the flow of water. Consider using a hair catcher or strainer to prevent hair and debris from clogging the drain pipe.
By following these steps in sealing and waterproofing your walk-in shower, you can enjoy a comfortable and worry-free showering experience for years to come. A properly sealed and waterproofed shower not only protects your investment but also provides peace of mind.
7. Testing And Adjusting The Shower
Once you have completed the installation of your walk-in shower kit, the next step is to test and adjust the shower to ensure it is functioning properly. This involves checking for leaks, adjusting the water temperature, and testing the shower’s functionality. By taking the time to thoroughly test and make any necessary adjustments, you can enjoy a relaxing and rejuvenating shower experience.
Checking for Leaks
Before you start enjoying your new walk-in shower, it’s essential to check for any leaks. Even a small leak can lead to water damage and mold growth, so it’s crucial to address any leaks immediately. To check for leaks, follow these steps:
- Inspect the area around the shower for any signs of water, such as wet spots or mold.
- Run the shower at full pressure for a few minutes while closely examining the showerhead, faucets, and connections for any drips or leaks.
- If you notice any leaks, tighten the connections with an adjustable wrench or call a plumber if needed.
- Repeat the process until all leaks are resolved.
Adjusting the Water Temperature
Having the appropriate water temperature is essential for a comfortable and enjoyable shower experience. Follow these steps to adjust the water temperature:
- Locate the temperature control valve on your walk-in shower kit.
- Turn the valve to the “hot” position and record the water temperature.
- Turn the valve to the “cold” position and record the water temperature.
- Gradually adjust the valve to find the desired water temperature.
- Take a test shower to ensure the water temperature remains consistent throughout your shower.
Testing the Shower’s Functionality
Lastly, it’s important to test the functionality of your walk-in shower to ensure everything is working correctly. Here’s a simple checklist to help you test the shower’s functionality:
- Turn on the shower and check if the water pressure is adequate.
- Test the showerhead settings (if applicable) to ensure all functions, such as adjustable spray patterns, are working correctly.
- Check the drain for any clogs or slow drainage.
- Ensure that the shower doors or curtains are closing properly and do not leak.
- Inspect the bathroom for any signs of excess moisture or water accumulation.
By following these steps and thoroughly testing and adjusting your walk-in shower, you can ensure that it functions properly and provides the ultimate showering experience. So go ahead, step into your new shower, and enjoy the relaxing and rejuvenating benefits it has to offer!
8. Cleaning And Final Touches
Now that you have successfully installed your walk-in shower kit, it’s time to give it a thorough cleaning and add those final touches that will make your shower truly shine. In this section, we will guide you through the steps of cleaning the shower, adding caulk and grout, and installing glass doors or curtains.
Cleaning the Shower
To keep your walk-in shower looking fresh and clean, regular cleaning is essential. Follow these simple steps to ensure your shower stays spotless:
- Mix a solution of warm water and mild liquid soap.
- Dampen a soft sponge or cloth with the solution.
- Wipe down all surfaces of the shower, paying special attention to soap scum and any areas with grime buildup.
- Rinse the sponge or cloth thoroughly and wipe down the shower again to remove any soap residue.
- Dry the surfaces with a clean, lint-free cloth to prevent water spots.
- For stubborn stains or mineral deposits, you can use a non-abrasive cleaner specifically designed for showers. Follow the instructions on the cleaner carefully and rinse well afterwards.
Adding Caulk and Grout
Caulk and grout not only enhance the appearance of your walk-in shower but also provide a watertight seal to prevent leaks. Follow these steps for a smooth caulk and grout application:
- Carefully remove any old caulk or grout using a putty knife or utility knife.
- Apply a bead of caulk along the joint between the shower base or walls and the tiles. Smooth the caulk with your finger or a caulking tool for a neat finish.
- Allow the caulk to dry completely according to the manufacturer’s instructions.
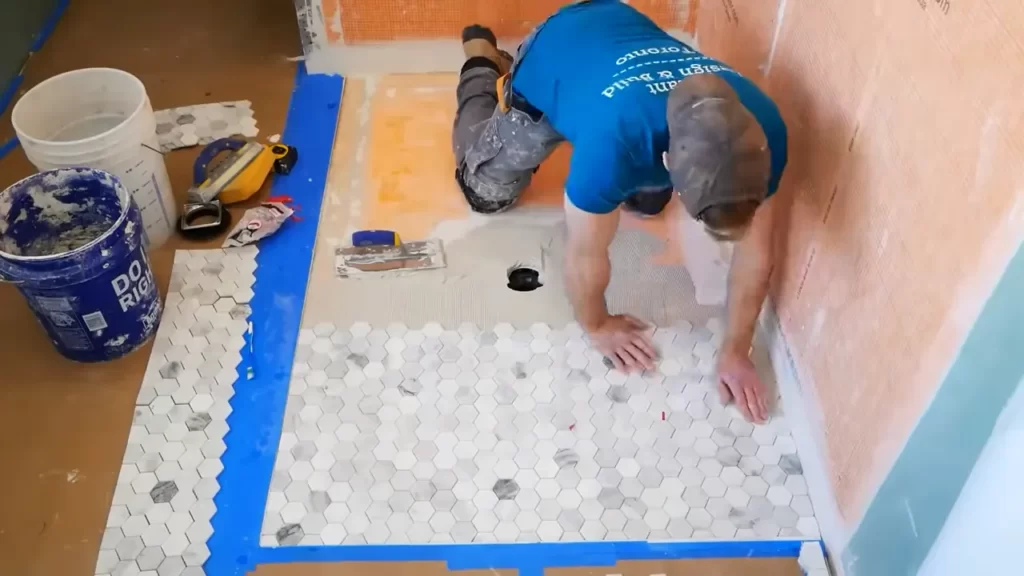
- Apply grout to the joints between the tiles using a grout float. Scrape off any excess grout and smooth the joints.
- Allow the grout to set for the recommended time, then wipe away any haze with a damp sponge.
- Seal the grout with a grout sealer to protect it from stains and mold. Follow the sealer manufacturer’s instructions for application and drying time.
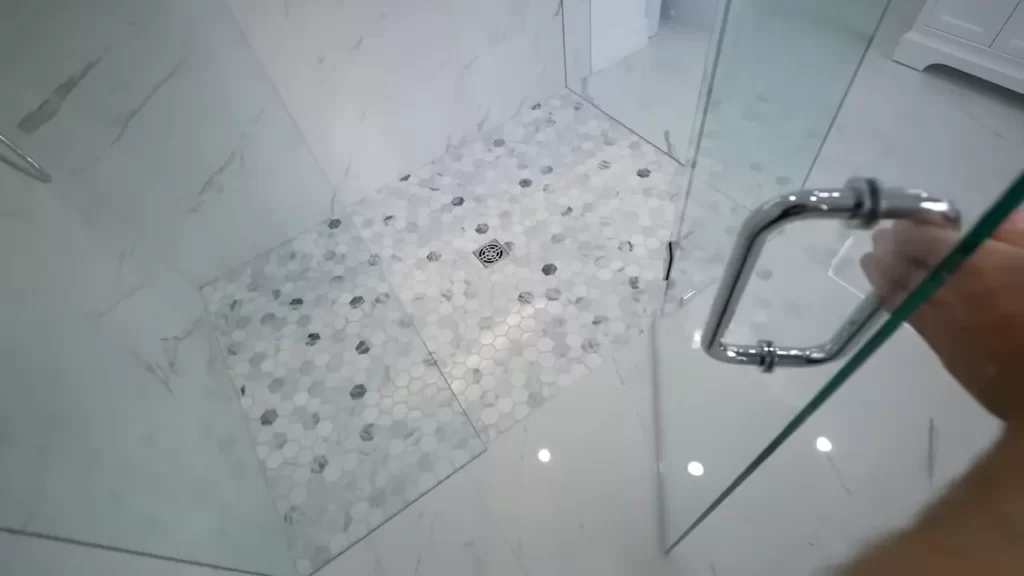
Installing Glass Doors or Curtains
To complete the look of your walk-in shower and add privacy, you can choose to install glass doors or curtains. Here’s how:
- If you prefer glass doors, measure the opening of your shower and purchase a door kit that fits your measurements.
- Follow the manufacturer’s instructions for installing the glass doors, ensuring they are securely attached and aligned properly.
- If you opt for curtains, choose a curtain rod that complements your bathroom decor and install it above the shower opening.
- Attach the curtain rings to the curtain rod and hang the curtain in place. Make sure the curtain fully covers the shower opening.
- Test the doors or curtains to ensure they open and close smoothly.
With the cleaning and final touches complete, step back and admire your newly installed walk-in shower. You’ve successfully transformed your bathroom into a stylish and functional space. Enjoy the luxurious experience every time you step into your beautifully finished shower!
9. Maintenance And Care Tips
Maintaining and caring for your walk-in shower kit is essential to ensure its longevity and functionality. By following these maintenance and care tips, you can keep your shower looking pristine and prevent any potential issues from arising. Let’s dive into the details:
Regular Cleaning and Maintenance
Regular cleaning is crucial to keep your walk-in shower kit in optimal condition. Here are some steps you can take to maintain its cleanliness:
- Start by rinsing the shower walls and floor after each use to remove soap scum and residue.
- Use a mild cleaner and a non-abrasive sponge or cloth to wipe down the surfaces.
- For tough stains, consider using a mixture of vinegar and water or a specialized shower cleaner.
- Don’t forget to clean the showerhead and fixtures regularly to prevent mineral buildup.
- Make it a habit to dry the shower after each use to prevent water spots and mildew growth.
Preventing Mold and Mildew
Mold and mildew thrive in moist environments, making the shower a common breeding ground for these nuisances. Follow these preventive measures to keep mold and mildew at bay:
- Ensure proper ventilation in your bathroom by using an exhaust fan or opening a window during and after showering.
- Keep the shower area well-lit and allow sufficient air circulation to discourage mold and mildew growth.
- Consider applying a mold-resistant silicone caulk around the edges of your shower to create a barrier against water infiltration.
- Regularly check for any signs of mold or mildew and address them promptly by using a mold and mildew remover.
Addressing Common Issues
Despite proper care, you might encounter some common issues with your walk-in shower kit. Here’s how to tackle them:
- Leaky seals: If you notice water leakage around the seals, inspect them for any damage or gaps. Apply a fresh sealant or contact a professional to fix the issue.
- Clogged drain: Prevent clogged drains by using a hair catcher or drain strainer. If you encounter a clog, try using a plunger or a drain snake to clear it.
- Water pressure problems: Low water pressure can be caused by various factors. Check the showerhead for any mineral buildup and clean it if necessary. If the issue persists, consult a plumber to evaluate the water pressure.
By following these maintenance and care tips, you can ensure that your walk-in shower kit remains in excellent condition, providing you with a refreshing showering experience for years to come.
Frequently Asked Questions
Can I Install A Shower Kit Myself?
Yes, you can install a shower kit yourself. Just follow the instructions and ensure you have the necessary tools and skills. Installing a shower kit can be a DIY project that saves you money and allows for personal customization. However, if you are unsure or lack experience, it’s best to hire a professional for safety and quality reasons.
How Easy Is It To Install A Walk-In Shower?
Installing a walk-in shower is relatively easy. It requires basic plumbing and carpentry skills.
How To Install A Prefab Shower Stall?
To install a prefab shower stall, first, prepare the area by measuring and ensuring the space is level. Next, assemble the shower stall according to the manufacturer’s instructions. Connect the drain and water supply lines, making sure they are secure.
Finally, seal the edges and apply any finishing touches.
How Do You Install A Shower Wall Kit?
To install a shower wall kit, follow these steps: 1. Clean the surface and remove any old materials. 2. Measure and mark the desired height and width for the kit. 3. Apply adhesive to the back of the panels and press them firmly onto the wall.
4. Secure the panels with screws or nails. 5. Seal the joints with caulk to prevent leakage.
Conclusion
Installing a walk-in shower kit can be a straightforward process when you follow the right steps. By carefully planning the layout, preparing the area, and assembling the kit, you can create a luxurious and functional shower space in your home.
Remember to double-check your measurements and consult the manufacturer’s instructions to ensure a successful installation. With a little effort and patience, you’ll soon be enjoying the convenience and comfort of your new walk-in shower.