To install a shower pan for tile, follow these steps: Level the floor, install the drain, apply a layer of mortar, position the shower pan, and secure it in place. Installing a shower pan for tile can be a simple and effective way to update your bathroom.
By following a few basic steps, you can ensure a sturdy and reliable shower base that is ready for tiling. We will walk you through the process of installing a shower pan for tile, from leveling the floor to securing the pan in place.
With the right tools and materials, you can confidently tackle this project and create a beautiful and functional shower space. So, let’s dive in and learn how to install a shower pan for tile!
Understanding The Importance Of A Shower Pan
Understanding the Importance of a Shower Pan
When it comes to installing a new shower, there is one crucial element that should never be overlooked – the shower pan. A shower pan is a vital component in any tile shower installation, as it plays a significant role in preventing water damage and ensuring the longevity of your shower.
What is a shower pan and why is it important?
A shower pan, also known as a shower base or shower tray, is a waterproof barrier that is installed beneath the tile floor of a shower. It serves as the foundation of the shower, providing a watertight seal to prevent any leakage into the subfloor or surrounding areas.
The importance of a shower pan cannot be overstated. Without a properly installed shower pan, water can seep through the tile grout and collect beneath the surface, causing damage to the underlying structure of your shower. Over time, this can lead to mold growth, rotting, and even structural issues in your bathroom.
The role of a shower pan in preventing water damage
A shower pan acts as a barrier, directing water towards the drain and away from vulnerable areas. By containing the water within the shower area, it protects the subfloor, walls, and other nearby surfaces from moisture and potential damage.
When water comes into contact with the shower pan, it is channeled towards the drain, eliminating the risk of pooling or stagnant water. This not only prevents water damage, but it also helps maintain a clean and hygienic showering environment.
Additionally, a properly installed shower pan provides an extra layer of protection against leaks, ensuring that water does not make its way into the underlying structure of your home. By investing in a high-quality shower pan and ensuring its correct installation, you can have peace of mind knowing that your shower will stand the test of time, free from water-related issues.
Shower pans are available in various materials, such as acrylic, fiberglass, and tile-ready systems. Each material has its own advantages and considerations, so it’s essential to choose the right one based on your specific needs and preferences. Consult with a professional or follow the manufacturer’s instructions to ensure proper installation and maximize the effectiveness of your shower pan.
Preparing For Installation
Before you can begin installing a shower pan for tile, it’s important to prepare the area. This involves gathering the necessary tools and materials, measuring and preparing the shower area, and removing any existing shower base if applicable. By taking the time to properly prepare, you can ensure a smooth and successful installation process.
Gathering the necessary tools and materials
In order to install a shower pan for tile, you will need a few essential tools and materials. Here’s a list of what you’ll need:
| Tools | Materials |
|---|---|
|
|
Measuring and preparing the shower area
Next, you’ll need to measure and prepare the shower area. Start by measuring the dimensions of the shower area, including the width, length, and height. Use these measurements to determine the size of the shower pan you’ll need.
Once you have the measurements, you can begin preparing the shower area. Remove any existing tile and fixtures, making sure to clean the area thoroughly. Check for any damage or decay in the subfloor, and repair if necessary.
In addition, it’s important to ensure that the shower area is level. Use a level tool to check for any uneven spots, and fill them in as needed. This will ensure a proper and secure installation of the shower pan.
Removing the existing shower base (if applicable)
If you already have an existing shower base that needs to be replaced, you’ll need to remove it before installing the new shower pan. Here’s how:
- Turn off the water supply to the shower.
- Remove any screws or nails holding the existing base in place.
- Use a chisel and hammer to carefully pry up the base, starting from one corner.
- Continue to remove the base, working your way around the edges.
- Clean up any debris or adhesive left behind.
Once the existing base is removed, you’ll be ready to proceed with the installation of the new shower pan.
By following these steps and properly preparing for installation, you’ll be well on your way to creating a beautiful and functional shower area in your home. Stay tuned for the next steps in the installation process!

Installing The Shower Pan
Installing a shower pan is an essential step in creating a sturdy and leak-proof base for your tile shower. In this article, we will guide you through the process of installing a shower pan, ensuring that it is properly positioned, secured, and connected to the drain assembly.
Applying a waterproofing membrane to the subfloor
The first step in installing a shower pan is to apply a waterproofing membrane to the subfloor. This membrane acts as a barrier between the subfloor and the shower pan, preventing any water from seeping through and causing damage to the underlying structure.
To apply the waterproofing membrane, follow these steps:
- Clean and prepare the subfloor, ensuring it is free from any debris or dust.
- Cut the waterproofing membrane to the appropriate size, allowing for a few inches of overlap on all sides.
- Apply a layer of thin-set mortar to the subfloor using a trowel, ensuring it is evenly spread.
- Place the waterproofing membrane onto the thin-set mortar, pressing it firmly to remove any air bubbles or wrinkles.
- Secure the membrane to the subfloor using a roller or a flat trowel, ensuring good adhesion.
- Trim off any excess membrane using a utility knife.
Positioning and securing the shower pan
Once the waterproofing membrane is in place, it’s time to position and secure the shower pan. This step is crucial as it ensures the shower pan is properly aligned and provides a solid base for the tile installation.
Follow these steps to position and secure the shower pan:
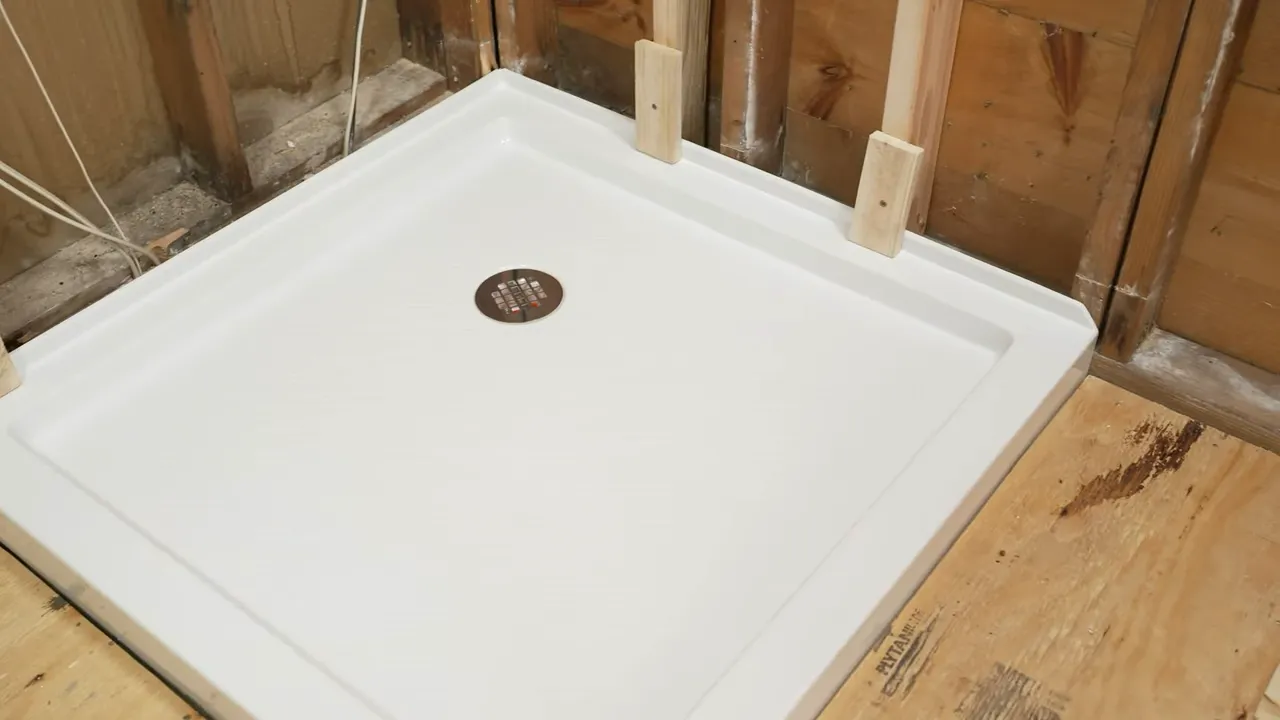
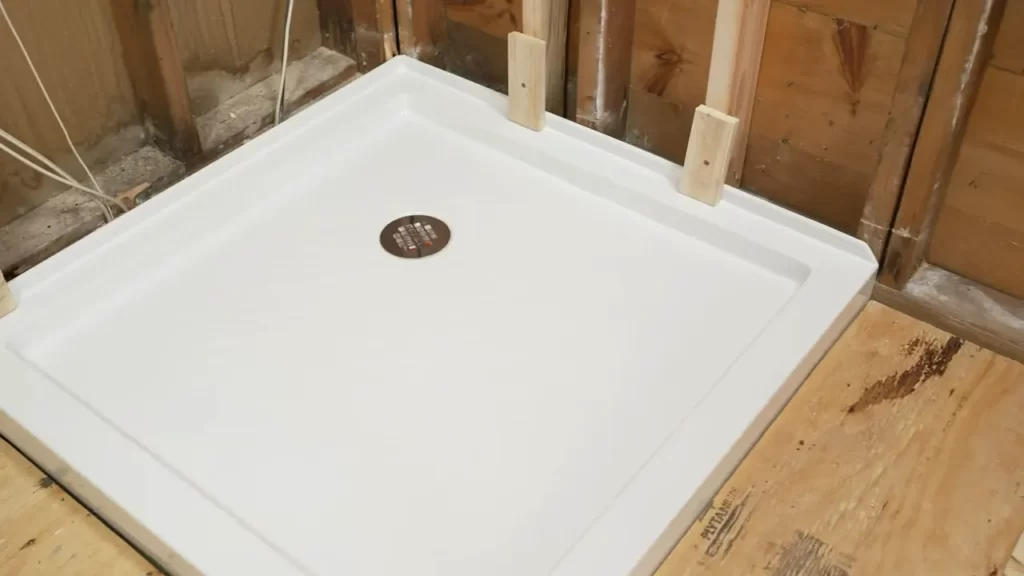
- Place the shower pan onto the subfloor, ensuring it fits snugly against the walls.
- Check that the pan is level using a spirit level, adjusting as necessary.
- Secure the shower pan to the subfloor using screws or nails, making sure it is firmly in place.
- Apply a layer of thin-set mortar around the edges of the shower pan to provide additional support and stability.
- Allow the thin-set mortar to dry according to the manufacturer’s instructions before proceeding to the next step.
Connecting the drain assembly
The final step in installing the shower pan is connecting the drain assembly. This ensures proper drainage and prevents any water from pooling in the shower.
Here’s how to connect the drain assembly:
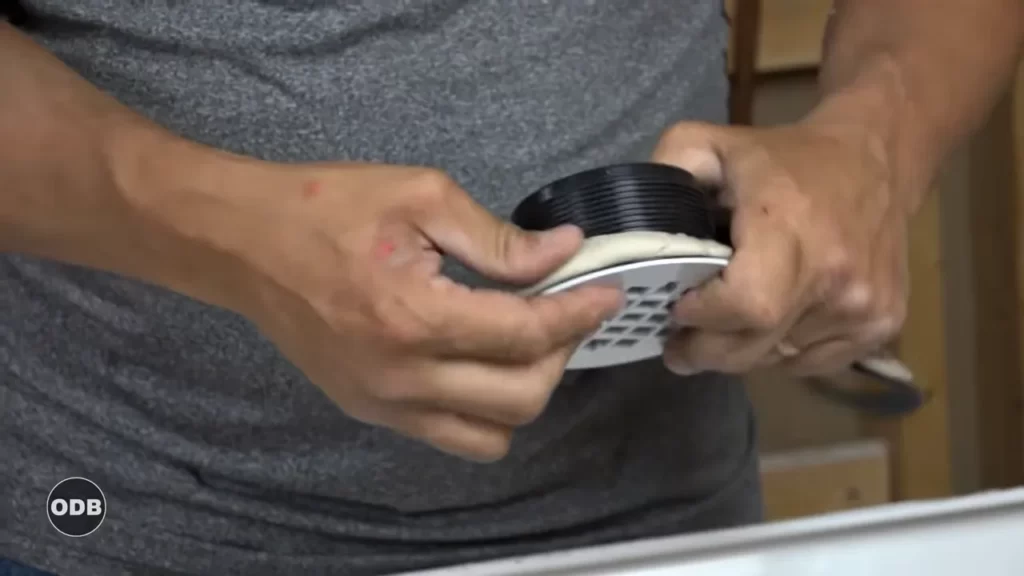
- Position the drain assembly in the designated area on the shower pan, ensuring it aligns with the drainpipe.
- Tighten the drain assembly using the appropriate wrench, ensuring a secure and leak-free connection.
- Apply a layer of plumber’s putty or silicone around the edges of the drain assembly to create a watertight seal.
- Attach the drain cover, ensuring it is flush with the shower pan surface.
- Test the drain assembly by pouring water into the shower pan and checking for any leaks.
With the shower pan properly installed and the drain assembly connected, you are now ready to move on to the next steps of tiling your shower and creating a beautiful and functional space.

Sealing And Waterproofing
When it comes to installing a shower pan for tile, sealing and waterproofing are essential steps to ensure the longevity and durability of your shower. These steps create a watertight barrier that prevents water from seeping into the subfloor and causing damage over time. Here, we will discuss how to apply sealant to the seams and edges of the shower pan, install a waterproofing membrane on the walls, and ensure proper drainage and water tightness.
Applying Sealant to the Seams and Edges of the Shower Pan
To start the sealing process, it is crucial to apply sealant to the seams and edges of the shower pan. This will prevent any water from seeping through these vulnerable areas and causing leaks. Begin by thoroughly cleaning the surface of the shower pan to remove any dirt or debris. Next, using a high-quality silicone sealant, apply a continuous bead along the seams and edges of the shower pan. Ensure that the bead is smooth and even, and use a caulking gun for precise application.
After applying the sealant, allow it to dry completely before proceeding to the next step. This will ensure that the sealant forms a tight bond with the shower pan, creating a reliable barrier against water infiltration.
Installing a Waterproofing Membrane on the Walls
To further enhance the waterproofing of your shower, it is essential to install a waterproofing membrane on the walls. This membrane acts as an additional layer of protection, preventing any moisture from penetrating the walls and causing potential damage. Before installing the membrane, **thoroughly clean and smooth the walls** to ensure proper adhesion.
Begin by **applying a layer of thin-set mortar** on the walls using a notched trowel. This mortar will serve as the adhesive for the waterproofing membrane. **Carefully press the membrane onto the mortar, starting from the bottom and working your way up**. Ensure that the membrane is smooth and free of any wrinkles or bubbles. As you continue to install the membrane, **overlap the edges by at least two inches for a secure and effective seal**.
Once the membrane is fully installed, **apply another layer of thin-set mortar over the entire surface, covering the membrane completely**. This will provide an additional layer of protection and create a solid base for the tile installation.
Ensuring Proper Drainage and Water Tightness
Ensuring proper drainage and water tightness is the final step in sealing and waterproofing your shower pan for tile. *To ensure proper drainage*, **install a high-quality drain assembly** that allows water to flow freely and efficiently. This will prevent any standing water and potential leaks.
To ensure water tightness, **inspect the entire shower pan for any gaps or areas that may require additional sealing**. Pay close attention to the corners, edges, and around the drain. If you notice any gaps or areas that may need attention, **apply an additional layer of sealant**, making sure to fill in any voids or crevices.
By taking these steps to properly seal and waterproof your shower pan, you can rest assured that your tile installation will be protected from water damage, increasing its longevity and ensuring a functional and beautiful shower for years to come.
Installing Tile On The Shower Pan
Preparing the tile and adhesive
Before you start laying the tile on the shower pan, it is crucial to properly prepare the tile and adhesive. This will ensure a smooth and durable installation that will last for years to come. Here are the steps for preparing the tile and adhesive:
- Make sure the shower pan surface is clean and free of any dust, dirt, or debris. Use a mild detergent and water solution to clean the surface, and then rinse it thoroughly.
- If you are using a pre-mixed adhesive, follow the manufacturer’s instructions for application. If you are mixing your own adhesive, make sure to mix it according to the package instructions.
- Apply a thin layer of adhesive to the shower pan surface using a notched trowel. This will create a solid bond between the tile and the pan.
- Allow the adhesive to dry for the recommended time specified by the manufacturer. This will ensure that the tile will adhere properly to the surface.
- If necessary, cut the tiles to fit the edges of the shower pan using a tile cutter or wet saw. Measure twice and cut once to avoid any mistakes.
Laying the tile on the shower pan
Once you have prepared the tile and adhesive, it’s time to start laying the tile on the shower pan. This step requires careful precision to ensure a professional-looking finish. Here’s how to lay the tile:
- Start by placing a tile at one corner of the shower pan. Press it firmly into the adhesive, ensuring it is level and aligned with the reference marks you made.
- Continue placing the tiles in a row, using tile spacers to maintain an even gap between each tile. This will create a professional-looking finish and allow for proper grout application.
- Work your way across the shower pan, placing each tile carefully and making sure they are level and aligned with the reference marks.
- If necessary, use tile nippers to cut tiles to fit around fixtures or protrusions.
- Continue laying the tiles until you have covered the entire shower pan surface. Make sure to periodically check the level and alignment of the tiles as you go.
Grouting and sealing the tiled shower pan
Once you have laid all the tiles on the shower pan, it’s time to grout and seal the surface. This will provide the finishing touches to your installation and ensure a waterproof and durable shower pan. Follow these steps to grout and seal the tiled shower pan:
- Mix the grout according to the manufacturer’s instructions. It should have a thick, paste-like consistency.
- Using a grout float, apply the grout to the spaces between the tiles, making sure to press it firmly into the gaps.
- Remove any excess grout from the tile surface using a damp sponge or cloth. Rinse the sponge or cloth frequently to avoid smearing grout onto the tiles.
- Allow the grout to dry for the recommended time specified by the manufacturer.
- Once the grout is dry, apply a penetrating tile sealer to the entire surface of the shower pan. This will prevent water damage and help maintain the integrity of the tile installation.
By following these steps and taking the time to properly prepare, lay, and seal the tile on the shower pan, you can achieve a beautiful and functional tiled shower pan that will stand the test of time. So go ahead and start transforming your shower into a stunning oasis.
Testing And Finishing Touches
Testing the shower pan for leaks
After successfully installing the shower pan for tile, the next crucial step is to test it for leaks. This step is essential to ensure that you don’t encounter any unpleasant surprises once you start using the shower. To test the shower pan for leaks, follow these steps:
- Plug the shower drain with a test plug to contain the water within the shower area.
- Meticulously inspect all the seams and corners of the shower pan to identify any potential weak spots.
- Fill the shower pan with water up to the approximate level you expect during regular use.
- Allow the water to sit for at least 24 hours, checking regularly for any signs of water leakage.
If you find any leaks during the testing phase, take note of their location. Once the leaks are identified, you can proceed to fix them before proceeding to the next steps.
Installing fixtures and finishing touches
Now that your shower pan has passed the leak test, it’s time to move on to the exciting part of installing fixtures and putting the finishing touches. This step will give your shower area a polished and complete look. Follow these guidelines to ensure a successful installation process:
- Select high-quality fixtures such as faucets, showerheads, and handles that complement your overall bathroom design.
- Install the fixtures according to the manufacturer’s instructions, ensuring a secure fit and no loose connections.
- To enhance the water resistance of your shower area, consider applying silicone caulking around the edges of the fixtures and any gaps between the shower pan and the walls.
- Once the fixtures are securely installed, take time to inspect and test each one individually to confirm that they are functioning correctly.
Investing the time and effort to properly install fixtures and add those finishing touches will not only enhance the aesthetic appeal of your shower area but also contribute to its longevity and functionality.
Cleaning and maintaining the shower pan
Cleaning and maintaining your shower pan is crucial for its longevity and to ensure proper hygiene. Here are some tips to keep it in pristine condition:
- Regularly clean your shower pan using mild soap or a non-abrasive cleaner to remove any soap scum, mold, or grime.
- Use a soft sponge or cloth to avoid scratching the surface of the shower pan.
- Avoid using harsh chemicals or abrasive materials that may damage the shower pan’s finish.
- To prevent clogs, use a drain protector to catch any hair or debris before it enters the drain.
- Periodically inspect for any signs of wear or damage and address them promptly to prevent further issues.
Following these simple cleaning and maintenance practices will not only preserve the appearance of your shower pan but also contribute to a pleasant and hygienic showering experience for years to come.
Frequently Asked Questions
Does Tile Go Directly On Shower Pan?
Yes, tile can be installed directly on a shower pan.
What Kind Of Shower Pan Goes Under Tile?
A shower pan made of waterproof material is ideal for tiling. It prevents water damage and ensures a sturdy base for the tiles. Waterproof options include cement, fiberglass, or pre-formed pans with built-in waterproofing layers, designed specifically for tile installation.
What Is The Proper Way To Install A Shower Pan?
To install a shower pan, follow these steps: 1. Begin by preparing the floor surface and ensuring it is level and clean. 2. Fit the drain assembly and connect it to the plumbing system. 3. Apply a waterproof membrane to the subfloor and walls.
4. Place the shower pan in position and secure it according to the manufacturer’s instructions. 5. Finally, check for any leaks and make any necessary adjustments.
Do You Have To Glue Down A Shower Pan?
Yes, it is necessary to glue down a shower pan.
Conclusion
Installing a shower pan for tile is a crucial step in creating a functional and stylish bathroom. By following the right techniques and using the proper tools, you can ensure a successful installation. Remember to thoroughly measure and level the shower pan, apply a waterproofing membrane, and use quality tile adhesive.
Finally, maintain regular maintenance to ensure the longevity of your shower pan. With these steps in mind, you’ll be able to enjoy a beautiful and leak-free shower space for years to come.