To install a walk-in shower kit, first, prepare the area by removing the existing shower and making sure the walls are waterproofed. Then, assemble the shower base and walls according to the manufacturer’s instructions, making sure everything is level and secure.
Finally, connect the plumbing fixtures and seal any gaps or joints to ensure the shower is watertight. [Introduction] A walk-in shower kit can be a practical and stylish addition to any bathroom. Whether you’re looking to replace your current shower or upgrade to a more accessible option, installing a walk-in shower kit is a relatively straightforward process that can be done with some basic tools and a little bit of know-how.
In this guide, we’ll walk you through the step-by-step process of installing a walk-in shower kit, from preparing the area to connecting the plumbing fixtures. So, let’s dive in and get started on transforming your bathroom with a beautiful and functional walk-in shower.
Measuring And Marking The Area
Before installing a walk-in shower kit, it is essential to measure and mark the area correctly. This step is crucial for ensuring proper alignment and a seamless installation process. By following these steps, you can determine the shower area size accurately and mark the walls for optimal alignment.
Determining the shower area size
Start by measuring the space where you plan to install your walk-in shower kit. Having precise measurements will help you choose the right shower kit and ensure a perfect fit. To determine the size of the shower area, follow these steps:
- Clear the space: Remove any obstacles, such as furniture or fixtures, near the area where the shower kit will be installed.
- Take measurements: Use a measuring tape and measure the length and width of the space. Make sure to measure from wall to wall accurately.
- Consider accessibility: If you are installing a walk-in shower for people with mobility issues, it is essential to allow enough space for them to maneuver comfortably.
By taking accurate measurements, you can ensure that your walk-in shower kit fits perfectly into the designated area, providing a functional and aesthetically pleasing addition to your bathroom.
Marking the walls for proper alignment
Once you have determined the shower area size, the next step is to mark the walls to ensure proper alignment during installation. Here’s how you can do it:
- Prepare the walls: Clean the walls thoroughly to remove any dirt, dust, or debris that may affect adhesion.
- Use a leveler: Place a leveler vertically against the wall to determine if it is perfectly straight.
- Mark the corners: Starting from one corner, use a pencil to mark the height where the shower enclosure will be installed. Repeat this process for all four corners.
- Connect the marks: Use a long straightedge or a leveler to connect the marks horizontally. This line will serve as a guide for aligning the shower enclosure.
With the walls properly marked, you can ensure that your walk-in shower kit is installed precisely and securely. The marked lines will help you align the enclosure accurately, resulting in a level and professional-looking installation.
By taking the time to measure and mark the area correctly, you can ensure a smooth and successful installation of your walk-in shower kit. Following these guidelines will help you achieve a well-fitted and aesthetically pleasing shower area, providing both functionality and style to your bathroom.
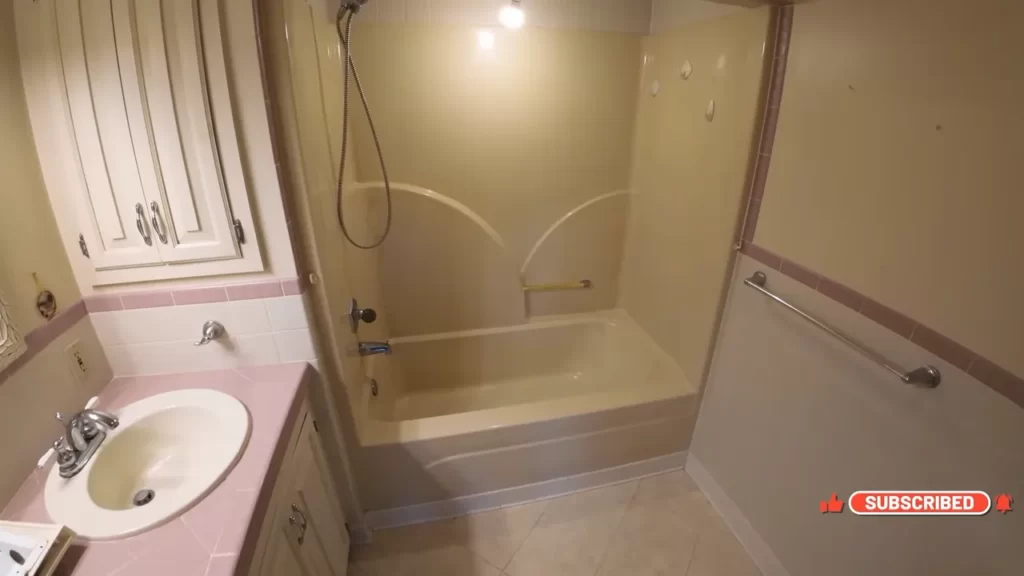
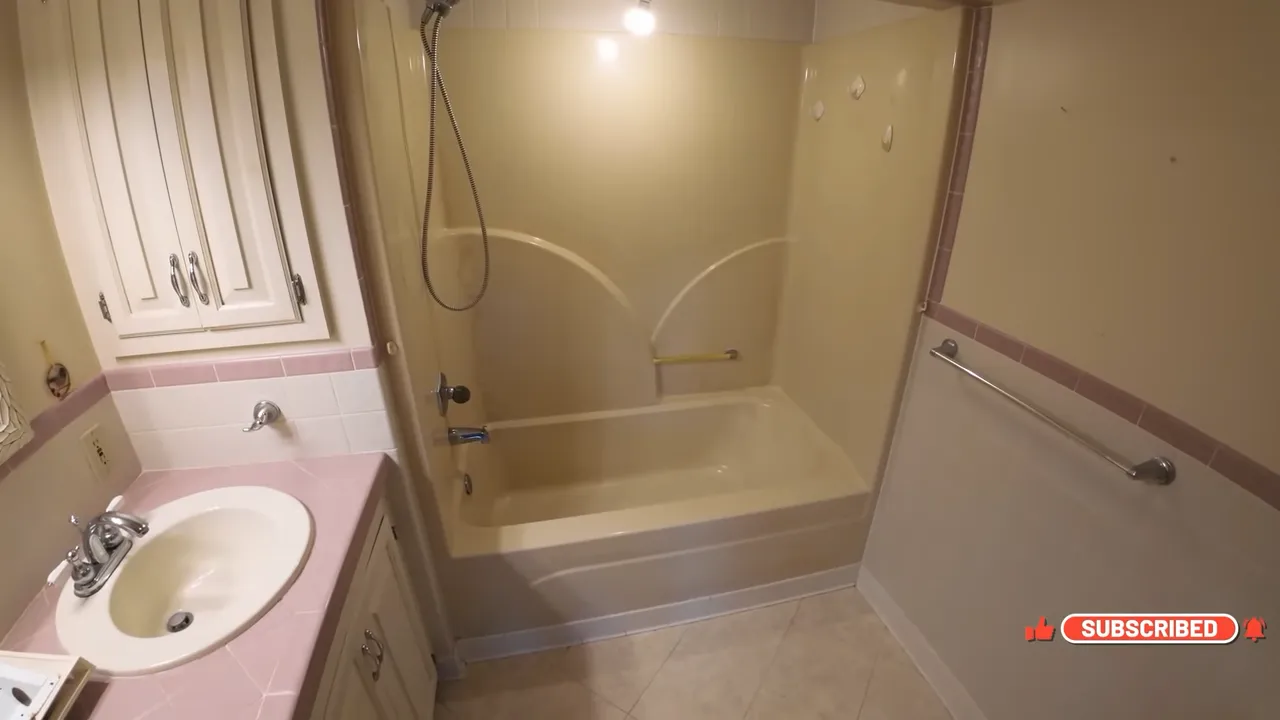
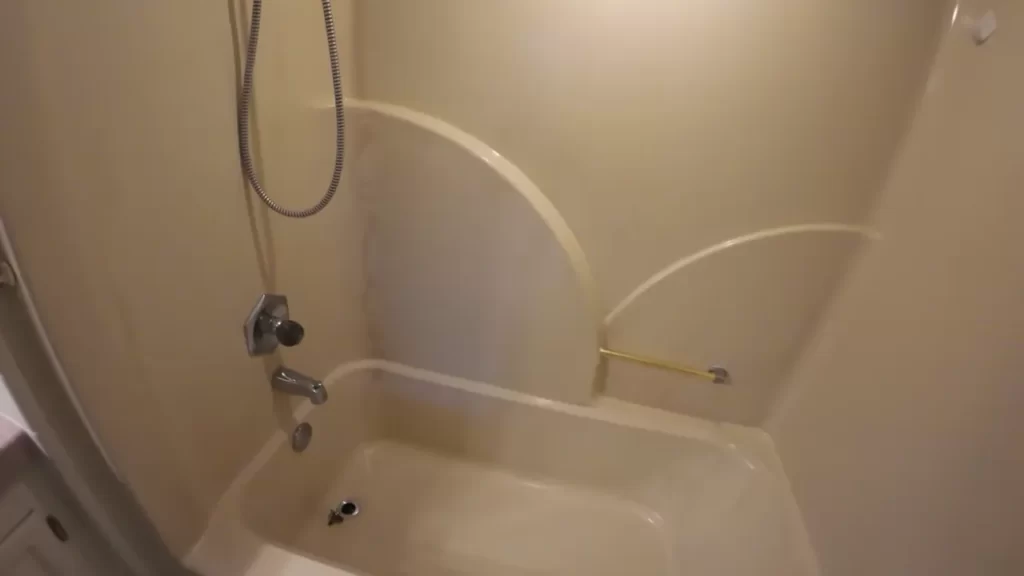
Removing The Existing Shower Or Bathtub
Before you can install your walk-in shower kit, you’ll need to remove the existing shower or bathtub. While this may seem like a daunting task, with the right tools and steps, it can be done efficiently and safely. This section will guide you through the process of removing fixtures and plumbing connections, as well as demolishing the walls and floor.
Removing Fixtures and Plumbing Connections
The first step in the removal process is to disconnect and remove all the fixtures and plumbing connections associated with the shower or bathtub. This includes the showerhead, faucets, handles, drain cover, and any other accessories that are attached to the walls or floor.
To start, turn off the water supply to the shower or bathtub. This can usually be done by shutting off the main water valve. Next, using a wrench or pliers, carefully disconnect the showerhead, faucets, and any other plumbing connections. Be sure to place a bucket or towel underneath to catch any remaining water.
Once the fixtures are removed, you can proceed to remove the drain cover. Depending on the type of drain, this may require either unscrewing it or prying it off with a flathead screwdriver. Take your time to avoid damaging the drain or surrounding area.
Demolishing the Walls and Floor
With the fixtures and plumbing connections removed, it is time to demolish the walls and floor surrounding the shower or bathtub. This step requires caution and proper safety gear, such as goggles and gloves.
Start by scoring the edges of the walls and floor using a utility knife. This will help prevent any damage to adjacent surfaces. Once scored, use a pry bar or hammer and chisel to carefully remove the tiles or other wall materials. Work your way from top to bottom, taking care not to create unnecessary debris or damage to the surrounding areas.
Once the walls are removed, you can now focus on the flooring. Again, using a pry bar or hammer and chisel, carefully remove any flooring material such as tiles or linoleum. Be mindful of any subflooring or waterproofing membranes that may be present and avoid damaging them.
After the walls and floor are successfully demolished, be sure to clean up any debris and remove all remaining screws or nails. This will ensure a clean and smooth surface for the installation of your walk-in shower kit.
Conclusion
In conclusion, removing the existing shower or bathtub is an essential step in installing a walk-in shower kit. By carefully removing fixtures and plumbing connections, as well as demolishing the walls and floor, you’ll create a clean canvas for the installation process. Remember to take your time, use the proper tools, and prioritize safety to ensure a successful removal.
Essential Tools For The Installation
Installing a walk-in shower kit can be a great way to enhance the functionality and aesthetic appeal of your bathroom. However, it’s important to have the right tools on hand to ensure a smooth and successful installation. Below are essential tools that you’ll need for the job:
1. Measuring Tape
A measuring tape is an essential tool that will help you accurately determine the dimensions of the space where the walk-in shower kit will be installed. This will ensure that the kit fits perfectly and eliminates any potential issues or gaps. Make sure to measure the height, width, and depth of the area where the kit will go, as well as any openings and fixtures that need to be accounted for.
2. Level
A level is another vital tool that you’ll need to ensure that your walk-in shower kit is installed correctly and level. This tool will help you ensure that all the components of the kit are properly aligned, preventing any unevenness or tilting. Before installing the kit, use the level to check the floors and walls for levelness and make any necessary adjustments.
3. Power Drill
A power drill is a versatile tool that will make the installation process much easier and faster. It will allow you to drill holes for screws, anchors, and other necessary attachments. Make sure to use the appropriate drill bit for the material you’re working with, such as tile or fiberglass, to prevent any damage or cracks.
4. Saw
A saw may be required to make any necessary cuts during the installation process. Depending on the type of materials you’re working with, you may need a different type of saw. For example, a jigsaw is often used for cutting through fiberglass or plastic, while a tile saw is necessary for cutting through tiles. Always follow the manufacturer’s instructions and wear appropriate safety gear when using a saw.
Having these essential tools on hand will make the installation of your walk-in shower kit easier and more efficient. Remember to take accurate measurements, use a level for proper alignment, utilize a power drill for the necessary attachments, and use the appropriate saw for any required cuts. With the right tools and a little patience, you’ll be enjoying your new walk-in shower in no time!
Required Materials For The Installation
When it comes to installing a walk-in shower kit, having the right materials is essential for a successful project. From the shower pan to the tile adhesive, each component plays a crucial role in ensuring a durable and waterproof installation. In this section, we will discuss the key materials you will need to complete the installation process.
Walk in Shower Kit
The walk-in shower kit itself is the centerpiece of your installation. It typically includes the shower base, walls, and door, providing a complete solution for transforming your bathroom into a modern and functional space. When choosing a kit, consider the size, style, and features that best suit your bathroom’s layout and your personal preferences.
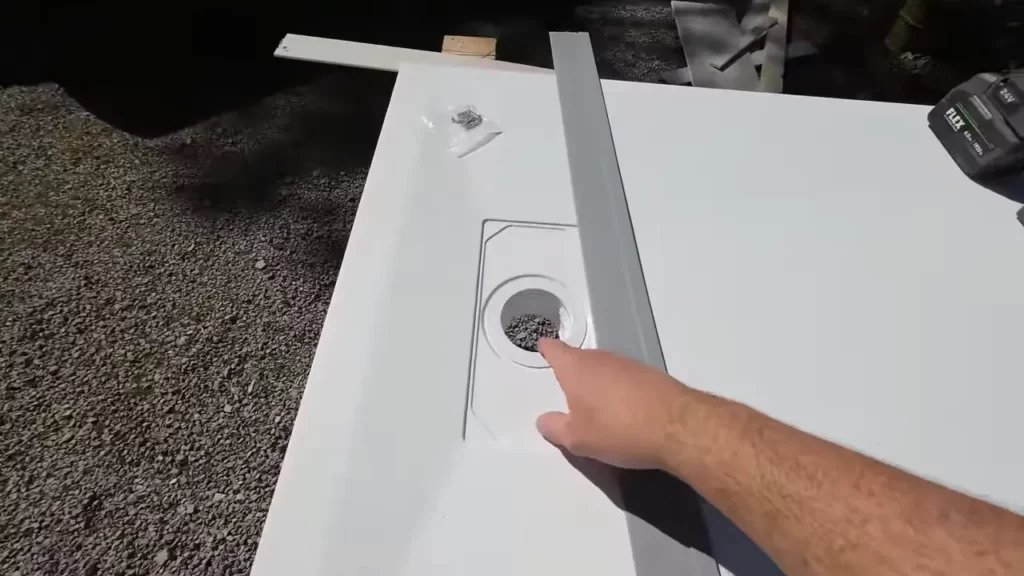
Shower Pan
The shower pan acts as the foundation for your walk-in shower and ensures proper drainage. Made from durable materials such as acrylic or fiberglass, it is designed to direct water toward the drain while providing a sturdy surface to stand on. You can find shower pans in various sizes and shapes to fit your specific installation requirements.
Waterproofing Membrane
To prevent water leakage and protect the underlying structure, a waterproofing membrane is a must-have for any walk-in shower installation. This impermeable barrier is applied to the walls and floor before tiling and acts as a sealant. Be sure to select a high-quality membrane that is compatible with your chosen tile adhesive and grout.
Tile Adhesive
Tile adhesive is used to bond the tiles to the walls and floor of your walk-in shower. It provides a strong and durable hold while ensuring that the tiles are properly adhered. Choose a tile adhesive that is suitable for wet areas and compatible with the type of tile you will be using.
Grout
Grout is the material used to fill the gaps between tiles, creating a water-resistant and visually appealing finish. It helps prevent moisture from penetrating the tile installation and protects against mold and mildew growth. Select a grout color that complements your chosen tiles and consider using a grout sealer for added protection.
By gathering these essential materials, you’ll have everything you need to successfully install a walk-in shower kit in your bathroom. With careful planning and attention to detail, you can create a stylish and functional shower space that enhances the overall aesthetics of your bathroom.

Installation Of The Shower Pan
Introduction: Installation of the Shower Pan
Installing a walk-in shower kit is a fantastic way to upgrade your bathroom and enhance its functionality and aesthetic appeal. One important aspect of this installation process is the installation of the shower pan. The shower pan forms the foundation of your walk-in shower, ensuring proper water drainage and sealing to prevent leaks. In this section, we will guide you through the steps required to prepare the subfloor, install the shower pan, and secure it in place for a sturdy and reliable shower enclosure.
Preparing the Subfloor
Before installing the shower pan, it is crucial to properly prepare the subfloor. Here’s a detailed breakdown of the steps involved:
- Start by ensuring that the subfloor is clean and free from any debris or obstructions that could affect the installation.
- Inspect the subfloor for any signs of damage or rot. Replace any damaged areas before proceeding with the installation.
- Measure and mark the desired location of the shower pan on the subfloor, using a tape measure and pencil. Ensure that the measurements align with the dimensions of your shower pan kit.
- If necessary, cut out a section of the subfloor to accommodate the drainpipe of the shower pan. This will allow proper connection and water drainage.
- Apply a layer of thin-set mortar or a waterproofing membrane over the subfloor surface. This will provide a secure and waterproof base for the shower pan.
Installing the Shower Pan
Once the subfloor is prepared, it’s time to install the shower pan. Follow these step-by-step instructions:
- Carefully place the shower pan in the designated area, aligning it with the marked measurements. Ensure that the drain hole lines up with the previously cut section of the subfloor for proper drainage.
- Use a level to check the shower pan for any unevenness. Adjust as necessary to achieve a level and balanced installation.
- Apply a generous amount of plumber’s putty or silicone caulk around the drain flange before attaching it to the drainpipe. This will create a watertight seal.
- Securely tighten the drain flange using a wrench or pliers to ensure it is firmly in place.
- Verify that the shower pan is securely positioned and level. Adjust if needed.
Securing the Shower Pan in Place
Finally, it’s time to secure the shower pan in place for added stability. Follow these simple steps to ensure a secure installation:
- Apply a bead of silicone caulk along the edges of the shower pan where it meets the walls or any adjoining surfaces. This will provide an additional waterproofing layer and help to prevent leaks.
- Use screws or anchoring clips (depending on the specific shower pan kit) to secure the shower pan to the subfloor. Follow the manufacturer’s instructions for the proper placement and installation of these fasteners.
- Inspect the entire perimeter of the shower pan to ensure that it is securely fastened and properly sealed. Make any necessary adjustments or repairs before proceeding to the next step.
- Allow the silicone caulk to dry completely before moving forward with the installation of the remaining components of your walk-in shower kit.
Congratulations! You have successfully installed the shower pan as part of your walk-in shower kit. With the foundation in place, you can now proceed with the installation of the shower walls, doors, and other accessories to create your dream shower space.
Waterproofing The Shower Area
Applying the waterproofing membrane
Proper waterproofing is crucial for preventing water damage and ensuring the longevity of your walk-in shower. To start the installation process, it’s essential to apply a waterproofing membrane. This membrane acts as a barrier, preventing any water from seeping through the walls and causing structural issues.
Applying the waterproofing membrane is a relatively simple process that can be done using a paintbrush or roller. Start by ensuring that the shower area is clean and free from any dirt or debris. Then, carefully follow the manufacturer’s instructions to mix the waterproofing solution. Make sure to wear protective gloves and eye goggles to avoid any discomfort or harm.
Ensuring adequate coverage and sealing
When applying the waterproofing membrane, it’s crucial to ensure that the entire shower area is adequately covered. Pay close attention to corners, seams, and any gaps between the walls and the shower base. These areas are particularly prone to water damage, so it’s vital to apply the membrane generously.
To achieve a watertight seal, pay attention to the areas where the waterproofing membrane meets other surfaces, such as the shower base or adjacent walls. Use a sealant to fill any gaps or cracks, ensuring that no water can penetrate through these vulnerable points.
Keep in mind that a thorough and meticulous waterproofing process is essential for a walk-in shower that will stand the test of time. Take your time and ensure that every inch of the shower area is properly sealed and protected.
Installing The Walls And Surround
Now that you have successfully prepared the subfloor and installed the shower pan, it’s time to move on to the next step – installing the walls and surround. This crucial part of the process ensures that your walk-in shower is not only functional but also visually appealing.
Cutting the backer board to size
The first thing you need to do is cut the backer board to the appropriate size. The backer board provides a solid and waterproof surface for attaching the shower surround. To ensure a proper fit, measure the distance between the walls and the height of the shower pan. Mark the measurements on the backer board and use a utility knife or a power saw to cut it accordingly. Remember to wear protective gear to prevent any injuries during the cutting process.
Securing the backer board to the walls
Once you have cut the backer board, it’s time to secure it to the walls. Begin by applying construction adhesive to the back of the board and press it firmly against the wall surface. Make sure the board is level and plumb by using a level. To further strengthen the installation, use screws or nails to secure the board at regular intervals. Ensure that each screw or nail sits flush with the backer board, as any protrusions can affect the installation of the shower surround.
Attaching the shower surround
After securing the backer board, it’s time to attach the shower surround. This step is essential for creating a watertight barrier and protecting the walls from moisture damage. Position the shower surround against the backer board and ensure it aligns with the edges of the shower walls. Use a level to check for any deviations and make adjustments if necessary. Once the surround is in the correct position, use the appropriate adhesive or fasteners to attach it securely to the backer board. Follow the manufacturer’s instructions carefully to ensure a proper bond.
As you install the shower surround, pay close attention to the corners and seams. Apply a waterproof sealant to prevent water from seeping through and causing damage to the walls. Additionally, ensure that all gaps are properly sealed to maintain the integrity of the installation.
By following these steps and adhering to proper installation techniques, you can successfully install the walls and surround for your walk-in shower kit. Remember to take your time, use the right tools and materials, and seek professional assistance if needed. With a well-installed surround, you can enjoy a beautiful and functional walk-in shower that adds value to your bathroom.
Connecting The Drain
Connecting the drain is a crucial step when installing a walk-in shower kit. It ensures proper functionality and prevents any potential issues in the future. In this section, we will guide you through the process of connecting the drain to the plumbing, while ensuring proper sealing and alignment.
Connecting the drain to the plumbing
Before you begin connecting the drain to the plumbing, it’s important to make sure you have the necessary tools and materials. These typically include a wrench, plumber’s tape, PVC pipe, and a shower drain kit.
To begin, you’ll need to remove the existing drain cover or plug. Use the wrench to loosen and remove any screws holding it in place. Once the cover is removed, you’ll have access to the drain pipe underneath.
Next, take the shower drain kit and apply plumber’s tape to the threads of the drain body. This tape helps to create a watertight seal and prevent any leaks. Wrap the tape in a clockwise direction to ensure a tight seal.
Now, carefully insert the drain body into the drain pipe. Make sure it is properly aligned and centered. Once in place, use the wrench to tighten the drain body securely. Be careful not to overtighten, as this can cause damage to the drain or the surrounding plumbing.
Ensuring proper sealing and alignment
Once the drain body is connected to the plumbing, it’s important to ensure a proper seal and alignment to prevent any leaks or water damage. Begin by checking the alignment of the drain body. It should be perfectly centered and flush with the floor surface. Adjust if necessary, ensuring a level and even surface.
Next, apply a bead of silicone caulk around the edges of the drain body. This will create a waterproof seal between the drain and the shower base, preventing any water from seeping through. Smooth out the caulk using a caulk tool or your finger, ensuring a neat and even finish.
Finally, allow the silicone caulk to dry for the recommended amount of time before using the shower. This will ensure that the seal is fully cured and ready for use.
By following these steps, you can successfully connect the drain of your walk-in shower kit to the plumbing while ensuring proper sealing and alignment. Taking the time to do this correctly will help prevent any potential issues and ensure a long-lasting and functional shower installation.
Installing The Shower Fixtures
In order to complete the installation of your walk-in shower kit, it’s time to install the shower fixtures. This includes attaching the showerhead and controls, as well as checking for leaks and ensuring proper functionality. Follow these steps to ensure a successful installation:
Attaching the showerhead and controls
- Start by locating the showerhead and controls that came with your walk-in shower kit.
- Using a wrench, carefully attach the showerhead to the shower arm, ensuring it is tightly secured.
- Next, attach the shower controls to the wall. Make sure to follow the manufacturer’s instructions for proper placement and installation.
- Double-check that all connections are secure and tight before moving on to the next step.
Checking for leaks and proper functionality
Once the shower fixtures are attached, it’s important to check for any leaks and ensure proper functionality. Follow these steps:
- Turn on the water supply to the shower and let it run for a few minutes.
- Inspect all connections for any signs of leaks, such as dripping water or water pooling around the fixtures.
- If you notice any leaks, tighten the connections as needed to eliminate the issue.
- Test the functionality of the shower controls, making sure they are operating smoothly and effectively.
- Adjust the water temperature and flow to ensure everything is working properly.
By carefully following these steps, you can successfully install the shower fixtures for your walk-in shower kit. Remember to always refer to the manufacturer’s instructions for any specific guidelines or recommendations. Enjoy your new walk-in shower!
Applying Tile Adhesive And Setting Tiles
Applying tile adhesive and setting tiles is a crucial step in installing a walk-in shower kit. This is where you bring life to your design vision, transforming a plain surface into a stunning tiled masterpiece. In this section, we will walk you through the process of preparing the adhesive and setting the tiles on both the walls and floor.
Preparing the adhesive
Before you start applying tile adhesive, it is important to ensure that the walls and floor are thoroughly cleaned and prepared. Here are the steps to prepare the adhesive:
- Start by gathering all the necessary tools and materials, including the adhesive, trowel, water, and mixing container.
- Follow the manufacturer’s instructions to mix the tile adhesive. Typically, you will need to add water to the adhesive powder and mix it until you achieve a smooth, consistent texture.
- Allow the adhesive to rest for a few minutes, as recommended by the manufacturer, to activate its bonding properties.
Once the adhesive is prepared, it’s time to move on to the next step.
Setting the tiles on the walls and floor
Now that you have prepared the adhesive, you are ready to set the tiles on the walls and floor. Here’s how to do it:
- Start by applying a thin, even layer of adhesive to the back of the first tile using the notched side of the trowel. Make sure the adhesive covers the entire surface of the tile.
- Press the tile firmly onto the wall or floor, using a slight twisting motion to ensure proper adhesion.
- Continue this process, placing spacers between tiles to ensure even gaps for grouting.
- Work in small sections to prevent the adhesive from drying out before you can set the tiles.
- Once all the tiles are set, allow them to dry and bond with the adhesive as per the manufacturer’s instructions.
Remember to clean any excess adhesive from the surface of the tiles as you go. It is essential to maintain cleanliness during the installation process to achieve a professional-looking finish.
Now that you have successfully applied the adhesive and set the tiles on the walls and floor of your walk-in shower kit, you are one step closer to enjoying the beauty and functionality of a stunning tiled shower. In the next section, we will explore the final steps of grouting and sealing the tiles, giving your shower that perfect finishing touch.
Grouting The Tiles
Mixing and applying the grout
Once you have installed the tiles in your walk-in shower kit, it’s time to give them a finished look by grouting the tiles. Grouting not only helps to secure the tiles in place, but it also adds a beautiful finishing touch to your shower. Here’s how you can mix and apply the grout:
- Start by gathering all the necessary materials: grout, grout float, sponge, water, and a bucket.
- Pour the grout into the bucket and add water, following the manufacturer’s instructions on the ratio of grout to water. Use a trowel or stir stick to mix the grout until it reaches a smooth, creamy consistency.
- Once the grout is mixed, use the grout float to scoop the grout onto the tiles. Hold the float at a 45-degree angle and press the grout firmly into the gaps between the tiles, ensuring full coverage.
- Work in small sections, spreading the grout diagonally across the tiles. Use the float to remove any excess grout from the tile surface.
- Continue applying the grout until all the gaps are filled. It’s important to work quickly, as the grout can dry fast.
Cleaning excess grout and polishing the tiles
Now that you have applied the grout, it’s time to clean off any excess grout and polish the tiles to reveal their true beauty. Follow these simple steps:
- Wait for the grout to dry for the specified amount of time, usually around 10-15 minutes. During this time, the grout will start to set.
- Once the grout has set, dampen a sponge with clean water and gently wipe it over the tiles, removing any excess grout from the surface. Rinse the sponge frequently to ensure a thorough clean.
- After removing the excess grout, use a dry cloth to buff the tiles, revealing their natural shine. This step will help to polish the tiles and remove any residue left behind by the grout.
- For a final touch, use a grout sealer to seal the grout lines. This will help protect the grout from moisture and stains, keeping it looking fresh for years to come.
By following these steps, you can easily grout your walk-in shower kit tiles and achieve a professional-looking finish. Take your time and be sure to clean up any excess grout as you go to ensure a flawless result.
Conducting A Water Test
Once you have successfully installed your walk-in shower kit, it is crucial to conduct a water test to ensure that everything is in proper working order. This step is essential to avoid any future issues such as leaks or poor drainage. By following these simple instructions, you can easily perform a water test on your newly installed walk-in shower.
Checking for Leaks
One of the first things you should do during the water test is to check for any leaks in your walk-in shower. This can be done by turning on the shower and observing the joints and connections for any signs of water leakage. Pay close attention to areas such as the showerhead, faucet, and drain. If you notice any water seeping through or dripping from these areas, it indicates the presence of a leak that needs to be addressed.
Ensuring Proper Drainage
In addition to checking for leaks, it is equally important to ensure that your walk-in shower kit has proper drainage. To do this, let the water run for a few minutes and observe how effectively it drains away. The water should flow smoothly down the drain without any pooling or backup. If you notice water collecting or draining slowly, it may indicate a clog or improper installation of the drain and should be investigated further.
Conclusion
Conducting a water test is an essential step in the installation process of a walk-in shower kit. By checking for leaks and ensuring proper drainage, you can identify and resolve any issues before they become major problems. Taking the time to perform a thorough water test not only guarantees the functionality of your shower but also provides you with peace of mind in the long run. Remember, it is always better to be proactive and catch any potential issues early on.
Sealing And Caulking
The sealing and caulking process is crucial when it comes to installing a walk-in shower kit. Properly sealing and caulking not only ensures a watertight enclosure but also helps prevent any water damage to your bathroom walls and floors. In this section, we will cover two important steps:
Applying Sealant to All Joints and Corners
One of the first steps in sealing and caulking your walk-in shower kit is to apply sealant to all the joints and corners. This not only helps in waterproofing the shower but also provides stability and prevents any movement.
To begin, gather the necessary supplies:
- High-quality waterproof sealant
- Caulking gun
- Caulking tool
- Masking tape
- Clean cloth
Once you have the supplies ready, follow these steps:
- Start by cleaning the joints and corners with a clean cloth to ensure there are no loose particles or dust.
- Apply masking tape on both sides of the joint. This will help create a clean and precise seal.
- Load the sealant into the caulking gun and cut the tip at a 45-degree angle.
- Slowly squeeze the trigger of the caulking gun and apply a thin and even bead of sealant to the joint.
- Use a caulking tool or your finger to smooth out the sealant and create a professional finish.
- Remove the masking tape immediately after applying the sealant to avoid any drying or sticking.
- Allow the sealant to dry according to the manufacturer’s instructions before moving on to the next step.
Caulking Around the Base and Edges
The next step in sealing and caulking your walk-in shower kit is to caulk around the base and edges. This will further enhance the watertight seal and prevent any leaks.
Follow these steps to properly caulk:
- Clean the area around the base and edges of the shower to ensure it is free from any dirt or debris.
- Load the caulking gun with high-quality shower-grade silicone caulk.
- Cut the tip of the caulk tube at a 45-degree angle.
- Place the caulk tube into the caulking gun and squeeze the trigger to start applying the caulk in a smooth and continuous motion.
- Apply the caulk in a thin and even line along the base and edges of the shower.
- Use a caulking tool or your finger to smooth out the caulk, ensuring it adheres properly to the surface.
- Wipe away any excess caulk with a clean, damp cloth.
- Allow the caulk to dry completely before using the shower.
By following these steps and properly sealing and caulking your walk-in shower kit, you can enjoy a durable and watertight shower enclosure for years to come.
Cleaning And Final Inspections
After successfully installing your walk-in shower kit, the next step is to ensure it is clean and ready for use. This involves removing any debris and giving the shower area a thorough cleaning. Additionally, you will need to carry out final inspections to check for any necessary touch-ups or adjustments that may be required. By following these steps, you can ensure that your walk-in shower kit installation is complete and ready to provide you with a relaxing shower experience.
Removing any debris and cleaning the shower area
Before conducting the final inspections, it is important to remove any debris that may have accumulated during the installation process. Use a broom or vacuum cleaner to sweep away any dust, dirt, or leftover materials. Pay special attention to the corners and edges of the shower area, as debris can often accumulate in these hard-to-reach areas.
Once the debris is removed, it is time to give the shower area a thorough cleaning. Use a suitable cleaning agent or solution and a non-abrasive scrub brush or sponge to clean the walls, floor, and any other surfaces of the shower. Remember to follow the manufacturer’s instructions for cleaning the specific materials used in your walk-in shower kit.
Inspecting for any necessary touch-ups or adjustments
With the cleaning complete, it is now time to inspect the installed walk-in shower kit for any touch-ups or adjustments that may be required. Take a close look at the caulking and grouting around the edges of the shower area. Ensure that they are properly applied and that no gaps or cracks are present. If any issues are detected, reapply caulking or grouting as needed to ensure a watertight seal.
Next, inspect the showerhead, faucets, and any other fixtures for any leaks or loose connections. Tighten any loose connections and replace any faulty components if necessary. Ensure that the water flow and temperature controls are functioning properly, and that there are no leaks or drips.
Finally, give the shower area a visual check to confirm that all tiles or panels are properly aligned and securely in place. Check for any signs of damage or imperfections, and make any necessary touch-ups to ensure a clean and seamless appearance.
By taking the time to carry out these cleaning and final inspection steps, you can ensure that your walk-in shower kit installation is completed with perfection. This will not only provide you with a beautiful and functional shower space, but also give you peace of mind knowing that everything has been thoroughly checked and is ready for use.
Frequently Asked Questions
Can I Install A Walk-In Shower Kit By Myself?
Yes, you can install a walk-in shower kit by yourself. The process requires basic plumbing and carpentry skills, but it is doable for most individuals. However, if you are unsure or uncomfortable with DIY projects, it is recommended to hire a professional for installation.
What Tools Do I Need To Install A Walk-In Shower Kit?
To install a walk-in shower kit, you will need some basic tools such as a drill, screwdriver, level, tape measure, and wrench. Additionally, you may need specific tools depending on the type of shower kit you purchased. Refer to the manufacturer’s instructions for a complete list of tools required.
How Long Does It Take To Install A Walk-In Shower Kit?
The time required to install a walk-in shower kit depends on various factors, including your level of experience and the complexity of the kit. On average, installation can take anywhere from a few hours to a full day. It is recommended to allocate a full day for the installation to ensure sufficient time and avoid rushing the process.
Can I Install A Walk-In Shower Kit On Any Type Of Flooring?
Most walk-in shower kits can be installed on a variety of flooring types, including tile, concrete, and even certain types of wooden floors. However, it is important to ensure that the flooring is level, stable, and capable of supporting the weight of the shower kit.
Consult the manufacturer’s instructions or seek professional advice if you are unsure.
Conclusion
Installing a walk-in shower kit can be a straightforward and cost-effective way to upgrade your bathroom. By following the step-by-step instructions mentioned above, you can successfully install a walk-in shower kit on your own. From selecting the right kit to preparing and assembling the components, this guide has provided comprehensive information to help you through the process.
With a little patience and a few basic tools, you can transform your bathroom into a stylish and functional space. Enjoy the convenience and luxury of a walk-in shower by installing a kit today!