To install a towel bar, first, determine the desired height and location on the wall. Then, use a level and screws to attach the mounting brackets before attaching the towel bar.
Planning And Preparation
Before you start installing a towel bar, it is crucial to plan and prepare properly. This will ensure a smooth and successful installation process, as well as the functionality and aesthetic appeal of your bathroom. In this section, we will walk you through the essential steps of planning and preparing for the installation of a towel bar.
Determining the Suitable Towel Bar Location
The first step in planning for your towel bar installation is determining the suitable location. You need to consider various factors such as the height, proximity to other fixtures, and accessibility. Here’s how you can go about it:
- Step 1: Look for a wall space that is easily accessible and within reach of the shower or bathtub. This will ensure convenience for everyone using the bathroom.
- Step 2: Consider the height of the towel bar. A general rule of thumb is to install it at a height of about 48 inches from the floor. However, you can adjust it based on your preference and the height of your family members.
- Step 3: Take into account the distance from other fixtures such as the toilet, sink, or shower. You don’t want the towel bar to be too close and cause obstructions.
- Step 4: Make sure there is enough space for the towels to hang without touching the floor or other objects. Allow for sufficient clearance.
Measuring and Marking the Wall for Installation
Once you have determined the suitable location for your towel bar, the next step is to measure and mark the wall for installation. Here’s what you need to do:
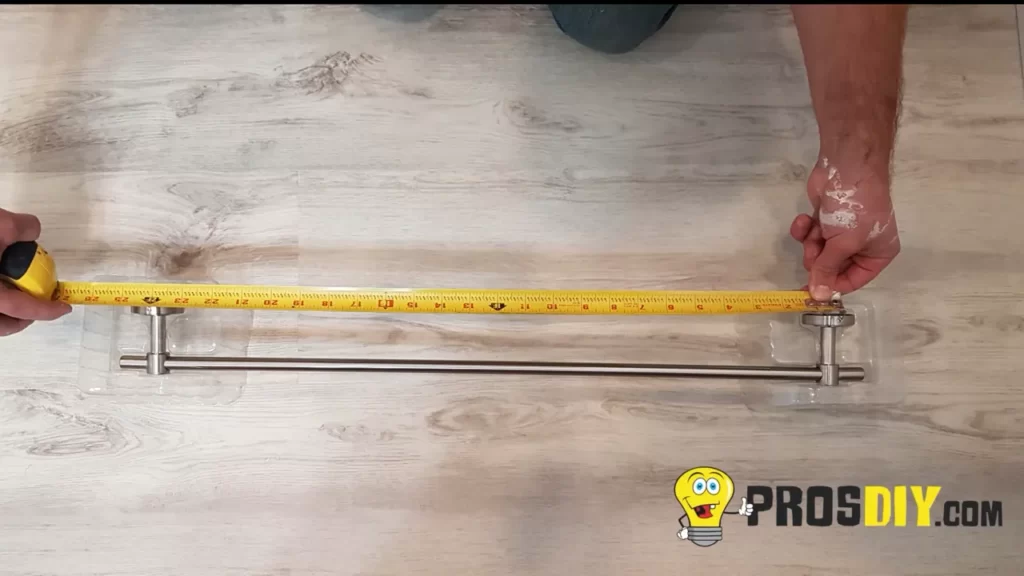
- Step 1: Start by measuring the length of your towel bar. This will help you determine how far apart the mounting brackets should be.
- Step 2: Use a measuring tape to measure and mark the desired height of the towel bar on the wall.
- Step 3: Measure the distance between the marked height and the floor to ensure accuracy.
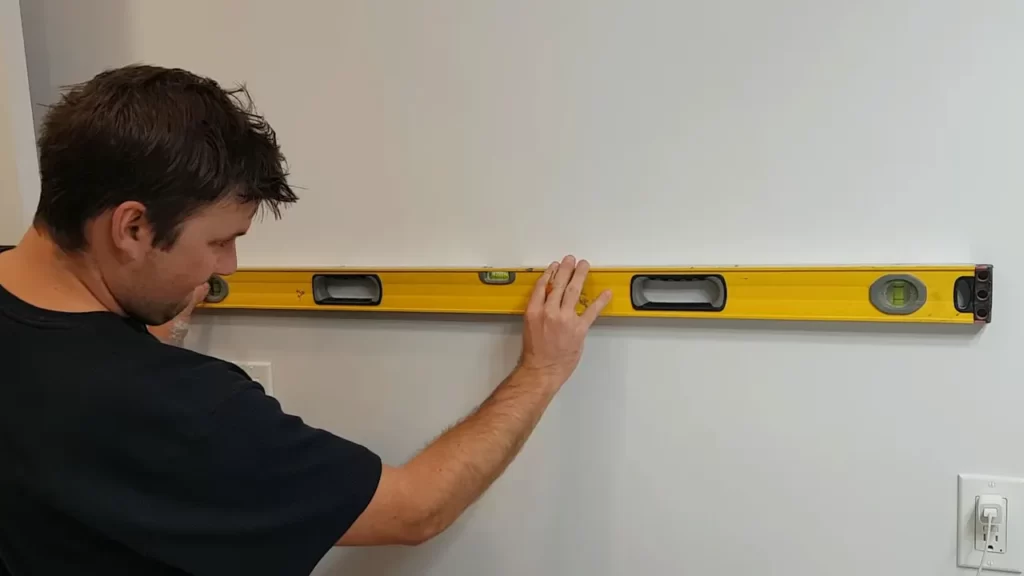
- Step 4: Use a level to make sure the marks are perfectly horizontal. This will ensure that your towel bar hangs straight and looks visually pleasing.
Gathering the Necessary Tools and Materials
Once you have determined the location and marked the wall, it’s time to gather the necessary tools and materials for the installation. Here’s what you’ll need:
| Tools | Materials |
|---|---|
| Screwdriver | Towel bar |
| Drill | Mounting brackets |
| Measuring tape | Screws or anchors |
| Pencil or marker | Level |
Make sure you have all these tools and materials ready before you start the installation. This will save you time and ensure a hassle-free process.
By planning and preparing thoroughly, you can ensure a successful towel bar installation that enhances the functionality and aesthetics of your bathroom. So, take the time to determine the suitable location, measure and mark the wall accurately, and gather all the necessary tools and materials. With these preparations in place, you’ll be ready to move on to the next step of installing your towel bar.
Installing The Mounting Brackets
When it comes to installing a towel bar, one of the most important steps is securely installing the mounting brackets. The brackets provide the necessary support for the towel bar and ensure its stability. In this article, we will guide you through the process of installing the mounting brackets with ease and precision.
Positioning and Aligning the Mounting Brackets
To begin, determine the desired height and location for your towel bar. Take into consideration the height of the tallest person who will be using the towel bar, as well as the height of the towels you plan to hang. Once you have determined the ideal position, use a tape measure to mark the exact spots where the mounting brackets will be installed.
Next, it is important to align the brackets properly. Use a level to ensure that they are perfectly horizontal. This will prevent your towel bar from slanting or tilting once it is installed.
Marking the Screw Holes for Drilling
Once the brackets are positioned and aligned, it is time to mark the screw holes for drilling. Place the bracket against the wall, making sure it is perfectly level. Using a pencil or a marker, mark the center of each screw hole on the wall.
Pro tip: If you are drilling into tile or another hard surface, it may be helpful to use a center punch to create a small indentation at each marked spot. This will prevent the drill bit from slipping and ensure a clean hole.
Preparing the Wall Surface for Installation
Before attaching the brackets to the wall, it is important to prepare the wall surface. Clean the area where the brackets will be installed to remove any dust, dirt, or residue. This will help ensure a strong bond between the brackets and the wall.
If you are installing the towel bar onto a tiled surface, consider using adhesive or tile anchors for added support. Follow the manufacturer’s instructions for the adhesive or anchors you are using, and allow sufficient drying time before proceeding to the next step.
Securing the Brackets to the Wall
Now it’s time to secure the brackets to the wall. Use a drill with the appropriate drill bit size to carefully drill pilot holes at the marked spots. Make sure the drill bit matches the size of the screws provided with your towel bar.
After drilling the pilot holes, attach the brackets to the wall using the screws provided. Tighten the screws firmly, but be careful not to overtighten and damage the wall or brackets.
Pro tip: It is recommended to use wall anchors or toggle bolts for additional support if you are installing the towel bar on a hollow wall or a wall with weak substrates.
Once the brackets are securely attached to the wall, double-check their alignment using a level. Make any necessary adjustments before proceeding to the next step of installing the towel bar.
Congratulations! You have successfully installed the mounting brackets for your towel bar. In the next section, we will guide you through the final steps of installing the towel bar itself and making sure it is properly secured.
Attaching The Towel Bar
Once you have successfully mounted the brackets onto the desired location, it’s time to attach the towel bar. This crucial step ensures that your towel bar not only looks great but also functions properly. In this section, we’ll guide you through the process of inserting the towel bar into the mounting brackets, adjusting the bar for desired positioning, and tightening the set screws to secure the bar in place.
Inserting the towel bar into the mounting brackets
To start, take the towel bar and align each end with the corresponding mounting bracket. Make sure that the open ends face towards the outside, as this is where your towels will hang. Gently slide the towel bar into the brackets until it rests securely.
Adjusting the bar for desired positioning
Now that the towel bar is inserted, you’ll want to position it at the desired height and distance from other fixtures. This step is crucial to ensure easy accessibility and visual appeal. Take a moment to step back and assess the placement before proceeding.
If adjustments need to be made, loosen the set screws on each bracket. Carefully slide the towel bar up or down to achieve the desired height. Additionally, you can adjust the angle of the bar by tilting it slightly up or down. Continue adjusting until you are satisfied with the positioning.
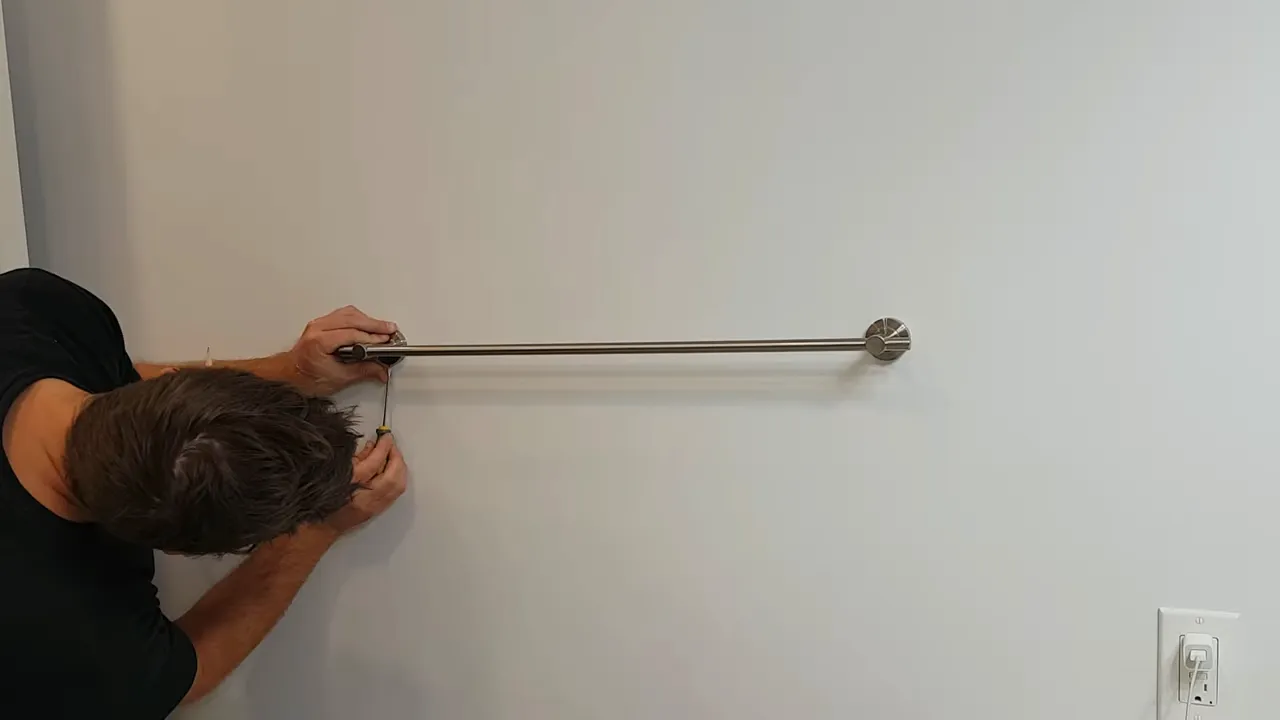
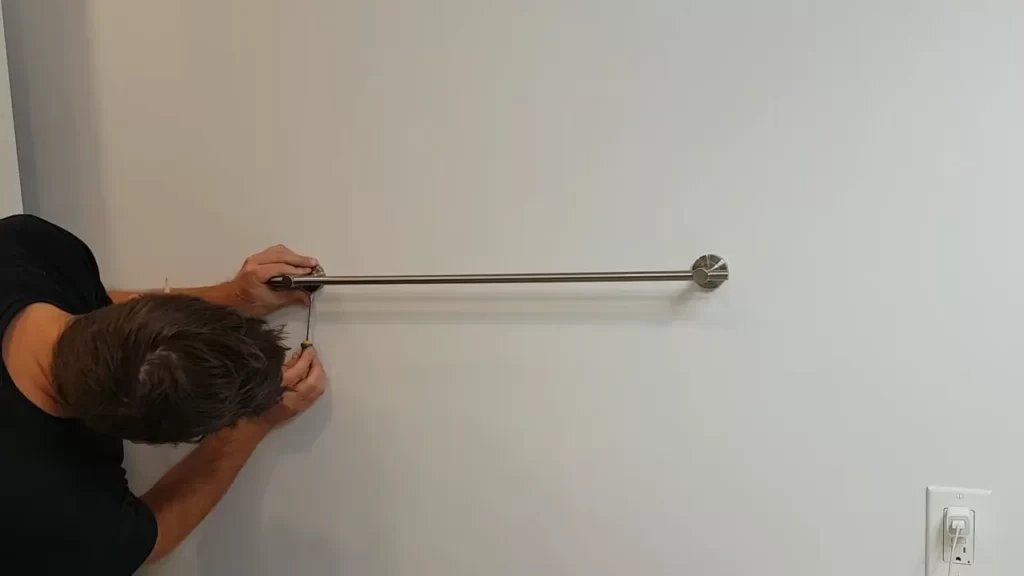
Tightening the set screws to secure the bar in place
With the towel bar in the desired position, it’s time to secure it by tightening the set screws. Locate the set screws on each bracket and using a screwdriver, gently tighten them. Be cautious not to overtighten, as this may damage the towel bar or the brackets.
After tightening the set screws, give the towel bar a gentle tug to ensure it is securely fastened. If it feels loose, repeat the process of tightening the set screws until it is stable.
Now that you have successfully attached the towel bar, take a step back and admire your handywork. Your towels will now have a designated space, adding functionality and style to your bathroom.
Finalizing The Installation
Checking the stability and alignment of the towel bar
After properly attaching the towel bar to the wall, it is important to check its stability and alignment. This step ensures that the towel bar is securely in place and will not fall off easily. To perform this check, give the towel bar a gentle tug to see if it feels loose or wobbly. If it does, it means that the mounting screws may need to be tightened further.
Another way to check the stability is to hang a towel on the bar and apply slight pressure. Notice if the bar shifts or moves. If it does, then it may require some adjustments. A stable towel bar is crucial to prevent accidents and ensure its longevity.
Making any necessary adjustments or corrections
If you find that the towel bar is not properly aligned or secure, it may require some adjustments or corrections. Before making any adjustments, ensure that the mounting screws are not over tightened, as this may cause damage to the wall.
To make the necessary adjustments, first, loosen the screws slightly and reposition the towel bar until it is aligned correctly. Use a level to ensure that the bar is straight. Once you are satisfied with the position, tighten the screws back in place, making sure not to overtighten.
Cleaning up and enjoying the newly installed towel bar
After completing the installation and making any necessary adjustments, it’s time to clean up and enjoy your newly installed towel bar. Remove any dust or debris that may have accumulated during the installation process. Wipe down the towel bar with a non-abrasive cleaner or warm soapy water to remove any fingerprints or smudges.
Take a moment to admire your handiwork and appreciate the convenience and functionality that the towel bar brings to your bathroom. Hang your favorite towels and relish in the organized and stylish appearance it adds to your space. Now you can confidently grab a fresh towel whenever you need one, knowing that your towel bar is securely and beautifully installed.
By following these steps, you can easily finalize the installation of your towel bar, ensuring its stability, alignment, and cleanliness. Enjoy the benefits of a functional and aesthetically pleasing towel bar in your bathroom.
Maintenance And Care Tips
Proper maintenance and care are essential for ensuring your towel bar remains in optimal condition for years to come. By following a few simple steps, you can keep your towel bar looking clean and polished, prevent any potential damage, and ensure it remains securely fastened to the wall. Let’s explore some important maintenance and care tips to help you maintain the longevity of your towel bar.
Regularly Cleaning and Polishing the Towel Bar
To keep your towel bar looking its best, it is important to regularly clean and polish it. Over time, water droplets, soap scum, and fingerprints may accumulate on the surface of the towel bar, diminishing its shine. To restore its lustre, follow these steps:
- Start by wiping down the towel bar with a soft cloth dampened with warm water.
- Gently scrub any stubborn dirt or residue using a mild soap solution or a non-abrasive cleaner.
- Rinse the towel bar thoroughly with clean water.
- Dry it completely with a dry cloth to prevent water spots or rust.
- After drying, apply a small amount of chrome or metal polish to a clean cloth.
- With a circular motion, rub the polish onto the surface of the towel bar.
- Continue polishing until a smooth and shiny appearance is achieved.
Remember, using abrasive cleaners or rough materials can scratch the surface of the towel bar, so always opt for gentle cleaning methods. Regular cleaning and polishing will not only keep your towel bar looking its best but will also help prevent the accumulation of grime and extend its lifespan.
Checking for Loose Screws and Tightening as Needed
Another important maintenance tip is to regularly check for loose screws and tighten them as needed. Over time, the towel bar may be subjected to slight movements and vibrations, causing the screws to gradually loosen.
To ensure the towel bar remains securely fastened to the wall and avoids any potential accidents, follow these steps to tighten the screws:
- Inspect all the screws on the towel bar.
- Using a screwdriver, carefully tighten any loose screws by turning them clockwise.
- Make sure not to overtighten the screws, as it may damage the towel bar or the wall.
By regularly checking and tightening the screws, you can maintain the stability of your towel bar and eliminate any wobbling or sagging.
Avoiding Excessive Weight on the Towel Bar to Prevent Damage
One common mistake to avoid is placing excessive weight on the towel bar. While towel bars are designed to hold towels, they have their limits. Placing heavy items or an excessive number of towels on the bar can lead to damage or even cause it to detach from the wall.
To prevent this, adhere to the following guidelines:
- Do not hang wet towels that are too heavy for the towel bar to support.
- Ensure that the weight on the towel bar is evenly distributed.
- Avoid using the towel bar to hang or support items other than towels.
- If you require additional storage or towel hanging capacity, consider installing multiple towel bars or alternative storage solutions.
By respecting the weight limits and intended use of the towel bar, you can prevent damage and maintain its functionality for years to come.
Troubleshooting Common Installation Issues
Installing a towel bar can be a simple and straightforward task, but sometimes, you may encounter common installation issues that can make the process a bit more challenging. In this section, we will address some of these common problems and provide you with practical solutions to ensure a successful towel bar installation.
Dealing with Uneven Walls or Surfaces
One of the common challenges during towel bar installation is dealing with uneven walls or surfaces. Uneven walls can create gaps between the towel bar and the wall, making it appear uneven or unstable. To address this issue, follow these steps:
- Start by measuring the distance between the mounting holes on the towel bar.
- Using a level, mark the desired placement for the towel bar on the wall.
- If you notice any unevenness, you can use shims to fill the gaps. Cut the shims to fit the required size and place them behind the towel bar brackets before securing them to the wall.
- Once the shims are in place, secure the towel bar brackets to the wall using screws or any mounting hardware provided.
- Check the levelness of the towel bar again and adjust as necessary.
- Finally, attach the towel bar to the brackets and ensure it is securely in place.
Handling Stripped or Damaged Screw Holes
If you encounter stripped or damaged screw holes during the installation process, don’t worry. There are a few simple solutions to address this problem:
- If the screw holes are stripped, you can try using larger screws to create a tighter fit.
- Alternatively, you can use wooden toothpicks or matchsticks to fill the stripped holes. Apply some wood glue to the toothpick or matchstick and insert it into the hole. Break off the excess and let it dry. Once dry, you can then reinsert the screws into the filled holes.
- If the screw holes are severely damaged, you may need to consider using wall anchors or toggle bolts for added support. These hardware options can provide a sturdy base for securing the towel bar.
Finding Solutions for Loose or Wobbly Towel Bars
After installation, you may notice that your towel bar feels loose or wobbly. This can be due to various reasons, such as insufficient tightening or inadequate support. To fix this issue, try the following:
- Check if the mounting brackets are securely in place. Tighten any loose screws or mounting hardware.
- Ensure that all screws are tightened properly, but be cautious not to overtighten as it may cause damage to the towel bar or the wall.
- If the towel bar continues to feel unstable, consider using adhesive or silicone caulk to provide extra reinforcement. Apply a small amount on the backside of the towel bar brackets before attaching them to the wall.
By following these troubleshooting tips, you can overcome common installation issues when installing a towel bar. Remember to take your time, double-check measurements, and make any necessary adjustments along the way. With patience and attention to detail, you’ll have a perfectly installed towel bar to enhance your bathroom functionality and aesthetics.
Frequently Asked Questions
Do Towel Bars Need To Be Installed In Studs?
No, towel bars do not necessarily need to be installed in studs. It depends on the weight of the towels and the type of wall surface. However, installing towel bars in studs provides extra stability and prevents potential damage to the wall.
Do You Need Drywall Anchors For Towel Bar?
Yes, it is recommended to use drywall anchors when installing a towel bar. This provides extra support and prevents damage to the drywall.
Where Is The Proper Towel Bar Placement?
The proper towel bar placement is typically based on personal preference and practicality. It’s commonly recommended to install the towel bar about 48 inches above the floor for adults and lower for children. Additionally, consider the proximity to the shower or bathtub for easy access and drying.
How Far Should Towel Bar Be From Floor?
The towel bar should be mounted about 48 inches above the floor to ensure it is conveniently reachable.
Conclusion
To sum up, installing a towel bar may seem like a daunting task, but with this step-by-step guide, you can easily accomplish it. By following the right tools and techniques, you can ensure a secure and functional towel bar in your bathroom.
Remember to measure accurately, drill and mount correctly, and tighten everything properly. With these tips, your towel bar installation will be a breeze. Happy DIYing!