To install a grab bar in a shower fiberglass, first mark the positions of the grab bar on the wall and make sure they align with the studs. Then drill pilot holes into the studs and screw in the mounting brackets.
Finally, attach the grab bar to the mounting brackets by tightening the screws. Installing a grab bar in a shower fiberglass requires careful measurement, drilling pilot holes into studs, and securely attaching the grab bar with mounting brackets. A grab bar offers stability and support while showering, especially for individuals with mobility issues.
By following these steps, you can ensure a safe and reliable installation that enhances accessibility and safety in your shower.
Understanding The Different Types And Sizes Of Grab Bars
Welcome to our comprehensive guide on how to install grab bars in a shower made of fiberglass. In this section, we will focus on understanding the different types and sizes of grab bars. By gaining a clear understanding of the options available, you’ll be able to choose the most suitable grab bar for your shower. Let’s explore each type in detail.
Straight Grab Bars
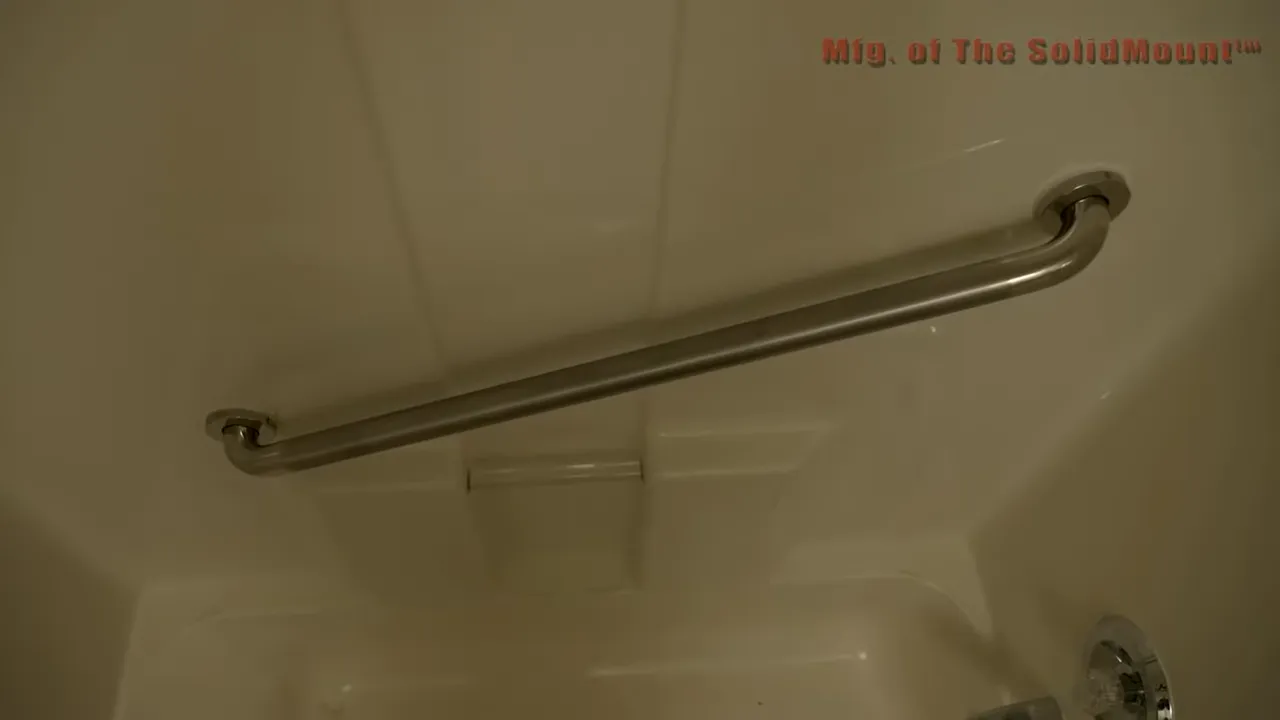
Straight grab bars are the most common type and are suitable for most shower installations. These bars are designed to provide stability and support while moving in and out of the shower, as well as when maneuvering inside the shower itself. Straight grab bars come in various lengths to accommodate different shower sizes and can be installed vertically, horizontally, or at an angle, depending on your preference and specific needs. The most commonly recommended lengths for straight grab bars range from 12 to 36 inches. However, it’s essential to consider the dimensions of your shower and where the bar will be mounted before making a final decision.
Angled Grab Bars
Angled grab bars are a popular choice for individuals who require additional support due to limited mobility or balance issues. These bars are designed with a unique shape that allows for a more ergonomic grip when holding onto them. Angled grab bars can be installed diagonally across a corner of the shower, providing optimal stability and a comfortable grip. These bars are available in various angles, typically ranging from 135 to 180 degrees. It’s vital to consider the user’s specific needs and preferences when selecting the angle of an angled grab bar.
Clamp-on Grab Bars
Clamp-on grab bars are an excellent option for those who require temporary or portable support in the shower. These bars do not require any drilling or permanent installation, making them ideal for individuals who may be renting or frequently traveling. Clamp-on grab bars utilize a unique clamping mechanism that securely attaches to the shower wall or any flat surface. These bars are typically adjustable and can be positioned at the desired height and location. When choosing a clamp-on grab bar, ensure that it is compatible with your shower’s fiberglass surface and that it provides sufficient grip strength to support the user’s weight.
Understanding the different types and sizes of grab bars is essential when it comes to selecting the right one for your fiberglass shower. Whether you opt for a straight grab bar, an angled grab bar, or a clamp-on grab bar, always prioritize safety and choose a grab bar that meets your specific needs. By installing the appropriate grab bar in your shower, you can enhance accessibility and provide extra stability, making your shower experience safer and more enjoyable.

Measuring And Determining The Ideal Location For The Grab Bar
When it comes to ensuring a safe and accessible shower experience, installing a grab bar is a crucial step. Not only does it provide support and stability, but it also enhances balance and minimizes the risk of slip and fall accidents. However, to maximize the effectiveness of the grab bar, proper measurement and determining the ideal location are of utmost importance. In this section, we will explore the key factors to consider when measuring and determining the ideal location for the grab bar in a fiberglass shower.
Identifying the Areas of the Shower Where Support is Needed
Before proceeding with the installation, it is essential to identify the specific areas of the shower where additional support is needed. Analyzing the layout and design of your shower will help determine the ideal locations for the grab bar. Keep in mind that the primary purpose of the grab bar is to provide support while entering and exiting the shower, as well as during movement within the shower space. Take note of any areas that may be slippery or require additional stability, such as near the entrance or near the showerhead.
Considering the User’s Height and Reach
When determining the ideal location for the grab bar, it is crucial to consider the height and reach of the intended user. Measure the height from the floor to the shoulder of the user to determine an appropriate height for the grab bar installation. This will ensure that the user can comfortably reach and utilize the grab bar for support. Keep in mind that the grab bar should be within the user’s arm’s reach, allowing for easy accessibility and maneuverability.
Ensuring Proper Positioning for Balance and Stability
Proper positioning of the grab bar is vital to ensure balance and stability while using the shower. The grab bar should be installed securely and at a height that allows the user to maintain a stable posture. Consider positioning the grab bar horizontally or diagonally, depending on the specific needs of the user and the layout of the shower. Additionally, make sure to position the grab bar in a location that provides support for various movements, such as entering, exiting, and shifting positions within the shower.
To summarize, measuring and determining the ideal location for the grab bar involves identifying the areas of the shower that require support, considering the user’s height and reach, and ensuring proper positioning for balance and stability. By taking these factors into account, you can install a grab bar in your fiberglass shower that enhances safety and accessibility for all users.
The Tools And Materials You’Ll Need For Installation
Installing a grab bar in your shower can help ensure safety and stability while using it. To successfully install a grab bar in a fiberglass shower, you’ll need a few essential tools and materials. These will make the installation process easier and more efficient. Ensure that you have the following tools and materials before you begin:
Drill
To securely attach the grab bar to your fiberglass shower, you’ll need a drill. A drill with a bit suitable for use on fiberglass is recommended. This will allow you to create precise holes without causing any damage to the shower surface.
Screwdriver
A screwdriver is necessary for tightening screws and securing the grab bar in place. Make sure you have a screwdriver that is compatible with the screws provided in your grab bar mounting kit.
Measuring Tape
Accurate measurements are crucial for proper placement and installation of the grab bar. Use a measuring tape to determine the desired location and spacing for the bar. This will ensure that it is installed at the optimal height and position for your specific needs.
Level
Using a level will help you ensure that the grab bar is installed straight and level. This is important for both visual appeal and functional stability. A level will help you maintain proper alignment during the installation process.
Grab Bar Mounting Kit
A grab bar mounting kit typically includes the necessary screws, anchors, and brackets required for installation. Ensure you have a suitable mounting kit that is compatible with the grab bar you have chosen. This kit will provide you with all the necessary hardware to securely attach the grab bar to your fiberglass shower.
Safety Goggles and Gloves
Prioritizing safety is crucial when working with tools and installing a grab bar. Wear safety goggles to protect your eyes from any potential debris or particles. Additionally, gloves will help protect your hands while handling tools and materials.
Having these tools and materials ready will ensure a smooth and successful installation of a grab bar in your fiberglass shower. With the right equipment, you’ll be able to enhance the safety and accessibility of your shower, making it a more secure and convenient space for everyone.

Preparing The Shower Fiberglass Surface
Before you can install a grab bar in your fiberglass shower, it’s important to properly prepare the surface. This ensures that the grab bar will adhere securely and function effectively. There are three key steps to preparing the shower fiberglass surface: cleaning the surface to remove any soap scum or residue, sanding down the surface to create a rough texture for better adhesion, and marking the drill points for the grab bar brackets.
Cleaning the surface to remove any soap scum or residue
To start, clean the surface of your fiberglass shower thoroughly. Soap scum and residue can prevent the grab bar from sticking properly, so it is important to remove any build-up. You can use a mild bathroom cleaner or a mixture of warm water and vinegar.
Sanding down the surface to create a rough texture for better adhesion
Next, you’ll need to create a rough texture on the fiberglass surface to improve adhesion. You can achieve this by lightly sanding the area where you plan to install the grab bar. Use a fine-grit sandpaper and gently rub the surface in circular motions. Be careful not to apply too much pressure, as this could damage the fiberglass.
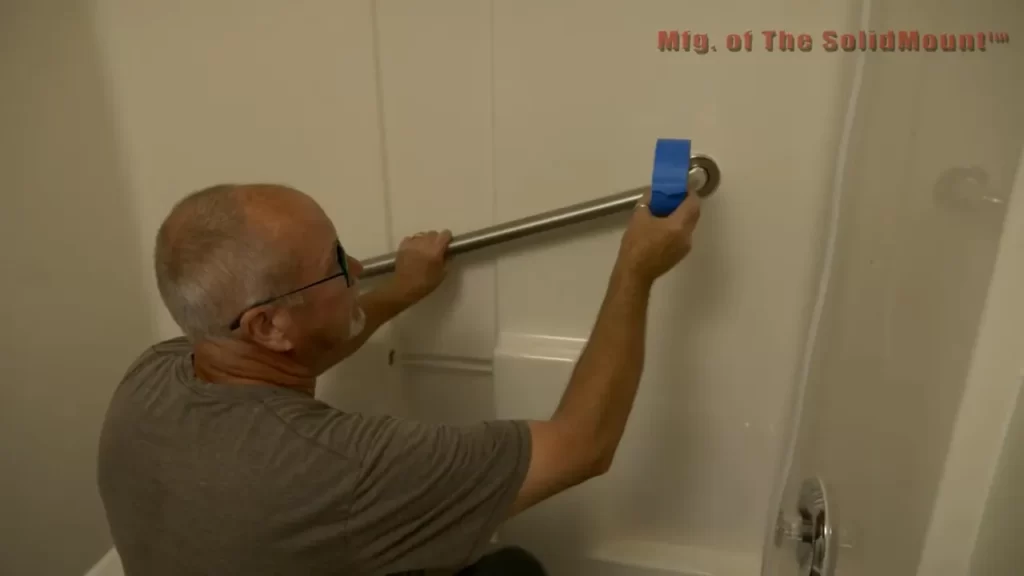
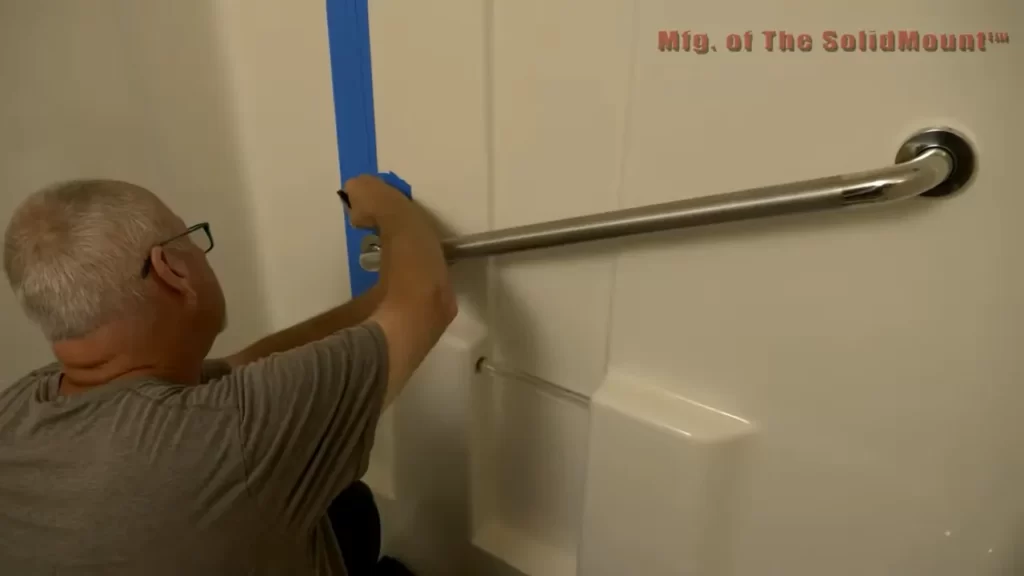
Marking the drill points for the grab bar brackets
Once the surface is clean and textured, you can proceed to mark the drill points for the grab bar brackets. Position the grab bar in the desired location and use a pencil or a marker to mark the areas where the brackets will be attached. Make sure the marks are level and evenly spaced to ensure the grab bar is installed securely.
By following these steps to prepare the shower fiberglass surface, you’ll create a secure foundation for installing the grab bar. This will give you added safety and stability while using your shower.
Installing The Grab Bar Brackets
Once you have marked the locations for your grab bar brackets in the shower fiberglass, it’s time to install them securely. This process involves drilling pilot holes, inserting wall anchors, and securing the brackets using screws. Follow these steps to ensure a stable and durable installation.
Drilling pilot holes at the marked locations
Using a drill with an appropriate drill bit size, carefully drill pilot holes at the marked locations on the shower fiberglass. The size of the drill bit should correspond to the diameter of the wall anchors you are using. Remember, the pilot holes are essential for guiding the wall anchors into the fiberglass and ensuring a secure fit.
To prevent any damage to the fiberglass, it is recommended to apply gentle pressure while drilling and periodically check the depth of the pilot holes to avoid drilling too far.
Inserting the wall anchors into the pilot holes
Once the pilot holes are drilled, it’s time to insert the wall anchors. Wall anchors provide additional support and stability to the grab bar brackets. Gently tap the wall anchors into the pilot holes using a hammer until they are flush with the surface of the shower fiberglass.
Ensure that each wall anchor is fully seated in its respective pilot hole and that they are evenly aligned with the marked locations. This will ensure a uniform distribution of weight and maximize the strength of the grab bar installation.
Securing the grab bar brackets to the shower fiberglass using screws
With the wall anchors in place, it’s time to secure the grab bar brackets to the shower fiberglass. Line up the brackets with the wall anchors and insert the screws provided through the holes in the brackets, into the wall anchors.
Use a screwdriver or a drill with a screwdriver bit to tighten the screws. Be sure not to overtighten, as this could damage the fiberglass. Once the brackets are firmly secured, give them a gentle tug to ensure they are stable and can support weight comfortably.
It is recommended to check the grab bar brackets periodically to ensure they remain secure over time. If you notice any loosening or movement, tighten the screws as necessary.
By following these steps for installing the grab bar brackets, you can enhance the safety and accessibility of your shower while maintaining the integrity of your fiberglass. Remember, a properly installed grab bar can provide valuable support and confidence for users of all ages and abilities.
Attaching The Grab Bar To The Brackets
Introduction:
Attaching the Grab Bar to the Brackets
Once you have successfully installed the brackets for your grab bar in the shower fiberglass, the next step is to securely attach the grab bar to these brackets. This step is crucial to ensure the stability and safety of the grab bar while you are using it. In this section, we will discuss the process of attaching the grab bar to the brackets step-by-step.
H3: Applying adhesive on the back of the grab bar
The first step in attaching the grab bar to the brackets is to apply adhesive on the back of the grab bar. This adhesive will help create a strong bond between the grab bar and the brackets, ensuring a secure attachment. Follow these steps to apply adhesive correctly:
1. Clean the back of the grab bar: Before applying the adhesive, make sure the back of the grab bar is clean and free from any dirt, dust, or residue. Cleaning the surface will ensure better adhesion.
2. Apply adhesive evenly: Squeeze a suitable amount of adhesive on the back of the grab bar. Use a spreader or your finger to evenly spread the adhesive over the surface. Apply enough adhesive to cover the entire area of the grab bar that will come in contact with the brackets.
3. Avoid excess adhesive: Take care not to apply an excessive amount of adhesive, as it may seep out when you attach the grab bar to the brackets. Excess adhesive can be hard to clean and may affect the overall appearance of the installation.
H3: Aligning the grab bar with the brackets
Once you have applied adhesive on the back of the grab bar, it’s time to align it properly with the brackets. Proper alignment is crucial to ensure that the grab bar fits securely and does not move or come loose. Follow these steps to align the grab bar correctly:
1. Take measurements: Measure the distance between the brackets to ensure that the grab bar is aligned correctly. Use a tape measure or a level to ensure accuracy.
2. Position the grab bar: Hold the grab bar in the desired position, aligning it with the brackets. Make sure the grab bar is level and centered between the brackets.
3. Make adjustments if necessary: If the grab bar is not aligning correctly, make slight adjustments to its position. Ensure that it fits securely against the brackets without any gaps or misalignments.
H3: Pressing the grab bar against the brackets to ensure a secure attachment
To complete the attachment process, you need to press the grab bar firmly against the brackets. This step will help ensure a secure attachment and prevent any movement or loosening of the grab bar. Follow these steps to press the grab bar against the brackets effectively:
1. Apply even pressure: Place both hands on the grab bar and press it firmly against the brackets. Apply even pressure to ensure that the grab bar is attached securely.
2. Check for stability: After pressing the grab bar against the brackets, check for stability. Try to move the grab bar to ensure that it does not wiggle or come loose. If needed, press it against the brackets again to further secure the attachment.
Conclusion:
By following these steps, you can attach the grab bar to the brackets properly and ensure a secure installation. Remember to apply adhesive evenly on the back of the grab bar, align it correctly with the brackets, and press it firmly to guarantee stability and safety while using the grab bar in your shower fiberglass. With these guidelines, you can enjoy the added security and convenience that a grab bar provides in your shower.
Cleaning And Care Instructions
Proper cleaning and care of your grab bar is essential for maintaining its functionality and longevity. By following these simple instructions, you can ensure your grab bar in the shower fiberglass remains in pristine condition:
Using non-abrasive cleansers to clean the grab bar
Regular cleaning is necessary to prevent the buildup of soap scum and dirt on your grab bar. When cleaning, always remember to use non-abrasive cleansers to avoid scratching the surface of the bar. Abrasive cleansers can damage the finish and compromise the integrity of the grab bar.
To clean the grab bar, follow these steps:
- Dampen a soft cloth or sponge with warm water.
- Apply a mild, non-abrasive cleanser to the cloth or sponge.
- Gently scrub the surface of the grab bar, paying extra attention to areas where dirt and grime may accumulate.
- Rinse the grab bar thoroughly with warm water to remove any residue from the cleanser.
- Dry the grab bar with a clean, soft cloth to prevent water spots and streaks.
| Do’s | Don’ts |
|---|---|
|
|
Regularly inspecting the grab bar for signs of damage or loose screws
In addition to cleaning, regular inspection of your grab bar is crucial for identifying any signs of damage or loose screws. Over time, the grab bar may be subjected to wear and tear, and it is important to address any issues promptly to maintain safety.
To inspect the grab bar, follow these steps:
- Gently apply pressure to the grab bar, checking for any signs of movement or instability.
- Look for any visible cracks, chips, or damage to the surface of the grab bar.
- Tighten any loose screws using a screwdriver.
- If you notice any significant damage or the grab bar is no longer secure, consider replacing it to ensure continued safety and stability.
By incorporating these cleaning and care instructions into your maintenance routine, you can extend the lifespan of your grab bar and enjoy a secure and reliable support system in your fiberglass shower.
Proper Usage And Safety Precautions
Installing a grab bar in a fiberglass shower not only provides additional support and stability but also promotes safety for individuals with mobility issues. However, it is important to follow proper usage techniques and safety precautions to ensure its effectiveness. In this section, we will demonstrate the correct way to grip and use the grab bar and emphasize the importance of caution and support while entering and exiting the shower.
Demonstrating proper technique for gripping and using the grab bar
When it comes to the proper technique for gripping and using a grab bar in the shower, there are a few key pointers to keep in mind:
- Position: Make sure the grab bar is installed at a height that is easily reachable, allowing you to maintain a comfortable grip without straining.
- Grip: Hold onto the grab bar with a firm grip using your whole hand. Avoid gripping with just your fingers, as this can reduce stability and increase the risk of slipping.
- Pressure: Apply a steady amount of pressure on the grab bar to support your weight. This will help maintain balance and prevent accidental slips or falls.
- Movement: Use the grab bar to assist with movements such as standing up, sitting down, or transitioning from one position to another. Avoid putting excessive weight or strain on the grab bar, as it is designed to provide stability rather than serve as a support for full body weight.
Encouraging caution and support while entering and exiting the shower
When entering and exiting the shower, it is crucial to exercise caution and support to minimize the risk of accidents. Here are some safety measures to consider:
- Stability: Before entering or exiting the shower, ensure that the grab bar is securely fastened to the wall and can support your weight. Give it a gentle tug to test its stability before relying on it for support.
- Support: If you have difficulties with mobility, consider having a trusted individual assist you while entering and exiting the shower. This additional support will provide you with reassurance and minimize the chances of falls or injurious slips.
- Equipment: Consider using additional safety equipment, such as non-slip mats or adhesive strips on the shower floor. These aids can further enhance stability and reduce the risk of slipping.
- Step with Care: Take small, deliberate steps when entering or exiting the shower to maintain balance. Ensure that the floor is dry and free from soap or shampoo residue, as these can make the surface slippery.
By following these proper usage techniques and adhering to safety precautions, you can make the most of your grab bar in a fiberglass shower. It will provide the stability and support needed to navigate safely, enhancing your overall bathing experience.
Ensuring Accessibility For All Users
When it comes to bathroom safety, installing a grab bar in your shower is a crucial step. It provides stability and support, helping individuals maintain their balance and prevent falls. However, it’s essential to consider the diverse needs of different users, especially those with disabilities or limited mobility. Ensuring accessibility for all users means going beyond just one standard grab bar installation. It involves installing additional grab bars at varying heights to accommodate the varying needs of different users.
Installing additional grab bars at varying heights for different users
Installing a single grab bar in your shower is a great start, but it may not be enough to meet the needs of all users. Different individuals have different heights, reach, and strength levels. Some may require additional support or prefer to have multiple points of contact for added stability. That’s why it’s important to consider installing additional grab bars at varying heights.
A good practice is to install one grab bar horizontally along the back wall of the shower, preferably at waist height. This provides a sturdy handhold for most users. Additionally, installing vertical grab bars on the side walls can provide extra support for individuals who need additional stability or assistance when standing up or sitting down.
For individuals with disabilities or limited mobility, it may be beneficial to install a horizontal grab bar lower down, around knee height. This lower bar can serve as a handhold for individuals who may have difficulty bending or reaching higher grab bars. In contrast, taller individuals may benefit from a higher horizontal grab bar, installed above shoulder height, providing support that matches their height and reach.
By strategically placing additional grab bars at varying heights, you create a customized and inclusive shower environment that caters to the needs of all users. This approach ensures that individuals with disabilities or limited mobility can safely and confidently navigate the shower without compromising their independence.
Remember, when installing grab bars at varying heights, it is crucial to ensure they are securely mounted to the wall using appropriate anchors and hardware. Consult a professional if needed, to ensure a proper and safe installation.
Frequently Asked Questions
Can I Attach A Grab Bar To A Fiberglass Shower?
Yes, you can attach a grab bar to a fiberglass shower. However, it is crucial to ensure that the grab bar is installed properly and securely to avoid any damage to the fiberglass.
Can You Screw Into Fiberglass Shower?
Yes, you can screw into fiberglass showers. Fiberglass is a versatile material that can be easily drilled and fastened. Just make sure to use the proper tools and techniques to avoid damaging the shower.
How Do You Find A Stud In A Fiberglass Shower?
To find a stud in a fiberglass shower, use a stud finder tool or a magnet. Move them along the wall until it detects a stud’s presence, indicated by a strong pull or a beep. Mark the spot and proceed with installing shelves or other fixtures securely.
How Do You Install Grab Bars Without Studs?
To install grab bars without studs, use a sturdy alternative like wall anchors or toggle bolts. First, secure the grab bar’s mounting brackets to the wall with the chosen hardware. Then, attach the grab bar to the brackets. Make sure to follow the manufacturer’s instructions for proper installation.
Conclusion
To sum it up, installing a grab bar in a fiberglass shower can greatly enhance safety and accessibility for individuals of all ages. By following the step-by-step instructions provided in this blog post, you can confidently complete this DIY project.
Remember to choose the right locations, use the proper tools, and ensure a secure installation. With a grab bar in place, you can enjoy peace of mind and prevent accidents in your shower. So go ahead and make this important addition to your bathroom today!