
To install a point of use water heater for shower, connect the inlet and outlet pipes to the corresponding connections on the heater unit, mount the heater securely on a wall, and connect the electrical supply following the manufacturer’s instructions. Installing a point of use water heater for your shower can provide you with immediate hot water without the need to wait for the main water heater to heat up.
This convenient and efficient solution allows you to enjoy hot showers quickly and easily. In this guide, we will walk you through the steps to install a point of use water heater for your shower, from connecting the pipes to mounting the unit securely on a wall.
By following these instructions, you’ll be able to enjoy a refreshing and hot shower whenever you desire. So, let’s get started with the installation process.
Eliminate Waiting Time For Hot Water
No more waiting for hot water to reach the shower
Are you tired of standing around and waiting for warm water to finally make its way from your conventional water heater to the shower? Say goodbye to those frustrating moments with the installation of a point of use water heater. By eliminating the need for hot water to travel long distances through pipes, these compact units provide instant hot water right where you need it, ensuring that you no longer have to endure the inconvenience of waiting.
Instant hot water for a more convenient showering experience
With a point of use water heater, you can forget about starting your day by shivering under a cold shower or wasting time waiting for the water to heat up. These efficient devices ensure that hot water is available on demand, allowing you to enjoy a more convenient and enjoyable showering experience.
Installing a point of use water heater is a simple and cost-effective solution to ensure that hot water is readily available for your shower. Unlike traditional water heaters that heat and store large amounts of water, point of use water heaters heat the water as it passes through the unit, providing you with instant hot water whenever you need it.
Not only does this eliminate the waiting time for hot water, but it also helps conserve energy and reduce utility bills. By heating water only when necessary, point of use water heaters minimize energy loss, making them more efficient and environmentally friendly.
Installation and compatibility considerations
When it comes to installing a point of use water heater for your shower, there are a few considerations to keep in mind:
- Electrical requirements: Point of use water heaters typically require a dedicated electrical circuit, so it’s important to ensure that your electrical system can support the additional load. Consulting a qualified electrician is recommended to ensure proper installation and compliance with electrical codes.
- Water flow and pressure: Before purchasing a point of use water heater, it’s crucial to determine the desired flow rate and pressure needed for your shower. Choosing a unit with the appropriate specifications will ensure an optimal showering experience.
- Space availability: Point of use water heaters are designed to be compact and space-saving. Make sure you have adequate space near your shower to accommodate the unit without obstructing other fixtures or plumbing.
By considering these factors and selecting the right point of use water heater for your specific needs, you can effectively eliminate waiting time for hot water and enjoy the luxury of instant hot showers.
Energy Efficiency And Cost Savings
Reduce energy wastage by heating water only where it’s needed
One of the key advantages of installing a point of use water heater for your shower is the significant reduction in energy wastage. Unlike traditional water heaters that heat and store large quantities of water, a point of use water heater is designed to heat water instantly as it passes through the unit. This means that energy is only consumed when hot water is required, eliminating the need to continuously heat and maintain a large tank of water.
By heating water only where it’s needed, you can enjoy substantial energy savings. The absence of standby heat loss, which occurs with traditional water heaters, further contributes to energy efficiency. Standby heat loss occurs when the heated water sitting in the tank loses heat over time, causing the water heater to continuously work to maintain the set temperature. With a point of use water heater, you can say goodbye to standby heat loss and hello to energy-efficient hot showers.
Lower utility bills by using less energy to heat smaller amounts of water
Not only does a point of use water heater offer energy efficiency, but it also translates into cost savings on your utility bills. By heating smaller amounts of water, you are using less energy compared to traditional water heaters that heat and store large quantities of water continuously. This means reduced energy consumption and ultimately, lower utility bills.
Furthermore, a point of use water heater provides the flexibility to set the desired temperature for each shower individually. This allows you to customize the temperature according to personal preferences and ensures that you are not wasting energy on heating water beyond what is necessary.
With a point of use water heater, you can enjoy the luxury of hot showers while being mindful of your energy consumption. By reducing energy wastage and using less energy to heat smaller amounts of water, you can save both the planet and your wallet.
Flexibility And Easy Installation Process
Easy installation process with minimal plumbing modifications required
Installing a point of use water heater for your shower doesn’t have to be a complicated and time-consuming process. In fact, it is surprisingly easy, requiring only minimal plumbing modifications. Whether you’re a seasoned DIY enthusiast or a beginner, you’ll be able to handle this installation without breaking a sweat.
The first step in the easy installation process is to gather all the necessary tools and equipment. You will need a screwdriver, adjustable wrench, pipe cutter, Teflon tape, and, of course, the point of use water heater itself. Once you have everything ready, it’s time to get started.
Allows for flexibility in positioning the water heater closer to the shower area
One of the major advantages of installing a point of use water heater for your shower is the flexibility it offers in terms of positioning. Unlike traditional water heaters, which are usually located far away from the shower area, a point of use water heater can be installed much closer, ensuring quicker access to hot water.
This flexibility in positioning allows you to optimize the efficiency of your water heater by minimizing heat loss through long plumbing lines. In addition, it also reduces the time wasted waiting for hot water to reach the shower. With a point of use water heater, you can enjoy hot water almost instantaneously, providing a more convenient and enjoyable showering experience.
Water Heater Capacity And Size
Evaluate the required water heater capacity based on usage and household size
When it comes to installing a point of use water heater for your shower, it is essential to consider the water heater capacity that meets your household’s needs. The capacity of the water heater determines how much hot water it can generate per minute, so you never run out of hot water during your shower. Evaluating your required water heater capacity involves assessing your household’s water usage patterns and the number of individuals in your household.
To determine the required water heater capacity, consider the following factors:
1. Number of individuals in the household
The more people in your household, the higher the demand for hot water. Each person will use a certain amount of hot water per minute during their shower, so it is crucial to calculate the total hot water demand based on the number of individuals. This will help you select a water heater with the appropriate capacity.
2. Usage patterns
Take into account your household’s usage patterns when deciding on the water heater capacity. If your family has a consistent schedule where multiple individuals all need hot water around the same time, you will require a water heater with a higher capacity. Alternatively, if hot water usage is spread out throughout the day, a water heater with a lower capacity may be suitable.
3. Average flow rate
Understanding the average flow rate of the plumbing fixtures in your shower is essential for determining the water heater capacity. Different fixtures have different flow rates, and it is crucial to estimate the total flow rate during simultaneous use. This will ensure that you choose a water heater capable of providing sufficient hot water to meet your household’s needs.
Consider the available space for installation and choose the appropriate size
Aside from considering the water heater capacity, it is vital to evaluate the available space for installation and choose a water heater size that fits seamlessly into your shower area. While some houses have ample space to accommodate any water heater size, others may have limited space that requires careful consideration.
To ensure a proper fit, follow these steps:
1. Measure the available space
Start by measuring the available space in your shower area where you plan to install the point of use water heater. Consider the height, width, and depth of the space and note down the dimensions. This will give you a clear understanding of the maximum size your water heater can be.
2. Consider water heater specifications
Check the technical specifications of the water heater models you are considering. Most manufacturers provide information on the dimensions of their water heaters, allowing you to select one that fits within your available space. You can typically find this information on the manufacturer’s website or in the product manual.
3. Account for accessibility
In addition to fitting within the available space, it is crucial to ensure the water heater remains easily accessible for maintenance and potential repairs. Avoid installing the water heater in hard-to-reach areas or blocked spaces that may hinder the functionality or servicing of the unit.
By carefully evaluating the required water heater capacity based on usage and household size, as well as considering the available space for installation and choosing the appropriate size, you can ensure a successful installation of your point of use water heater for your shower.
Electrical Requirements
When it comes to installing a point of use water heater for your shower, one of the most important considerations is the electrical requirements. This ensures that the water heater operates efficiently and safely. In this guide, we will discuss the essential electrical requirements you need to consider before installing a point of use water heater for your shower.
Check the voltage requirements of the point of use water heater
Before installing a point of use water heater, it’s crucial to check the voltage requirements of the unit. Different models may require different voltage levels, such as 120V or 240V. This information is usually provided in the product specifications or user manual. Make sure to look for this information and verify that your electrical system can support the required voltage.
Ensure the existing electrical system can support the additional load
Once you have determined the voltage requirements of the point of use water heater, you need to ensure that your existing electrical system can support the additional load. This is important to prevent overloading the circuit and potential electrical hazards.
To determine if your electrical system can support the additional load, follow these steps:
- Calculate the wattage requirements of the water heater: Check the product specifications to find the wattage rating of the point of use water heater. Multiply this rating by the voltage requirement (120V or 240V) to calculate the wattage.
- Check the capacity of the circuit: Identify the circuit that will supply power to the water heater. Check the circuit breaker or fuse rating to determine its capacity. A typical household circuit is rated at 15 or 20 amps.
- Compare the wattage requirements with the circuit capacity: If the wattage requirements are lower than the circuit capacity, your existing electrical system can support the additional load. However, if the wattage requirements exceed the circuit capacity, you may need to upgrade the circuit or consult an electrician to ensure a safe installation.
It’s important to note that the calculations described above are general guidelines. Depending on your specific electrical system and local electrical codes, additional considerations or requirements may apply. It is always recommended to consult a professional electrician for a thorough assessment of your electrical system before installing a point of use water heater.
By following these electrical requirements, you can ensure a safe and efficient installation of a point of use water heater for your shower. Taking the time to check the voltage requirements and assess the capacity of your electrical system will help you enjoy a reliable supply of hot water without any electrical issues.
Plumbing Considerations
Assess the current plumbing setup and determine if any modifications are necessary
One of the crucial aspects to consider before installing a point of use water heater for the shower is the existing plumbing setup in your home. Assessing the current plumbing arrangement will help you determine if any modifications are necessary to ensure a successful installation process.
Start by examining the placement of your shower and its proximity to the main water supply and drain lines. Take note of the distance between the shower and the current hot water source. If your existing plumbing is not equipped to handle a point of use water heater, modifications may be required to accommodate the new installation.
Here are some factors to consider when assessing the plumbing setup:
1. Pipe Size: Check the size of the existing pipes. Point of use water heaters typically require smaller diameter pipes compared to traditional whole-house water heaters. If the existing pipes are too large, it might be necessary to install reducers or replace pipes to match the recommended size for the new water heater.
2. Water Pressure: Evaluate the water pressure in your home to ensure it meets the requirements of the point of use water heater. Low water pressure can affect the performance and efficiency of the device. Consider installing a pressure regulator if the pressure is excessively high or low.
3. Ventilation: Determine if the location you’ve chosen for the point of use water heater allows for proper ventilation. Some models require venting to remove combustion gases, so it’s essential to follow the manufacturer’s guidelines for safe installation.
In addition to these considerations, it’s advisable to consult a professional plumber who can assess your current plumbing setup and provide expert advice on any necessary modifications. They can also help ensure compliance with local building codes and regulations.
Identify the location for installation and ensure access to water supply and drain lines
Once you have assessed the plumbing setup, the next step is to identify the ideal location for installing the point of use water heater. Choose a location that provides easy access to both the water supply and drain lines.
Here are some key points to remember when choosing the installation location:
1. Proximity to the Shower: Opt for a location that is close to the shower to minimize heat loss and ensure hot water reaches the showerhead quickly.
2. Accessibility: Ensure there is enough space around the water heater unit for maintenance and potential repairs in the future.
3. Water Supply: Make sure the chosen location allows easy access to the cold water supply line. This can be the main water line or a branch line dedicated to the shower.
4. Drain Line: Similarly, ensure that there is a nearby drain line where the system can discharge any excess water and prevent water damage.
5. Power Supply: If the point of use water heater requires an electrical connection, ensure the chosen location has access to an electrical outlet.
Taking the time to identify the optimal location and ensuring easy access to necessary water and power connections will simplify the installation process and contribute to the efficient functioning of the point of use water heater.
Remember, it’s essential to follow the manufacturer’s instructions and consult a licensed plumber if you have any concerns or questions during the installation process. This will ensure a successful installation and a satisfying shower experience with your new point of use water heater.
Gather Necessary Tools And Materials
Installing a point of use water heater for your shower can be a great way to enjoy a constant supply of hot water without having to wait for it to reach your bathroom. Before you begin the installation process, it’s important to gather all the necessary tools and materials. This ensures that you have everything you need within arm’s reach, saving you time and frustration along the way. In this section, we will provide you with a comprehensive list of tools and materials required for a successful installation.
List of Tools Required for Installation
To get started, make sure you have the following tools:
| Tool | Description |
|---|---|
| Adjustable Wrench | A wrench that can be adjusted to fit different size nuts and bolts. |
| Plumber’s Tape | A thin, white tape used to create a watertight seal. |
| Screwdriver | A tool used to tighten or loosen screws. |
| Drill | A power tool used to create holes in various materials. |
| Level | A tool used to determine if a surface is perfectly horizontal or vertical. |
| Tubing Cutter | A tool specifically designed to cut plastic or copper tubing. |
| Tape Measure | A flexible ruler used to measure distances. |
Materials Needed for Plumbing Modifications
If your point of use water heater requires any plumbing modifications, you will need the following materials:
- Flexible Water Supply Lines
- Pipe Fittings (such as couplings, elbows, and tees)
- Pipe Insulation
- Plumbing Valves
- Plumbing Connectors
- Plumbing Cement or Tape
Make sure you have at least one of each item listed above to meet your plumbing needs. It’s always a good idea to purchase some extra supplies in case of any unexpected issues during the installation process.
By gathering all the necessary tools and materials before you start your point of use water heater installation, you can ensure a smoother and more efficient process. You won’t have to pause in the middle of the installation to run out and purchase a forgotten tool or material. So, take the time to prepare properly, and you’ll be well on your way to enjoying endless hot showers.
Shut Off Water Supply And Drain Lines
If you’re tired of running out of hot water during your shower, it may be time to consider installing a point of use water heater. This type of water heater is designed to provide hot water directly at the source, eliminating the need for long waits or cold showers. In this blog post, we will guide you through the process of installing a point of use water heater for your shower so you can enjoy hot showers all year round.
Locate the main water supply valve and turn it off
The first step in installing a point of use water heater is to locate the main water supply valve and turn it off. This valve is usually located near the water meter or where the main water line enters your home. Turning off the main water supply valve is crucial as it will prevent any water from flowing into the pipes during the installation process.
Drain any remaining water from the pipes to prevent leaks during installation
After turning off the main water supply valve, it’s important to drain any remaining water from the pipes to prevent leaks during the installation. Simply opening the faucets in your home will help drain the water. However, if you want to ensure a thorough drain, you can follow these steps:
- Start by turning on the lowest faucet in your home, such as a basement or outdoor faucet.
- Next, go to the highest faucet in your home, such as an upstairs bathroom, and open it as well.
- Finally, open all faucets in between the lowest and highest points to allow the water to flow out completely.
Draining the water from the pipes will not only prevent leaks during installation but also make it easier to work with the plumbing system.
Important note: Make sure to close all the faucets once the water has been drained to avoid any additional water entering the pipes during the installation process.
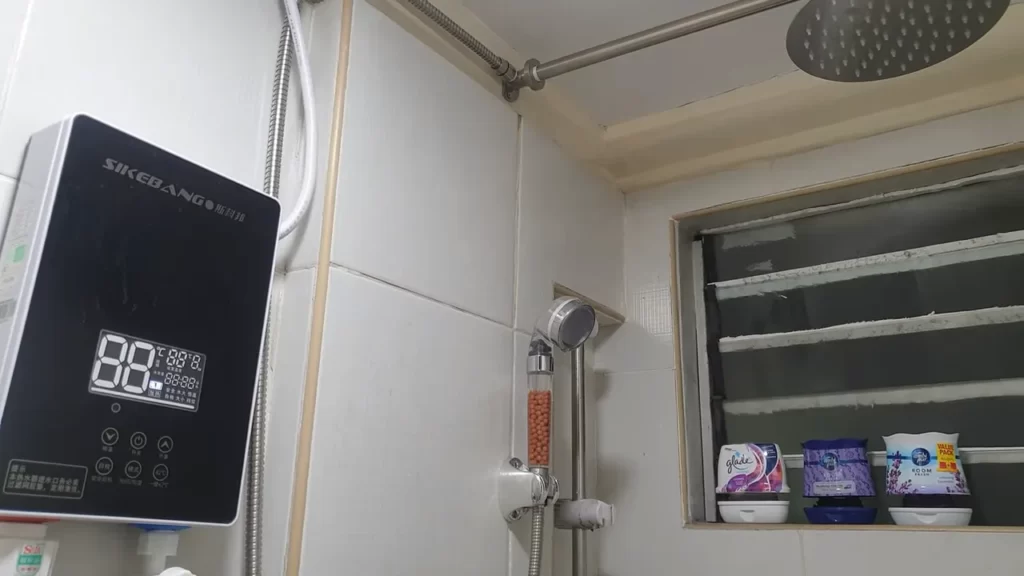
Mount The Water Heater
Now that you have chosen a suitable location near the shower area for your point of use water heater, it’s time to securely mount it on the wall or other designated surface. Follow these simple steps to get your water heater ready for use:
Choose a suitable location near the shower area
Before you begin the installation process, make sure you have selected a suitable location for your water heater. Consider the following factors:
- Proximity to the shower: Choose a spot that is close to the shower area to minimize heat loss in the pipes. This will ensure that hot water reaches your shower quickly.
- Accessibility: Mount the water heater in a location that is easily accessible for maintenance and repairs if needed.
- Wall strength: Ensure that the wall or surface where you plan to install the water heater is strong enough to support its weight. Check the manufacturer’s specifications for the weight of the water heater.
- Electrical outlet availability: If your water heater requires an electrical connection, make sure there is an outlet nearby. If not, consider hiring an electrician to install one.
Securely mount the water heater on the wall or other designated surface
Once you have chosen a suitable location, follow these steps to securely mount the water heater:
- Position the water heater: Place the water heater against the wall or surface where you want to mount it. Ensure that it is level and there is enough space around it for proper ventilation.
- Mark the mounting holes: Use a pencil to mark the positions of the mounting holes on the wall. Make sure to align the holes with the brackets or mounting points on the water heater.
- Drill pilot holes: Using a drill bit that is slightly smaller than the diameter of the screws or anchors you will be using, drill pilot holes at the marked positions.
- Attach brackets or mounting points: If your water heater comes with brackets or mounting points, attach them to the wall using the screws or anchors that are provided. Make sure they are securely fastened.
- Secure the water heater: Carefully lift the water heater and align it with the brackets or mounting points on the wall. Insert the screws through the mounting holes on the water heater and tighten them with a screwdriver or drill.
- Double-check the stability: Once the water heater is securely mounted, give it a gentle shake to ensure it is stable. If it feels loose or wobbly, tighten the screws further.
By securely mounting your point of use water heater, you have taken an important step towards enjoying hot showers on demand. Now that the water heater is in place, the next step is connecting it to the plumbing system. Stay tuned for our next blog post on how to complete the installation process and start enjoying the benefits of a point of use water heater.
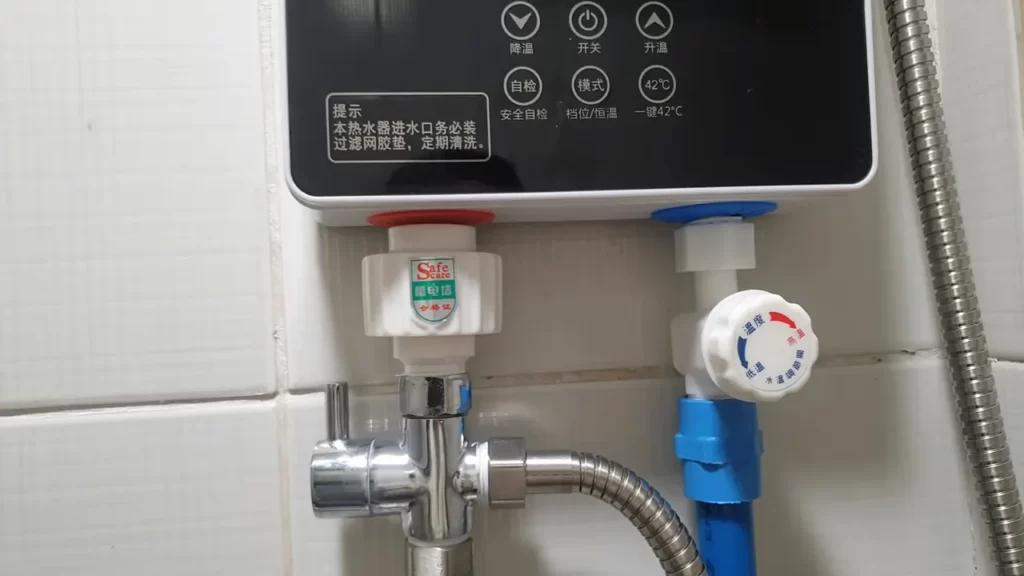
Connect Water Supply And Drain Lines
Once you have positioned your point of use water heater securely near the shower area, it’s time to connect the essential water supply and drain lines. Properly connecting these lines is crucial for the effective functioning of your water heater.
Connect the water supply line to the water heater input
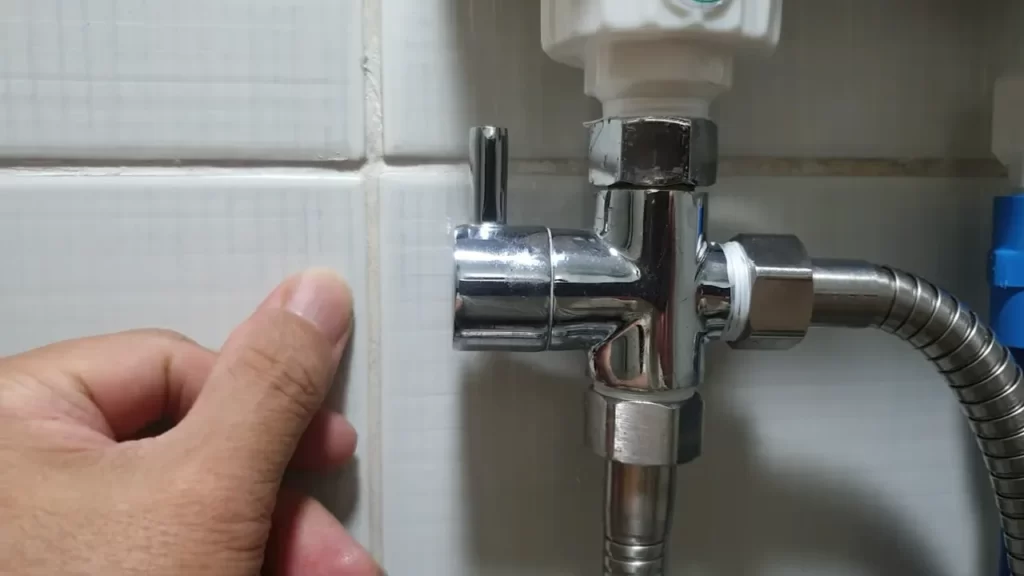
To begin, locate the water supply line that will be connected to the water heater input. This line is responsible for bringing the cold water into the unit. Ensure that the water supply valve is turned off before continuing with the installation process. With caution, connect one end of the supply line to the water heater’s input, ensuring it is securely fastened. Tighten the connection using an adjustable wrench to prevent any leaks.
Note: It is important to check for any potential leaks before proceeding to the next step. Turn on the water supply valve gradually and inspect the connections for any signs of leakage. If there are any leaks, re-tighten the connections until they are secure.
Attach the drain line to the water heater output
Navigate to the water heater output, which is responsible for releasing the heated water. This output should be connected to the drain line. Locate the drain line and connect one end to the water heater output. Just like with the water supply line, use an adjustable wrench to tighten the connection, ensuring it is leak-proof.
Note: Before turning on the water heater, double-check that all connections are tightly secured. Any loose connections can result in water leakage, causing damage to your property.
Now that you have successfully connected the water supply and drain lines to your point of use water heater, you are one step closer to experiencing the convenience and comfort it provides. Once everything is securely connected, you can proceed with the following steps in the installation process to ensure your shower is ready for use.
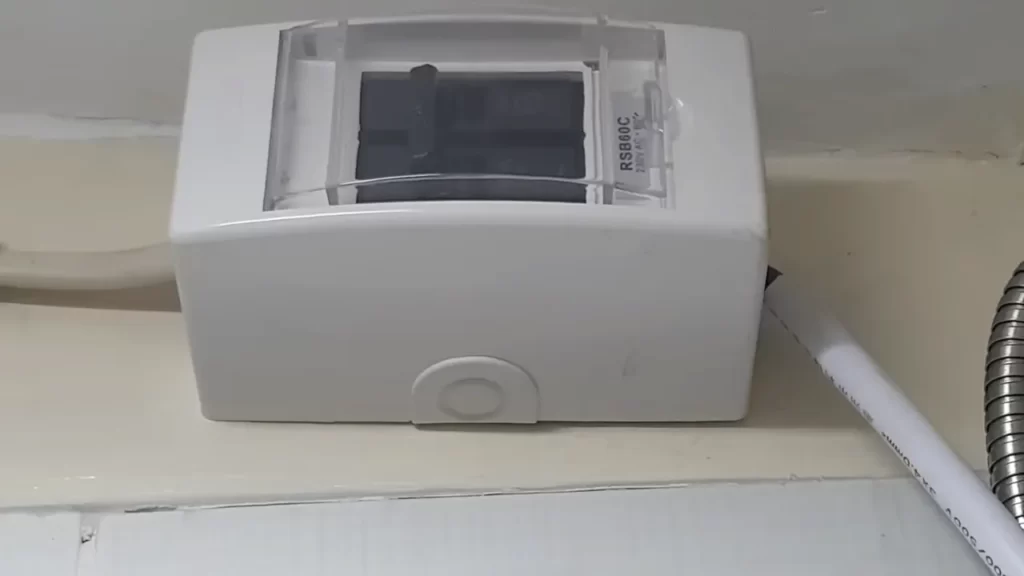
Electrical Connections
Follow the manufacturer’s instructions for electrical connections
Proper electrical connections are crucial when installing a point of use water heater for the shower. Following the manufacturer’s instructions is essential to ensure a safe and reliable electrical connection. These instructions provide specific guidance on the wire size, circuit breaker, and voltage requirements for your particular water heater model.
Make sure to carefully read and understand the manufacturer’s guidelines before proceeding with the installation. This ensures that you comply with the recommended procedures and avoid any potential risks or damages. The manufacturer’s instructions are designed to guarantee optimal performance, energy efficiency, and safety, so it’s important not to overlook them.
Ensure proper grounding and secure wiring
An important aspect of the electrical connection is ensuring proper grounding. Grounding is essential for protecting yourself and your appliances from electrical shocks and malfunctions. Start by identifying a suitable location for grounding, such as a metal water pipe or a dedicated grounding rod.
Next, ensure that the wiring is securely connected. Loose or damaged wires can lead to electrical hazards, so it’s crucial to inspect them thoroughly before proceeding. Use appropriate wire connectors, such as wire nuts or crimp connectors, to securely fasten the wires together. You may also need to strip the wire insulation to expose a sufficient amount of bare wire for a proper connection.
During the installation process, double-check the tightness of all connections and inspect the wiring for any signs of damage or wear. If you notice any issues, address them immediately before proceeding with the installation.
Example of a table:
For a clear reference, the following table outlines the recommended wire gauge for common point of use water heater sizes:
| Water Heater Size (kW) | Wire Gauge (AWG) |
|---|---|
| 1-2 kW | 12 AWG |
| 2.5-3.5 kW | 10 AWG |
| 4.5-6 kW | 8 AWG |
Note that these recommendations may vary depending on the specific water heater model and local electrical codes, so always refer to the manufacturer’s instructions for the most accurate information.
By adhering to the manufacturer’s instructions and ensuring proper grounding and secure wiring, you can install a point of use water heater for your shower safely and effectively. These precautions help to minimize electrical risks and ensure a reliable supply of hot water in your bathroom.
Test And Adjust Temperature
After installing a point of use water heater for your shower, it’s crucial to test and adjust the temperature to ensure a comfortable and safe bathing experience. This step is essential as it allows you to check for any leaks in the water supply and to fine-tune the temperature settings to your personal preference.
Turn on the water supply and check for leaks
Once the installation is complete, turn on the water supply to the point of use water heater. Start by opening the valve slowly to allow the water to flow through the system. As the water begins to flow, keep an eye out for any leaks or drips around the connections and joints.
If you notice any leaks, it’s crucial to address them immediately. Tighten the connections or replace any faulty components to ensure a watertight system. Ignoring leaks can lead to water damage and inefficiency in your water heater, so it’s essential to address them promptly.
Adjust the temperature settings according to personal preference
Once you’ve confirmed that there are no leaks in the system, it’s time to adjust the temperature settings of your point of use water heater. Most water heaters come with a thermostat that allows you to control the temperature.
- Locate the temperature adjustment dial on your water heater. It is usually located near the inlet or outlet connections.
- Turn the dial clockwise to increase the temperature or counterclockwise to decrease it. Make small adjustments and wait a few minutes for the water to reach the new temperature before making further changes.
- Keep in mind your personal preference for hot water temperature and the safety considerations. The U.S. Consumer Product Safety Commission recommends setting the thermostat to 120°F (49°C) to prevent scalding.
It’s essential to find the right balance between comfort and safety when adjusting the temperature. Remember that hotter temperatures can increase the risk of burns and scalding, especially for young children and the elderly.
Don’t forget to test the water temperature after each adjustment by running the shower to ensure it’s within your desired range. This will allow you to make any further adjustments if needed.
By carefully testing and adjusting the temperature settings of your point of use water heater, you can create a comfortable and enjoyable showering experience while prioritizing safety. Take the time to fine-tune the temperature to your liking and always be vigilant for any leaks or issues that may arise.
Regular Flushing And Cleaning
One important aspect of maintaining the performance and longevity of your point of use water heater for shower is regularly flushing and cleaning it. Over time, sediment and mineral deposits can accumulate inside the water heater tank, which can affect its efficiency and lead to various issues. Additionally, showerheads and filters can become clogged with debris, causing reduced water flow and poor showering experience. By following a simple routine of flushing the water heater periodically and cleaning the showerhead and filters, you can prevent these problems and ensure optimal performance.
Flush the water heater periodically to remove sediment buildup
Flushing your point of use water heater is an essential step to remove sediment buildup. Sediment can settle at the bottom of the tank and cause issues such as reduced heating efficiency and strange noises. To flush the water heater, follow these steps:
- Turn off the power supply to the water heater to ensure safety.
- Locate the drain valve at the bottom of the water heater tank. It is usually a small spigot-like valve.
- Place a bucket or container beneath the drain valve to collect the water.
- Open the drain valve by turning it counterclockwise. Allow the water to flow out until it appears clear and free from sediment.
- Close the drain valve by turning it clockwise.
- Turn on the power supply and wait for the water heater to heat up again.
By performing this simple flushing process every few months, you can prevent sediment buildup and ensure the smooth operation of your point of use water heater.
Clean the showerhead and filters to prevent clogs and improve performance
Cleaning the showerhead and filters is crucial for preventing clogs and maintaining optimal performance. Over time, minerals, dirt, and other debris can accumulate, blocking the water flow and reducing the showering experience. Here’s how you can clean them:
- Detach the showerhead from the water supply pipe. This can usually be done by unscrewing it.
- Soak the showerhead in a solution of equal parts vinegar and water for about 30 minutes to dissolve any mineral deposits.
- Scrub the showerhead gently with a brush to remove any remaining residue.
- Rinse the showerhead thoroughly with clean water.
- Inspect the showerhead for any clogged nozzles and use a small pin to unclog them.
- Reattach the showerhead to the water supply pipe and ensure it is securely tightened.
In addition to cleaning the showerhead, it’s also important to clean the filters installed in your point of use water heater. These filters can become clogged with debris and affect the water flow. Check the manufacturer’s instructions to locate the filters and clean or replace them as needed.
By regularly maintaining and cleaning your point of use water heater, you can enjoy efficient heating, consistent water flow, and a refreshing shower experience every time.
Addressing Common Issues
Installing a point of use water heater for your shower can provide numerous benefits, including hot water on demand and increased energy efficiency. However, like any other appliance, these water heaters can occasionally encounter common issues that may disrupt the showering experience. In this section, we will address some of the most prevalent problems, such as low water pressure or temperature fluctuations, and provide troubleshooting steps to resolve them.
Troubleshoot common problems such as low water pressure or temperature fluctuations
Low water pressure or temperature fluctuations during your shower can be frustrating. Fortunately, there are several troubleshooting steps you can take to address these common issues:
- Check the water pressure: Start by checking the water pressure in your entire plumbing system. If you notice low water pressure throughout your home, the issue may not be specific to the point of use water heater. In such cases, contacting a professional plumber may be necessary to diagnose and fix the problem.
- Inspect the showerhead: Sometimes, the issue of low water pressure or temperature fluctuations can be caused by a clogged or faulty showerhead. Remove the showerhead and clean it thoroughly, removing any dirt or mineral deposits that may be obstructing the flow of water.
- Check the supply lines: Ensure that the supply lines connected to the point of use water heater are not kinked or obstructed. A kinked or restricted supply line can lead to low water pressure or temperature fluctuations. Straighten out any kinks and ensure a free flow of water through the lines.
- Inspect the heating elements: Temperature fluctuations may be caused by faulty heating elements. Consult the user manual provided by the manufacturer for specific guidance on how to inspect and troubleshoot the heating elements. If necessary, contact the manufacturer’s customer support or seek professional assistance.
- Check for leaks: Inspect the water heater and its surrounding area for any signs of leaks. Leaks can not only cause low water pressure but also damage your property. If you notice any leaks, turn off the water supply to the heater and contact a professional plumber immediately.
Follow troubleshooting steps provided by the manufacturer or seek professional assistance
If you have followed the troubleshooting steps mentioned above and the issues persist, it is advisable to refer to the user manual provided by the manufacturer. Each manufacturer may have specific troubleshooting procedures and recommendations to address common issues. Reading and following the instructions provided can help you identify and resolve the problem efficiently.
If you are unable to resolve the issues on your own or have concerns about troubleshooting, it is always a good idea to seek professional assistance. Plumbers experienced in water heater installations and repairs can diagnose the problem accurately and provide the necessary solutions, ensuring your point of use water heater functions optimally.
By addressing common issues such as low water pressure or temperature fluctuations promptly and effectively, you can ensure a satisfying and uninterrupted showering experience with your point of use water heater.
Ensuring Longevity And Efficiency
Installing a point of use water heater for your shower is a great way to enhance efficiency and convenience. However, to ensure the longevity and optimal performance of your water heater, it is essential to take a few extra steps. By insulating pipes and the water heater to minimize heat loss and scheduling regular maintenance, you can enjoy hot showers for years to come.
Insulate pipes and the water heater to minimize heat loss
One simple yet effective way to ensure the longevity and efficiency of your point of use water heater is to insulate both the pipes and the unit itself. Proper insulation prevents heat loss during transfer, which means less energy is required to heat the water, saving you money and reducing your carbon footprint.
To insulate pipes, you can use foam pipe insulation sleeves or wraps. These are readily available at hardware stores and are easy to install. Simply cut the insulation to the appropriate length, split it open, and wrap it around the pipe. The foam will provide a protective barrier, keeping the water inside warm and preventing the heat from escaping into the surroundings.
Similarly, insulating the water heater tank is crucial to minimize heat loss. You can purchase an insulating blanket designed specifically for water heaters. These blankets are made of insulating material and can significantly reduce standby heat loss, especially for older models. Wrap the blanket around the tank, following the manufacturer’s instructions, and secure it tightly.
Schedule regular maintenance to extend the lifespan of the water heater
Regular maintenance is key to ensuring the longevity of any appliance, and your point of use water heater is no exception. By following a few simple maintenance tasks, you can extend the lifespan of your unit and maximize its efficiency.
Firstly, it is essential to regularly check and adjust the temperature settings of the water heater. Ideally, the temperature should be set around 120 degrees Fahrenheit (48 degrees Celsius). This temperature provides hot water for daily use while preventing scalding accidents and reducing energy consumption.
Additionally, flushing out the water heater once or twice a year helps remove sediment buildup, preventing efficiency loss and potential damage. Follow the manufacturer’s instructions to safely drain the tank and flush out any sediment that may have accumulated over time.
Lastly, it is recommended to have a professional plumber inspect your point of use water heater annually. They can identify any potential issues, such as leaks or faulty components, and repair them before they escalate into major problems. Regular inspections and minor repairs can significantly extend the lifespan of your water heater, saving you the headache and expense of a premature replacement.
By insulating your pipes and water heater and scheduling regular maintenance, you can ensure the longevity and efficiency of your point of use water heater. Taking these extra steps will not only save you money on energy bills but also give you peace of mind knowing that your water heater will continue to provide hot showers for years to come.
Proper Ventilation
Proper ventilation is crucial when installing a point of use water heater, especially if it is gas-powered. Ensuring adequate ventilation not only helps prevent the buildup of harmful gases, such as carbon monoxide, but also optimizes the performance and efficiency of the water heater. In this section, we will discuss the importance of adequate ventilation for gas-powered water heaters and provide you with essential safety guidelines to follow during the installation process.
Ensure adequate ventilation for gas-powered water heaters
Gas-powered water heaters require proper ventilation to ensure the safe operation of the unit. Ventilation helps to eliminate any potentially harmful combustion byproducts, including carbon monoxide, and allows fresh air to be drawn into the area where the water heater is installed. Without adequate ventilation, these byproducts can accumulate and pose a significant health risk to you and your family.
Follow safety guidelines to prevent the buildup of carbon monoxide
When installing a gas-powered point of use water heater, it is essential to adhere to safety guidelines to prevent the buildup of carbon monoxide. Carbon monoxide is an odorless and colorless gas that can be deadly in high concentrations. To ensure the safety of everyone in your home, consider the following:
- Install a carbon monoxide detector near the water heater and throughout your home to quickly detect any potential leaks.
- Ensure that the ventilation system is properly sized and meets the manufacturer’s recommendations.
- Inspect and clean the exhaust vents regularly to prevent any obstructions that may impede the flow of gases.
- Keep the surrounding area of the water heater free from any flammable materials.
- If you notice any signs of carbon monoxide poisoning, such as headaches, dizziness, or nausea, evacuate the area immediately and seek medical attention.
By following these safety guidelines and ensuring adequate ventilation for your gas-powered point of use water heater, you can enjoy a safe and comfortable shower experience while minimizing the risk of carbon monoxide buildup. Prioritizing ventilation is not only a necessary step for installation but also a responsible choice for the well-being of you and your loved ones.
Electrical Safety Precautions
Turn off power before performing any maintenance or repairs
When installing a point of use water heater for shower, electrical safety precautions are of utmost importance. Before you begin any maintenance or repair work, make sure to turn off the power supply to the existing electrical connections. This will help prevent any potential electrical shocks and ensure your safety.
Avoid using extension cords or overloading electrical circuits
It is important to note that using extension cords or overloading electrical circuits can lead to hazardous situations. To ensure electrical safety, it is best to avoid using extension cords altogether. Instead, try to position your point of use water heater near an existing electrical outlet. This will not only minimize the risk of accidents but also maintain efficient and reliable power supply to your device.
If relocating your point of use water heater near an electrical outlet is not feasible, it may be necessary to consult a professional electrician to install a proper electrical connection. Always remember, safety should never be compromised when it comes to electricity, so take the necessary precautions to protect yourself and prevent any potential electrical hazards.
Proper Use And Handling
Proper use and handling of a point of use water heater are crucial to ensure its safe and efficient operation. By following the manufacturer’s instructions and taking some precautions, you can enjoy a hot and refreshing shower without any worries. In this section, we will discuss the essential guidelines for safe usage and how to prevent potential hazards.
Follow the Manufacturer’s Instructions for Safe Usage
Each point of use water heater comes with specific guidelines provided by the manufacturer. It is vital to read and understand these instructions thoroughly before attempting to install or operate the unit. Here are some key points to keep in mind:
- Installation: Follow the recommended installation steps described in the user manual. Make sure you have all the necessary tools and materials before you begin.
- Electrical Connections: If your point of use water heater requires electrical connections, be sure to follow the wiring diagram provided by the manufacturer. If you are not comfortable with electrical work, it is best to consult a professional electrician.
- Water Connections: Properly connect the hot and cold water supply lines according to the manufacturer’s instructions. Ensure there are no leaks or loose connections.
- Temperature Setting: Set the water heater to the desired temperature as per the instructions. Avoid excessively high temperatures to prevent scalding.
- Maintenance: Regularly inspect and maintain your point of use water heater as recommended by the manufacturer. This may include flushing the tank, checking the pressure relief valve, and replacing any worn-out parts.
Avoid Placing Flammable Materials near the Water Heater
It is crucial to ensure that there are no flammable materials in close proximity to the point of use water heater. This can help prevent accidents and potential fire hazards. Follow these tips:
- Clearance: Leave enough space around the water heater, as specified in the manufacturer’s instructions. This allows for proper ventilation and reduces the risk of overheating.
- Keep Away from Combustibles: Avoid placing flammable items such as gasoline, paints, cleaning solvents, and aerosol cans near the water heater.
- Proper Storage: Store flammable materials in a separate, designated area away from the water heater.
By adhering to these precautions and safety measures, you can ensure the proper use and handling of your point of use water heater. This will not only extend its lifespan but also promote a safer showering experience for you and your loved ones.
Frequently Asked Questions
Can A Point Of Use Water Heater Be Used For A Shower?
A point of use water heater can be used for a shower. It provides hot water directly at the specific location, like a sink or shower, without the need for the hot water to flow from a central heater. This ensures instant hot water for a comfortable shower experience.
What Size Point Of Water Heater Do I Need For A Shower?
For a shower, the size point of water heater you need depends on the flow rate of your showerhead. Most showers have a flow rate of 2. 5 gallons per minute (GPM). To determine the size, multiply the flow rate by 1.
5. Therefore, you will need a water heater with a capacity of at least 3. 75 GPM.
What Are The Electrical Requirements For A Point Of Use Water Heater?
A point of use water heater requires electrical power to operate. It is important to consider the electrical requirements, such as voltage and amperage, to ensure proper installation and functioning of the unit. Consult the manufacturer’s specifications for the specific electrical requirements of your point of use water heater.
Can I Add A Tankless Water Heater To My Shower?
Yes, you can add a tankless water heater to your shower. It provides instant hot water and saves energy by heating water as it flows through the unit. It’s a great option for those looking to upgrade their showers and enjoy a continuous supply of hot water without the need for a storage tank.
Conclusion
Installing a point of use water heater for your shower can greatly enhance your bathing experience. With its compact size and efficient heating capabilities, this easy-to-install appliance ensures a consistent supply of hot water. By following the step-by-step guide provided in this blog post, you can confidently install and enjoy the benefits of a point of use water heater.
Start enjoying hot showers whenever you want, without the hassle of a whole-house water heater. Say goodbye to cold showers and hello to comfort!