To install subway tile in a shower, start by preparing the surface and measuring and marking your layout. Then, apply the adhesive, press the tiles into place, and allow them to dry.
Finally, grout the tiles and apply any necessary finishing touches. When it comes to installing subway tile in a shower, it is important to follow a step-by-step process. We will discuss the exact steps to ensure a successful installation. We will cover preparing the surface, measuring and marking the layout, applying the adhesive, setting the tiles, drying time, grouting, and finishing touches.
By following these guidelines, you will be able to install subway tile in your shower efficiently and effectively. Now, let’s dive into the details of each step.
Gathering The Necessary Tools And Materials
Gathering the necessary tools and materials is an essential first step when installing subway tile in a shower. Ensuring you have everything you need before starting the project will make the installation process smoother and more efficient. This section will provide you with a comprehensive list of the tools and materials required, so you can be well-prepared to tackle this DIY project.
List of tools required
Before you begin installing subway tile in your shower, make sure you have the following tools:
- Measuring tape – to accurately measure the dimensions of your shower
- Level – to ensure that the tiles are installed straight
- Tile cutter – to cut tiles to fit around edges and corners
- Trowel – for spreading adhesive
- Notched trowel – for creating ridges in the adhesive to help tiles adhere
- Grout float – for applying grout to the tile
- Sponge – for wiping away excess grout
- Bucket – for mixing adhesive and grout
- Tile spacers – for maintaining consistent spacing between tiles
- Hammer – for gently tapping tiles into place
- Grout sealer – to protect the grout from moisture and stains
- Tile saw – for cutting tiles with precision
- Goggles, gloves, and a dust mask – for personal protection during the tile cutting process
List of materials required
In addition to the tools mentioned above, you will also need the following materials for installing subway tile in your shower:
- Subway tiles – choose the size, color, and material that suits your aesthetic preferences
- Adhesive – select a high-quality adhesive suitable for use in wet areas
- Grout – choose a grout color that complements your tiles
- Grout additive – to enhance the flexibility and durability of the grout
- Tile primer – to ensure proper adhesion between the tiles and the substrate
- Tile spacers – for maintaining consistent spacing between tiles
- Caulk – for sealing any gaps in corners and edges
- Sealer – to protect the tiles from moisture and stains
- Waterproofing membrane – to prevent water damage behind the tiles
- Backing board – provides a stable surface for tile installation
- Thin-set mortar – for adhering the backing board to the wall
Having these tools and materials readily available will enable you to proceed with the installation smoothly, without any unnecessary interruptions. Now that you have a complete list, it’s time to move on to the next steps of the subway tile installation process.

Preparing The Shower Area
The first step in installing subway tile in a shower is to properly prepare the shower area. This involves clearing the area and checking for any repairs or modifications that may be required before starting the installation process.
Clearing the shower area
Before you can begin installing subway tile in your shower, it is essential to clear the area completely. This means removing any existing fixtures, such as shower curtains, rods, and shelves. Take the time to thoroughly clean the walls and floor, removing any dirt, grime, or leftover adhesive from previous installations.
Checking for any repairs or modifications required
Once the shower area is clear, it is important to carefully inspect the walls and floor for any repairs or modifications that may be necessary before installing subway tile. Look for any cracks, loose tiles, or water damage that may need to be addressed. If you come across any issues, it is best to fix them before proceeding with the tile installation.
| Repair Needed | Fix |
|---|---|
| Cracks in the walls or floor | Fill in cracks with appropriate filler and smooth with a putty knife. Allow the filler to dry completely before continuing. |
| Loose tiles | Remove loose tiles and replace them with new ones. Ensure the area is clean and dry before applying new adhesive. |
| Water damage | Inspect for any signs of mold or mildew. If necessary, treat the area with a mold and mildew remover and allow it to dry before proceeding. |
By taking the time to clear the shower area and address any necessary repairs or modifications, you can ensure a smooth and successful installation of subway tile in your shower. This proactive approach will save you time and effort in the long run and help create a beautiful and long-lasting finished product.
Measuring And Cutting The Tile Backer Board
When it comes to installing subway tile in a shower, one crucial step is measuring and cutting the tile backer board. This step ensures that the backer board fits perfectly in your shower area, providing a solid foundation for your tiles.
Measuring the dimensions of the shower area
The first step in the process is to measure the exact dimensions of your shower area. This will help you determine the size of the tile backer board you need to cut. To do this, you’ll need a measuring tape.
To measure the height, place the tape measure against the bottom of the shower base or tub and extend it all the way up to the desired height for your tiles. Make sure to account for any gaps or expansion joints you want to leave between tiles.
To measure the width, start at one side of the shower and extend the tape measure to the opposite side. Again, consider any gaps or expansion joints you want to include in your measurements.
Cutting the tile backer board to fit the measurements
Now that you have the dimensions of your shower area, it’s time to cut the tile backer board. This board will act as a sturdy substrate for your tiles, ensuring they adhere properly and withstand the test of time.
Here are the steps to cut the tile backer board:
- Measure and mark the dimensions of the backer board on its surface, using the measurements you took earlier.
- Use a straight edge, such as a level or a metal ruler, to connect the marks and create straight lines for cutting.
- With the backer board secured on a stable surface, use a utility knife to score along the marked lines. Make several passes with the knife to ensure a deep score.
- Once the board is deeply scored, carefully snap it along the scored lines to separate the pieces.
- Use the utility knife to smooth any rough edges or make any additional cuts needed to fit the backer board into corners or irregular areas of the shower.
Remember to wear protective gloves and goggles while cutting the backer board to ensure your safety.
Now that you have your tile backer board cut to fit the measurements of your shower area, you’re ready for the next step in the installation process. Stay tuned for our next blog post on preparing the surface and applying thin-set mortar for a successful subway tile installation.
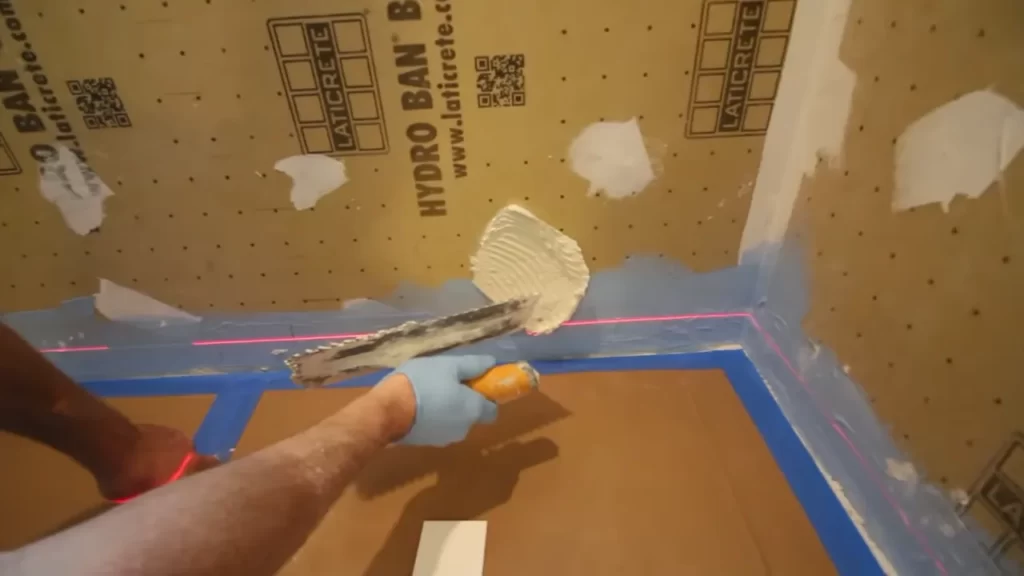
Applying And Securing The Tile Backer Board
When it comes to installing subway tile in a shower, applying and securing the tile backer board is a crucial step that ensures a solid foundation for your tiles. The backer board not only provides stability but also helps in preventing moisture damage to the walls.
Applying adhesive to the backer board
The first step in securing the tile backer board is applying adhesive to its surface. Use a trowel to spread a thin layer of adhesive evenly on the backer board, creating a strong bond between the board and the wall. Make sure to follow the manufacturer’s instructions regarding the type and application of adhesive.
Here are a few key points to remember during this process:
- Wear protective gloves and goggles when handling the adhesive.
- Apply the adhesive in small sections to prevent it from drying out before you can attach the backer board.
- Use a trowel with notched edges to create a ridged pattern in the adhesive. This helps increase the bonding surface area and enhances the bond between the backer board and the wall.
Securing the backer board to the wall studs
Once the adhesive is applied, secure the backer board to the wall studs. This step ensures that the backer board is firmly in place and ready to support the weight of the subway tiles. Follow these steps to properly secure the backer board:
- Measure and mark the locations of the wall studs on the backer board. This will help you determine where to drive the screws.
- Using a drill or screwdriver, drive screws through the backer board and into the wall studs at regular intervals, typically every 8 to 12 inches. Make sure to countersink the screws slightly below the surface of the backer board to create a flat surface for the tiles.
- Check the backer board for any movement or flexing. If you notice any areas that seem loose, add additional screws to secure them properly.
Remember, a well-secured backer board is crucial for the long-term stability and durability of your shower tile installation.
By following these guidelines for applying adhesive to the backer board and securing it to the wall studs, you can ensure a solid and reliable base for your subway tile. This will ultimately result in a beautiful, professionally finished shower. Take your time during this step to ensure a solid foundation for your subway tile project, and you’ll enjoy a stunning and long-lasting shower for years to come!
Deciding On The Pattern And Placement
Exploring different tile patterns and styles
When it comes to installing subway tile in a shower, deciding on the pattern and placement is an important step. The pattern you choose can greatly impact the overall look and feel of your shower space. Subway tiles offer a classic and timeless appeal, and there are a variety of patterns and styles to choose from.
One of the most common patterns is the classic offset pattern, where each tile is staggered and slightly overlaps the one below it. This pattern creates a clean and traditional look that works well in both modern and traditional bathrooms. Another popular option is the herringbone pattern, which involves arranging the tiles in a diagonal zigzag pattern. This pattern adds a unique and sophisticated touch to your shower and can make a bold statement.
If you’re looking for something a little different, you might consider the vertical stack pattern. This pattern involves stacking the tiles in a straight vertical line, creating a sleek and modern look. Alternatively, you could try the basket weave pattern, where tiles are arranged in a grid-like pattern with alternating tiles turned 90 degrees. This pattern adds visual interest and texture to your shower walls.
Determining the best placement for subway tiles in the shower
Once you have decided on the pattern, it’s important to determine the best placement for your subway tiles in the shower. Proper placement ensures that the tiles are applied correctly and create a cohesive and visually pleasing design. Here are some key factors to consider when determining the placement:
1. Focus on the main shower wall: Start by identifying the main wall or walls where you want to install subway tiles. This is typically the most visible and prominent area of the shower. Installing tiles on this wall will create a focal point and draw attention to the space.
2. Consider the shower fixtures: Take into account the location of your shower fixtures, such as the showerhead, faucet, and handles. Make sure that the tiles are properly placed around these fixtures, and that they do not interfere with the functionality of your shower.
3. Plan for symmetry and balance: Whether you choose a centered pattern or an offset pattern, aim for symmetry and balance in your tile placement. This will create a harmonious and visually pleasing design. Consider using a level or a chalk line to ensure that your tiles are aligned correctly.
4. Extend the tiles to the ceiling or beyond: To create a seamless and cohesive look, you may choose to extend the subway tiles from the shower wall all the way up to the ceiling. This elongates the space and gives it a more uniform appearance. Alternatively, you could extend the tiles to other areas of the bathroom, such as the vanity backsplash or the bathtub surround, for a coordinated look.
In conclusion, exploring different tile patterns and styles and determining the best placement for subway tiles in the shower are crucial steps in the installation process. By carefully considering these factors, you can create a stunning and functional shower space that suits your personal style and preferences. So go ahead, get creative and transform your shower into a beautiful oasis with subway tile!
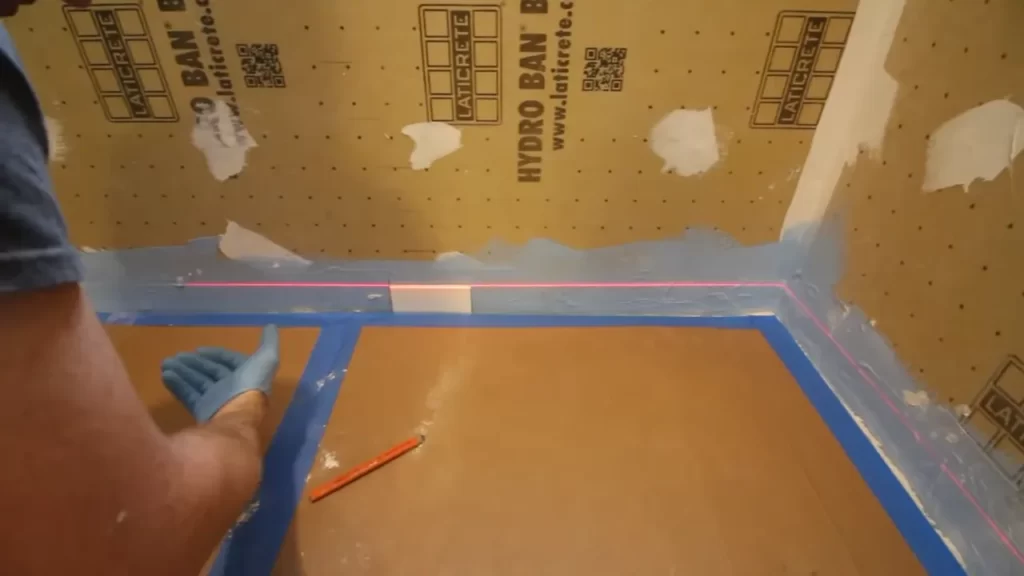
Marking Guidelines For Tile Placement
When it comes to installing subway tile in a shower, marking guidelines are crucial for ensuring a precise and professional-looking result. By following these simple steps, you can achieve a level and visually appealing tile placement that will enhance the overall aesthetic of your shower space.
Marking the starting point
The first step in marking guidelines for tile placement is to identify the starting point for your installation. This is usually the center of the back wall of the shower, as it provides a balanced and symmetrical layout. To mark the starting point:
- Measure the width of the shower wall and divide it in half. This will give you the center point.
- Using a pencil or a marker, make a small mark at the center point. This will serve as your reference for the rest of the tile installation.
Creating level and vertical guidelines for tile placement
Once you have marked the starting point, the next step is to create level and vertical guidelines. These guidelines will assist you in placing each tile accurately and maintaining a consistent alignment throughout the installation process.
To create level guidelines:
- Using a level, place it vertically against the starting point mark on the wall. Adjust it until it is perfectly level.
- Draw a horizontal line along the top of the level, extending it across the entire shower wall. This line will serve as your first level guideline.
- Repeat this process on both sides of the starting point mark, drawing additional level guidelines at equal intervals. These guidelines will help you ensure that your tiles are properly aligned and prevent them from appearing crooked.
To create vertical guidelines:
- Measure the height of the shower wall and divide it by the height of your subway tiles. This will give you the number of rows that will fit on the wall.
- Starting from the bottom, mark each vertical guideline at the height of one subway tile, counting up until you reach the top of the wall.
By following these marking guidelines for tile placement, you will be well on your way to achieving a beautifully tiled shower that adds elegance and style to your bathroom. Remember to use a good-quality tile adhesive and grout for a durable and long-lasting installation. Happy tiling!
Preparing The Tile Adhesive
Mixing the Tile Adhesive According to the Manufacturer’s Instructions
Before installing subway tile in a shower, it’s important to prepare the tile adhesive properly. Following the manufacturer’s instructions is essential for achieving the best results. Here’s a step-by-step guide to mixing the tile adhesive:
- Start by gathering all the necessary materials: tile adhesive, a mixing tray or bucket, a mixing paddle, and clean water.
- Read the instructions on the packaging of the tile adhesive thoroughly. Different brands may require different ratios of adhesive to water, so it’s important to follow the specific guidelines.
- Pour the recommended amount of tile adhesive into the mixing tray or bucket. It’s important to measure the adhesive accurately to ensure the right consistency.
- Add water to the adhesive gradually, following the manufacturer’s instructions. Use the mixing paddle to stir the mixture continuously as you add the water.
- Mix the adhesive and water thoroughly until you achieve a smooth, lump-free consistency. This may take several minutes of mixing.
Mixing the tile adhesive according to the manufacturer’s instructions is crucial in ensuring its proper bonding properties. It’s important to avoid deviating from the recommended ratios as it may affect the adhesive’s ability to hold the tiles securely in place.
Ensuring the Adhesive Consistency is Suitable for Tile Installation
The consistency of the tile adhesive plays a vital role in the success of subway tile installation in a shower. Here are some tips to ensure the adhesive consistency is suitable for tile installation:
- Pay attention to the manufacturer’s instructions regarding the desired consistency. Some adhesives may require a thicker consistency, while others may need to be slightly more fluid.
- Continue mixing the adhesive until it reaches the recommended consistency. If it’s too thick, add a small amount of water and mix again. Conversely, if it’s too thin, add a bit more adhesive and mix thoroughly.
- To check the adhesive consistency, use the “notch” test. Take the edge of the mixing paddle or trowel and create a notch in the adhesive. If the notch holds its shape without sagging or sliding, the consistency is correct.
- Remember that different tile materials may require slightly different adhesive consistencies. Porcelain or ceramic tiles usually require a stiffer consistency, whereas glass or natural stone tiles may need a slightly more fluid adhesive.
Ensuring the right consistency of the adhesive is crucial for proper tile installation. A consistent adhesive will provide good coverage and ensure that the tiles bond securely to the shower walls, minimizing any chance of future issues such as tile cracking or water damage.
Applying Tile Adhesive And Setting The Tiles
Applying Tile Adhesive to the Back of the Tile
Before you start applying adhesive to the back of your subway tiles, make sure you have the correct type of tile adhesive for your shower. Read the manufacturer’s instructions carefully to ensure you choose the right adhesive that can withstand moisture and humidity.
Once you have chosen the adhesive, it’s time to start applying it to the back of the tiles. Here’s a step-by-step guide:
- Clean the back of the tile with a damp cloth to remove any dust or debris that could hinder proper adhesion.
- Using a trowel, apply a thin layer of adhesive to the back of the tile. Make sure the entire back of the tile is covered evenly with the adhesive. Avoid applying too much adhesive, as this can cause the tile to slip or slide.
- For better adhesion, you can also use the notched side of the trowel to create grooves in the adhesive. This will help create a stronger bond between the tile and the wall.
Pressing the Tile Firmly Onto the Wall
Once you have applied adhesive to the back of your subway tiles, it’s time to press them firmly onto the wall. Here’s what you need to do:
- Start at the bottom of the shower wall and work your way up. This will help ensure that the tiles are evenly aligned and prevent them from sliding down.
- Hold the tile at a slight angle and place it firmly onto the wall. Wiggle the tile slightly to ensure good contact between the adhesive and the tile.
- After placing the tile, use a level to make sure it is perfectly straight and aligned with the adjacent tiles.
- If necessary, adjust the position of the tile by gently sliding it until it is in the desired position. Avoid applying excessive force, as this can result in uneven placement or adhesive squishing out from under the tile.
- Repeat the process for each tile, leaving a small gap between each for grouting. Make sure each tile is pressed firmly onto the wall to ensure a strong bond.
Remember, patience is key when installing subway tiles in a shower. Take your time and double-check your work to ensure a professional and long-lasting tile installation. Following these steps will help you achieve a beautiful and functional subway tile shower that you’ll enjoy for years to come.
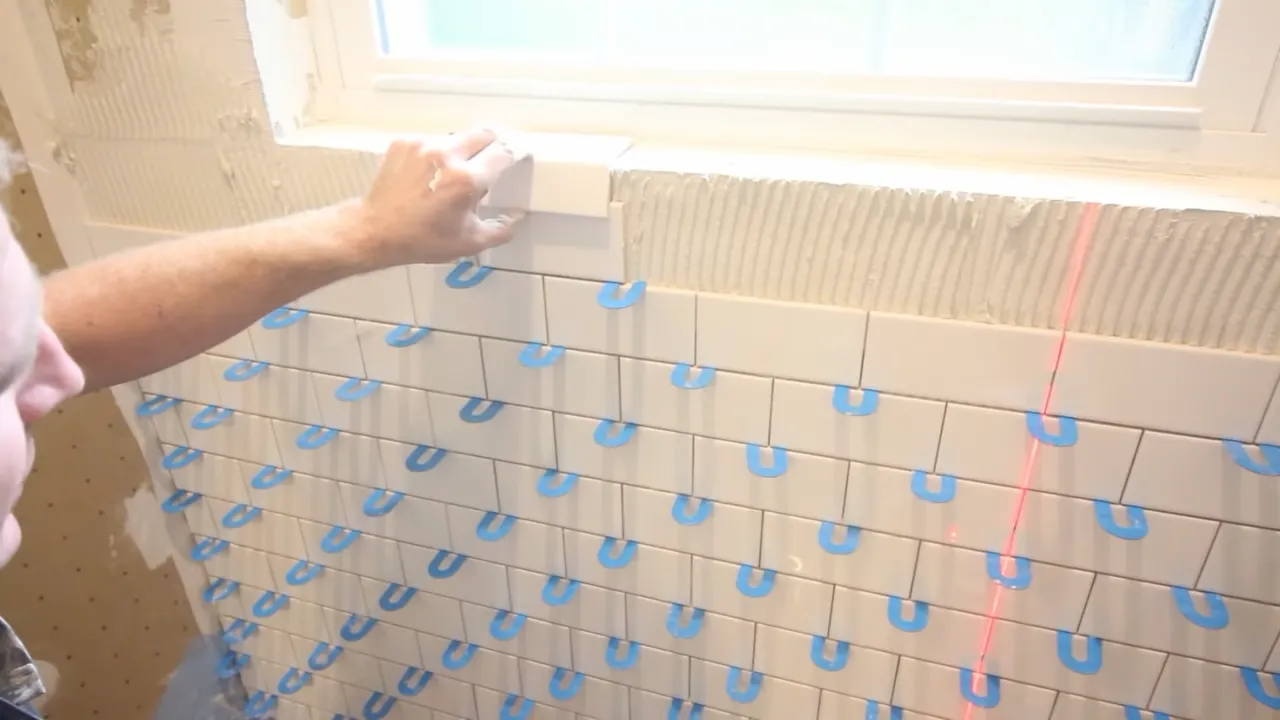
Maintaining Straight Lines And Spacing
When it comes to installing subway tile in a shower, maintaining straight lines and consistent spacing between tiles is crucial to achieve a professional and polished look. Uneven lines and unevenly spaced tiles can easily detract from the overall aesthetic appeal of your project. In this section, we will delve into the steps to ensure your tiles are properly aligned and evenly spaced.
Using spacers to maintain consistent spacing between tiles
Spacers are an essential tool that helps in achieving consistent spacing between tiles. These small plastic or rubber pieces come in various sizes, typically 1/16 to 1/4 inch, and are placed between adjacent tiles during installation. By using spacers throughout the tiling process, you can ensure uniform width between tiles, creating neat and visually pleasing lines.
To use spacers:
- Begin by applying a layer of tile adhesive to the wall or floor surface using a notched trowel. The size of the notched trowel determines the thickness of the adhesive layer.
- Place a spacer on each corner of the tile, then press the tile firmly into the adhesive, making sure it is level and aligned with adjacent tiles.
- Continue placing spacers between each tile as you work your way across the surface. Be sure to remove any excess adhesive that may squeeze out from between the tiles.
- Check for level and adjust as needed before the adhesive dries. This will help ensure that all tiles are perfectly aligned in a straight line.
Checking and adjusting tile alignment as necessary
As you install each tile, it is important to periodically check for proper alignment and make adjustments if necessary. Here’s how:
- Use a level to check the horizontal and vertical alignment of the tiles. Place the level vertically against the side of the tile and horizontally across the top surface of the tile.
- If a tile is not aligned, gently tap it with a rubber mallet to adjust its position. Be careful not to hit the tile too hard, as it may crack or break.
- Continue checking and adjusting the tile alignment as you progress with the installation.
By regularly checking and adjusting the alignment during the installation process, you can ensure your subway tiles are straight and properly aligned, contributing to a visually pleasing end result.
Preparing The Grout
When it comes to installing subway tile in a shower, preparing the grout is a crucial step to ensure a successful and long-lasting tile installation. Properly mixed and applied grout not only holds the tiles together but also helps to prevent moisture penetration, keeping your shower walls and floors resistant to mold and mildew. In this section, we will discuss two important aspects of preparing the grout: mixing the grout according to the manufacturer’s instructions and ensuring the grout consistency is suitable for application. Let’s dive in!
Mixing the grout according to the manufacturer’s instructions
To ensure the best results, always follow the manufacturer’s instructions when it comes to mixing the grout. Different grout brands may have specific guidelines that you need to adhere to. Here are the general steps to mix the grout:
- Start by gathering all the necessary materials, including the grout powder, a clean bucket, a mixing paddle, and clean water.
- Pour the required amount of grout powder into the bucket. Be sure to measure it accurately to achieve the correct grout-to-water ratio.
- Add water to the bucket gradually, following the manufacturer’s instructions. It is essential to add water slowly and mix continuously to achieve a smooth and lump-free consistency.
- Use the mixing paddle to thoroughly combine the grout powder and water. Continue mixing until the grout reaches a creamy and homogeneous texture.
Note: Avoid adding excess water to the grout mixture as it can weaken the final product and affect its ability to bond properly.
Ensuring the grout consistency is suitable for application
Once you have mixed the grout according to the manufacturer’s instructions, it is important to check its consistency before applying it to the shower tiles. The consistency of the grout should be neither too dry nor too wet. Here’s what you need to do:
- Take a small amount of mixed grout onto the edge of the grout float or a putty knife.
- Hold the float or knife at an angle and turn it upside down.
- If the grout easily slides off the float or knife, it might be too wet. Add a small amount of grout powder and mix again until you achieve the desired consistency.
- If the grout does not stick to the float or knife and crumbles, it is too dry. Add a small amount of water and mix again until you achieve the desired consistency.
- Repeat this process until you obtain a grout consistency that allows easy application and proper adhesion to the tiles.
Remember, a properly mixed and suitable grout consistency is crucial for achieving a seamless and durable tile installation. Take your time during this step to ensure a professional-looking finish and to minimize the chances of future grout-related issues in your shower.
Applying The Grout
Applying the grout to the tile joints
Once you have carefully laid and spaced out your subway tiles on the walls of your shower, it’s time to apply the grout. This is a crucial step in the installation process as it not only fills in the gaps between the tiles, but also helps to create a watertight seal and adds visual appeal to your shower. Follow these steps to ensure a successful grouting job:
- Carefully mix your grout according to the manufacturer’s instructions in a clean bucket. Make sure to wear gloves and protect your eyes to prevent any skin or eye irritation.
- Using a grout float, start applying the grout to the tile joints in a downward motion at a 45-degree angle. Work in small sections to avoid the grout drying out before you have a chance to clean it off.
- Push the grout into the joints, making sure each joint is completely filled. A good tip is to hold the float at a 90-degree angle and press down firmly to ensure the grout gets into all the nooks and crannies.
Removing excess grout and cleaning the tiles
Once you have finished applying the grout to all the tile joints, it’s time to remove the excess grout and clean the tiles. Follow these steps to achieve a professional-looking finish:
- Allow the grout to set for about 15-20 minutes. This will allow it to firm up slightly, making it easier to remove the excess grout without disturbing the joints.
- Using a damp sponge, gently wipe away the excess grout from the surface of the tiles. Make sure to rinse the sponge frequently to avoid smearing grout over already cleaned areas.
- Once you have removed most of the excess grout, go over the tiles again with a clean, damp sponge to remove any remaining residue. This will help to ensure a clean and polished look.
- After a day or two, when the grout has fully cured, apply a grout sealer to protect the grout from moisture and stains. This will help to maintain the integrity and appearance of your subway tile shower for years to come.
Remember, when it comes to applying the grout and achieving a professional finish, take your time, work carefully, and clean as you go. By following these steps, you’ll have a beautifully installed subway tile shower that not only looks stunning but also functions efficiently.
Sealing The Grout
Allowing the grout to cure before sealing
Once you have finished applying the grout to your subway tile in the shower, the next crucial step is to allow it to cure fully before sealing. Curing the grout ensures that it has enough time to harden and achieve its maximum strength, providing a solid foundation for the sealer to adhere to.
To ensure the grout cures properly, refer to the manufacturer’s instructions for the recommended curing time. This period typically ranges from 24 to 48 hours, but it’s crucial not to rush this step. Patience is key to achieving a long-lasting and beautiful finished look for your subway tile shower.
Applying the grout sealer to protect and prolong the lifespan
Sealing the grout is an essential step in the installation process of subway tile in a shower. The grout sealer acts as a protective barrier against moisture, dirt, and stains, helping to maintain the appearance and integrity of your shower for years to come.
To apply the grout sealer, follow these steps:
- Clean the tile and grout surfaces thoroughly, ensuring there is no dirt, dust, or residue. This ensures optimal adhesion of the sealer.
- Using a small, clean brush or roller, gently apply the sealer onto the grout lines. Take care not to apply too much sealer, as excess sealer can create a sticky residue.
- Allow the sealer to penetrate the grout for the recommended time indicated by the manufacturer. This usually ranges from 5 to 15 minutes, but always refer to the specific product instructions for accurate information.
- After the recommended time, wipe off the excess sealer using a clean and lint-free cloth. Ensure that all the sealer on the tile surface is completely removed.
- Let the sealer dry for the specified amount of time as indicated by the manufacturer. This typically ranges from 24 to 48 hours.
By meticulously applying the grout sealer and allowing it to fully dry, you are effectively safeguarding your subway tile shower against potential damage and prolonging its lifespan.
Installing Trim And Edging
Adding Trim Tiles to the Corners and Edges
One important step in installing subway tile in a shower is adding trim tiles to the corners and edges. This not only provides a clean and finished look, but also helps protect the edges of the tile from damage. Here’s how you can do it:
- Measure the length of each edge and cut the trim tile accordingly. Remember to account for the width of the grout lines.
- Apply adhesive to the back of the trim tile using a notched trowel. Press the tile firmly against the corner or edge, ensuring it is level and aligned with your existing tiles.
- Allow the adhesive to dry completely before grouting. This will ensure a strong bond and prevent the trim tiles from shifting or coming loose.
- Once the adhesive is dry, mix the grout according to the manufacturer’s instructions. Using a grout float, spread the grout over the trim tiles, pressing it firmly into the joints.
- Wipe away the excess grout using a damp sponge, being careful not to disturb the grout lines. Rinse the sponge frequently to avoid smearing grout onto the adjacent tiles.
- Allow the grout to cure for the recommended time, usually about 24 hours. Then, buff the tiles with a clean, soft cloth to remove any remaining haze.
Trimming and Shaping the Tiles for a Finished Look
To achieve a polished and professional finish, it’s important to trim and shape the tiles as needed. Here are the steps you can follow:
- If your layout requires it, measure and mark the tiles that need to be trimmed. Use a wet saw or tile cutter to carefully cut the tiles along the marked lines.
- Smooth any rough edges or uneven surfaces using a tile file or sandpaper. This will ensure a seamless transition between tiles and prevent any sharp edges.
- Before installing the trimmed tiles, make sure the area is clean and free of debris. Apply adhesive to the back of each tile and press them firmly into place, making sure they are level and aligned with the existing tiles.
- Allow the adhesive to dry completely before grouting. Follow the same grouting process mentioned earlier to fill the joints and achieve a cohesive look.
- Once the grout is cured, clean the tiles with a mild detergent and water solution and a soft cloth. This will remove any grout residue or smudges, leaving your subway tile shower looking pristine.
By adding trim tiles to the corners and edges and carefully trimming and shaping the tiles, you can achieve a professional and finished look for your subway tile shower. Follow these steps, and enjoy a shower space that exudes style and elegance.
Cleaning And Inspecting The Installation
Once you have successfully installed the subway tile in your shower, it’s time to thoroughly clean and inspect the installation to ensure it meets your high standards. This step is crucial in achieving a professional and flawless finish. In this section, we will guide you through the cleaning process and how to inspect for any missed areas or flaws in the installation.
Removing Excess Adhesive or Grout Residue
After the installation, it’s common to find excess adhesive or grout residue on the surface of the tiles. This can be unsightly and may affect the overall appearance if left unaddressed. To remove any excess residue, follow these steps:
- Carefully inspect the installed tiles for any visible residue, paying particular attention to the grout lines.
- Use a damp sponge or cloth to gently wipe away the excess adhesive or grout. Be cautious not to apply excessive pressure, as this may cause damage to the tiles.
- If the residue is hardened and difficult to remove, you can mix a solution of water and mild dish soap.
- Apply the soapy solution to a soft-bristle brush or non-abrasive sponge and gently scrub the affected area to remove the residue.
- Rinse the tiles thoroughly with clean water to remove any soap residue.
- Wipe the tiles dry with a clean, lint-free cloth to reveal their pristine appearance.
Inspecting for Any Missed Areas or Flaws in the Installation
Now that you have removed any excess residue, it’s essential to inspect the installation for potential missed areas or flaws. This meticulous examination will help you identify any imperfections that may require remedial action. Follow the steps below to conduct a comprehensive inspection:
- Begin by stepping back and taking a broad view of the shower walls. Look for any visible gaps between the tiles, uneven spacing, or misaligned patterns that may have gone unnoticed during the installation.
- Run your fingers carefully over the surface of each tile, feeling for any irregularities or loose tiles that could indicate an incomplete installation.
- Inspect the grout lines closely, paying attention to the smoothness and consistency of the grout. Look for any areas where the grout may be cracked, chipped, or unevenly applied.
- If you notice any defects or missed areas, mark them for future attention. These may require additional adhesive, grout, or even replacing a tile if necessary.
- Take note of any areas that may require resealing or additional caulk to prevent water infiltration in the future.
By thoroughly cleaning and inspecting the installation, you can ensure a beautifully finished subway tile shower. Taking the time to address any excess residue, missed areas, or flaws will result in a visually appealing and long-lasting installation that enhances the overall aesthetic of your bathroom.
Proper Cleaning And Maintenance
Proper Cleaning and Maintenance
Once you have successfully installed subway tile in your shower, it is essential to prioritize regular cleaning and maintenance to keep it looking fresh and pristine. This not only ensures the longevity of your tile but also promotes a healthy and hygienic showering environment. In this section, we will discuss the recommended cleaning methods for subway tile showers and provide some handy tips for preventing mold and mildew growth in the shower area.
Recommended cleaning methods for subway tile showers
When it comes to cleaning subway tile showers, it is important to use gentle cleaning products that won’t damage the tile or grout. Here are a few recommended methods:
- Vinegar and water solution: Create a mixture of equal parts distilled white vinegar and warm water. Dip a soft cloth or sponge into the solution and gently scrub the tiles. Rinse with clean water and dry with a microfiber cloth. Vinegar is an excellent natural cleaner that effectively removes grime and water spots without leaving behind any harsh residues.
- Baking soda paste: Make a paste by combining baking soda and water until it forms a thick consistency. Apply the paste directly onto the grout lines and scrub with a soft brush. The gentle abrasiveness of baking soda helps to remove stubborn stains and brighten the grout. Rinse thoroughly with clean water and dry the surface.
- Mild dish soap: Dilute a few drops of mild dish soap in warm water. Using a sponge or soft cloth, wipe down the subway tiles and grout lines. Rinse with clean water to remove any soap residue and dry the surface with a microfiber cloth. Dish soap is a mild yet effective option for everyday cleaning and maintenance.
Tips for preventing mold and mildew growth in the shower area
Mold and mildew thrive in damp environments, making the shower area a prime breeding ground. To keep your subway tile shower mold-free, consider implementing these preventive measures:
- Proper ventilation: Ensure your bathroom has adequate ventilation to minimize excess moisture. Open a window or use an exhaust fan during and after showers to promote air circulation and reduce humidity levels.
- Regular drying: After each shower, use a squeegee or towel to remove excess water from the tiles and glass surfaces. This helps to prevent moisture buildup and inhibits the growth of mold and mildew.
- Mold-resistant products: Consider using mold-resistant caulk and grout when installing subway tile in your shower. These specialized products are designed to resist mold growth and make cleaning easier.
- Periodic resealing: If your subway tile shower is sealed, make sure to periodically inspect and reseal the grout lines. Resealing helps to maintain the integrity of the tile installation and protects against water penetration.
- Keep essentials dry: Store shampoo bottles, loofahs, and other shower accessories in a dry area or use shower caddies to prevent them from sitting in pooled water. This reduces the chances of mold and mildew developing in and around these items.
By following these recommended cleaning methods and implementing preventive measures, you can ensure that your subway tile shower remains spotless and free from mold and mildew. Regular maintenance will not only enhance the visual appeal of your shower but also contribute to a healthier and more enjoyable showering experience.
Addressing And Repairing Tile Issues
When it comes to installing subway tile in a shower, it’s important to be prepared for any potential tile issues that may arise. Whether you encounter cracked or damaged tiles, or grout lines and loose tiles that need repair, addressing these problems promptly can help maintain the integrity and aesthetic appeal of your shower. In this section, we will guide you through the steps of dealing with cracked or damaged tiles and repairing grout lines or loose tiles.
Dealing with cracked or damaged tiles
If you notice cracked or damaged tiles in your shower, it’s essential to address them quickly to prevent further damage and potential water leakage. Here are the steps to follow:
- Assess the damage: Take a close look at the cracked or damaged tile to determine the extent of the problem. Is it a hairline crack or a more significant break? Understanding the severity will help you determine the best course of action.
- Remove the damaged tile: If the tile is severely cracked or damaged, you will need to carefully remove it. Use a grout saw to cut around the damaged tile, taking care not to damage the surrounding tiles. Once the grout is removed, use a chisel and hammer to break the tile and remove it.
- Clean the area: After removing the damaged tile, thoroughly clean the area to ensure proper adhesion for the replacement. Remove any remaining grout or adhesive using a scraper or utility knife.
- Replace the tile: If you have spare tiles from the initial installation, use one of those to replace the damaged tile. Apply a thin layer of adhesive to the back of the tile and press it firmly into place. Make sure it is aligned with the surrounding tiles.
- Grout the tile: Once the replacement tile is secure, allow it to set for the recommended time. Then, apply grout to the joints, ensuring full coverage and a smooth finish. Wipe away any excess grout with a damp sponge, and let it dry according to the manufacturer’s instructions.
Repairing grout lines or loose tiles
Over time, grout lines can become damaged or cracks can appear, leading to loose tiles in your shower. Repairing these issues is crucial to maintaining the overall integrity of the tile installation. Follow these steps to repair grout lines or loose tiles:
- Assess the problem areas: Inspect the grout lines and tiles in your shower to identify any loose or damaged areas. Look for gaps, cracks, or tiles that are no longer securely in place.
- Remove damaged grout: Using a grout saw or a specialized grout removal tool, carefully remove the damaged grout from between the tiles. Be cautious not to damage the tiles in the process.
- Reapply grout: Prepare a fresh batch of grout according to the manufacturer’s instructions. Using a grout float, spread the grout over the grout lines, ensuring it fills the gaps completely. Scrape off any excess grout with the float.
- Replace loose tiles: If you have any loose tiles, you will need to remove them and reattach them securely. Clean the back of the tile and the area where it will be placed, then apply a thin layer of adhesive. Press the tile firmly into place, making sure it aligns with the surrounding tiles.
- Clean and seal the grout: Once the grout has dried for the recommended amount of time, clean the tiles and grout lines with a sponge and water. To protect against future damage, consider applying a grout sealer.
By promptly addressing and repairing tile issues in your shower, you can ensure the longevity and beauty of your subway tile installation. Remember to assess the damage, remove any damaged tiles or grout, replace them with care, and finish with proper cleaning and sealing. With these steps, your shower will be both functional and visually appealing.
Frequently Asked Questions
How To Install Subway Tile On A Shower Wall?
To install subway tile on a shower wall, follow these steps: 1. Start by preparing the surface and ensuring it is clean and dry. 2. Use a notched trowel to apply thin-set adhesive to the wall. 3. Press the subway tiles onto the adhesive, using tile spacers to maintain equal gaps.
4. Allow the adhesive to dry, then remove the spacers. 5. Finally, apply grout between the tiles and wipe off any excess.
How Do You Start The First Row Of Subway Tile In The Shower?
To start the first row of subway tile in the shower, begin by measuring and marking the midpoint on the wall. Apply adhesive to the area, then position the first tile at the centerline. Press it firmly into place and continue with the remaining tiles, ensuring they are evenly spaced and aligned.
Can Subway Tile Be Installed Without Spacers?
No, it is not recommended to install subway tile without spacers. Spacers ensure proper alignment and consistent grout lines, resulting in a professional and visually pleasing installation.
Is It Necessary To Back Butter Subway Tile?
It is not necessary to back butter subway tile.
Conclusion
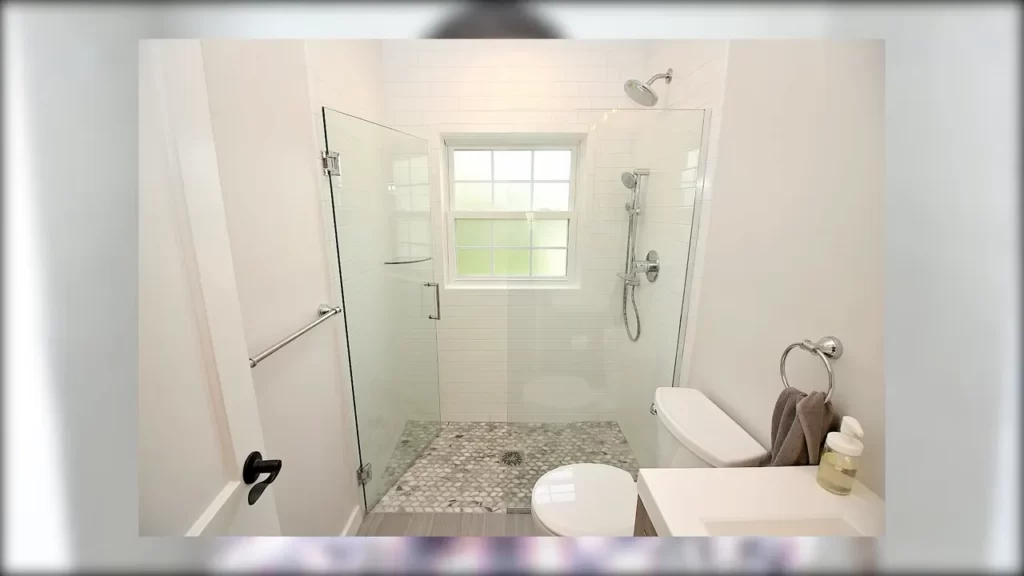
To sum up, installing subway tile in a shower can be a rewarding project that enhances the overall aesthetic and durability of your bathroom. By following the step-by-step instructions provided in this blog post, you can confidently take on the task yourself.
Remember to prepare the necessary materials, measure accurately, and approach each step with patience. With proper installation, your subway tile shower will not only look beautiful but also provide a long-lasting and water-resistant solution. Give your bathroom a stunning makeover with subway tile today!