To install a Delta bathroom faucet, follow these steps: Shut off the water supply, remove the old faucet, clean the sink surface, insert the new faucet, tighten the mounting nuts, connect the supply lines, and turn the water back on. Installing a Delta bathroom faucet is a straightforward process that can be completed in a few simple steps.
By shutting off the water supply, removing the old faucet, cleaning the sink surface, and inserting the new faucet, you can easily update your bathroom. After tightening the mounting nuts, connecting the supply lines, and turning the water back on, your Delta faucet will be ready for use.
This guide will provide you with a clear and concise explanation of how to successfully install a Delta bathroom faucet, allowing you to enhance the functionality and aesthetic appeal of your bathroom.
Preparing For Installation
Preparing for Installation
Gathering the necessary tools and materials
Before starting the installation process for your new Delta bathroom faucet, it is essential to gather all the necessary tools and materials. By having everything ready, you can save time and ensure a smooth installation.
Here is a list of tools and materials you will need:
| Tools | Materials |
|---|---|
|
|
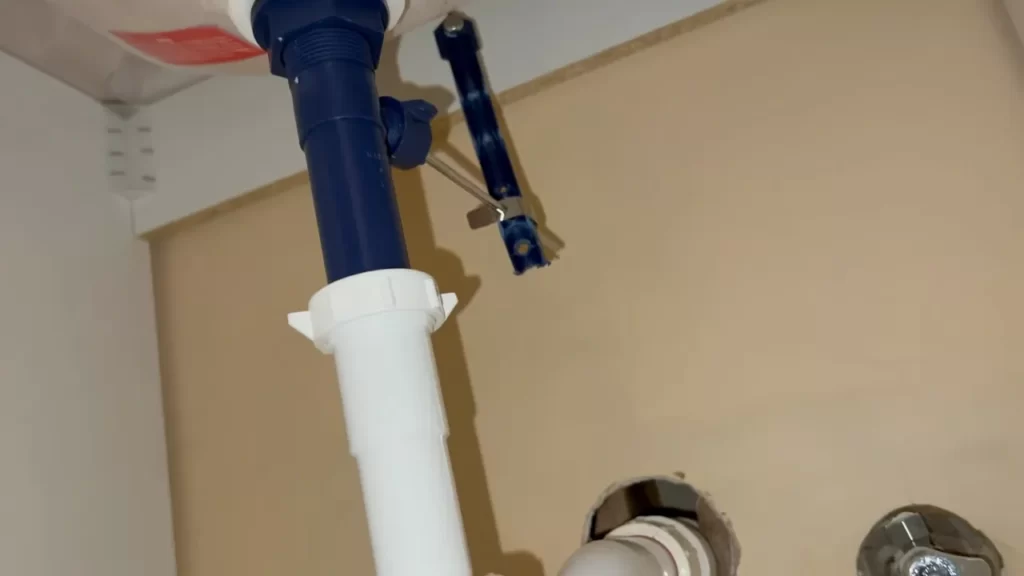
Shutting off the water supply to the bathroom faucet
Before you can remove the old faucet and start the installation process, you must first shut off the water supply to the bathroom faucet. This crucial step prevents any water leakage and keeps the installation area dry.
To shut off the water supply, follow these steps:
- Locate the shut-off valve
- Turn the valve clockwise until it is fully closed
- Check that the water supply has been successfully shut off by turning on the faucet
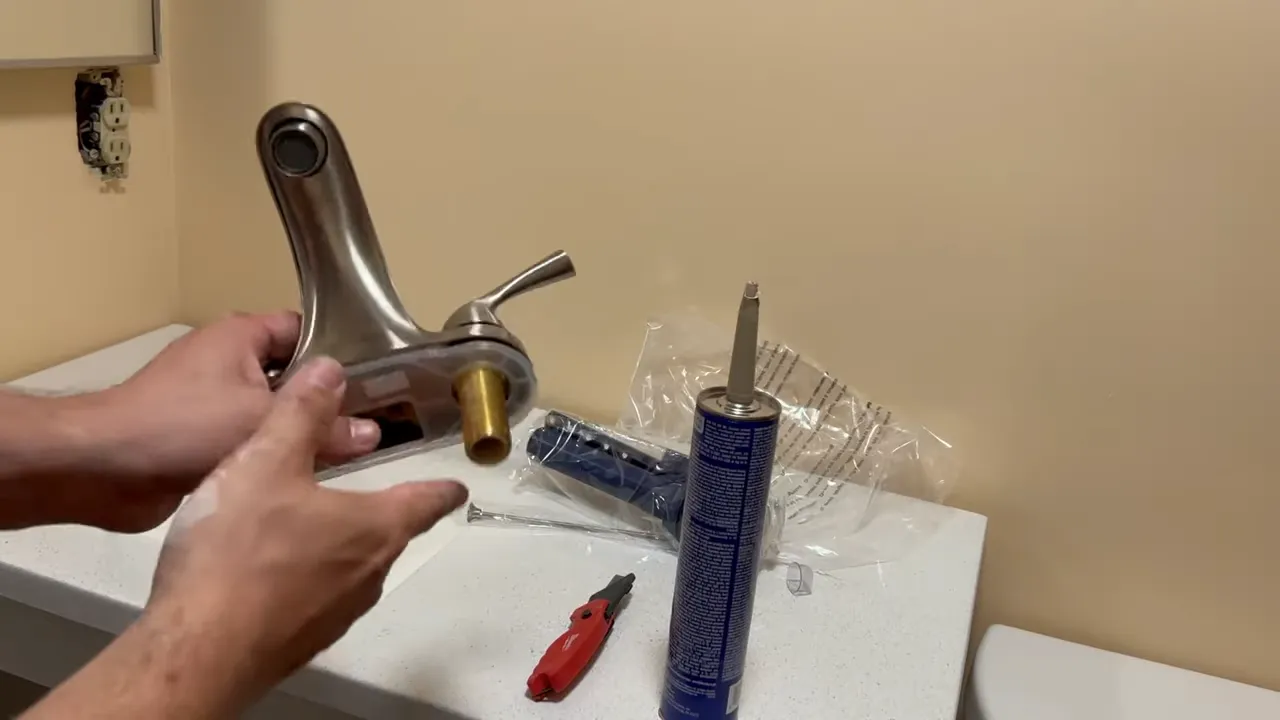
Removing the old faucet and cleaning the sink surface
Once the water supply is turned off, you can proceed to remove the old faucet and ensure a clean surface for the installation of your new Delta bathroom faucet. Follow these steps:
- Use an adjustable wrench to disconnect the supply lines connected to the faucet
- Unscrew any nuts or bolts holding the faucet in place
- Carefully lift the old faucet off the sink
- Use a cleaning solution and a non-abrasive cloth to thoroughly clean the sink surface
- Remove any old putty or residue to create a smooth installation area
By following these steps and preparing in advance, you are now ready to install your new Delta bathroom faucet. In the next section, we will guide you through the installation process itself.
Choosing The Right Delta Bathroom Faucet
Understanding the different types of Delta faucets available
When it comes to choosing the right Delta bathroom faucet, understanding the different types available is crucial. Delta offers a wide range of faucets, each with its own unique features and benefits. By familiarizing yourself with the various types, you can make an informed decision that suits your needs and preferences.
Delta offers three main types of faucets: single-handle, double-handle, and touch-free.
Considering the design and style options
In addition to functionality, design and style play a significant role in choosing the right Delta bathroom faucet. Delta offers an extensive selection of designs, ranging from contemporary to traditional, ensuring there’s something for everyone.
When choosing a design, consider the overall aesthetic of your bathroom. Whether you prefer a sleek and modern look or a classic and timeless style, Delta offers faucets in a variety of finishes, including chrome, brushed nickel, and bronze.
Ensuring compatibility with your existing plumbing system
Compatibility with your existing plumbing system is essential when installing a Delta bathroom faucet. Before making a purchase, it’s crucial to check the specifications and requirements of your current plumbing setup.
Ensure that the faucet you select is compatible with your existing sink and countertop. Delta provides detailed measurements and dimensions for each faucet, allowing you to determine if it will fit properly.
Additionally, consider the type of installation required for your particular plumbing system. Delta offers both single-hole and widespread faucets, so be sure to choose the right one to avoid any installation complications.
By following these guidelines, you can choose the right Delta bathroom faucet that meets your needs, matches your style, and seamlessly integrates with your existing plumbing system. Remember to take into account the different types available, consider the design and style options, and ensure compatibility for a successful installation.
Installing The New Delta Bathroom Faucet
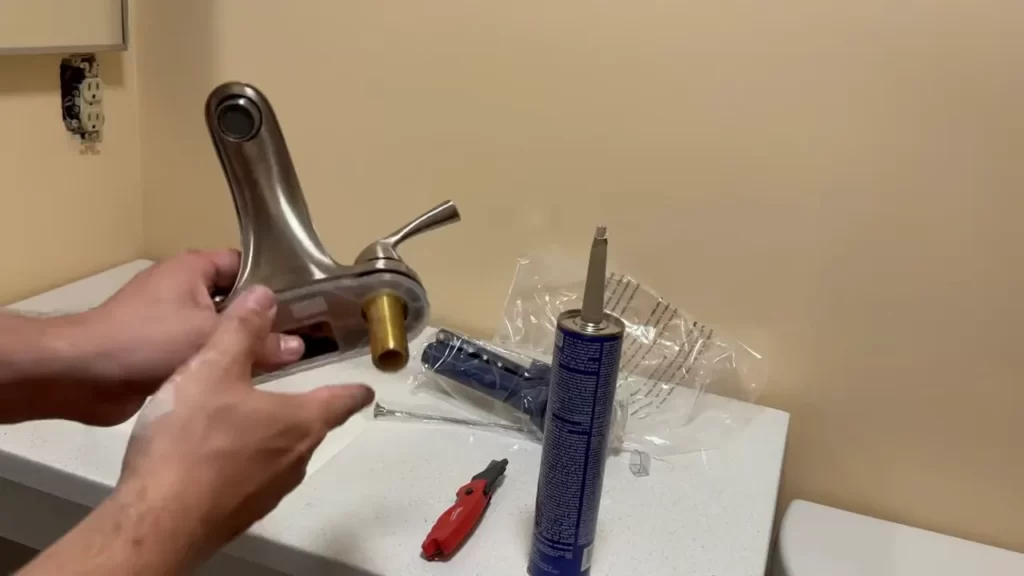
Once you have gathered all the necessary tools and materials, it’s time to install your new Delta bathroom faucet. Follow these steps to ensure a successful installation:
Reading the manufacturer’s instructions carefully
Before you begin the installation process, it’s crucial to read the manufacturer’s instructions that come with your Delta bathroom faucet. These instructions will provide specific guidelines and diagrams that are tailored to your faucet model. Take the time to thoroughly understand the steps and ensure that you have all the necessary tools and materials.
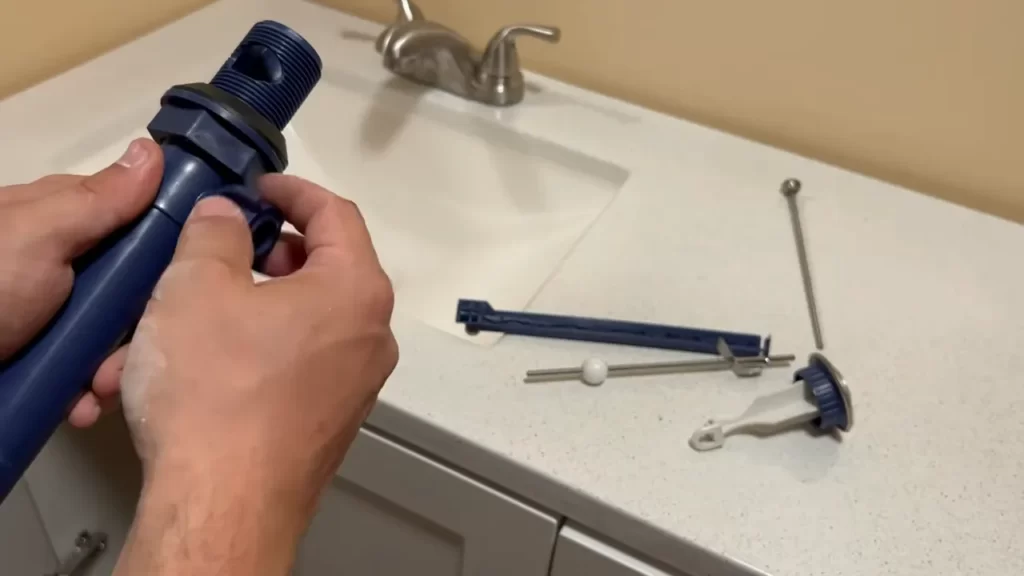
Attaching the faucet to the sink or countertop
Now that you have familiarized yourself with the manufacturer’s instructions, it’s time to attach the faucet to your sink or countertop. Start by identifying the mounting holes on your sink or countertop where the faucet will be installed. Most Delta bathroom faucets come with a gasket or rubber seal, which should be placed between the faucet and the sink or countertop to create a watertight seal.
Next, insert the faucet through the mounting holes and secure it from underneath using the provided mounting hardware. This may include nuts, washers, and screws. Use an adjustable wrench or pliers to tighten the hardware until the faucet is securely fastened.
Connecting the water supply lines properly
With the faucet securely attached, it’s time to connect the water supply lines. Locate the hot and cold water supply valves underneath your sink and turn them off. This will prevent any water from flowing while you make the connections.
Next, connect the corresponding supply lines from your faucet to the hot and cold water valves. Most Delta bathroom faucets come with pre-installed flexible supply lines, which make this step easier. Ensure that the connections are tight, but be careful not to overtighten as it may damage the fittings or cause leaks.
Once the supply lines are connected, turn on the water supply valves slowly and check for any leaks. Let the water run for a few minutes to flush out any debris that may have accumulated during installation.
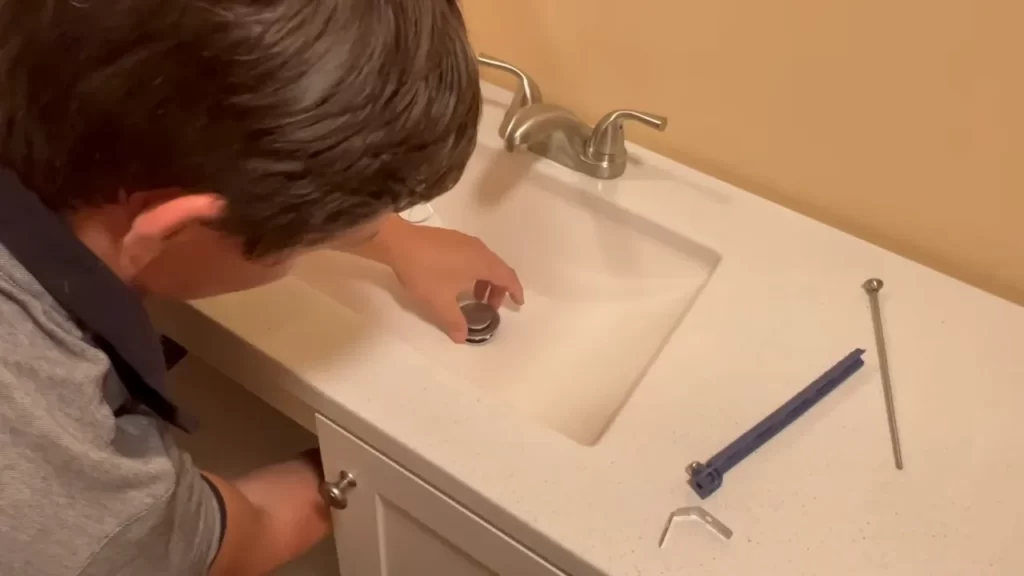
Testing for leaks and making necessary adjustments
After connecting the water supply lines, it’s crucial to test for leaks and make any necessary adjustments. Start by visually inspecting all connections for any signs of water leakage. If you notice any leaks, tighten the connections slightly until the leak stops.
To further test for leaks, turn on both the hot and cold water handles and let the water run for a few minutes. Check all connections again for any signs of leakage. If any leaks persist, you may need to disassemble the connections and reassemble them, ensuring everything is properly aligned and tight.
Remember, it’s essential to regularly check for leaks, especially within the first few days after installation. Any leaks should be addressed promptly to prevent water damage.
Troubleshooting Tips For Delta Bathroom Faucet Installation
Dealing with potential problems during installation
Installing a Delta bathroom faucet can seem like a daunting task, especially if you encounter any unexpected issues along the way. However, with the right troubleshooting tips, you can tackle these problems head-on and ensure a successful installation. Here are some common problems you may encounter and how to address them:
Fixing common issues such as leaks or loose handles
One of the most common issues during faucet installation is leaks. If you notice any water dripping from the connections, it’s essential to address the problem promptly to avoid any potential water damage. Here’s what you can do to fix leaks:
- Check the connections: Ensure that all the connections are tight and secure. Use a wrench or pliers to tighten any loose nuts or fittings.
- Replace faulty parts: If tightening the connections doesn’t solve the issue, you may need to replace faulty washers or O-rings. Consult the user manual or contact Delta customer support for the appropriate replacement parts.
- Apply plumber’s tape: If leaks persist around threaded connections, wrapping plumber’s tape around the threads can create a tighter seal and prevent leaks.
- Inspect the cartridge: Leaks can also occur if the cartridge is damaged or worn out. Consider replacing the cartridge if necessary.
Another common problem you may come across is a loose handle. This can make it challenging to control the water flow and temperature. Follow these steps to fix a loose handle:
- Locate the set screw: Look for a small screw hidden underneath the handle or decorative cap. Use an Allen wrench to tighten the set screw, which should secure the handle to the faucet.
- Inspect the handle mechanism: If tightening the set screw doesn’t solve the issue, the handle mechanism itself may be worn or damaged. In this case, consider replacing the handle.
Seeking professional help when needed
While many faucet installation issues can be resolved with the troubleshooting tips mentioned above, there may be instances where professional help is necessary. If you encounter complex problems or lack the necessary tools and expertise, it’s best to seek assistance from a licensed plumber or a professional Delta faucet installer. They can diagnose the issue accurately and provide a solution that ensures your faucet functions properly.
By being aware of potential problems during Delta bathroom faucet installation and knowing how to troubleshoot them, you can overcome any challenges that arise and achieve a successful installation. Don’t hesitate to seek professional help when needed and enjoy the convenience and functionality of your newly installed Delta bathroom faucet.
Maintaining And Caring For Your Delta Bathroom Faucet
Regular cleaning and maintenance routine:
Keeping your Delta bathroom faucet clean and well-maintained is essential for its long-term performance and appealing aesthetics. To ensure that your faucet remains in top-notch condition, it’s important to follow a regular cleaning and maintenance routine. By doing so, you can prevent the buildup of dirt, grime, and other undesirable materials that may compromise the functionality and beauty of your faucet.
- Start by gently wiping the exterior surfaces of your faucet with a soft cloth or sponge dampened with warm, soapy water.
- Avoid using harsh chemical cleaners or abrasive materials, as they can damage the finish of your faucet.
- Rinse the faucet thoroughly after cleaning to remove any soap residue.
- Dry the faucet with a clean, soft cloth to prevent water spots or stains.
Preventing limescale buildup:
Limescale buildup is a common problem that can affect the performance of your Delta bathroom faucet over time. To prevent this issue and maintain optimal water flow, follow these tips:
- Periodically check the aerator for any limescale buildup. If necessary, remove the aerator and soak it in a mixture of equal parts white vinegar and water overnight. Rinse it thoroughly before putting it back in place.
- Consider installing a water softener system if your area has hard water. This can help minimize limescale buildup and extend the lifespan of your faucet.
Addressing minor repairs and replacements:
Despite proper maintenance, minor issues may arise with your Delta bathroom faucet over time. Addressing these issues promptly can help prevent further damage and ensure the continued functionality of your faucet.
- If you notice a leak, tighten the connections or replace any worn out washers or O-rings.
- In case of reduced water flow, check for any debris or mineral buildup in the aerator and clean it thoroughly.
- If a part of your faucet needs replacement, such as a handle or cartridge, consult the Delta Faucet website or manuals for specific instructions on how to properly replace the part.
By following these care and maintenance tips, you can extend the life and performance of your Delta bathroom faucet, ensuring it continues to provide reliable and efficient operation for years to come.
Upgrading Your Bathroom With Delta Faucet Accessories
Upgrade your bathroom and enhance its functionality with a range of stylish accessories from Delta. These accessories not only add aesthetic appeal but also provide convenience and organization to your space. From towel bars to soap dispensers, Delta offers a wide variety of options to match your personal style and complement your Delta bathroom faucet. In this blog post, we will explore some of the additional accessories available from Delta and provide a step-by-step guide on installing towel bars, shelves, and soap dispensers to take your bathroom to the next level of luxury and functionality.
Exploring additional accessories available from Delta
Delta understands that each bathroom is unique, and they offer an extensive range of accessories to suit the specific needs of your space. Whether you prefer a modern and sleek design or a more traditional style, Delta has something for everyone. Some of the popular additional accessories include:
- Faucet handles: Upgrade the look of your faucet by replacing the existing handles with Delta’s stylish options.
- Toilet paper holders: Keep your toilet paper Rolls easily accessible with Delta’s selection of toilet paper holders that blend seamlessly with your bathroom decor.
- Robe hooks: Hang towels and robes conveniently with Delta’s robe hooks, available in various finishes to match your faucet.
- Shower shelves: Free up counter space and keep your shower essentials well-organized with Delta’s practical and stylish shower shelves.
Installing towel bars, shelves, or soap dispensers
Installing Delta towel bars, shelves, or soap dispensers is a straightforward process that you can easily accomplish on your own. Follow these simple steps to upgrade your bathroom with Delta’s additional accessories:
- Start by identifying the desired location for the towel bar, shelf, or soap dispenser. Ensure that it is convenient and easily accessible.
- Use a measuring tape to mark the precise spots where you will install the accessories. Double-check your measurements to ensure everything is level and aligned.
- Using a drill and appropriate drill bit, create pilot holes at the marked spots. This will prevent the wall from cracking or splitting when you insert the screws.
- Attach the mounting brackets or hardware provided with the Delta accessory to the wall, aligning them with the pilot holes.
- Secure the accessory to the mounting brackets or hardware using the provided screws.
- Double-check that the accessory is securely attached and level.
- Repeat the above steps for any additional accessories you wish to install in your bathroom.
In no time, your bathroom will be transformed with the added functionality and style of Delta’s accessory range. Upgrade your space today and enjoy the benefits of a well-organized and aesthetically pleasing bathroom!
Frequently Asked Questions
How Do I Know Which Delta Bathroom Faucet I Have?
To determine which Delta bathroom faucet you have, look for the model number on the faucet itself. It is usually located on a tag attached to the supply lines or handle. If you can’t find the model number, contact Delta customer service with photos of your faucet for assistance.
How To Install Delta Faucet?
To install a Delta faucet, follow these steps: 1. Shut off the water supply. 2. Remove the old faucet. 3. Install the new faucet by aligning it with the mounting holes. 4. Secure it with the provided screws or nuts.
5. Connect the water supply lines, tighten them, and turn on the water.
How Do You Remove A Delta Widespread Bathroom Faucet?
To remove a Delta widespread bathroom faucet, follow these steps: 1. First, turn off the water supply to the faucet. 2. Use a wrench to loosen and remove the nuts securing the faucet handles. 3. Take off the spout assembly by unscrewing it counterclockwise.
4. Disconnect the water supply lines from the faucet base. 5. Lastly, unscrew the mounting nuts and lift the faucet off the countertop.
How Do You Install A Quick Connect Bathroom Faucet?
To install a quick connect bathroom faucet, follow these steps: 1. Turn off the water supply. 2. Remove the old faucet by unscrewing the nuts and disconnecting the water lines. 3. Clean the sink surface and apply plumber’s putty to the base of the faucet.
4. Position the faucet and tighten the mounting nuts. 5. Connect the water supply lines and turn on the water. Done!
Conclusion
Installing a Delta bathroom faucet can seem daunting at first, but with proper guidance, it becomes a straightforward process. By following the step-by-step instructions detailed in this blog post, you can successfully install a Delta bathroom faucet in no time.
Remember to gather all the necessary tools, read the instructions thoroughly, and take your time to ensure a leak-free and functional installation. With the right techniques and a little patience, you’ll be enjoying your new Delta bathroom faucet in no time.
Happy DIY-ing!