
To install tile on a shower floor, start by cleaning the surface and ensuring it is dry. Apply thin-set mortar to the floor and press the tiles into place, using spacers to maintain even gaps.
Let the mortar dry, then grout the tiles by spreading the grout over the surface and wiping away excess with a sponge. Seal the grout once it has cured to ensure long-lasting durability.
Preparing The Shower Floor
Properly preparing the shower floor is crucial for a successful tile installation. This is the foundation upon which you will lay your beautiful tiles, so it’s essential to get it right. The process can be broken down into three main steps: clearing the shower area, inspecting and repairing the subfloor, and measuring and planning the tile layout.
Clearing the Shower Area
Before you can begin preparing the shower floor, you need to clear the area of any obstructions. Remove any existing tiles, grout, or adhesive using a chisel, scraper, or other suitable tools. Make sure to wear protective goggles and gloves to avoid injury.
Once the area is cleared, thoroughly clean the floor to remove any dirt, debris, or mold. This will ensure a clean and smooth surface for the new tile installation.
Inspection and Repair of Subfloor
Next, it’s important to inspect the subfloor for any signs of damage, such as rot, water damage, or uneven surfaces. Addressing these issues before installing the tiles will help prevent future problems and ensure a stable foundation.
Start by thoroughly examining the subfloor for signs of moisture or decay. Pay close attention to areas near drains or water fixtures, as these are prone to water damage. If you notice any signs of damage, it’s crucial to repair or replace the subfloor as needed.
In addition to repairing any damage, it’s essential to level the subfloor. Use a leveling compound or floor patch to fill in any low spots or uneven areas. This will create a smooth and even surface for the tile installation.
Measuring and Planning the Tile Layout
Once the subfloor is inspected and repaired, it’s time to measure and plan the layout of your tiles. This step is crucial to ensure that the end result is aesthetically pleasing and fits the shower space perfectly.
Start by measuring the dimensions of the shower floor accurately. Use a tape measure to determine the length and width of the space, taking note of any irregularities or obstacles that may impact the layout.
Next, consider the tile size and the desired grout lines. This will help determine the number of tiles needed and the layout pattern you want to achieve. You can create a basic sketch or use a tile layout tool to visualize the placement of the tiles.
It’s also essential to consider the location of the shower drain and plan accordingly. This will ensure that the tiles are properly aligned and centered around the drain.
By taking the time to properly prepare the shower floor, you’ll ensure a smooth and successful tile installation. Clearing the shower area, inspecting and repairing the subfloor, and measuring and planning the tile layout are essential steps that should not be overlooked. Once these preparations are complete, you’ll be ready to move on to the exciting part of actually installing the tiles!

Applying Mortar And Setting Tiles
Mixing Mortar
Before you can begin the process of applying mortar and setting tiles on your shower floor, you need to properly mix the mortar. Mixing the mortar is a crucial step in ensuring a strong and durable tile installation. The consistency of the mortar should be similar to peanut butter to ensure it adheres well to the shower floor and the tiles.
Here are the steps to mix the mortar:
- Gather all the necessary materials including the mortar mix, water, and a mixing container.
- Follow the instructions on the mortar mix packaging to determine the appropriate water-to-mix ratio.
- Pour the designated amount of water into your mixing container.
- Slowly add the mortar mix into the water while stirring with a trowel or paddle mixer. Make sure all the dry mix is incorporated into the water.
- Continue to mix the mortar until you achieve a smooth and consistent peanut butter-like texture. Avoid over mixing as it can cause the mortar to dry out too quickly.
Applying Mortar to the Shower Floor
Once your mortar mix is ready, it’s time to apply it to the shower floor. Properly applying the mortar ensures a solid base for your tiles and helps prevent them from shifting or cracking in the future.
Here’s how to apply mortar to the shower floor:
- Start by scooping a small amount of mortar onto your trowel or notched trowel.
- Hold the trowel at a 45-degree angle and spread the mortar onto the floor surface.
- Spread the mortar in a thin, even layer, working in small sections at a time. This will prevent the mortar from drying out before you have a chance to set the tiles.
- Use the notched side of the trowel to create ridges in the mortar. These ridges will help ensure proper tile adhesion and prevent air pockets.
- Continue applying mortar and creating ridges until the entire shower floor is covered.
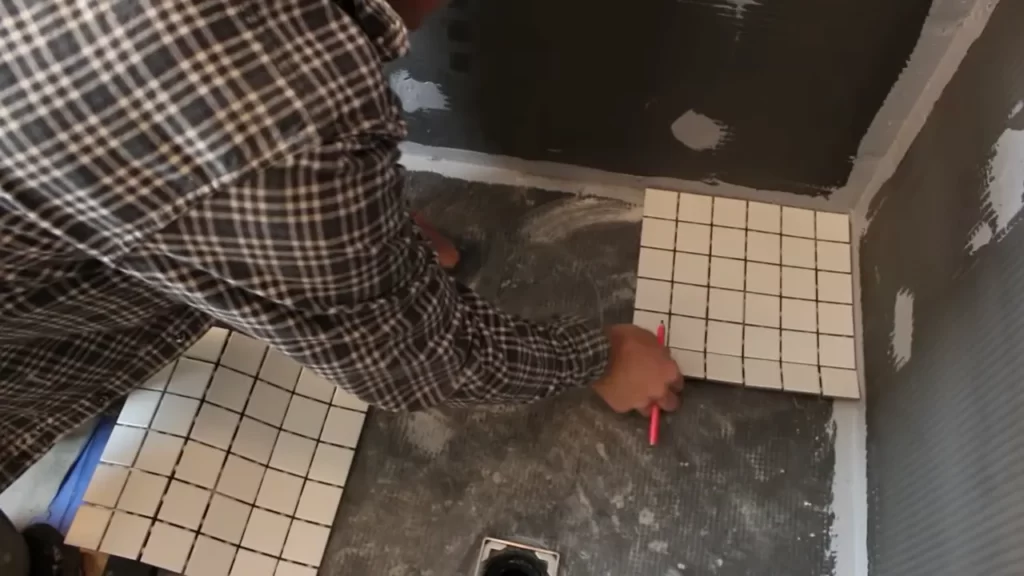
Positioning and Setting the First Tile
With the mortar applied to the shower floor, it’s time to position and set the first tile. This is an important step as it sets the foundation for the rest of the tile installation.
Follow these steps to position and set the first tile:
- Decide on the starting point for your tile installation. It’s generally recommended to start at the center of the shower floor.
- Place the tile onto the mortar, pressing firmly to ensure proper adhesion and to make sure it is levelled.
- Wiggle the tile slightly to ensure it is securely set in place.
- Place tile spacers around the first tile to create consistent spaces between each tile. This will help ensure a professional and uniform look.
- Check the alignment of the tile using a level. Make any necessary adjustments to ensure it is perfectly level and aligned with your desired pattern.
Continue Setting Tiles in Rows
With the first tile in place, you can now continue setting the remaining tiles in rows. This process should be repeated until the entire shower floor is covered.
Follow these steps to set tiles in rows:
- Apply mortar on the shower floor, following the same process as described earlier.
- Position the next tile next to the previously set tile, against the tile spacers.
- Press the tile firmly into the mortar, making sure it is level and aligned with the adjacent tiles.
- Continue setting tiles in rows, using the tile spacers to maintain consistent spacing between each tile.
- As you set each tile, periodically check the level and alignment to ensure a professional-looking installation.
Remember, be patient and take your time during the tile installation process. It’s important to give the mortar enough time to dry and set before grouting.
Grouting And Finishing The Tile Installation
Once you have successfully installed the tiles on your shower floor, it’s time to move on to the next crucial step – grouting and finishing. This step will not only ensure the durability and stability of the tiles but also give your shower a polished and professional look. In this section, we will guide you through the process of preparing the grout, applying it to the tile joints, removing excess grout, cleaning the tiles, and finally sealing the tile and grout for long-lasting protection.
Preparing Grout
Before you can start applying grout to the tile joints, you need to prepare the grout mixture. Here’s a step-by-step guide on how to do it:
- Start by choosing the right type of grout for your shower floor. You can opt for sanded grout for wider joints or unsanded grout for narrower joints.
- Read the manufacturer’s instructions on the grout bag to determine the water-to-grout ratio. Use a clean bucket and mix the grout and water following the recommended measurements.
- Stir the mixture using a grout float or a margin trowel until you achieve a smooth and consistent paste-like consistency.
Applying Grout to the Tile Joints
Now that you have prepared the grout mixture, it’s time to apply it to the tile joints. Here’s how you can do it:
- Using a grout float, scoop a generous amount of grout from the bucket.
- Hold the float at a 45-degree angle and firmly press the grout into the joints, ensuring full coverage.
- Work in small sections to prevent the grout from drying before you can finish it.
- Once you have filled the joints with grout, hold the float at a 90-degree angle and scrape off the excess grout diagonally across the joints.
Removing Excess Grout and Cleaning the Tiles
After applying the grout, it’s essential to remove the excess grout and clean the tiles to achieve a polished look. Follow these steps:
- Wait for about 30 minutes for the grout to set before removing the excess.
- Using a damp sponge, lightly wipe the surface of the tiles in circular motions to remove the grout haze and reveal the tile’s natural beauty.
- Rinse the sponge frequently to avoid spreading grout residue.
- Repeat the wiping and rinsing process until the tiles are clean and the grout lines are smooth.
Sealing the Tile and Grout
Lastly, to protect your newly installed tiles and grout from dirt, stains, and moisture, it’s crucial to seal them. Here’s how:
- Ensure that the grout has fully cured for at least 48 hours before applying the sealer.
- Choose a high-quality sealer suitable for your shower floor tiles and grout type.
- Using a brush or roller, apply the sealer evenly on the tiles and grout lines, following the manufacturer’s instructions.
- Allow the sealer to penetrate the surface for the recommended time.
- Wipe off any excess sealer using a clean cloth or sponge.
Following these steps will not only complete the installation process but also ensure the longevity and beauty of your shower floor tiles. Now you can enjoy a stunning and durable shower space for years to come!
Frequently Asked Questions
How Do You Prepare A Shower Floor For Tile?
To prepare a shower floor for tile, follow these steps. First, clean and remove any existing flooring. Next, repair any cracks or uneven surfaces. Then, apply a waterproof membrane to prevent moisture damage. Install a sloped mortar bed to ensure proper water drainage.
Finally, let the mortar bed dry completely before tiling.
What Do You Put Under A Tile Shower Floor?
Under a tile shower floor, you need to use a waterproofing membrane. This membrane helps prevent water from seeping through and causing damage. It provides a protective barrier and ensures that your shower floor remains waterproof and durable.
How Do You Waterproof A Shower Floor Before Tiling?
To waterproof a shower floor before tiling: 1. Clean and prepare the surface. 2. Apply a waterproofing membrane or liquid coating. 3. Ensure complete coverage and dry before tiling. 4. Use epoxy grout for added protection. 5. Follow manufacturer instructions and consult a professional if needed.
Can I Tile Directly On Concrete Shower Floor?
Yes, you can tile directly on a concrete shower floor. It provides a stable surface for tiles, but ensure the concrete is clean, dry, and level. Apply a waterproofing membrane before tiling to prevent water damage. Recommended to use appropriate adhesive and grout for better durability.
Conclusion
To sum up, installing tile on a shower floor is a major home improvement project that requires careful planning and execution. By following the step-by-step instructions provided in this blog post, you can achieve a professional-looking result that will enhance the aesthetics and functionality of your shower.
Remember to choose the right type of tile, prepare the surface properly, and use the correct tools and techniques for a successful installation. With practice and patience, you can transform your shower into a beautiful oasis of relaxation.