To install a shower liner, measure the dimensions of your shower space, purchase a liner that fits those dimensions, and attach it to the shower walls using adhesive or screws for a secure installation. A shower liner is an essential component to protect your shower walls from water damage, and proper installation ensures its effectiveness.
Additionally, a well-installed shower liner can enhance the overall appearance and functionality of your bathroom. So, follow these steps and enjoy a stylish and leak-free showering experience.
Understanding The Basics Of Shower Liners
When it comes to your bathroom remodeling project, installing a shower liner is an essential step that can significantly enhance the functionality and aesthetics of your shower area. A shower liner, unlike a shower curtain, provides a more secure and waterproof barrier, preventing water from seeping through and causing potential damage to your bathroom walls and floors. In this article, we will explore the basics of shower liners and discuss the differences between shower liners and shower curtains, as well as the benefits of installing a shower liner.
Differentiating Shower Liners from Shower Curtains
Many homeowners often wonder about the difference between shower liners and shower curtains. While both serve a similar purpose of keeping water inside the shower area, there are distinct characteristics that set them apart.
| Shower Liner | Shower Curtain |
|---|---|
| Typically made from durable and waterproof materials such as vinyl or PVC | Usually made from fabric or plastic, which may not provide the same level of water resistance |
| Designed to fit snugly against the shower walls, preventing water from escaping | Hangs freely and may not form a tight seal against the walls |
| Can be used on its own or in combination with a decorative shower curtain | Predominantly used for decorative purposes and may require a liner for added functionality |
Benefits of Installing a Shower Liner
There are several advantages to installing a shower liner in your bathroom:
- Waterproof Protection: One of the primary benefits of a shower liner is its ability to provide a waterproof barrier. Unlike shower curtains that may allow water to escape, a shower liner helps contain water within the shower area, preventing damage to your bathroom floors and walls.
- Easier Maintenance: Shower liners are relatively easy to clean and maintain. Most liners can be wiped down with a damp cloth or sponge to remove any buildup of soap scum or mildew. This makes them a hygienic and convenient choice for busy households.
- Longevity: Shower liners, especially those made from durable materials such as vinyl or PVC, can offer long-lasting performance. They are resistant to wear and tear, ensuring that your investment will stand the test of time.
- Customization Options: Shower liners come in a wide range of colors, styles, and patterns, allowing you to personalize your bathroom decor. You can choose a liner that complements your existing design scheme or opt for a clear liner to preserve the visual openness of your shower area.
Installing a shower liner is a practical and cost-effective way to enhance the functionality and appearance of your bathroom. Whether you’re looking for a waterproof solution or want to add a touch of style to your shower, a shower liner is a worthwhile addition. In the next section, we will guide you through the step-by-step process of installing a shower liner to help you achieve a beautiful and functional shower space.

Gathering The Necessary Tools And Materials
Before you dive into installing a shower liner, it’s important to gather all the essential tools and materials. Having everything ready beforehand will ensure a smooth and efficient installation process. In this section, we will provide you with a list of tools and recommended materials for your shower liner installation project.
List of tools required for the installation
Here’s a handy list of tools you’ll need to have on hand:
- Tape Measure: Essential for measuring the dimensions of your shower area accurately.
- Pencil: Needed for marking the spots where you’ll install the shower liner or make important measurements.
- Utility Knife: Used for cutting the shower liner and making precise cuts during the installation process.
- Scissors: Useful for trimming any excess liner and ensuring a neat and tidy installation.
- Level: Helps you ensure that the shower liner is installed perfectly straight and level.
- Screwdriver: Might be required for removing or loosening any fixtures or fittings in the shower area.
- Drill: If you’re planning to install grab bars or other accessories, a drill will be necessary to make holes in the wall.
- Sealant Gun: Needed for applying adhesive or sealant to ensure a water-tight seal.
- Painter’s Tape: Helpful for temporarily securing the shower liner in place during the installation process.
Recommended materials for a shower liner
When it comes to the materials for your shower liner installation, quality is key. Here are some recommended materials to consider:
- Shower Liner: Choose a durable and water-resistant liner made of PVC or high-quality fabric. Ensure it is the correct size to fit your shower area.
- Adhesive or Sealant: Opt for a waterproof adhesive or sealant designed specifically for securing shower liners.
- Grout: If you’re planning to install tiles in your shower area, make sure to have grout on hand for sealing the gaps between tiles.
- Caulk: Caulking is essential for sealing gaps between the shower liner and walls or floor, providing an additional layer of waterproofing.
- Grab Bars and Accessories: If desired, select high-quality grab bars and other accessories that are resistant to moisture and will complement your shower liner.
By ensuring you have all the necessary tools and materials, you’ll be well-prepared to tackle the installation process. Having everything at your fingertips will help you save time and eliminate any unnecessary delays during the project. So, gather your tools and materials, and get ready to install your shower liner!
Cleaning And Removing Existing Shower Curtains
Step-by-step process to clean the shower area
Cleaning and removing existing shower curtains is an essential step in preparing for the installation of a shower liner. By ensuring that the shower area is thoroughly cleaned, you can optimize the adherence and effectiveness of the new liner. Follow this step-by-step guide to clean the shower area effectively.
- Remove any personal items or accessories from the shower area, including shampoo bottles, soap dispensers, and loofahs.
- Start by rinsing the shower walls and floor with warm water to remove any loose dirt and debris.
- Apply a generous amount of a mild bathroom cleaner onto a non-abrasive sponge or cloth. Make sure to choose a cleaner that is suitable for your specific shower material, whether it be fiberglass, acrylic, or tile.
- Scrub the walls and floor of the shower using gentle circular motions, focusing on areas where soap scum and mildew tend to accumulate.
- Rinse the shower thoroughly with warm water to remove any traces of the cleaner.
- Dry the shower area using a clean towel or a squeegee, ensuring that no moisture is left behind.
Removing old shower curtains effectively
Before installing a new shower liner, it is crucial to remove the old shower curtains properly. Here’s a guide on how to effectively remove old shower curtains, ensuring a smooth transition.
- Start by removing any curtain rings or hooks from the curtain rod. Set them aside for later use or discard them if they are worn out.
- If your shower curtain has a liner attached, detach it from the curtain itself.
- Inspect the curtain for any signs of mildew or mold. If it is heavily contaminated, it is advisable to discard it and replace it with a new one.
- If the curtain is relatively clean, prepare a mixture of warm water and mild detergent in a bucket.
- Dip a sponge or cloth into the soapy water and thoroughly clean both sides of the curtain. Pay special attention to any visible stains or spots.
- Rinse the curtain with clean water to remove any soap residue.
- To dry the curtain, either hang it outside on a clothesline or lay it flat on a clean surface. Allow it to air dry completely.
- Once dry, inspect the curtain for any remaining stains or damage. If necessary, repeat the cleaning process.
By following these steps, you can ensure that your shower area is clean and free of any residue before installing a new shower liner. This will not only enhance the appearance of your shower but also provide a solid foundation for the successful installation of the liner.

Measuring The Shower Area
Determining the dimensions of the shower area
Before installing a shower liner, it is crucial to accurately measure the dimensions of your shower area. By doing so, you can ensure a perfect fit and streamline the installation process. Here are some steps to help you determine the dimensions of your shower area.
Tips for accurate measurements
When measuring your shower area, it is essential to be precise to avoid any issues during the installation process. Here are a few tips to help you take accurate measurements:
- Use a measuring tape: A measuring tape is a simple yet effective tool for measuring the dimensions of your shower area. Make sure to use a flexible tape measure to accurately measure any curved or irregular surfaces.
- Measure each wall individually: Start by measuring each wall of your shower area separately. Measure from the floor to the ceiling and from side to side. Take note of any variations in height or width.
- Include any recessed areas: If your shower area has any recessed sections, such as shelves or niches, make sure to measure them as well. These measurements are crucial for determining the exact dimensions of your shower liner.
- Consider the curvature of the shower base: If your shower base has a curved or sloped surface, be sure to measure the depth and radius of the curve. This information will help ensure a proper fit for your shower liner.
By following these tips, you can ensure accurate measurements of your shower area, setting the foundation for a successful shower liner installation.
Setting Up The Liner
Unpacking and Inspecting the Shower Liner
Before you begin setting up your shower liner, it’s important to carefully unpack and inspect the liner for any damage or defects. Here’s a step-by-step guide to help you with this process:
- Start by removing the liner from its packaging, ensuring not to use sharp objects that may accidentally puncture it.
- Once unpacked, lay the liner flat on a clean and dry surface, such as your bathroom floor.
- Thoroughly inspect the liner for any rips, tears, or holes that could compromise its effectiveness. If you spot any damage, consider contacting the manufacturer and requesting a replacement.
- Additionally, check for any manufacturing defects like uneven seams or misaligned holes for hooks or rings. It’s always better to address these issues before proceeding to the installation.
Spreading the Liner and Ensuring Proper Positioning
Once you’ve inspected your shower liner and made sure it’s in perfect condition, it’s time to spread it out and ensure it’s properly positioned. Follow these simple steps:
- Carefully lift the liner off the floor and hold it up near the shower area.
- Start by aligning the top edge of the liner with the top edge of the shower, ensuring that it hangs evenly and covers the shower walls completely.
- Using your hand or a smooth surface like a squeegee, gently smooth out any air bubbles or wrinkles that may have formed on the surface of the liner.
- Be mindful of the liner’s position, ensuring that it overlaps the top edge of the shower by a few inches. This will help prevent water leakage between the liner and the shower walls.
- Check the liner’s bottom for any excess material and make sure it extends below the shower base or tub by a few inches. This will ensure proper water drainage.
- Finally, secure the liner in place by using hooks or rings, depending on the type of liner you have. Ensure that the liner is taut but not overly stretched, as this may cause it to tear or detach from the hooks/rings.
By carefully following these steps for unpacking, inspecting, spreading, and ensuring proper positioning, you’re well on your way to successfully installing your shower liner. Now that everything is set up, you can move on to the next steps of your shower installation process with confidence.

Attaching The Liner To The Shower Area
One of the crucial steps in installing a shower liner is attaching it securely to the shower area. This ensures the liner stays in place and effectively protects your walls and floors from water damage. In this section, we will discuss two methods to accomplish this – applying adhesive or hooks to secure the liner and ensuring that the liner is taut and properly aligned.
Applying adhesive or hooks to secure the liner
To get started, you have two main options for attaching the liner to the shower area – using adhesive or hooks. Both methods have their benefits, so you can choose the one that suits your preferences and shower setup.
Applying adhesive:
If you opt for adhesive, ensure you choose a waterproof adhesive that is suitable for your specific liner material. Follow these steps to securely attach the liner:
- Clean the shower walls thoroughly to remove any dirt, grime, or moisture. This will help the adhesive bond better.
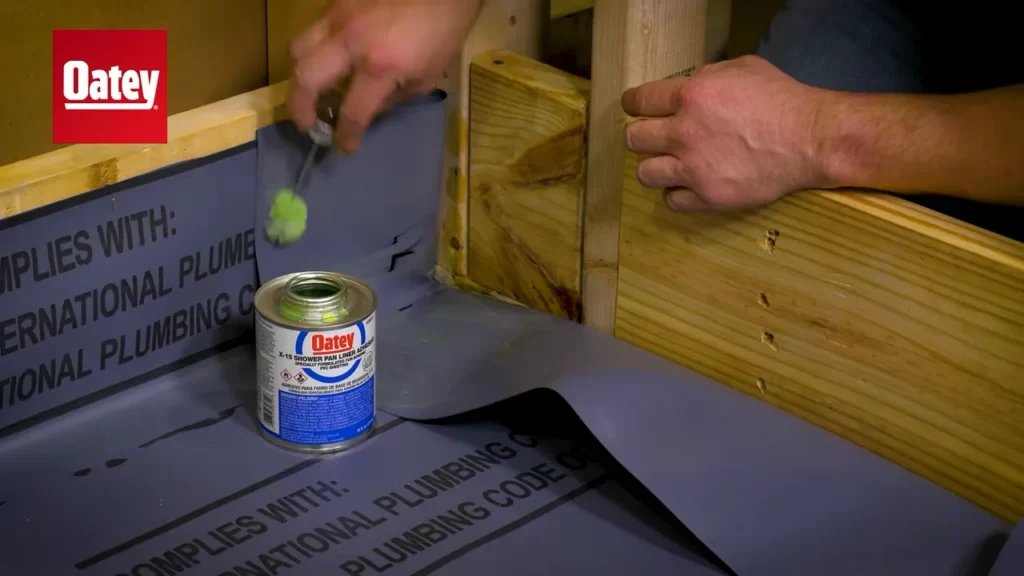
- Apply the adhesive to the back of the liner using a trowel or a recommended applicator. Be sure to spread the adhesive evenly, covering the entire area that will come into contact with the wall.
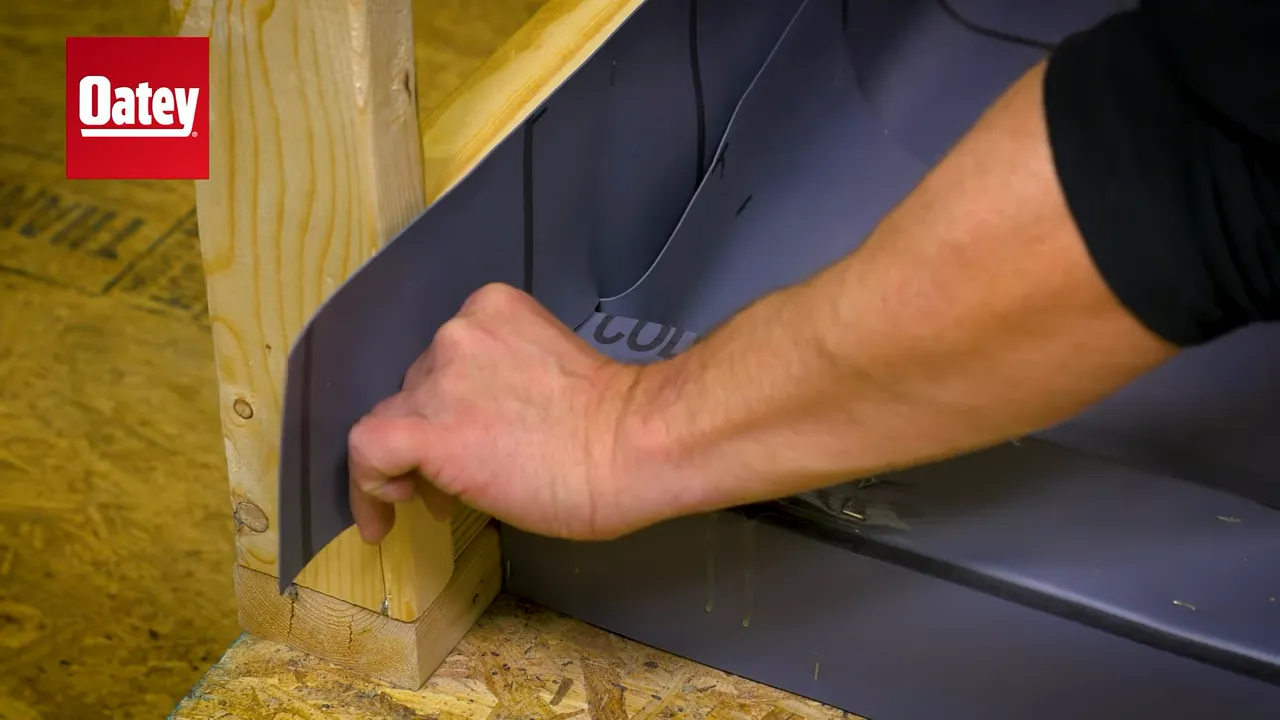
- Press the liner firmly against the shower wall, starting from the top and working your way down. Smooth out any wrinkles or air bubbles using a soft cloth or a wallpaper smoother.
- Allow the adhesive to dry completely as per the manufacturer’s instructions before proceeding with the next steps of the installation process.
Using hooks:
If you prefer hooks as a method of attachment, follow these steps:
- Choose high-quality hooks that are designed to withstand water exposure and are suitable for your liner material.
- Measure and mark the desired placement of the hooks along the shower walls. Ensure they are evenly spaced and at the appropriate height to hold the liner securely.
- Install the hooks according to the manufacturer’s instructions. This may involve drilling holes and using screws or utilizing adhesive-backed hooks.
- Hang the liner onto the hooks, ensuring it is taut and properly aligned. Smooth out any wrinkles or folds to achieve a neat and professional finish.
Ensuring the liner is taut and properly aligned
In addition to securely attaching the liner, it is crucial to ensure that it is taut and properly aligned. This will not only enhance the appearance of your shower but also prevent water from seeping behind the liner. To achieve this:
- Regularly check the liner’s tension to make sure it hasn’t loosened over time. Adjust as necessary by reapplying adhesive or tightening the hooks.
- Smooth out any wrinkles, folds, or bubbles on the surface of the liner using a soft cloth or your hands. Gently tug the liner to eliminate any slack.
- Verify that the liner is aligned with the shower walls, with no overlaps or gaps. This will ensure maximum protection against water leakage.
By following these steps, you can ensure that your shower liner is securely attached, taut, and properly aligned. This will provide you with a reliable barrier against water damage and contribute to the longevity of your shower area.
Sealing The Liner
Sealing the liner of your shower is an important step in the installation process to prevent leaks and maintain the integrity of your bathroom. The sealant acts as a barrier between the shower liner and the walls, ensuring that water doesn’t seep through and cause damage. In this section, we will explore how to apply caulk or waterproof sealant to prevent leaks and how to remove excess sealant for a neat finish.
Applying caulk or waterproof sealant to prevent leaks
Applying caulk or waterproof sealant is a crucial step in sealing the shower liner and preventing water leakage. Here’s a step-by-step guide on how to do it:
- Clean the surface: Before applying the sealant, make sure the walls and edges are clean and free from any dirt or debris. Use a mild detergent and water to clean the area.
- Prepare the sealant: Choose a high-quality caulk or waterproof sealant that is specifically designed for bathroom use. Follow the manufacturer’s instructions on how to prepare the sealant.
- Load the caulk gun: Insert the tube of caulk or sealant into the caulking gun, ensuring that the nozzle is cut at a 45-degree angle.
- Apply the sealant: Starting from one corner, slowly and steadily squeeze the trigger of the caulk gun to apply a thin, even bead of sealant along the edges of the shower liner. Be sure to cover all the seams and joints between the liner and the walls.
- Smooth the sealant: Immediately after applying the sealant, use a putty knife or a caulk smoothing tool to smooth out the bead of sealant. This will create a neat finish and ensure proper adhesion.
- Allow the sealant to dry: Check the drying time mentioned on the sealant packaging and leave the shower area undisturbed until the sealant is completely dry.
Removing excess sealant for a neat finish
Removing excess sealant is essential to achieve a clean and professional-looking finish. Here’s how you can do it:
- Wait for the sealant to dry: Give the sealant ample time to dry before attempting to remove any excess. This will ensure that the sealant doesn’t smear or create a messy finish.
- Scrape off the excess: Using a plastic scraper or a putty knife, gently scrape off any excess sealant that may have protruded or spread beyond the desired sealing line. Be careful not to damage the shower liner or the walls.
- Clean the area: Once you have removed the excess sealant, clean the area with a damp cloth or sponge to remove any residue. This will leave you with a clean and polished look.
By following these steps and taking the time to seal the shower liner properly, you can ensure a watertight and visually appealing shower installation. Taking care of the sealing process will not only prevent leaks but also prolong the lifespan of your shower liner and maintain the integrity of your bathroom.
Checking For Leaks And Proper Fit
One of the most important steps in installing a shower liner is checking for leaks and ensuring a proper fit. This will not only prevent water damage but also ensure a long-lasting and functional shower space. In this section, we will discuss how to perform a water test to check for leaks and how to ensure the liner fits snugly and is properly installed.
Performing a water test to check for leaks
Before you start enjoying your newly installed shower liner, it is crucial to perform a water test to ensure there are no leaks. This simple yet effective test will help identify any potential areas of concern and allow for timely repairs. Here’s how to do it:
- Seal off the drain with a rubber stopper or towel to prevent water from escaping.
- Fill the shower floor with enough water to reach a depth of at least an inch.
- Observe the shower liner and its surrounding areas for any signs of water leakage, such as drips or pooling.
- If you notice any leaks, mark the area and drain the water.
- Once the water has been drained, thoroughly dry the area and repair the identified leaks using waterproof sealant or appropriate materials.
Performing a water test should be considered an essential step in shower liner installation. It ensures that the liner is effectively waterproof and prevents any potential damage to the underlying structure.
Ensuring the liner fits snugly and is properly installed
A proper fit is crucial for the optimal functionality and longevity of a shower liner. Here are some tips to ensure that the liner fits snugly and is properly installed:
- Start by carefully measuring the dimensions of your shower space. Take accurate measurements of the floor area and the height from the floor to the top of the walls.
- Based on the measurements, select a liner that matches the size and shape of your shower space. Remember, it is better to choose a liner slightly larger than the measurements to ensure a snug fit.
- When installing the liner, ensure that it covers the entire shower floor and extends up the walls by at least a few inches.
- Use a heavy-duty adhesive or adhesive caulk to secure the liner in place. Apply the adhesive evenly along the edges and seams to prevent any gaps or potential leaks.
- Smooth out any wrinkles or air bubbles in the liner during installation. This will not only enhance the aesthetic appeal but also help with proper water flow.
By following these guidelines, you can ensure that your shower liner fits snugly and is properly installed. Remember, a well-fitted liner not only enhances the look of your shower but also provides a reliable barrier against water leakage.
Adding Finishing Touches
Once you have successfully installed your shower liner, it’s time to add the finishing touches to complete the look and functionality of your shower. These final steps will not only enhance the overall appearance of your bathroom but also contribute to maintaining and prolonging the lifespan of your shower liner. Here are two essential tasks to consider: installing shower curtain rings or hooks and cleaning and maintaining the shower liner.
Installing Shower Curtain Rings or Hooks
To hang your shower curtain, you’ll need the proper curtain rings or hooks. Here’s a simple step-by-step guide to help you:
- First, decide whether you prefer shower curtain rings or hooks. Both options are widely available in various styles and materials, so choose the one that suits your personal preference and bathroom decor.
- Next, gather the necessary number of curtain rings or hooks. This will depend on the number of holes in your shower curtain and how you want it to hang. Generally, twelve rings or hooks are sufficient for a standard shower curtain.
- With the shower curtain positioned properly, take each curtain ring or hook and insert it through the hole in the shower curtain.
- Once all the rings or hooks are in place, slide them onto the shower curtain rod or track. Make sure that each ring or hook is securely fastened to prevent any accidents or unexpected curtain falls.
- Finally, adjust the curtain rings or hooks evenly spaced along the shower curtain. This will not only improve the appearance of the shower curtain but also ensure that it hangs properly and moves smoothly when opened or closed.
Cleaning and Maintaining the Shower Liner
To keep your shower liner in top condition, regular cleaning and maintenance are crucial. Follow these simple steps to maintain a clean and hygienic shower:
- Starting with a damp cloth, wipe down the entire surface of the shower liner. This will remove any soap scum, mildew, or residue that may have accumulated during regular use.
- If there are any stubborn stains or spots on the shower liner, create a mixture of warm water and mild detergent. Gently scrub the affected areas using a soft sponge or brush.
- After cleaning, thoroughly rinse the shower liner with warm water to remove any soap or detergent residue. Ensure that all cleaning products are entirely washed away to prevent any skin irritation or damage to the liner.
- Once rinsed, use a clean cloth or towel to wipe off any excess moisture from the shower liner. This will help maintain a dry environment and prevent the growth of mold or mildew.
- Regularly inspect the shower liner for signs of wear and tear. If any holes or damages are detected, consider replacing the liner promptly to prevent water leakage and potential damage to your bathroom.
By following these simple steps and adding these finishing touches, you’ll be able to enjoy a clean, organized, and visually appealing shower space for years to come.
Frequently Asked Questions
How Do You Secure A Shower Liner To The Wall?
Secure a shower liner to the wall by using adhesive or caulk specifically designed for wet areas. Apply the adhesive or caulk to the back of the liner, then press it firmly against the wall. Make sure to smooth out any air bubbles or wrinkles for a secure and waterproof attachment.
How Do You Fasten A Shower Liner?
To fasten a shower liner, follow these steps: 1. Attach the liner to the shower walls using adhesive or screws. 2. Use a waterproof caulk or sealant to secure the edges of the liner. 3. Ensure a tight seal by pressing the liner firmly against the walls.
4. Allow the adhesive or caulk to dry completely before using the shower. 5. Regularly inspect the liner for any signs of damage or wear and replace as needed.
Can You Tile Directly On Shower Pan Liner?
Yes, you can tile directly on a shower pan liner.
What Do You Use To Glue A Shower Liner?
Use a waterproof adhesive or glue specifically designed for shower liners. These products are readily available and can bond the liner securely to the shower walls and floor, ensuring a watertight seal.
Conclusion
Installing a shower liner can be a simple and cost-effective way to protect your bathroom against water damage. By following the step-by-step instructions provided in this blog post, you can ensure a successful installation process. Remember to measure accurately, clean and prepare the surface, and carefully attach the liner.
With a little patience and attention to detail, you’ll have a waterproof and appealing shower in no time. Happy installing!