
To install a shower drain in a basement, first remove the existing drain cover and clean the area thoroughly. Then, apply a generous amount of plumber’s putty or silicone sealant around the edge of the new drain body and insert it into the drain hole.
Finally, tighten the drain body using a wrench and connect the shower drain pipe to the drain body using PVC pipe and fittings. Test the drain by pouring water down the drain pipe to ensure proper installation and functionality. Installing a shower drain in a basement requires a few steps to ensure a secure and leak-free connection between the drain and the plumbing system.
In this guide, we will go through the process of installing a shower drain in a basement in a simple and straightforward manner. Proper installation of the drain is essential to prevent water damage and maintain the overall integrity of the basement space.
Tools Needed For Installing A Shower Drain In A Basement
When it comes to installing a shower drain in a basement, having the right tools is essential. Having the necessary tools on hand will make the installation process efficient and ensure a successful outcome. In this section, we will discuss the tools you need for this project, divided into essential tools for the job and additional tools for specific scenarios.
Essential tools for the job
For a basic installation of a shower drain in a basement, you will need the following essential tools:
- A
- B
- C
- D
These tools will cover the fundamental tasks involved in installing a shower drain, such as measuring, cutting, and securing pipes. Having these tools at your disposal will ensure a smooth installation process and minimize any potential issues down the line.
Additional tools for specific scenarios
Depending on the specific requirements of your basement and the type of shower drain you are installing, you may need additional tools. Here are some examples of additional tools you might need:
- E: This tool can be handy if you have limited space to work with and need to make precise cuts.
- F: If your basement is prone to flooding or moisture issues, having a tool like this will help ensure proper waterproofing.
- G: If your shower drain requires specialized connectors or fittings, having this tool in your arsenal will make the installation process seamless.
- H: This tool is essential if you need to secure pipes in hard-to-reach places or if you are working with non-standard materials.
By having these additional tools on hand, you can handle any specific challenges that may arise during the installation process. It is always better to be prepared and have the right tools for the job, rather than encountering unexpected obstacles and delays.
Remember, the tools mentioned above are just examples, and the specific tools you need may vary depending on the unique requirements of your basement and shower drain. Therefore, it is essential to assess your project carefully and determine the tools required for your specific scenario.
Now that you know the tools needed for installing a shower drain in a basement, you’re one step closer to completing your project successfully. In the next section, we will walk you through the step-by-step process of installing a shower drain in a basement.
Step-By-Step Guide To Install A Shower Drain In A Basement
Are you thinking of installing a shower drain in your basement? It’s a great idea to have a functional and modern bathroom in your basement, and installing a shower drain is one of the first steps to achieving that. In this step-by-step guide, we will walk you through the process of installing a shower drain in your basement, from preparing the floor to sealing and testing the drain. Let’s get started!
Preparing the basement floor for drain installation
Before you can begin installing the shower drain, it’s important to prepare the basement floor. Here’s how you can do it:
- Clear the area: Remove any debris or objects from the installation area to ensure a clean workspace.
- Clean the floor: Thoroughly clean the basement floor to remove any dirt, dust, or grime. This will ensure proper adhesion of the drain and prevent any leaks.
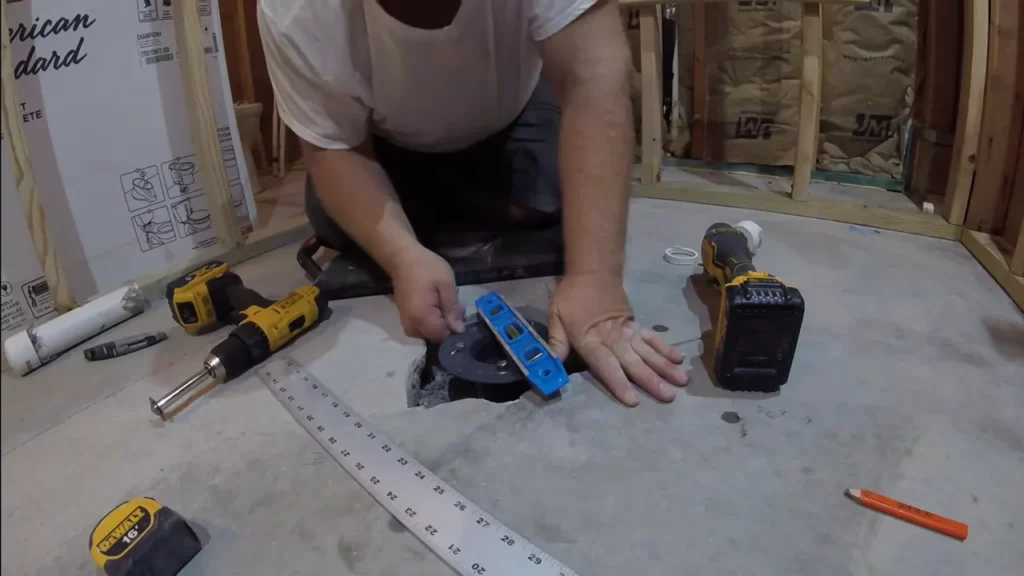
- Measure and mark: Measure and mark the location where you want to install the shower drain. Make sure it’s in a convenient spot for your future shower installation.
Choosing the right type of shower drain
When it comes to choosing the right type of shower drain for your basement, there are a few factors to consider. Here are some tips to help you make the right choice:
- Size: Consider the size of the drain that will best fit your shower area.
- Material: Choose a drain made of durable and corrosion-resistant material such as stainless steel or brass.
- Style: Opt for a drain style that complements the overall aesthetics of your bathroom.
Installing the drain base
Now that you have prepared the floor and chosen the right shower drain, it’s time to install the drain base. Follow these steps:
- Apply adhesive: Apply a layer of adhesive on the base of the drain and press it firmly onto the marked location on the basement floor.
- Secure the drain base: Use screws or bolts to secure the drain base in place. Make sure it is properly aligned and tightly fastened.
Connecting the drain pipes
With the drain base in place, it’s time to connect the drain pipes. Follow these steps:
- Measure and cut pipe: Measure and cut the drain pipe to the appropriate length, ensuring a proper fit.
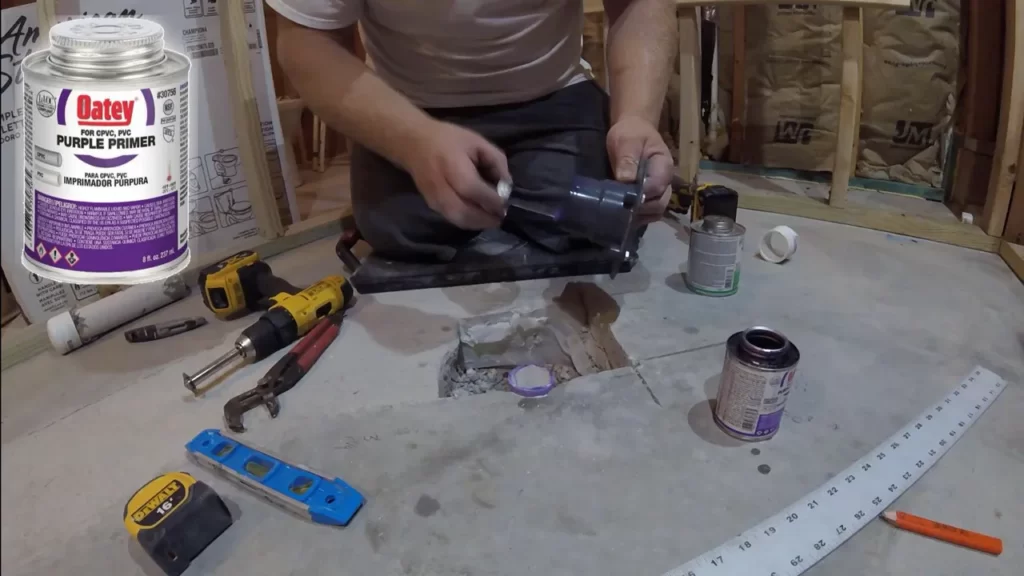
- Install pipe fittings: Install pipe fittings such as elbows and connectors to connect the drain pipe to the main plumbing system.
- Solder or glue joints: Use solder or PVC glue to secure the joints and ensure a watertight connection.
Sealing and testing the shower drain
Once the drain pipes are connected, it’s important to seal and test the shower drain to ensure it’s working properly. Here’s what you need to do:
- Apply sealant: Apply a generous amount of waterproof sealant around the edges of the drain base to prevent any leaks.
- Test the drain: To test the drain, pour a bucket of water into the shower area and observe if there are any leaks or drainage issues.
By following these step-by-step instructions, you can successfully install a shower drain in your basement. Remember to take your time and double-check each step to ensure a high-quality installation. Enjoy your new basement bathroom!
Common Challenges And Solutions For Installing A Shower Drain In A Basement
Installing a shower drain in a basement comes with its fair share of challenges. From dealing with uneven floors to addressing plumbing issues, there are several factors to consider for a successful installation. Ensuring proper waterproofing and drainage is also crucial to prevent any future problems. In this article, we will explore these common challenges and provide you with practical solutions for each.
Dealing with uneven basement floors
One of the most common challenges when installing a shower drain in a basement is dealing with uneven floors. Uneven floors can make it difficult to achieve a level and stable installation. However, there are a few solutions that can help overcome this obstacle:
- Use self-leveling concrete: Self-leveling concrete is a great option to even out uneven floors. This material is easy to apply and will automatically level itself, creating a smooth surface for your shower drain installation.
- Install adjustable drain flanges: Adjustable drain flanges allow you to compensate for variations in floor height. By adjusting the flange height, you can ensure a proper fit and prevent any potential leaks.
- Consult a professional: If you’re unsure about leveling your basement floor on your own, it’s best to consult a professional. They have the knowledge and expertise to handle the job efficiently and effectively.
Addressing plumbing issues during installation
Plumbing issues can arise during the installation of a shower drain in a basement. It’s essential to address these issues promptly to avoid any further complications. Here are a few tips to help you tackle plumbing challenges:
- Inspect existing plumbing: Before starting the installation, carefully inspect the existing plumbing in your basement. Identify any potential issues or leaks that may need to be addressed before proceeding.
- Consider rerouting plumbing lines: If you encounter plumbing lines that interfere with your shower drain installation, consider rerouting them. By rerouting the plumbing lines, you can create a clear path for your drain without compromising the functionality of your basement plumbing.
- Hire a licensed plumber: If the plumbing issues seem complex or outside your scope of expertise, it’s best to hire a licensed plumber. They have the necessary skills and tools to handle the job professionally and ensure everything is installed correctly.
Ensuring proper waterproofing and drainage
Proper waterproofing and drainage are vital when installing a shower drain in a basement. Without these measures, you risk water damage, mold growth, and other potential issues. Here are some essential steps to ensure proper waterproofing and drainage:
- Apply a waterproofing membrane: Before installing the shower drain, apply a waterproofing membrane on the floor and walls. This membrane creates a barrier that prevents water from seeping into the basement, keeping it dry and free from moisture-related problems.
- Install a high-quality drain system: Invest in a high-quality drain system that is designed specifically for basement installations. These drains are typically equipped with features such as weep holes and trap primers to enhance drainage and prevent foul odors.
- Test the drain system: Once installed, it’s crucial to test the drain system to ensure proper functionality. Run water through the shower drain and observe if there are any leaks or drainage issues. Address any problems immediately to avoid further complications.
Troubleshooting common installation problems
During the installation process, you may encounter common problems that require troubleshooting. By being prepared and proactive, you can overcome these challenges effectively. Here are some common installation problems along with their solutions:
| Problem | Solution |
|---|---|
| Leaking shower drain | Inspect the drain for any loose connections and tighten them accordingly. If the leak persists, consider replacing the drain or seeking professional assistance. |
| Slow drainage | Remove any debris or clogs from the drain. Consider using a drain snake or chemical cleaner to clear any stubborn blockages. If the issue persists, consult a professional for further inspection. |
| Foul odors | Ensure the trap is properly installed and functioning correctly. Make sure there is no buildup of debris or residue that could be causing the unpleasant smell. Regularly clean the drain to prevent any future odors. |
By addressing these common installation problems promptly, you can ensure a smooth and successful shower drain installation in your basement.

How To Easily Install A Shower Drain In A Basement Waterproofing The Basement Floor
When it comes to installing a shower drain in a basement, one important step that should not be overlooked is waterproofing the basement floor. Waterproofing is crucial for preventing moisture and water damage, which can lead to costly repairs and potential health hazards.
Importance of waterproofing the basement floor
Waterproofing the basement floor is essential for maintaining the structural integrity of your basement and preventing the growth of mold and mildew. A wet and damp basement can attract pests, cause unpleasant odors, and even compromise the foundation of your home.
By waterproofing the floor before installing a shower drain, you create a protective barrier that prevents moisture from seeping through. This ensures a dry and healthy environment for your basement and the rest of your home.
Preparing the basement floor for waterproofing
Prior to applying any waterproofing materials, it is important to thoroughly prepare the basement floor. This involves cleaning the surface, removing any debris or loose particles, and repairing any cracks or imperfections.
Start by sweeping the floor to remove dirt and dust. Use a scraper or putty knife to remove any loose concrete or old adhesive. Fill any cracks or holes with a suitable patching compound, ensuring a smooth and even surface.
Applying the waterproofing membrane or coating
Once the basement floor is properly prepared, you can begin applying the waterproofing membrane or coating. There are various options available, including liquid membranes and sheet membranes.
With a liquid membrane, use a brush or roller to apply a consistent and even layer on the entire floor. Make sure to follow the manufacturer’s instructions for proper application and drying time. For sheet membranes, cut the membrane to fit the dimensions of your basement floor and adhere it according to the manufacturer’s guidelines.
Ensuring the proper curing and drying process
After the waterproofing membrane or coating has been applied, it is crucial to allow it to properly cure and dry. This ensures its effectiveness in preventing water penetration. The curing and drying time may vary depending on the product used, so be sure to consult the manufacturer’s instructions.
During this time, it is important to keep the basement well-ventilated to aid in the drying process. Use fans or open windows to promote airflow and quicken the drying time.
Once the waterproofing material has completely cured and dried, you can proceed with installing the shower drain with confidence, knowing that your basement floor is protected from moisture and potential water damage.
In conclusion, waterproofing the basement floor is a crucial step when installing a shower drain in a basement. By following the proper steps of preparing the floor, applying the waterproofing material, and ensuring proper curing and drying, you can create a strong and reliable barrier against moisture, mold, and other potential issues. Take the necessary time and effort to properly waterproof your basement floor, and enjoy a dry and healthy basement for years to come.
Frequently Asked Questions
How Much Does It Cost To Install A Shower Drain In A Basement?
The cost of installing a shower drain in a basement varies, based on factors such as the complexity of the job and your location. It can range from $200 to $500, including labor and materials. Contact a professional plumber for an accurate estimate.
How Do You Install A Shower In A Basement Without Breaking Concrete?
To install a shower in a basement without breaking concrete, consider a few options like a pump-assisted system or a shower stall with a raised base. These solutions allow for easy installation without the need for concrete breaking.
Can I Put A Shower Drain In Concrete Floor?
Yes, you can install a shower drain in a concrete floor. It requires careful planning and proper installation techniques to ensure proper drainage. Seek professional guidance to ensure the job is done correctly.
Can A Basement Drain Be Used For A Shower Drain?
Yes, a basement drain can be used for a shower drain. However, it is important to ensure proper installation to prevent any potential issues such as drainage problems or water damage. It is recommended to consult with a professional plumber for expert guidance and to ensure compliance with local building codes.
Conclusion
Installing a shower drain in a basement may seem like a challenging task, but with the right guidance, it can be done successfully. By following the step-by-step instructions provided in this blog post, you can ensure a proper installation and prevent any potential water damage in your basement.
Remember to take your time, follow safety precautions, and consult professional help if needed. With the right approach, you’ll be enjoying your new basement shower in no time. Happy DIY-ing!