To install a shower door sweep, measure the length needed, cut the sweep to size, and attach it to the bottom of the shower door. Shower door sweeps are essential for preventing water leakage and keeping the bathroom floor dry.
Installing a shower door sweep is a simple and cost-effective way to maintain the functionality and cleanliness of your shower. With a few basic tools and a little bit of time, you can easily install a shower door sweep on your own.
This article will guide you through the step-by-step process of installing a shower door sweep, ensuring a watertight and secure seal for your shower door. So, let’s dive in and learn how to install a shower door sweep properly.
Understanding The Purpose Of A Shower Door Sweep
When it comes to maintaining the cleanliness and functionality of your shower, the shower door sweep plays a crucial role. Understanding the purpose of a shower door sweep is essential for proper installation and regular maintenance. In this section, we will delve into the importance of a shower door sweep and the benefits of installing one.
Importance of a Shower Door Sweep
The shower door sweep, also known as a shower door bottom seal, serves as a barrier between your shower space and the outside world. It is typically made of durable materials like rubber or vinyl and is attached to the bottom of your shower door. The main purpose of the shower door sweep is to prevent water from leaking out of the shower enclosure and causing potential damage to your bathroom floor.
Water leakage from the shower door not only creates a mess, but it can also lead to more severe issues such as water damage, mold, and mildew growth. The shower door sweep acts as a seal, closing the gap between the shower door and the floor, effectively preventing water from escaping. This ensures that your bathroom remains clean and dry, prolonging the life of your flooring and preventing any structural damage.
Benefits of Installing a Shower Door Sweep
1. Water damage prevention: The most obvious benefit of installing a shower door sweep is that it prevents water leakage. By creating a watertight seal, the sweep keeps water within the shower area, protecting your floors and preventing costly damage.
2. Mold and mildew control: One of the main causes of mold and mildew growth in bathrooms is excessive moisture. With a properly installed shower door sweep, you can effectively reduce the amount of moisture that escapes your shower enclosure. This controls the humidity levels in your bathroom, making it less likely for mold and mildew to thrive.
3. Energy efficiency: A well-sealed shower door can also help with energy efficiency. By preventing drafts and controlling the temperature inside your shower, a shower door sweep can help maintain a comfortable showering experience without wasting unnecessary energy on heating or cooling.
4. Noise reduction: Another benefit of a shower door sweep is that it helps reduce noise. The seal provided by the sweep minimizes the sound of splashing water and running showers, creating a more peaceful and relaxing environment in your bathroom.
| Key Benefits of a Shower Door Sweep |
|---|
| Water damage prevention |
| Mold and mildew control |
| Energy efficiency |
| Noise reduction |
In conclusion, the purpose of a shower door sweep goes beyond aesthetics. It is an essential component of your shower enclosure that prevents water leakage, reduces the risk of moisture-related issues, improves energy efficiency, and creates a more pleasant showering experience overall.
Types Of Shower Door Sweeps
When installing a shower door sweep, you have several options to choose from. The type of sweep you select will depend on your personal preferences, the type of shower door you have, and the level of water protection you require. Let’s take a closer look at the different types of shower door sweeps:
Rubber Shower Door Sweeps
Rubber shower door sweeps are one of the most popular options due to their effectiveness in preventing water leakage. Made from high-quality rubber, these sweeps create a tight seal between the bottom of the shower door and the threshold. This helps to keep the water inside the shower enclosure and prevents it from seeping onto the bathroom floor. Rubber sweeps are also easy to install and replace when necessary.
Vinyl Shower Door Sweeps
Vinyl shower door sweeps are another common choice among homeowners. These sweeps are typically made from durable vinyl material that offers excellent resistance to water damage. Like rubber sweeps, vinyl sweeps also create a tight seal to prevent water leakage. One advantage of vinyl sweeps is that they come in various shapes and sizes, making it easier to find one that perfectly fits your shower door.
Other Types of Shower Door Sweeps
In addition to rubber and vinyl sweeps, there are other types of sweeps available in the market. These include sweeps made from materials such as silicone or plastic. While these sweeps may not be as widely used as rubber and vinyl sweeps, they can still offer effective water protection. Additionally, some shower door sweeps come with added features like drip rails or fins to further enhance their water-blocking capabilities.
When choosing the right shower door sweep for your needs, it’s essential to consider factors such as the type of shower door, the thickness of the glass, and the style of the sweep. By selecting the right type of sweep, you can ensure a watertight seal and enjoy a leak-free showering experience.

Gathering The Necessary Tools And Materials
Gathering the Necessary Tools and Materials
Before you begin installing a shower door sweep, it’s important to gather all the necessary tools and materials. Having everything at hand will ensure a smooth installation process without any frustrating interruptions. In this article, we will discuss the list of tools needed for the installation as well as the materials required.
List of tools needed for the installation
Make sure you have the following tools ready before you start installing the shower door sweep:
- Measuring tape
- Screwdriver (Phillips-head or flat-head, depending on your specific door)
- Drill
- Drill bit (size may vary depending on the type of screws you’ll be using)
- Teflon tape
- Plastic putty knife or scraper
- Level
- Masking tape
- Pencil or marker
- Safety goggles
- Gloves
Materials required for the installation
Now that you have all the tools ready, it’s time to gather the necessary materials for the installation:
- Shower door sweep (make sure you measure your shower door correctly to ensure a proper fit)
- Screws (usually provided with the shower door sweep)
- Soap and water (for cleaning the shower door before installation)
- Isopropyl alcohol or glass cleaner (for thoroughly cleaning the edges of the shower door)
- Adhesive sealant or silicone caulk (to provide a watertight seal and prevent leaks)
Ensure that you have all the tools and materials listed above before starting the installation process. This will save you time and frustration, allowing you to complete the installation smoothly and effectively.

Removing The Old Shower Door Sweep
To install a new shower door sweep, you first need to remove the old one. This is an essential step to ensure a proper fit and optimal performance of the new sweep. In this section, we will guide you through a step-by-step process to remove the old shower door sweep and share some valuable tips for removing stubborn or damaged sweeps.
Step-by-step process to remove the old sweep
- Start by gathering the necessary tools for the task. You will need a screwdriver, pliers, and a putty knife.
- Inspect the shower door sweep to determine the type of attachment it has. Most shower door sweeps are either screw-on or snap-on.
- If your sweep is screw-on, use the screwdriver to remove the screws securing it in place. Carefully loosen the screws until you can remove the sweep from the shower door.
- If your sweep is snap-on, locate the edge of the sweep where it connects to the shower door. Insert the tip of the putty knife under the edge and gently pry it up. Continue sliding the putty knife along the sweep until it detaches from the door.
- Once the sweep is detached, examine the track or channel on the shower door to ensure there are no remaining pieces or debris.
- Using pliers, grip any remaining protruding screws or nails and carefully pull them out of the shower door.
- Lastly, clean the area where the old sweep was attached using a mild detergent or vinegar solution. Ensure the surface is dry and free from any residue or adhesive before proceeding with the installation of the new shower door sweep.
Tips for removing stubborn or damaged sweeps
Removing a stubborn or damaged shower door sweep may require some extra effort and caution. Here are a few tips to help you tackle such situations:
- If the sweep is stubbornly attached, try applying a lubricant, such as WD-40, along the edges to loosen it. Allow the lubricant to penetrate for a few minutes before attempting to remove the sweep.
- In case the old sweep is damaged and challenging to remove, you can carefully use a hacksaw or a utility knife to cut it into smaller sections. Be cautious not to damage the shower door in the process.
- For adhesive residue left behind by the old sweep, you can use a commercial adhesive remover specifically designed for the surface you are working on. Follow the product instructions carefully to ensure safe and effective removal.
- When dealing with a metal sweep, protective gloves are recommended to avoid any potential injuries. Always prioritize your safety throughout the removal process.
By following these step-by-step instructions and utilizing the tips provided, you can successfully remove the old shower door sweep. Once the old sweep is removed, you can proceed with confidence to install the new one, ensuring a secure and watertight seal for your shower door.
Measuring And Cutting The Sweep
Installing a shower door sweep can be a simple yet effective way to prevent water from leaking out of your shower enclosure. To ensure a proper fit, it is important to accurately measure and cut the sweep to the correct size. Taking your time to get these steps right will save you from potential headaches down the line. Here, we will walk you through the process of getting accurate measurements and cutting the sweep to the correct size.
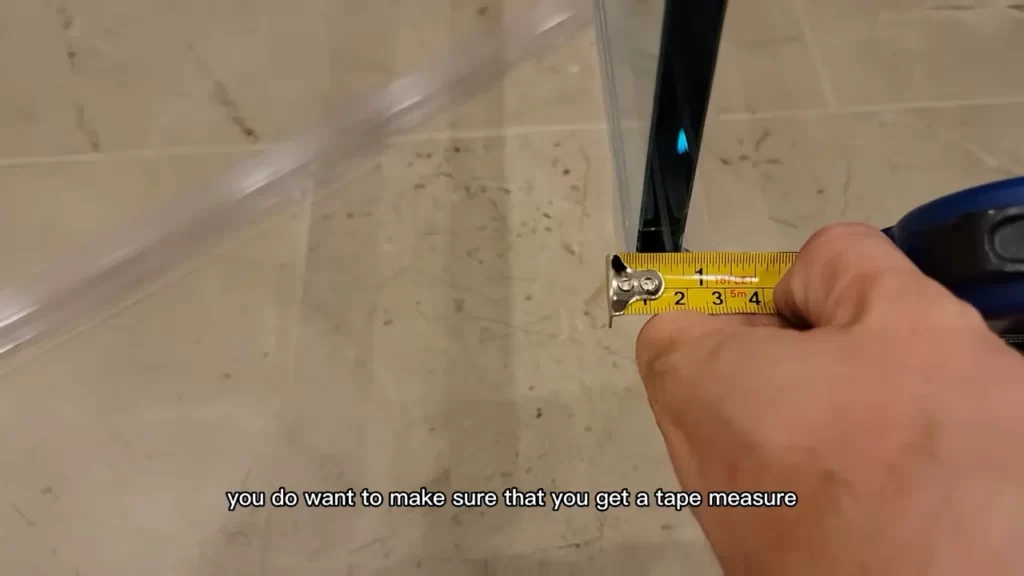
Getting accurate measurements
Before you start cutting the sweep, you need to take precise measurements of your shower door. This will ensure that the sweep fits snugly and effectively prevents any water leakage. Follow these steps to get accurate measurements:
- Clean the bottom of the shower door to remove any dirt or debris that may affect the measurements.
- Using a measuring tape, measure the length of the bottom edge of the shower door.
- Record the measurement, making sure to note it down in inches or centimeters, depending on your preference.
- Measure the thickness of the glass or frame where the sweep will be installed.
- Note down this measurement as well, as it will help you determine the appropriate size of the sweep.
By following these steps, you will have accurate measurements of your shower door, which will guide you in cutting the sweep to the correct size.
Cutting the sweep to the correct size
Once you have the measurements, it’s time to cut the shower door sweep to the correct size. Pay attention to the following steps to ensure a precise and accurate cut:
- Place the shower door sweep on a flat surface.
- Using the recorded measurements, mark the appropriate length on the sweep.
- If necessary, use a straight edge to draw a straight line across the sweep, ensuring an even cut.
- Double-check the measurements and markings before proceeding.
- Equip yourself with a fine-toothed saw or a hacksaw, suitable for cutting the material of the sweep.
- Align the saw with the marked line and start cutting slowly and steadily, following the line.
- Take your time and ensure a smooth, straight cut.
Remember to wear protective eyewear and gloves while cutting the sweep, as safety should always be a priority.
By following these steps, you will be able to accurately measure and cut the sweep to the correct size. This will result in a proper fit, ensuring that your shower remains leak-free and your bathroom stays dry. Don’t rush through these steps, as taking your time to get the measurements and cuts right will save you time and frustration in the long run.
Applying The Sweep To The Shower Door
Installing a shower door sweep is an essential step in ensuring that your bathroom remains watertight. The sweep acts as a barrier, preventing water from leaking out of the shower enclosure onto your bathroom floor. In this guide, we will walk you through the process of applying the shower door sweep correctly, ensuring a tight seal that keeps water where it should be – inside the shower.
Positioning the sweep correctly
Before applying the shower door sweep, it is important to position it correctly to ensure an effective seal. Here’s how you can do it:
- Start by thoroughly cleaning the bottom edge of the shower door. Use a mild detergent and warm water to remove any dirt, grime, or soap residue. This step will help the adhesive of the sweep to adhere more effectively.
- Measure the width of the shower door opening and mark the desired length on the sweep. Using a sharp utility knife, carefully trim the sweep to the correct size. Ensure that it is slightly longer than the width of the door to cover the entire opening.
- Once the sweep is trimmed to the appropriate length, place it on the bottom edge of the shower door. Make sure that the side with the adhesive strip is facing the inside of the shower.
- Align the sweep with the edge of the door, ensuring that it is centered. Take note of any magnets or other shower door accessories that need to fit properly alongside the sweep.
- If necessary, adjust the position of the sweep to ensure a snug fit. Make sure it is in contact with the bottom surface of the shower door and extends slightly beyond the edge.
Securing the sweep in place
Once the sweep is positioned correctly, it’s time to secure it in place. Follow these steps to ensure the sweep stays in position:
- Peel off the protective backing from the adhesive strip of the sweep.
- Press firmly along the length of the sweep to ensure proper adhesion to the shower door.
- Apply extra pressure to the ends and corners of the sweep to guarantee a secure bond.
- Allow the adhesive to set for the recommended time before using the shower. This will ensure that the sweep adheres firmly.
By positioning and securing the shower door sweep correctly, you can effectively prevent water from escaping your shower enclosure. Take the time to install the sweep properly to enjoy a leak-free and water-efficient showering experience.
Testing The Seal
Once you have successfully installed your shower door sweep, the next step is to test the seal to ensure that it is effectively preventing any leaks or water from escaping. Testing the seal is an important step in the installation process, as it guarantees that your shower door will provide the necessary barrier to keep the water inside the shower area and prevent any damage to your bathroom floor.
Checking for any gaps or leaks
To begin testing the seal, carefully inspect the lower edge of the shower door sweep for any gaps or leaks. Run your fingers along the entire length of the sweep, checking for any irregularities or areas where the sweep may not be making proper contact with the shower floor. Pay close attention to the corners and edges, as these are common trouble spots where leaks may occur. If you notice any gaps or leaks, make a note of their locations for further adjustments.
Making adjustments if necessary
If you find any gaps or leaks during your inspection, it’s important to make the necessary adjustments to ensure a proper seal. Depending on the type of shower door sweep you have installed, there are a few different adjustment options available.
| Adjustment Option | Description |
|---|---|
| Tightening the sweep | If the seal is not tight enough, you can try tightening the sweep by adjusting the screws or clips that hold it in place. This will help the sweep to make better contact with the shower floor and create a tighter seal. |
| Replacing the sweep | If the gap or leak is significant and cannot be fixed by tightening the sweep, you may need to replace the entire sweep. Measure the length of the current sweep and purchase a new one of the same size to ensure a proper fit. |
| Using sealant | In some cases, you may need to use a sealant to fill small gaps or leaks. Apply the sealant carefully along the problem areas, following the manufacturer’s instructions. Allow the sealant to dry completely before testing the seal again. |
Remember:
- It’s important to address any gaps or leaks as soon as possible to prevent water damage to your bathroom floor.
- Regular maintenance and inspection of your shower door sweep are recommended to ensure its effectiveness over time.
- If you are unsure about the correct adjustment method or need further assistance, it’s always best to consult a professional for guidance.
By thoroughly testing the seal of your shower door sweep and making any necessary adjustments, you can enjoy a leak-free and enjoyable showering experience. Don’t overlook this crucial step in the installation process, as it will save you from potential headaches and costly repairs in the future.
Cleaning The Shower Door Sweep
One of the essential maintenance tasks for your shower door sweep is regular cleaning. Over time, dirt, grime, and soap scum can accumulate on the sweep, compromising its effectiveness and potentially leading to microbial growth. By implementing a regular cleaning routine and addressing any mold or mildew buildup promptly, you can ensure the longevity and optimal performance of your shower door sweep.
Regular cleaning routine
To keep your shower door sweep in top condition, establish a regular cleaning routine. Follow these simple steps:
- Start by wiping down the shower door sweep with a damp cloth to remove any loose debris. This will make the cleaning process easier.
- Next, prepare a solution of warm water and mild detergent. Dip a clean cloth or sponge into the solution and gently scrub the sweep to remove stubborn dirt and grime. Avoid using abrasive cleaners or scrub brushes, as these can damage the sweep.
- Rinse the sweep thoroughly with clean water to remove any soapy residue.
- Dry the sweep with a clean towel or allow it to air dry completely before closing the shower door. This will help prevent the growth of mold or mildew.
Removing mold or mildew buildup
In some cases, you may notice mold or mildew buildup on your shower door sweep. To address this issue, follow these steps:
- Prepare a mixture of equal parts water and white vinegar in a spray bottle.
- Spray the affected areas of the sweep with the vinegar solution and let it sit for a few minutes to allow the vinegar’s natural disinfecting properties to work.
- Gently scrub the mold or mildew using a soft brush or a toothbrush. Be mindful not to scrub too hard, as this could damage the sweep.
- Rinse the sweep thoroughly with clean water to remove any vinegar residue.
- Dry the sweep completely with a clean towel or allow it to air dry before closing the shower door.
By incorporating these cleaning methods into your shower door sweep maintenance routine, you can keep it clean, free from mold or mildew, and ensure it functions properly for years to come.
Inspecting And Replacing The Sweep
Properly maintaining your shower door sweep is essential to prevent leaks and keep your bathroom floor dry. Over time, the sweep may wear out, causing water to seep out of the shower enclosure. In this section, we will discuss the signs that indicate the sweep needs replacement and the steps involved in replacing a worn-out sweep.
Symptoms of a worn-out shower door sweep
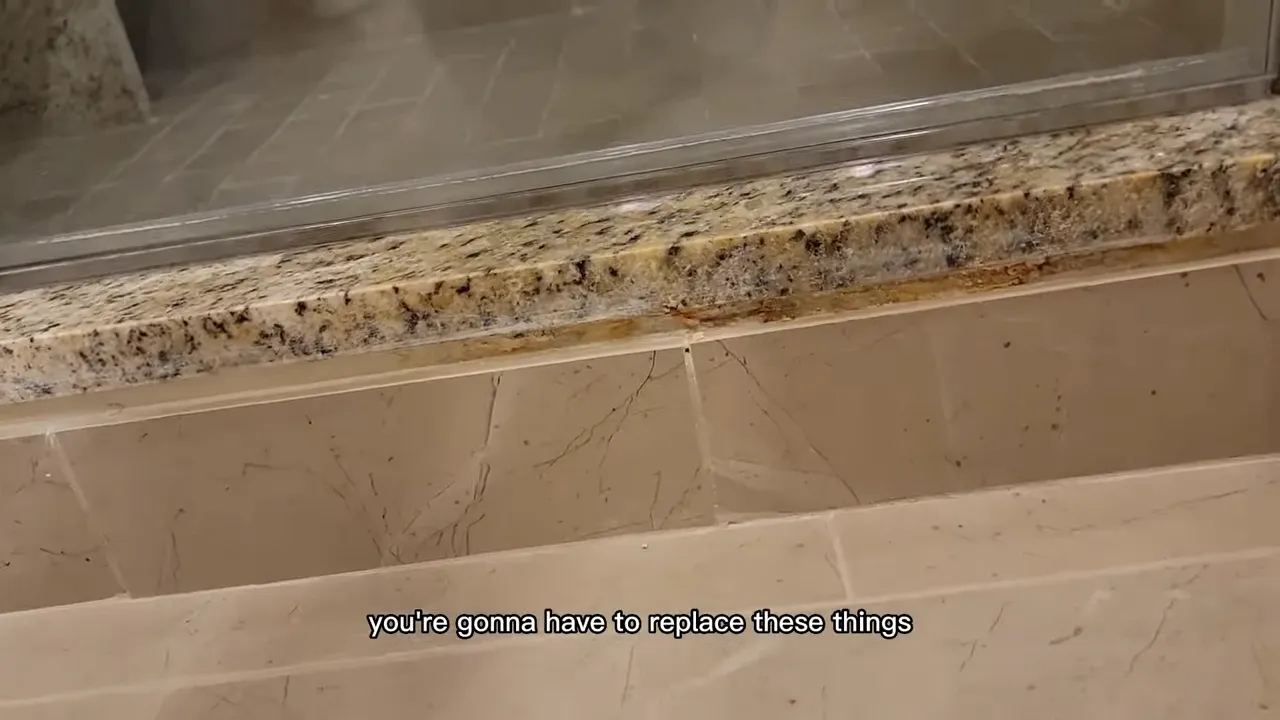
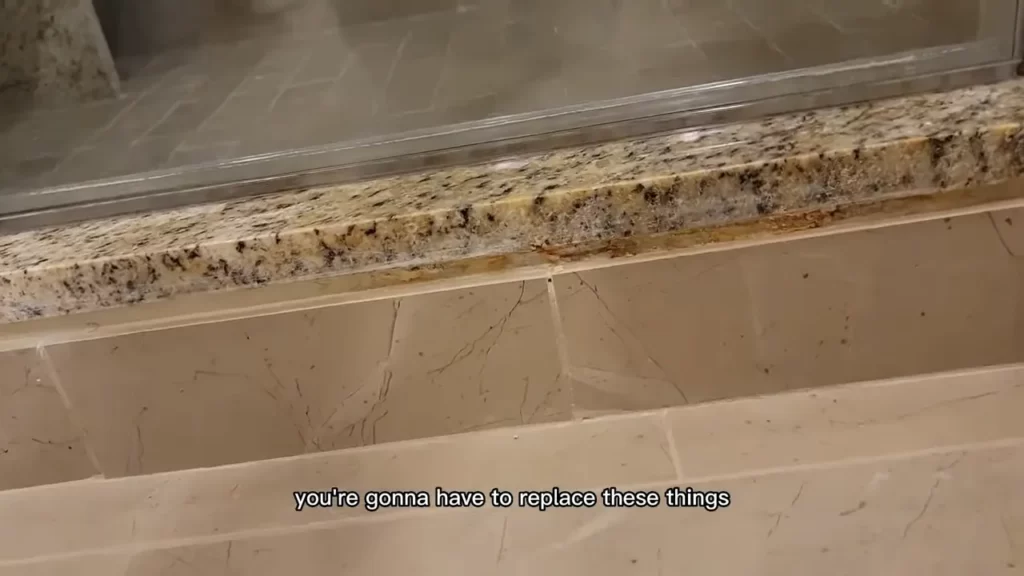
Before proceeding with the replacement, it’s important to identify whether the sweep actually needs to be replaced. Look out for the following signs:
- Visible cracks or tears in the sweep material
- Water seeping out from under the shower door
- Excessive moisture or mildew forming on the shower door or surrounding areas
- Noisy or squeaky door operation
If you notice any of these symptoms, it’s a clear indication that the shower door sweep has worn out and needs immediate replacement.
Steps to replace a worn-out shower door sweep
Now that you have determined the need to replace the shower door sweep, follow these steps:
- Start by removing the old sweep. This can typically be done by either pulling it out or applying a little pressure to loosen it from its track.
- Clean the track and surrounding area to ensure there is no debris or residue left behind.
- Measure the length of the old sweep to ensure the new one is the correct size. It’s important to have an accurate measurement to ensure a snug fit.
- Once you have the correct measurement, purchase a replacement sweep from your local hardware store or online.
- Insert the new sweep into the track, starting from one end and working your way to the other. Make sure it fits securely and snugly in the track.
- Test the newly installed sweep by opening and closing the shower door. Check for any gaps or leaks and make adjustments if necessary.
- Finally, clean the shower door to remove any fingerprints or smudges.
By following these simple steps, you can easily replace a worn-out shower door sweep and ensure a watertight seal for your shower enclosure. Regularly inspecting and replacing the sweep will not only prevent water damage but also extend the lifespan of your shower door.
Eliminating Noise From The Sweep
Eliminating noise from the sweep of your shower door is important for a peaceful and pleasant showering experience. No one wants to be disturbed by the irritating squeaking or rattling sounds while trying to relax and enjoy their time in the shower.
Causes of Noisy Sweeps
Understanding the causes of noisy sweeps can help in finding effective solutions to reduce or eliminate the noise. Here are a few common reasons behind those annoying sounds:
- Poor installation: If the shower door sweep is not installed properly, it can rub against the floor or the door frame, causing noise.
- Worn-out sweep: Over time, the sweep can wear out and lose its effectiveness. This can lead to friction and noise when the door is opened or closed.
- Misalignment: If the shower door is not aligned properly, it can put pressure on the sweep, resulting in noise.
- High water pressure: Excessive water pressure in the shower can create vibrations that cause the sweep to make noise.
Solutions for Reducing or Eliminating Noise
To ensure a peaceful and quiet shower experience, here are some effective solutions to reduce or eliminate the noise from your shower door sweep:
- Proper installation:Ensure that the shower door sweep is correctly installed, making sure it is aligned with the door and floor. This will prevent any unnecessary rubbing or friction that can cause noise.
- Replace worn-out sweeps: If your shower door sweep is old and worn-out, consider replacing it with a new one. A fresh and properly functioning sweep will reduce noise significantly.
- Check for misalignment: Inspect the shower door to make sure it is properly aligned within the frame. Adjust it if necessary to relieve any pressure on the sweep and minimize noise.
- Install a pressure regulator: If high water pressure is the culprit behind the noise, consider installing a pressure regulator. This will help control the water flow and vibrations, ultimately reducing noise.
- Apply lubrication: Apply a small amount of silicone lubricant or baby oil to the sweep to minimize friction and noise. Remember to wipe off any excess to avoid slipping hazards.
By following these simple solutions, you can say goodbye to the annoying noise from your shower door sweep and enjoy a quiet and relaxing shower every time. Don’t let the sounds of squeaks and rattles ruin your shower experience when there are easy fixes available.
Dealing With A Loose Sweep
One common issue that many homeowners face with their shower doors is a loose sweep. The sweep, also known as a shower door seal or door drip rail, is the rubber or plastic strip that runs along the bottom edge of the shower door, preventing water from leaking out. A loose sweep can lead to water leakage and damage to the surrounding area. Fortunately, fixing a loose sweep is a relatively simple task that you can do on your own. In this article, we will discuss the reasons for a loose sweep and provide you with step-by-step instructions on how to fix it securely.
Reasons for a loose sweep
Before we dive into the process of fixing a loose sweep, it’s important to understand the reasons why it may become loose in the first place. The most common causes of a loose sweep include:
- Wear and tear: Over time, the sweep can become worn out and lose its grip.
- Incorrect installation: If the sweep was not installed properly to begin with, it may not stay secure.
- Excessive force: Slamming the shower door or applying excessive force while opening or closing it can cause the sweep to become dislodged.
Fixing a loose sweep securely
Now that you know the reasons behind a loose sweep, let’s move on to the steps to fix it securely:
- Remove the old sweep: Start by removing the loose or damaged sweep. Use a flat-head screwdriver or a putty knife to gently pry it off the bottom of the shower door.
- Clean the area: Once the old sweep is removed, thoroughly clean the bottom edge of the shower door. Use a mild soap solution or a cleaning agent specifically designed for shower doors, and wipe it clean with a soft cloth.
- Measure and cut the new sweep: Take accurate measurements of the length needed for the new sweep. Most shower door sweeps are adjustable and can be trimmed to fit your specific door size. Use a hacksaw or a utility knife to trim the new sweep to the appropriate length.
- Apply adhesive: Apply a thin line of adhesive along the bottom edge of the shower door where the new sweep will be installed. Make sure to use a shower door adhesive that is waterproof and designed for use with rubber or plastic materials.
- Install the new sweep: Carefully press the new sweep onto the adhesive, ensuring that it is aligned properly and securely in place. Apply gentle pressure to help the adhesive bond effectively.
- Allow for drying time: Give the adhesive sufficient time to dry and cure as per the manufacturer’s instructions. This will ensure that the new sweep stays securely in place.
- Test for effectiveness: Once the adhesive is fully dried, test the shower door by running water along the bottom edge. Check for any signs of water leakage. If there are no leaks, congratulations! Your loose sweep has been successfully fixed.
By following these simple steps, you can fix a loose sweep and prevent any future water leakage issues. Remember to regularly inspect and maintain your shower door sweep to ensure its longevity and effectiveness in keeping water inside the shower. With a little effort and attention, you can keep your shower area clean, dry, and free from water damage.
Note: If you encounter any difficulties during the installation process or if the problem persists despite your efforts, it is advisable to seek professional assistance from a shower door specialist or a handyman.
Frequently Asked Questions
How Do You Install A Side Sweep On A Shower Door?
To install a side sweep on a shower door, follow these steps: 1. Measure the length needed for the sweep. 2. Clean the edge of the shower door thoroughly. 3. Apply adhesive along the edge where the sweep will be attached.
4. Press the sweep onto the adhesive and hold it firmly in place. 5. Allow the adhesive to dry completely before using the shower.
Can You Install Door Sweep Without Removing Door?
Yes, you can install a door sweep without removing the door. This allows for easy installation and helps to keep drafts and pests outside while saving energy.
How Do You Slide A Shower Door Sweep?
To slide a shower door sweep, follow these steps: 1. Start by removing old sweep. 2. Slide the new sweep onto the bottom of the shower door. 3. Align the sweep with the door and ensure it covers the gap.
4. Use a screwdriver to tighten the screws and secure the sweep in place. 5. Test the door to make sure it slides smoothly.
How Do You Install A Bottom Shower Door Seal?
To install a bottom shower door seal, follow these steps: 1. Clean the bottom of the shower door thoroughly. 2. Measure the length of the door and cut the seal accordingly. 3. Insert the seal into the bottom of the door, ensuring it fits snugly.
4. Use adhesive or screws to secure the seal in place. 5. Allow the adhesive to dry completely before using the shower.
Conclusion
To wrap it up, installing a shower door sweep may seem like a daunting task, but with the right tools and knowledge, it becomes a straightforward process. By following the step-by-step guide provided in this blog post, you can ensure a tight and secure seal for your shower door, preventing water leakage and enhancing the longevity of your bathroom.
So, don’t delay any further and give your shower door the upgrade it deserves.