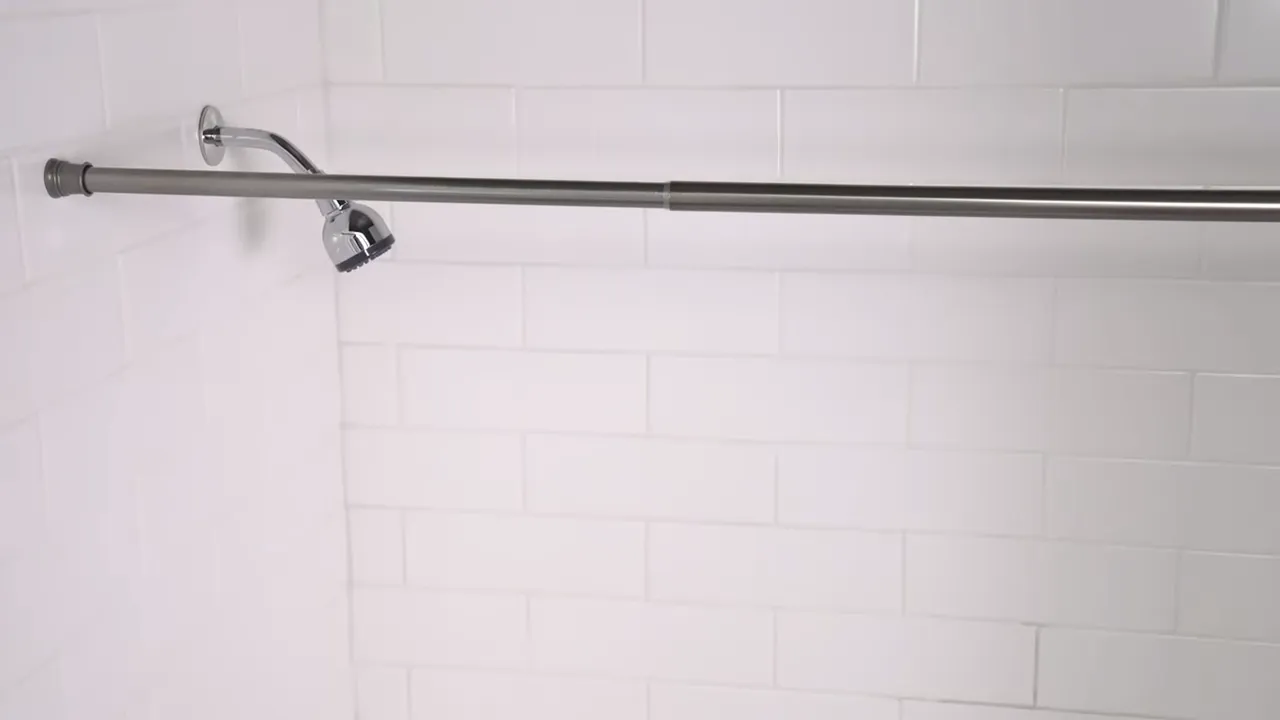
To install a tension shower rod, position the rod between the two walls and twist it until it fits tightly. Installing a tension shower rod is a simple and practical solution for creating extra space to hang towels and shower curtains in your bathroom.
Unlike traditional shower rods that require drilling and mounting, tension shower rods can be easily installed without any tools or hardware. By following a few simple steps, you can have a sturdy and secure shower rod in no time. In this guide, we will walk you through the process of installing a tension shower rod, ensuring a hassle-free and convenient experience.
Whether you are a handyman or a DIY enthusiast, this step-by-step tutorial will help you achieve a professionally installed tension rod that adds functionality and style to your bathroom.
Factors To Consider When Selecting A Tension Shower Rod
Selecting the right tension shower rod is crucial for a hassle-free and enjoyable shower experience. With various options available in the market, it can be overwhelming to make a decision. To help you choose the perfect tension shower rod for your bathroom, there are a few key factors to consider. These factors include the length, diameter, and weight capacity of the rod, as well as material and finish options, and adjustability and installation features. By taking these factors into account, you can ensure that your tension shower rod not only complements your bathroom decor but also functions efficiently.
Length, Diameter, and Weight Capacity
When it comes to choosing a tension shower rod, one of the primary factors to consider is the length. The length should be compatible with the measurement of your shower space. A too short or too long rod may not fit properly and can lead to stability issues. Measure your shower area carefully, ensuring that the tension shower rod you select is long enough to cover the space securely and provide enough tension to keep it in place.
Another important consideration is the diameter of the rod. A thicker rod typically offers better durability and stability. Look for a tension shower rod with a diameter that suits your needs and preferences. A thicker rod can better withstand the weight of your shower curtain, preventing it from sagging or drooping.
Weight capacity is a crucial aspect, especially if you plan to hang a heavy shower curtain or other items on your tension shower rod. Ensure that the rod you choose has a weight capacity that can support the weight of your desired curtain and any additional accessories. This will prevent any potential damage to your shower rod and provide peace of mind while using it.
Material and Finish Options
When selecting a tension shower rod, the material and finish options are important factors to consider. A wide range of materials are available, including stainless steel, aluminum, and plastic. Each material has its own unique benefits and considerations. Stainless steel is known for its durability, while aluminum offers a lightweight option. Plastic rods are generally more affordable but may lack the same level of sturdiness as metal options.
The finish of the tension shower rod also plays a significant role in its appearance and longevity. The finish options can include chrome, brushed nickel, bronze, or even colorful coatings. Consider the overall aesthetic of your bathroom and choose a finish that complements the existing fixtures and decor.
Adjustability and Installation Features
Lastly, consider the adjustability and installation features of the tension shower rod. An adjustable rod allows you to customize the length to fit your specific shower space. Look for a rod with easy-to-use adjustment mechanisms that secure it in place without any hassle.
Additionally, the installation process should be straightforward and user-friendly. Opt for a tension shower rod that doesn’t require drilling or permanent fixtures, as this allows for easier installation and flexibility to move the rod if needed.
By considering the factors of length, diameter, weight capacity, material and finish options, as well as adjustability and installation features, you can confidently choose a tension shower rod that meets your requirements. Make your shower experience more enjoyable by finding the perfect tension shower rod for your bathroom.
How To Measure For The Correct Tension Shower Rod Size
Installing a tension shower rod is a quick and easy way to upgrade your bathroom without the need for drilling. However, to ensure a perfect fit, it’s important to measure the available space in your shower before purchasing a tension shower rod. In this section, we will guide you through the process of measuring the correct tension shower rod size for your bathroom.
Measuring the available space
The first step in finding the right tension shower rod size is to measure the available space in your shower. To do this, you will need a measuring tape or a ruler. Follow these steps:
- Start by measuring the width of your shower area. Measure from wall to wall, making sure to account for any obstructions such as window frames or tiles. Write down this measurement as it will determine the length of the tension shower rod you need.
- Next, measure the height of your shower area. This will determine the overall length of the tension shower rod.
- Take note of any variations in height within your shower area. Some showers have sloped ceilings or raised platforms. Measure the tallest point as this will be the height you need for the tension shower rod.
By measuring the available space accurately, you can ensure that your tension shower rod fits perfectly without any gaps or sagging.
Taking into account window frames or other obstacles
In addition to measuring the available space, it’s important to take into account any window frames or other obstacles that might affect the installation of your tension shower rod. These obstacles can limit the width of your shower area and impact the length of the tension shower rod you can use.
If you have window frames or obstacles near your shower, measure the width from wall to wall, excluding the space occupied by these obstacles. This will give you the usable width for your tension shower rod.
By considering these factors and accurately measuring the available space in your shower, including any obstacles, you can ensure a proper fit for your tension shower rod. This will not only enhance the functionality of your shower but also add a stylish touch to your bathroom decor.
Gathering The Necessary Tools And Materials
Before you start installing a tension shower rod, it’s important to gather all the necessary tools and materials. Having everything at hand will make the installation process smoother and more efficient. Here is a list of items you will need:
Screwdriver or drill
A screwdriver or drill is essential for attaching the mounting hardware of the tension shower rod. This tool will be used to secure the screws or anchors into the wall, providing a stable base for the shower rod.
Level
Ensure your tension shower rod is installed perfectly straight by using a level. This tool will help you determine if your rod is even, preventing it from tilting or sagging on one side. Having a level handy will ensure a professional and polished finish to your shower rod installation.
Measuring tape
Precision is key when it comes to installing a tension shower rod. A measuring tape will help you accurately measure the distance between the two walls where the rod will be installed. This measurement is crucial to ensure a snug fit and prevent any wobbling or instability in the shower rod.
Tension shower rod kit
A tension shower rod kit typically includes the rod, mounting hardware, and instructions. These kits are designed for easy installation and do not require any drilling or permanent modifications to your bathroom walls. Make sure to choose a high-quality tension shower rod kit that suits your bathroom’s aesthetic while providing durability and security.
Now that you have all the necessary tools and materials, you are ready to move on to the next step in installing your tension shower rod. In the following section, we will guide you through the process of measuring and preparing the installation site, ensuring a successful and hassle-free installation.
Preparing The Shower Area
Before installing a tension shower rod, it’s important to properly prepare the shower area. This not only ensures a secure and stable installation but also helps maintain the cleanliness and integrity of your shower. Here are a few steps to follow when preparing the shower area for tension rod installation:
Removing the existing curtain rod, if applicable
If you already have a curtain rod in place, you’ll need to remove it before installing a tension rod. Start by loosening the screws or brackets that hold the curtain rod in place. Once the screws are loose, carefully remove the curtain rod from the brackets. Be sure to keep any hardware, such as screws or brackets, in a safe place in case you need them for your tension rod installation.
Cleaning and drying the shower surface
Before installing a tension shower rod, it’s important to clean and dry the shower surface thoroughly. Use a mild soap or a non-abrasive cleaner to remove any dirt, grime, or soap scum from the walls. Pay close attention to the area where the tension rod will be installed, as any residue can affect the rod’s stability. After cleaning, rinse the walls with warm water and dry them thoroughly with a clean towel. This will ensure a clean and smooth surface for your tension rod installation.
Ensuring the walls are suitable for tension rod installation
Not all walls are suitable for tension rod installation, so it’s important to ensure that your walls can support the rod securely. Check the type of wall material in your shower area. Generally, tension rods work best on drywall or tile walls. If you have plaster or wallpaper, consult a professional to ensure the walls are strong enough to hold the rod. Additionally, make sure that there are no obstructions, such as tiles or fixtures, that could interfere with the installation. It’s always better to have a clear and flat surface for a secure tension rod installation.
Making any necessary repairs or modifications
Prior to installing the tension rod, inspect the shower area for any cracks, holes, or other damages. If you notice any issues, it’s important to make the necessary repairs or modifications before proceeding with the installation. Cracks or holes can compromise the stability of the tension rod and may lead to damage or accident later on. Use appropriate materials and techniques to repair any damages and ensure a solid foundation for your tension rod.
By following these steps, you can properly prepare the shower area for tension rod installation. This will ensure a secure and stable rod that can withstand the weight of your shower curtain or liner. Take the time to remove any existing curtain rods, clean and dry the shower surface, assess the walls’ suitability, and make any necessary repairs or modifications. With a well-prepared shower area, you can proceed confidently with installing your tension shower rod.
Adjusting The Tension Rod
Properly adjusting the tension rod is essential for a secure and stable shower installation. Fortunately, it’s a straightforward process that requires only a few simple steps. In this section, we will guide you through the process of extending the rod to its longest size and twisting or turning the rod to increase or decrease tension. Let’s get started!
Extending the rod to its longest size
To ensure a proper fit, begin by extending the tension rod to its longest size. Start by unscrewing the smaller rod section from the larger rod section. Once separated, pull the rod sections apart until you reach the desired length. It’s important to note that the longer the rod, the more tension it can provide. This step allows you to customize the rod’s dimensions to fit your shower perfectly.
Twisting or turning the rod to increase or decrease tension
Now that the rod is extended to its longest size, it’s time to adjust the tension. To increase tension, twist or turn the smaller rod section in a clockwise direction. This will create more pressure against the shower walls, securing the rod in place. On the other hand, to decrease tension, twist or turn the rod in a counterclockwise direction. This will release the pressure and allow for easier removal or adjustment of the rod.
It’s recommended to test the tension periodically as you twist or turn the rod. Gently push against the rod to check for any movement or give. If the rod stays firmly in place, you have achieved the optimal tension for a sturdy installation.
Remember, a properly adjusted tension rod should remain secure without the need for additional hardware or drilling into your shower walls. It offers a convenient and temporary solution for hanging curtains or organizing shower essentials. Follow these steps, and you’ll have a tension rod that fits perfectly and keeps your shower space functional and organized.
Positioning The Tension Rod
Positioning the tension rod is a crucial step when it comes to installing a tension shower rod. The proper positioning ensures stability and functionality of the rod, allowing you to enjoy your showers without any worries. In this article, we will guide you through the process of positioning the tension rod, covering topics such as locating the ideal height for the rod and aligning it between the shower walls. So, let’s get started and make your showering experience even better!
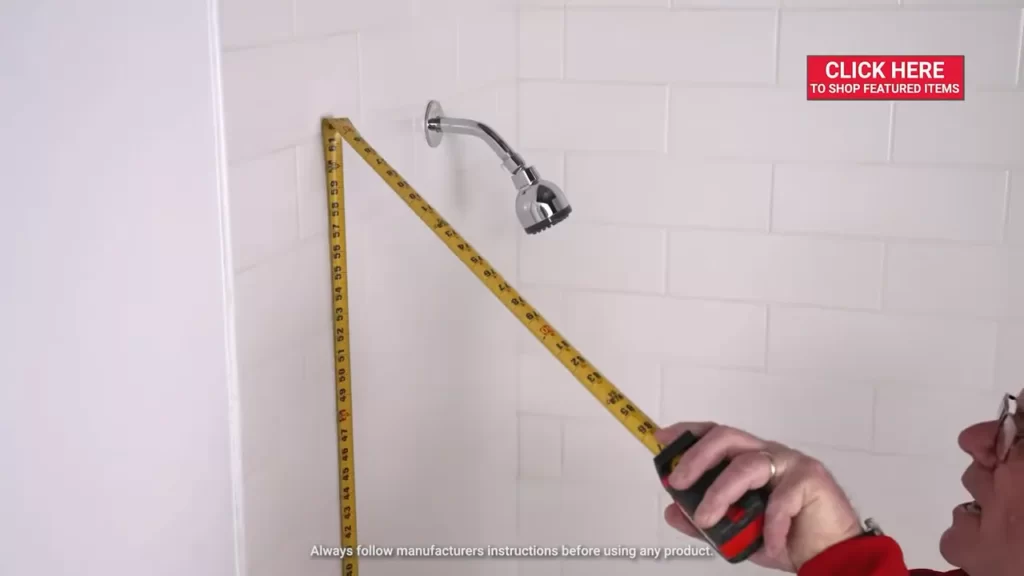
Locating the Ideal Height for the Rod
Locating the ideal height for your tension shower rod depends on personal preference and the height of the shower users. When determining the height, consider factors such as the comfort of the tallest person using the shower and the available space between the shower walls. To find the perfect height:
- Stand inside the shower area and measure the distance between the floor and the desired height for the rod using a measuring tape.
- Mark the height on both walls using a pencil or a marker.
- Ensure that the marked lines are level by using a bubble level tool.
By following these steps, you can accurately locate the ideal height for your tension shower rod, providing optimum comfort for every member of your household.
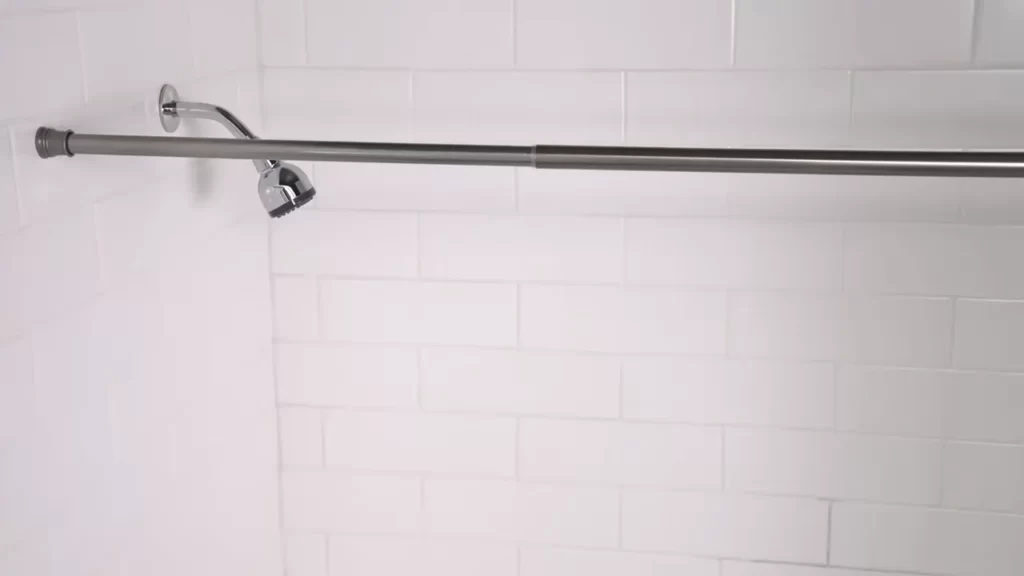
Aligning the Rod Between the Shower Walls
Once you have determined the ideal height for your tension shower rod, the next step is to align the rod between the shower walls for proper installation. To do this:
- Measure the distance between the shower walls at the marked height to determine the required length for your tension rod.
- Extend the tension rod to match the measured distance.
- Place one end of the tension rod against one wall and hold it firmly.
- Slowly twist the other end of the rod against the opposite wall, applying gentle pressure until the rod is securely in place.
Make sure the tension rod is level and secure between the shower walls. Adjust the length, if needed, by twisting the rod in the desired direction until it fits snugly. This ensures that your shower rod remains stable and won’t fall down during use.
Positioning the tension rod correctly is essential to ensure stability and functionality. By locating the ideal height and aligning the rod between the shower walls, you can create a secure and comfortable showering experience. Now that you have learned how to position your tension shower rod, you can proceed to the next steps of installing your shower curtain and enjoying a relaxing shower!
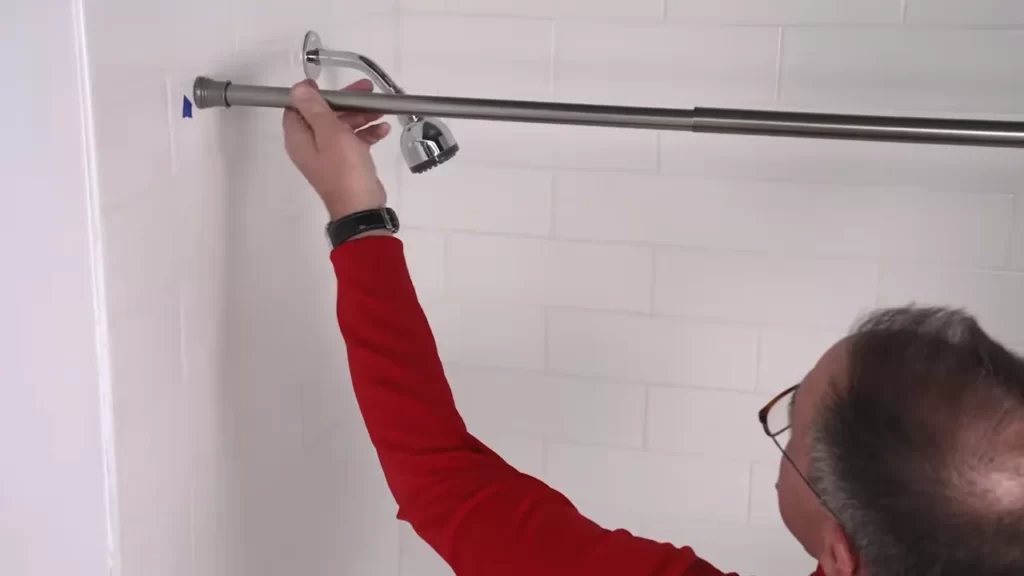
Securing The Tension Rod
Once you have positioned your tension shower rod properly, it’s time to secure it in place to ensure stability and prevent it from slipping or falling down unexpectedly. Follow these simple steps to securely install your tension shower rod:
Twisting or turning the rod to tighten it within the shower walls
One of the key steps in securing a tension shower rod is twisting or turning the rod to tighten it within the shower walls. This action creates the necessary pressure to hold the rod firmly in place. You can achieve this by:
- Hold the shower rod firmly from both ends and twist it clockwise. The rod should start to extend and press against the shower walls.
- Continue twisting the rod until it feels tight and secure. Be careful not to overtighten, as this may cause damage to the rod or the shower walls.
By twisting or turning the rod in a clockwise direction, you are effectively increasing the tension and creating a strong fit within the shower walls.
Testing the rod’s stability and readjusting if necessary
To ensure the tension shower rod is secure and stable, it’s important to perform a stability test. Follow these steps to check the rod’s stability:
- Gently push or pull the rod to test its stability. It should feel firm and not move or shift easily.
- If the rod wobbles or feels loose, it may require readjustment. Start by twisting the rod in a clockwise direction again to increase the tension.
- Re-test the rod’s stability by pushing or pulling on it. Repeat the process until the rod feels secure and stable.
Remember to test the rod’s stability periodically, especially after prolonged use, to ensure it remains secure and in place.
By following these simple steps for securing a tension shower rod, you can enjoy a stable and secure showering experience without worrying about the rod slipping or falling down. Take the time to properly install and test the rod’s stability to achieve the desired result.
Common Issues During Tension Shower Rod Installation
Installing a tension shower rod can be a straightforward task, but it may come with its fair share of challenges. To make sure your installation process goes smoothly, it’s important to be aware of some common issues that may arise. By being equipped with the knowledge to handle these issues, you can ensure a secure and functional tension shower rod in your bathroom.
Rod slipping or falling
One common issue that you may encounter during tension shower rod installation is the rod slipping or falling. This can be frustrating as it not only disrupts your shower experience but may also cause damage to your bathroom walls. To prevent this issue, it is crucial to follow the manufacturer’s instructions carefully and ensure that the rod is properly tightened. Additionally, using a rubber grip or adhesive pads on both ends of the rod can provide extra friction, minimizing the chances of slipping or falling.
Walls not providing enough grip for the rod
Another issue that many people face is walls that do not provide enough grip for the tension shower rod. This can happen if the walls are too smooth or if there is a layer of paint or wallpaper that hinders the rod’s stability. If you encounter this problem, there are a few solutions you can try. Firstly, you can use sandpaper to lightly roughen the wall surface around the areas where the rod will be mounted. This will create small grooves that will improve the grip. Additionally, using a tension shower rod with non-slip rubber ends can also help to enhance the rod’s stability.
Adjustability mechanisms not working properly
The adjustability mechanisms of a tension shower rod are essential for ensuring a proper fit in your shower space. However, sometimes these mechanisms may not work as intended, causing difficulties in adjusting the length or holding the rod securely in place. If you experience this issue, first make sure that you have followed the installation instructions correctly. If the problem persists, try loosening and retightening the rod to see if that helps. If not, it may be necessary to contact the manufacturer for troubleshooting steps or a replacement.
In conclusion, while installing a tension shower rod may seem like a simple task, it can come with its fair share of challenges. By being aware of common issues such as rod slipping or falling, walls not providing enough grip, and adjustability mechanisms not working properly, you can tackle these problems effectively. Remember to follow the manufacturer’s instructions, use additional grip methods if necessary, and seek assistance if the issues persist. With the right approach, you’ll be able to install a tension shower rod that stays securely in place and enhances your shower experience.
Troubleshooting Techniques
Using adhesive or grip pads for added stability
If you have installed a tension shower rod but are having trouble with it slipping or falling down, don’t worry! There are a few troubleshooting techniques you can use to ensure that your tension shower rod stays securely in place. One option is to use adhesive or grip pads to provide extra stability.
To use adhesive or grip pads, follow these steps:
- Choose a high-quality adhesive or grip pad specifically designed for shower rods. Look for one that is waterproof and can withstand the moisture present in the bathroom.
- Thoroughly clean the surface where the tension rod is going to be installed. Use a mild cleaner and a cloth to remove any dirt, grime, or residue.
- Apply the adhesive or grip pads to the surface. Make sure to follow the manufacturer’s instructions for proper placement and application.
- Press firmly on the adhesive or grip pads to ensure good adhesion.
- Install the tension shower rod as usual and adjust to the desired length.
- Once the tension rod is in place, give it a gentle tug to test its stability. It should feel secure and not move or slip.
Using adhesive or grip pads can provide that extra layer of stability needed to keep your tension shower rod securely in place. It’s a simple and effective solution to prevent any slipping or falling. However, if you’re still experiencing issues, there are other troubleshooting techniques you can try.
Reinforcing the walls with additional hardware if needed
If adhesive or grip pads aren’t providing enough stability for your tension shower rod, you may need to reinforce the walls with additional hardware. This will ensure that the rod is securely supported and won’t budge.
Here are the steps to reinforce the walls with additional hardware:
- Identify the areas where the tension shower rod is sagging or not staying in place.
- Measure the distance between the two points where the rod is sagging.
- Choose appropriate hardware, such as wall anchors or brackets, that can handle the weight and pressure of the tension rod.
- Using a drill and the appropriate drill bit, create pilot holes for the hardware.
- Insert the wall anchors or brackets into the pilot holes and secure them tightly.
- Install the tension shower rod, making sure it rests securely on the reinforced areas.
- Give the tension rod a gentle tug to test its stability. It should feel solid and not move or sag.
Reinforcing the walls with additional hardware can provide the extra support needed to keep your tension shower rod in place. It’s a more permanent solution that ensures the rod stays securely installed.
By using adhesive or grip pads and reinforcing the walls with additional hardware, you can troubleshoot any issues you may be experiencing with your tension shower rod. These techniques will help you achieve a sturdy and secure installation, giving you peace of mind during your showers.
Maintenance And Care For Tension Shower Rods
Proper maintenance and care for your tension shower rod is essential to ensure its longevity and optimal performance. By taking a few simple steps, you can keep your shower rod clean, rust-free, and in excellent condition for years to come. In this section, we will discuss some important practices, including cleaning and removing rust or buildup, checking for any signs of wear or damage, and replacing the rod if necessary.
Cleaning and Removing Rust or Buildup
Regular cleaning of your tension shower rod is crucial to prevent the buildup of dirt, soap scum, and mineral deposits. Here are some steps to effectively clean your tension shower rod:
- Start by wiping the rod with a damp cloth to remove any loose debris.
- Next, prepare a cleaning solution using warm water and mild detergent.
- Dip a sponge or soft cloth into the cleaning solution and gently scrub the entire surface of the tension shower rod, paying special attention to areas with visible dirt or buildup.
- Rinse the rod thoroughly with clean water to remove any residue from the cleaning solution.
- Dry the rod using a clean, dry cloth or towel.
- If you notice any rust on the rod, you can use a mixture of equal parts water and white vinegar to remove it. Apply the solution to the affected areas using a cloth and scrub gently. Rinse and dry the rod afterward.
Checking for Any Signs of Wear or Damage
Regularly inspecting your tension shower rod is essential to ensure its stability and safety. Follow these steps to check for any signs of wear or damage:
- Examine the entire length of the tension shower rod for any visible cracks, dents, or bends.
- Check the spring mechanism or tension adjustment knobs to ensure they are in good working condition.
- Test the tension by pulling on the rod gently. It should remain securely in place without wobbling or sliding.
- Inspect the rubber tips or suction cups at both ends of the rod. If they are damaged or worn out, replace them to maintain a stable grip.
Replacing the Rod if Necessary
In some cases, your tension shower rod may require replacement due to severe damage or wear that cannot be repaired. Here’s how to replace the rod:
- Measure the width of your shower area to ensure you purchase the correct size of tension shower rod.
- Remove the old tension rod by loosening the tension adjustment knobs or releasing the spring mechanism.
- Install the new tension rod following the manufacturer’s instructions, making sure it fits securely within the shower space.
- Adjust the tension or spring mechanism to achieve the desired fit and stability.
By following these maintenance and care tips, you can keep your tension shower rod clean, functional, and aesthetically pleasing. Regular cleaning, thorough inspection, and timely replacement, if necessary, will help prolong the life of your tension shower rod and enhance your showering experience.
Frequently Asked Questions
Why Does My Tension Shower Rod Keep Falling Down?
Your tension shower rod keeps falling down due to insufficient tension or poor installation. Make sure to tighten the rod securely against the walls, ensuring a snug fit. If the walls are smooth or the rod is old, consider using adhesive wall mounts or purchasing a new, sturdier rod.
How Do You Install A Tension Curtain Rod?
To install a tension curtain rod, follow these steps: 1. Choose the desired location for the rod. 2. Extend the rod to the desired length. 3. Position the rod between the walls or window frame. 4. Twist or adjust the rod until it securely stays in place.
5. Hang your curtains on the rod and adjust as needed.
Does Shower Rod Go On Tile Or Wall?
The shower rod can be installed on either a tile or a wall surface.
Is A Tension Rod The Same As A Shower Rod?
No, a tension rod is not the same as a shower rod. A tension rod is a spring-loaded rod that can be easily adjusted to fit between two surfaces, while a shower rod is specifically designed to hold up a shower curtain in the bathroom.
Conclusion
Installing a tension shower rod is a simple and quick project that can instantly upgrade your bathroom. By following the steps outlined in this blog post, you can easily achieve a secure and stable installation that will withstand the demands of everyday use.
Remember to measure accurately, choose the right type of tension rod, and follow the manufacturer’s instructions for the best results. Start enjoying the benefits of a new tension shower rod today!