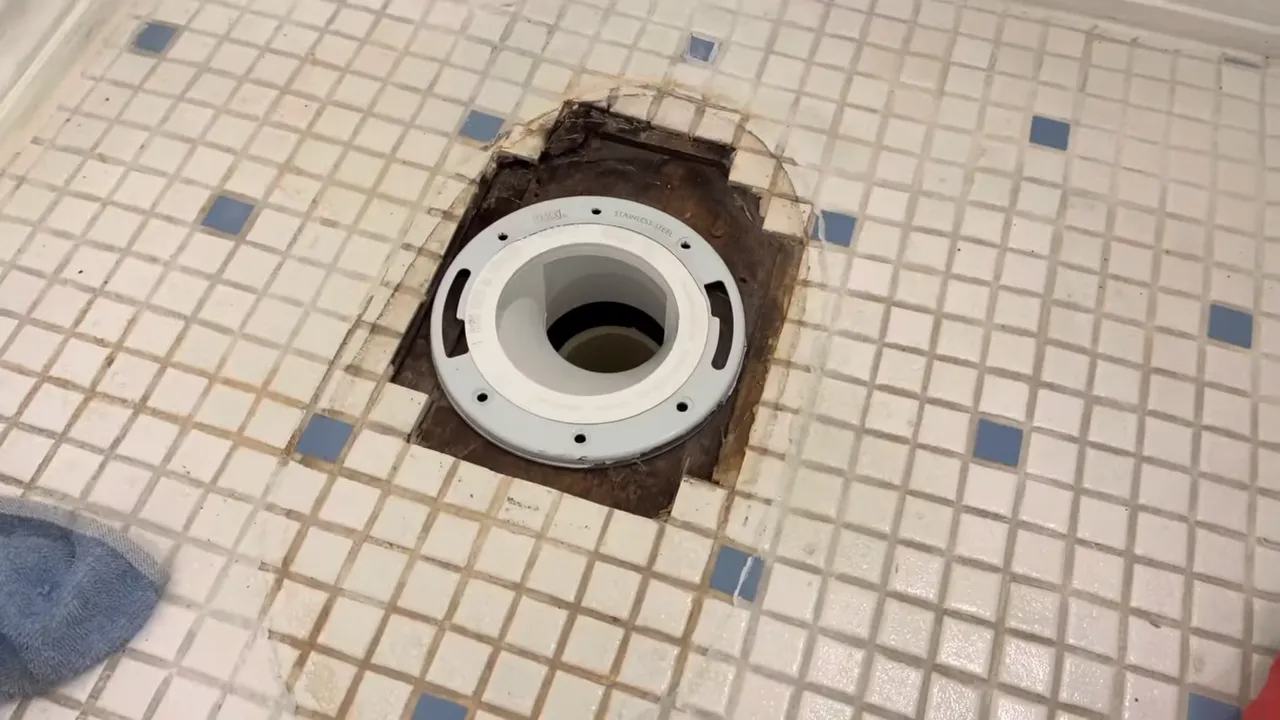
To install a toilet offset flange, first, remove the old flange and clean the area. Then attach the new offset flange with screws and secure it tightly.
The toilet is an essential fixture in any bathroom, and it is crucial to ensure that it is installed correctly for optimal performance. One common issue during installation is when the existing plumbing does not align with the toilet’s outlet.
This is where an offset flange comes in handy. The offset flange helps to bridge the gap and connects the toilet to the existing drain pipe. In this guide, we will explain step-by-step how to install a toilet offset flange to ensure a secure and leak-free connection. By following these instructions, you can easily complete the installation process and have your toilet up and running in no time.
Removing The Old Flange And Wax Ring
Before installing a new toilet offset flange, it is essential to start by removing the old flange and wax ring. This step is crucial as it ensures a proper and secure fit for the new flange. In this section, we will guide you through the process of inspecting the existing flange, removing the toilet, and getting rid of the old wax ring. So, let’s get started!
Inspecting the Existing Flange
The first step in removing the old flange and wax ring is inspecting the existing flange. This will help you assess the condition of the flange and determine if it needs to be replaced. Here’s how you can inspect the existing flange:
- Remove the toilet tank lid: Carefully remove the lid of the toilet tank and set it aside in a safe place.
- Turn off the water supply: Locate the water shut-off valve usually positioned behind or beside the toilet. Turn it clockwise to shut off the water supply.
- Flush the toilet: This step is necessary to drain the water from the toilet bowl and make the removal process easier.
- Inspect the flange: Take a close look at the existing flange for any signs of damage, such as cracks or corrosion. Additionally, check if the flange is level and securely attached to the floor.
- Measure the offset: Use a measuring tape to determine the offset from the wall to the center of the existing flange. This measurement will help you select the correct offset flange for installation.
Removing the Toilet and Wax Ring
Once you have inspected the existing flange, the next step is to remove the toilet and wax ring. Follow these steps carefully:
- Disconnect the water supply line: Use an adjustable wrench to detach the water supply line from the bottom of the toilet tank. Make sure to have a bucket or towel handy to catch any water drips.
- Remove the toilet tank lid: Lift off the toilet tank lid and place it in a secure location.
- Unbolt the toilet: Locate the bolts securing the toilet to the floor on each side. Loosen the bolts with a wrench and carefully lift the toilet straight up to detach it from the flange.
- Set the toilet aside: Place the toilet on an old towel or blanket in a safe area to avoid damaging it.
Now that the toilet is removed, you can focus on removing the old wax ring:
- Inspect the wax ring: Check the condition of the wax ring. If it shows signs of wear or damage, it is essential to replace it with a new one.
- Scrape off the remaining wax: Using a putty knife or scraper, gently scrape away any remnants of the old wax ring from the flange and the bottom of the toilet.
- Dispose of the old wax ring: Properly dispose of the old wax ring and any other debris.
By following these steps to remove the old flange and wax ring, you are now ready to move on to the next phase of installing the new offset flange. Stay tuned for our upcoming blog post on how to install a toilet offset flange for a secure and leak-free bathroom fixture!
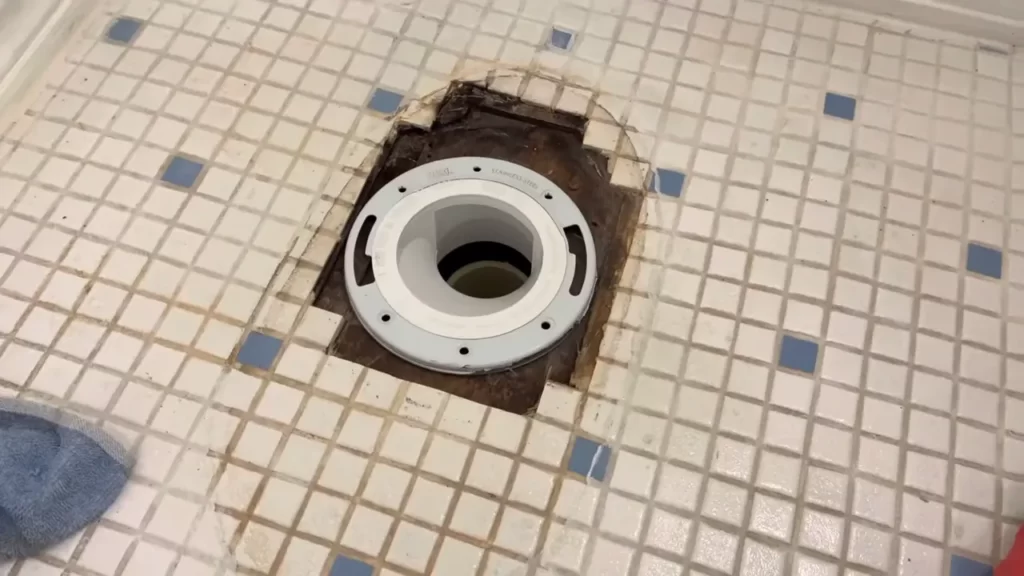
Determining The Right Offset Flange Size
Understanding Different Offset Flange Options
Before you can install a toilet offset flange, it’s important to understand the different options available. Offset flanges come in various sizes, shapes, and materials, and choosing the right one for your toilet installation is crucial for proper functionality.
There are primarily two types of offset flanges: PVC offset flanges and cast iron offset flanges. PVC offset flanges are more commonly used due to their lightweight and ease of installation. On the other hand, cast iron offset flanges are known for their durability and long lifespan, but they can be heavier and more challenging to install.
Measuring and Selecting the Correct Size
Now that you have a basic understanding of the offset flange options, it’s time to measure and select the correct size for your toilet installation. Determining the right offset flange size is crucial to ensure a secure and leak-free connection between the toilet and the drainage pipe. Here’s how you can do it:
- Start by removing your old toilet and inspect the existing flange. Measure the rough-in distance, which is the distance from the wall to the center of the drainpipe.
- Based on the rough-in measurement, determine the required offset size for the flange. The offset size refers to the distance between the center of the flange and the center of the drainpipe.
- Consult the manufacturer’s specifications or installation instructions for your toilet to find the recommended offset size. It’s important to follow these guidelines to ensure the proper fit and performance of your toilet.
- Alternatively, you can consult a plumbing professional who can help you determine the correct offset size based on your specific bathroom layout and toilet requirements.
Once you have measured and determined the correct offset flange size, you can proceed with the installation process confidently, knowing that you have selected the right product for your toilet installation.
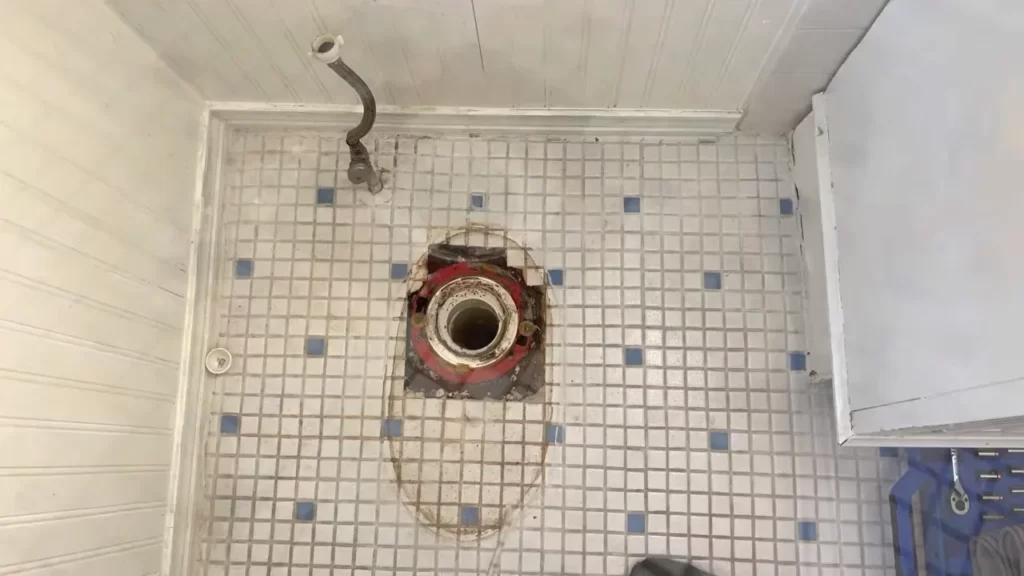
Installing The Offset Flange
Installing an offset flange is an essential step in ensuring your toilet is properly connected to the drain pipe. The offset flange is designed to correct misalignment issues, allowing you to install a toilet in a location where the existing drain pipe is not in the desired position. In this section, we will discuss how to position the flange on the drain pipe, secure it to the floor, and ensure proper alignment and leveling.
Positioning the Flange on the Drain Pipe
Before you begin, make sure you have the necessary tools and materials ready, including an offset flange, a wax ring, and a wrench. Follow these steps to position the flange on the drain pipe:
- Remove the old flange, if necessary, by loosening the screws or bolts that secure it to the drain pipe.
- Inspect the drain pipe for any damage or debris that may affect the installation of the offset flange. Clean the area thoroughly if needed.
- Place the offset flange over the drain pipe, ensuring that the offset portion aligns with the desired position for the toilet. The flange should fit securely onto the pipe.
Securing the Flange to the Floor
Once you have positioned the flange on the drain pipe, it’s time to secure it to the floor. Follow these steps:
- Mark the position of the screw holes on the floor using a pencil or marker. Make sure they align with the slots or openings on the flange.
- Drill pilot holes for the screws using an appropriate size drill bit. Be careful not to damage any pipes or subflooring.
- Place the flange back over the drain pipe, aligning the screw holes with the pilot holes on the floor.
- Insert screws into the pilot holes and tighten them using a wrench or screwdriver. Make sure the flange is securely fastened to the floor.
Ensuring Proper Alignment and Leveling
Proper alignment and leveling of the offset flange are crucial for the installation of the toilet. To ensure everything is in place, follow these steps:
- Place a level across the top of the flange to check for any unevenness. Adjust the flange if needed by loosening the screws and repositioning it.
- Once the flange is level, insert a wax ring onto the center of the flange. This will create a watertight seal between the flange and the toilet base.
- Lower the toilet onto the flange, aligning the mounting bolts on the base with the holes on the flange.
- Apply downward pressure to compress the wax ring and ensure a tight seal.
- Tighten the nuts onto the mounting bolts to secure the toilet to the flange. Use caution not to overtighten, as this may damage the toilet or the flange.
By following these steps, you can successfully install an offset flange for your toilet. It is important to take the necessary precautions and seek professional help if needed to ensure a safe and properly functioning toilet installation.
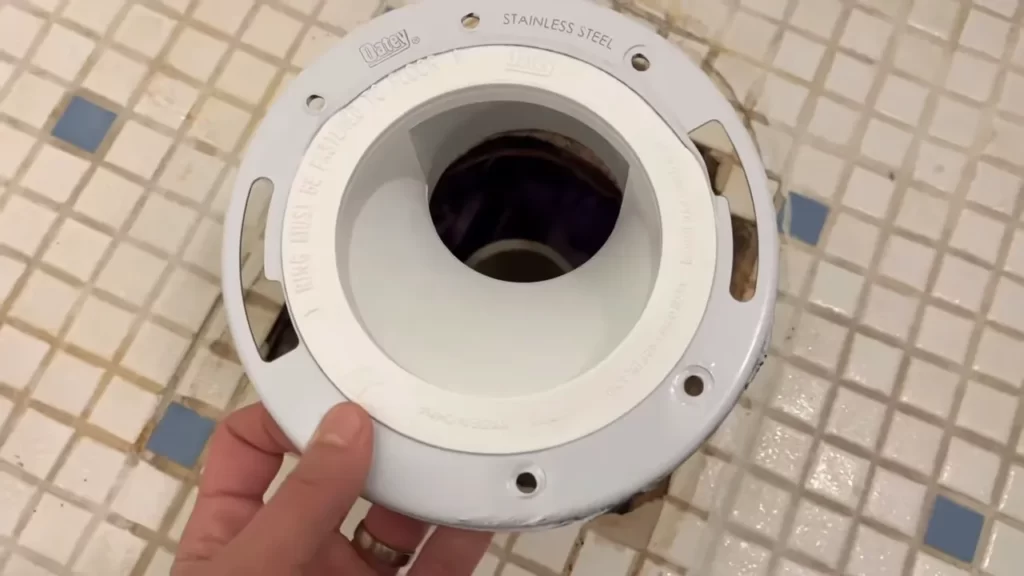
Connecting The Toilet To The Offset Flange
Now that you have successfully prepared the toilet and installed the offset flange, it’s time to connect the two. This step is crucial as it ensures a secure and leak-free installation. Follow these steps to properly connect the toilet to the offset flange.
Preparing the Toilet for Installation
Before you can connect the toilet to the offset flange, make sure it is properly positioned and ready for installation. Here are the steps to prepare the toilet:
- Remove any protective plastic coverings or packaging material from the toilet.
- Gently place the toilet bowl onto the flange, ensuring that it is aligned with the flange and the mounting bolts.
- Check that the wax ring has been properly placed on the flange, as we will discuss in the next step.
Placing the Wax Ring on the Flange
Now that the toilet is properly positioned, it’s time to place the wax ring on the flange. The wax ring creates a watertight seal between the toilet and the flange, preventing leaks. Follow these steps to place the wax ring:
- Remove any old wax residue or debris from the flange to ensure a clean surface.
- Take the wax ring and position it directly on top of the flange, making sure it is centered and fits snugly.
- Apply gentle pressure to the wax ring to secure it in place, ensuring it is completely flat and even.
Lowering the Toilet onto the Flange
Once the wax ring is properly positioned, it’s time to lower the toilet onto the flange. This step requires caution and precision to prevent any damage to the wax ring or misalignment of the toilet. Follow these steps to lower the toilet:
- Using your knees and not your back, lift the toilet bowl and slowly lower it onto the wax ring.
- Ensure that the mounting bolts on the flange align with the corresponding holes on the toilet bowl.
- Apply even pressure to the toilet bowl to compress the wax ring, creating a secure seal.
Securing the Toilet to the Flange
With the toilet properly positioned and lowered onto the flange, it’s time to secure it in place. This step ensures that the toilet remains stable and does not move or rock. Follow these steps to secure the toilet:
- Tighten the nuts onto the mounting bolts, alternating between them to ensure even pressure.
- Avoid overtightening the nuts, as this can cause damage to the toilet.
- Double-check that the toilet is level and stable, making any necessary adjustments.
- Once the toilet is securely fastened, use a wrench to trim the excess length of the mounting bolts.
Congratulations! You have successfully connected your toilet to the offset flange. This final step ensures a secure and leak-free installation, providing you with peace of mind and functionality. With the toilet now in place, your bathroom project is one step closer to completion.
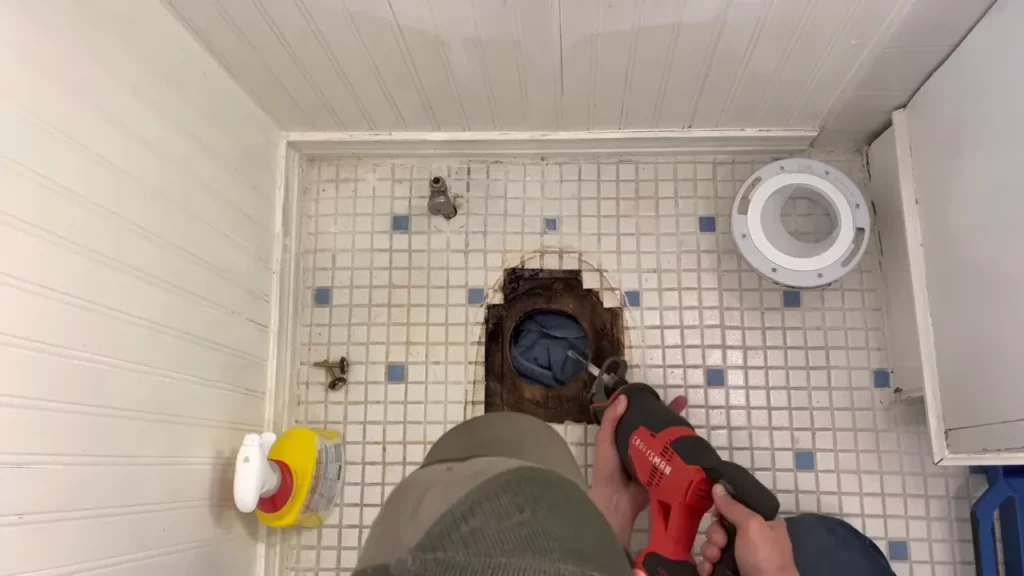
Testing And Checking For Leaks
Once you have successfully installed a toilet offset flange, the next crucial step is to test and check for leaks. This involves filling the toilet with water, inspecting for leaks, and making adjustments if necessary. It is essential to ensure that the flange is properly sealed and that there are no leakages before using the toilet.
Filling the Toilet with Water
To test for leaks, the first step is to fill the toilet with water. Start by closing the water supply valve located behind the toilet. Then, remove the tank lid and carefully pour water into the tank until it reaches its maximum level. Be cautious not to overflow the tank. Once filled, flush the toilet to allow the water to fill the bowl.
Inspecting for Leaks
After filling the toilet with water, the next step is to inspect for any leaks. Observe the area around the base of the toilet and the floor for any signs of water seepage. Pay close attention to the connection between the toilet and the flange, as well as the wax ring. Look for water puddles, moisture, or water stains that may indicate a leak. If you notice any signs of leakage, identify the source and take the necessary steps to fix it.
Making Adjustments if Necessary
If you have identified a leak during the inspection, it is crucial to make the necessary adjustments. Start by tightening the toilet bolts that connect the toilet to the flange. Make sure they are evenly tightened to provide a secure seal. If the leak persists, you may need to replace the wax ring or reposition the toilet to ensure a proper fit. Remember to always follow the manufacturer’s instructions and use the correct tools to prevent any damage.
In conclusion, testing and checking for leaks after installing a toilet offset flange allows you to ensure the proper functioning of your toilet and prevent any water damage. By filling the toilet with water, inspecting for leaks, and making adjustments if necessary, you can address any issues before they become significant problems. Regular maintenance and careful observation will help keep your bathroom clean and leak-free.
What To Do If The Toilet Doesn’T Fit Properly On The Flange
If you’ve recently purchased a new toilet and are in the process of installing it, you may encounter a common issue where the toilet doesn’t fit properly on the flange. This can be frustrating, but luckily, there are a few steps you can take to address this problem and ensure a secure and leak-free installation. In this section, we’ll explore two primary solutions: adjusting the positioning and alignment of the toilet and exploring alternative options if necessary.
Adjusting the Positioning and Alignment
If your toilet doesn’t fit properly on the flange, the first step is to inspect the positioning and alignment. The flange should be centered directly over the waste pipe, with the bolts fitting through the mounting holes of the toilet base. If the toilet is slightly off-center or misaligned, it can prevent a proper fit. Here’s how you can adjust the positioning and alignment:
- Loosen the bolts: Start by loosening the bolts that secure the toilet to the flange. This will allow you to reposition and align the toilet without any constraints.
- Reposition the toilet: Carefully lift the toilet and adjust its position so that the mounting bolts align with the corresponding holes on the flange. Make sure the toilet is centered over the waste pipe.
- Tighten the bolts: Once you’re satisfied with the positioning and alignment, tighten the bolts gradually and evenly using a wrench. Avoid over-tightening, as it may damage the toilet or the flange.
- Check for stability: Sit on the toilet and check for any wobbling or movement. If the toilet remains stable and does not shift, it is properly aligned on the flange.
Exploring Alternative Solutions
In some cases, even after adjusting the positioning and alignment, the toilet may still not fit properly on the flange. When this happens, it’s important to consider alternative solutions that can help resolve the issue. Here are a few options to explore:
- Use an offset flange: An offset flange is designed to bridge the gap between an off-centered waste pipe and the toilet flange. It allows for a secure connection and ensures a proper fit. Consider installing an offset flange if the misalignment is significant.
- Consider a wax ring extender: A wax ring extender can be used to create a tighter seal between the toilet and the flange. This can help compensate for minor misalignments. The extender is placed on the flange before installing the wax ring and the toilet.
- Consult a professional: If the issue persists or seems too complex to handle on your own, it’s best to consult a professional plumber. They have the expertise and tools to identify and resolve the problem.
- Replace flange or toilet: In rare cases, it may be necessary to replace either the flange or the toilet itself. This should be considered as a last resort if none of the other solutions work.
By following these steps and exploring alternative solutions if needed, you can tackle the issue of a toilet that doesn’t fit properly on the flange. Don’t let this setback discourage you from achieving a successful toilet installation.
Dealing With Leaks Or Odors After Installation
Identifying the Source of the Problem
After the installation of a toilet offset flange, it’s crucial to keep an eye out for any leaks or odors that might arise. These issues can be quite bothersome and may indicate a problem with your installation. To effectively address these concerns, it’s important to first identify the source of the problem. Here are a few possible culprits to consider:
1. Leaks at the Wax Ring: The wax ring is a key component that creates a watertight seal between the toilet flange and the toilet base. If there is a leak at the wax ring, water can seep out and cause damage to your floors. To check for leaks at the wax ring, inspect the area around the base of the toilet for any signs of water.
2. Leaking Sealant: During the installation process, sealant is typically applied around the edges of the toilet flange to ensure a secure connection. If the sealant is not applied properly or has started to deteriorate, it can result in leaks. Check for any visible cracks or gaps in the sealant.
3. Improper Alignment: If the toilet offset flange is not aligned correctly with the drainpipe, it can create a gap where leaks or odors can escape. Make sure to inspect the alignment of the flange to ensure it is properly seated on the drainpipe.
Tips for Fixing Leaks or Odor Issues
Dealing with leaks or odors after the installation of a toilet offset flange can be frustrating, but with a few simple steps, you can mitigate these problems and ensure a properly functioning bathroom. Here are some tips to help you fix these issues:
- Replace the Wax Ring: If you suspect that the wax ring is the source of the leak, it’s crucial to replace it. Start by shutting off the water supply to the toilet and removing the toilet from the flange. Carefully scrape off the old wax ring and replace it with a new one. Make sure to properly align the toilet and tighten the bolts.
- Reapply Sealant: If you find that the sealant around the toilet flange is damaged or deteriorated, it’s important to reapply sealant. Remove the old sealant and thoroughly clean the area. Apply a new bead of sealant around the edges of the flange, ensuring a complete and even coverage.
- Check Alignment: If the toilet offset flange is misaligned, it can lead to leaks or odor issues. To fix this, carefully detach the toilet from the flange and adjust the alignment. Make sure the flange is correctly seated on the drainpipe and reattach the toilet securely.
By following these tips, you can effectively troubleshoot and address any leaks or odor issues that may arise after the installation of a toilet offset flange. Remember to regularly inspect the toilet and its components to proactively identify any potential problems. With the right maintenance and care, you can enjoy a leak-free and odor-free bathroom experience.
Other Considerations And Tips For A Successful Installation
When it comes to installing a toilet offset flange, there are a few other considerations and tips that can greatly contribute to the success of your installation. In this section, we will cover two important aspects: Understanding Local Plumbing Codes and Regulations, and Maintaining and Cleaning the Toilet Offset Flange.
Understanding Local Plumbing Codes and Regulations
It is crucial to be aware of the local plumbing codes and regulations before installing a toilet offset flange. These codes are designed to ensure the safety and functionality of your plumbing system. Failing to comply with these codes can lead to costly repairs or even legal issues.
Here are a few key points to keep in mind:
- Familiarize Yourself with the Codes: Take the time to read and understand the plumbing codes specific to your region. You can usually access the codes online or inquire with your local government or plumbing department.
- Get the Required Permits: Certain plumbing projects may require permits before installation. Check with your local authorities to determine if a permit is needed for installing a toilet offset flange. Obtaining the necessary permit will ensure your installation is in compliance with the regulations.
- Hire a Professional if Necessary: If you are unfamiliar with plumbing work or have doubts about your abilities, it is always best to hire a licensed plumber. They have the expertise to complete the installation correctly and in accordance with local codes.
Maintaining and Cleaning the Toilet Offset Flange
To ensure the longevity and performance of your toilet offset flange, regular maintenance and cleaning are essential. Here are some tips to keep it in optimal condition:
- Inspect Regularly: Periodically check the toilet offset flange for any signs of damage, such as cracks, leaks, or loose fittings. Addressing these issues promptly can prevent further problems.
- Clean Thoroughly: Over time, mineral deposits, debris, and bacteria can accumulate on the flange. It is recommended to clean the flange regularly using a mild cleaner and a brush. Remember to also clean the toilet bowl and surrounding area.
- Prevent Clogs: To avoid clogs, be mindful of what you flush down the toilet. Avoid flushing items that can obstruct the offset flange and cause blockages, such as sanitary products, wet wipes, or excessive toilet paper.
Remember, proper maintenance and regular cleaning will help prolong the lifespan of your toilet offset flange, ensuring its optimal performance for years to come.
Frequently Asked Questions
How Far Will An Offset Flange Move A Toilet?
An offset flange can move a toilet up to a maximum distance of its offset measurement. The offset measurement determines how far the toilet can be moved horizontally from the original drain location.
Should Toilet Flange Be Flush With Floor?
Yes, the toilet flange should be flush with the floor. This ensures a proper seal and prevents leaks. A flush flange also provides stability for the toilet and prevents rocking or movement. It is important to properly install the flange to avoid any future issues.
What Is An Offset Toilet Flange Used For?
An offset toilet flange is used when the toilet drain pipe is not centered with the floor drain hole. It helps to align the toilet properly and prevent leaks by creating a secure connection between the toilet and the drain pipe.
Do You Screw Or Glue Toilet Flanges?
Toilet flanges are typically secured using screws rather than glue. Screws provide a more secure attachment and allow for easier removal if needed. Gluing the flange may not provide the necessary strength and stability.
Conclusion
Toilets are an essential part of any home, and installing a toilet offset flange correctly is crucial for proper functionality. By following the step-by-step guide provided in this blog post, you can ensure a successful installation process. Remember to choose the right size for your specific needs and carefully align the flange with the drain pipe.
With the right tools and a little bit of patience, you’ll have your new toilet offset flange securely in place in no time. Happy plumbing!
