To install a one-piece fiberglass shower stall, you will need to prep the area, position the stall, secure it in place, and make the necessary plumbing connections. This step-by-step guide will walk you through the process.
Installing a one-piece fiberglass shower stall can be a great way to update your bathroom and enhance its functionality. Whether you’re renovating your existing space or starting from scratch, this installation process is relatively straightforward and can be completed with a few basic tools and materials.
In this guide, we will outline each step of the installation, from preparing the area to making the final plumbing connections. By following these instructions, you’ll be able to successfully install a one-piece fiberglass shower stall and enjoy a stylish and functional bathroom for years to come.
Factors To Consider Before Installation
Before embarking on the installation process of a one-piece fiberglass shower stall, it is important to consider several factors to ensure a smooth and successful installation. By giving thought to the size and shape, drain placement, and wall material compatibility, you can make informed decisions that will contribute to a functional and aesthetically pleasing shower stall in your bathroom.
Size and Shape
One of the primary factors to consider before installing a one-piece fiberglass shower stall is the size and shape that will best fit your bathroom space. Measure the available area to determine the maximum dimensions the shower stall can occupy. Additionally, consider the shape of the stall that will complement the overall design of your bathroom and allow for comfortable movement within the shower. Common shapes include rectangular, square, and corner stalls.
Drain Placement
The placement of the drain is crucial for proper functioning of your one-piece fiberglass shower stall. It is important to ensure that the existing plumbing in your bathroom aligns with the desired drain placement. Measure the distance between the existing drainpipe and the intended location of the stall to confirm compatibility. Additionally, consider the slope and pitch of the floor, as these factors will affect proper drainage and prevent water pooling.
Wall Material Compatibility
Before installation, it is essential to ensure that the wall material in your bathroom is compatible with a one-piece fiberglass shower stall. Check if the walls are made of suitable materials, such as drywall, cement board, or tile, that will provide a stable and secure surface for installation. If necessary, make any repairs or modifications to ensure the walls are prepared for the shower stall installation.

Preparing For The Installation Process
Before you dive into the installation process, it’s essential to properly prepare the area where your one-piece fiberglass shower stall will be installed. Taking the time to measure and mark the area, prepare the subfloor, and ensure proper ventilation will help guarantee a successful installation. In this section, we’ll guide you through these crucial steps to ensure a smooth and efficient installation.
Measuring and Marking the Area
Measuring the area where your one-piece fiberglass shower stall will be installed is the first step to ensuring a precise fit. Here’s how to go about it:
- Clear the space of any obstacles, ensuring there is ample room for the shower stall.
- Using a measuring tape, measure the dimensions of the area where the shower stall will sit. Make sure to measure the width, height, and depth accurately.
- Mark the dimensions on the walls using a pencil or masking tape. This will serve as a guide during the installation process.
Preparing the Subfloor
A stable and level subfloor is crucial for the long-lasting installation of your one-piece fiberglass shower stall. Follow these steps to prepare the subfloor:
- Ensure the existing subfloor is clean and free from debris or any loose materials.
- Inspect the subfloor for any signs of damage or rot. Replace any damaged sections, as a solid and sturdy subfloor is essential for a secure installation.
- Use a level to check if the subfloor is even. If there are any uneven areas, use shims to level them out.
- Secure any loose floorboards or plywood, ensuring they are tightly fastened to prevent movement or squeaking.
Ensuring Proper Ventilation
Proper ventilation is crucial to prevent moisture buildup and the growth of mold or mildew in your bathroom. Here’s how you can ensure adequate ventilation:
- Check if your bathroom already has a functioning exhaust fan. If not, consider installing one to improve air circulation.
- Ensure that the exhaust fan is properly vented to the outside of your home, allowing moist air to be efficiently expelled.
- If you already have an exhaust fan, inspect and clean it to ensure optimal performance.
By taking these steps to ensure proper ventilation, you’ll create a healthier and more comfortable bathroom environment.
Essential Tools For The Job
Before you dive into the exciting task of installing a one-piece fiberglass shower stall, it’s important to gather all the essential tools you’ll need to get the job done. Having the right tools at your disposal can make the installation process easier, faster, and more efficient. Here are the must-have tools that will come in handy:
Tape Measure
A tape measure is an indispensable tool when it comes to installing a one-piece fiberglass shower stall. It allows you to accurately measure the space where the shower stall will be installed. This is crucial to ensure a proper fit and prevent any gaps or misalignments. Be sure to choose a tape measure that is long enough to measure the height, width, and depth of the installation area.
Drill with Bits
A drill with appropriate bits is another essential tool you’ll need for the installation process. You’ll use it to create holes for mounting brackets, screws, and other fixtures. When selecting a drill, consider one with variable speed settings to accommodate different types of materials and ensure precise drilling. Additionally, it’s important to have a variety of drill bits on hand to accommodate various sizes and types of screws or fasteners you may encounter during the installation process.
Screwdriver Set
A reliable screwdriver set is a must-have when installing a one-piece fiberglass shower stall. From removing old fixtures to tightening screws and fastening brackets, a screwdriver set will be your go-to tool throughout the installation process. Opt for a set that includes different types and sizes of screwdriver tips, such as flathead and Phillips head, to ensure you have the right tool for any task that comes your way.
By ensuring you have these essential tools ready before you begin, you’ll be well-prepared to tackle the installation of a one-piece fiberglass shower stall with confidence and ease. Now that you know what tools you need, it’s time to get started on your bathroom transformation!
Required Materials For A Successful Installation
When it comes to installing a one piece fiberglass shower stall, having the right materials is crucial for a successful installation. This article will guide you through the necessary materials needed to ensure a seamless and leak-free installation process. From the one piece fiberglass shower stall itself to essential items like waterproof sealant and plumbing supplies, each material plays a significant role in creating a durable and functional shower space.
One Piece Fiberglass Shower Stall
The first item you’ll need for the installation is a high-quality one piece fiberglass shower stall. These pre-molded units are available in various sizes and designs to suit your preferences and bathroom layout. Whether you opt for a standard-sized stall or a custom-made one, make sure the shower stall meets your requirements and fits perfectly in your bathroom space. Choosing a reputable brand ensures durability and longevity, giving you peace of mind knowing that your shower stall will withstand daily use.
Waterproof Sealant
To prevent any water leakage or damage to your bathroom walls and floors, a waterproof sealant is essential during the installation process. Sealants create a watertight barrier between the shower stall and the surrounding walls and floor. It’s important to choose a high-quality, mold-resistant sealant that is specifically designed for use in wet areas. Applying the sealant meticulously along the edges and seams of the shower stall helps to ensure a tight seal and prevents any potential leaks in the future.
Plumbing Supplies
In addition to the shower stall and waterproof sealant, you’ll need a variety of plumbing supplies to complete the installation. These may include:
- Pipes and fittings: Ensure you have the necessary pipes and fittings to connect the shower stall to your existing plumbing system. Consider the layout of your bathroom and the location of your water supply lines when choosing the appropriate pipes and fittings.
- Shower valve: The shower valve controls the water flow and temperature. Make sure you choose a valve that is compatible with your existing plumbing system and the shower stall.
- Drain assembly: The drain assembly is responsible for removing the water from the shower stall. It’s important to select a drain assembly that matches the size and design of your shower stall for proper drainage.
- Wrenches and plumbing tools: Having the right tools on hand, such as wrenches and other plumbing tools, will make the installation process much easier. These tools will help you securely connect the pipes and fittings, ensuring a leak-free installation.
By gathering all the required materials before starting the installation process, you’ll be well-prepared and equipped to install your one piece fiberglass shower stall successfully.

Preparing The Shower Stall
Welcome to our guide on how to install a one-piece fiberglass shower stall! Before you start the installation process, it’s crucial to properly prepare the shower stall to ensure a successful and long-lasting installation. In this section, we’ll walk you through inspecting the shower stall, sealing any cracks or damages, and applying a waterproof membrane. Let’s get started!
Inspecting the Shower Stall
The first step in preparing the shower stall is to carefully inspect it for any signs of damage or defects. Inspecting the shower stall thoroughly will help identify any underlying issues that could affect the installation process or the performance of the shower in the long run. Make sure to pay attention to the following:
- Check the surface of the shower stall for any cracks, chips, or scratches.
- Inspect the corners and seams for any signs of wear or separation.
- Check for any water damage or soft spots on the floor of the shower stall.
If you come across any of these issues, it’s important to address them before proceeding with the installation. This will ensure a strong and stable base for your new shower stall.
Sealing Any Cracks or Damages
If you find any cracks or damages during the inspection, it’s essential to seal them properly to prevent water leakage and further damage. Here’s how you can do it:
- Clean the affected area: Start by cleaning the cracked or damaged area with a mild detergent and water. Make sure the surface is free from dirt, dust, and debris.
- Apply a suitable filler: Use a high-quality, waterproof filler or caulk to seal the cracks or damages. Apply the filler using a caulking gun, ensuring it fills the entire crack or damaged area.
- Smooth the filler: Use a putty knife or your finger to smooth out the filler and create a seamless finish. This will ensure the repaired area blends in with the rest of the shower stall.
By properly sealing any cracks or damages, you’ll ensure your shower stall is watertight and ready for the next step in the installation process.
Applying a Waterproof Membrane
Once you’ve inspected the shower stall and sealed any cracks or damages, it’s time to apply a waterproof membrane. This membrane will provide an extra layer of protection against moisture and help prolong the lifespan of your shower stall. Here’s how you can do it:
- Clean and dry the surface: Before applying the waterproof membrane, make sure the surface of the shower stall is clean and dry. Remove any dust, dirt, or debris to ensure proper adhesion.
- Apply the membrane: Use a paintbrush or roller to apply the waterproof membrane evenly on the walls and floor of the shower stall. Make sure to follow the manufacturer’s instructions for the specific product you’re using.
- Allow drying time: After applying the membrane, allow sufficient drying time as per the product instructions. This will ensure the membrane forms a strong barrier against water.
Applying a waterproof membrane is an important step in preventing water damage and mold growth. It will ensure your shower stall stays in excellent condition for years to come.
By following these steps to prepare the shower stall, you’ll be well on your way to a successful installation. In the next section, we’ll guide you through assembling and installing the one-piece fiberglass shower stall. Stay tuned!
Positioning And Securing The Shower Stall
Installing a one-piece fiberglass shower stall is a great way to enhance the functionality and aesthetics of your bathroom. However, proper positioning and securing of the shower stall are crucial to ensure a long-lasting and hassle-free installation. In this section, we will guide you through the essential steps involved in lifting and leveling the shower stall, attaching it to the wall studs, and securing the shower base to the floor.
Lifting and Leveling the Shower Stall
Before you start lifting the shower stall into position, make sure you have enough space to maneuver around it. It is recommended to have at least two people for this task to ensure safety and ease of installation. Follow these steps:
- Measure the height of the shower stall and mark the corresponding measurement on the wall studs using a level.
- Carefully lift the shower stall and place it in the desired location, aligning it with the marked measurements on the wall studs.
- Use a level to ensure the shower stall is perfectly level both horizontally and vertically.
- Make any necessary adjustments by shimming or repositioning the stall until it is perfectly level.
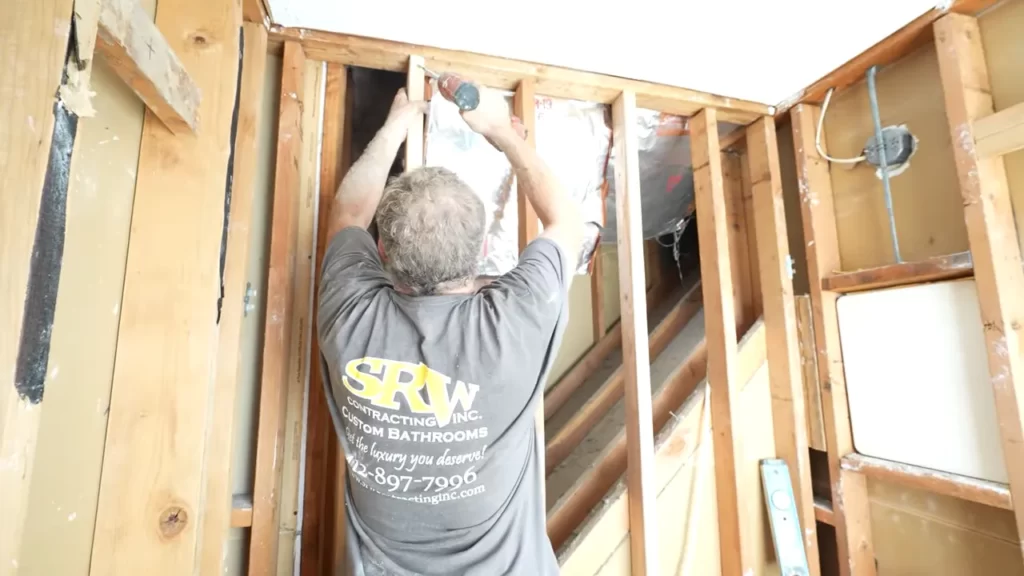
Attaching the Stall to the Wall Studs
After leveling the shower stall, it’s time to secure it to the wall studs for stability and support. Follow these steps:
- Locate the wall studs behind the shower stall using a stud finder.
- Mark the position of the studs on the shower stall walls.
- Drill pilot holes through the marked positions on the shower stall walls.
- Align the holes on the shower stall walls with the wall studs and insert screws through the pilot holes, tightening them securely.
- Repeat this process for each remaining stud to ensure the shower stall is firmly attached to the wall.
Securing the Shower Base to the Floor
In addition to attaching the shower stall to the wall studs, securing the shower base to the floor is crucial to prevent movement and ensure stability. Follow these steps:
- Prepare the area where the shower base will be installed by ensuring it is clean and free from any debris.
- Apply a generous amount of adhesive caulk on the bottom surface of the shower base.
- Place the shower base in its designated position on the floor, ensuring it is aligned with the drain opening.
- Apply firm downward pressure on the shower base to ensure the caulk spreads evenly and creates a strong bond between the base and the floor.
- Check the level of the shower base both horizontally and vertically to ensure it is aligned correctly.
- Allow the adhesive caulk to dry and cure according to the manufacturer’s instructions before using the shower stall.
By following these steps, you can position and secure your one-piece fiberglass shower stall effectively, ensuring a sturdy and durable installation. Now that your shower stall is properly installed, you can proceed with connecting the plumbing fixtures and adding finishing touches to complete your new bathroom upgrade.
Plumbing And Drain Installation
Connecting the Water Supply Lines
Connecting the water supply lines is an essential step in the installation process of a one-piece fiberglass shower stall. This ensures that your shower has a reliable source of water for a refreshing experience. Here’s a step-by-step guide on how to connect the water supply lines:
- Start by turning off the main water supply to avoid any leaks or accidents.
- Locate the hot and cold water supply lines near your shower stall. These can typically be found in an adjacent wall or under the floor.
- Measure and cut the appropriate length of copper or PEX tubing for each water supply line.
- Attach a shut-off valve to each end of the tubing using compression fittings. This allows you to control the water flow to your shower easily.
- Connect the hot and cold water supply lines to the corresponding shut-off valves using the appropriate fittings and secure them tightly.
- Make sure to use plumber’s tape on all threaded connections to prevent any potential leaks.
- Open the main water supply, and check for any leaks. If there are any, tighten the connections until they are snug.
Following these steps will ensure a proper connection of the water supply lines to your one-piece fiberglass shower stall, giving you a steady and consistent flow of water.
Installing the Shower Faucet and Fixtures
The shower faucet and fixtures play a crucial role in providing a comfortable and enjoyable shower experience. Here’s how you can install them:
- Before installing the shower faucet, ensure that the water supply is turned off.
- Position the valve body in the appropriate location on the shower wall, following the manufacturer’s instructions.
- Connect the hot and cold water supply lines to the corresponding ports on the valve body.
- Tighten the connections using an adjustable wrench, making sure they are secure.
- Attach the showerhead arm to the upper port of the valve body using plumber’s tape and an adjustable wrench.
- Connect the showerhead to the arm, ensuring it is tightened properly.
- Install any additional fixtures, such as a hand-held showerhead or body jets, according to the manufacturer’s instructions.
- Turn on the water supply, and check for any leaks. If necessary, tighten the connections until they are snug.
Following these steps will ensure a proper installation of the shower faucet and fixtures, allowing you to enjoy a refreshing shower experience in your newly-installed one-piece fiberglass shower stall.
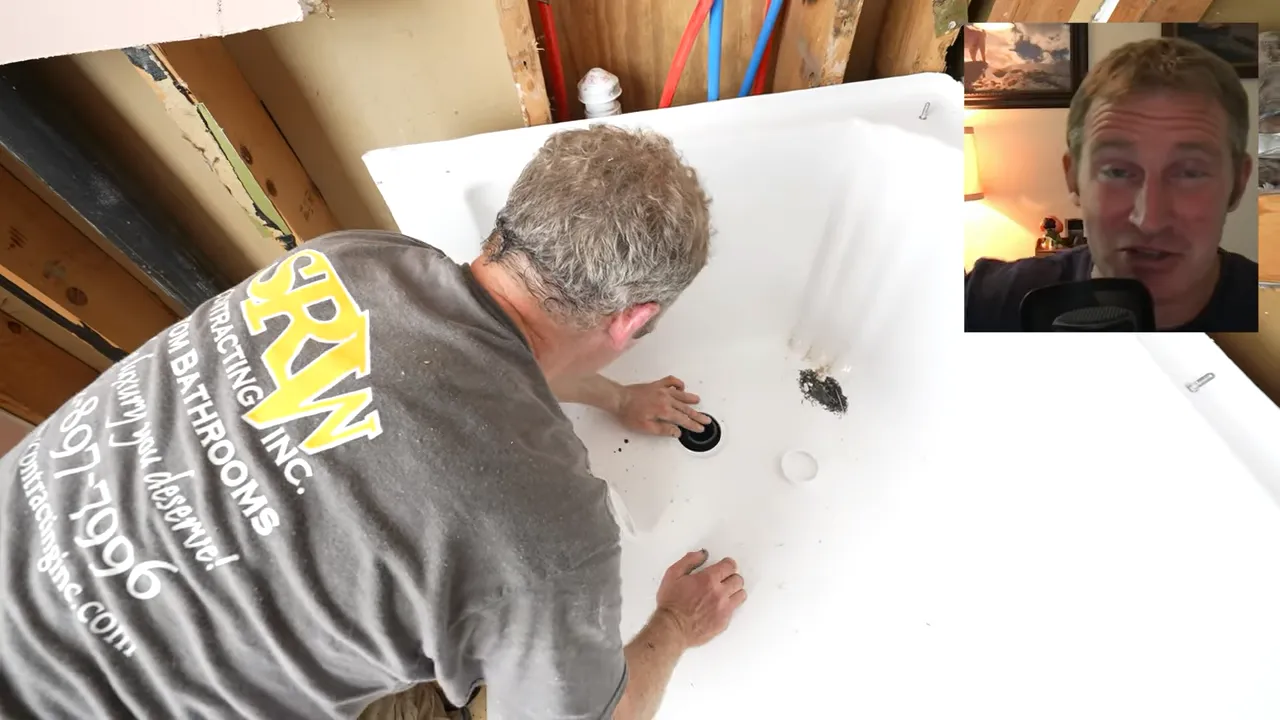
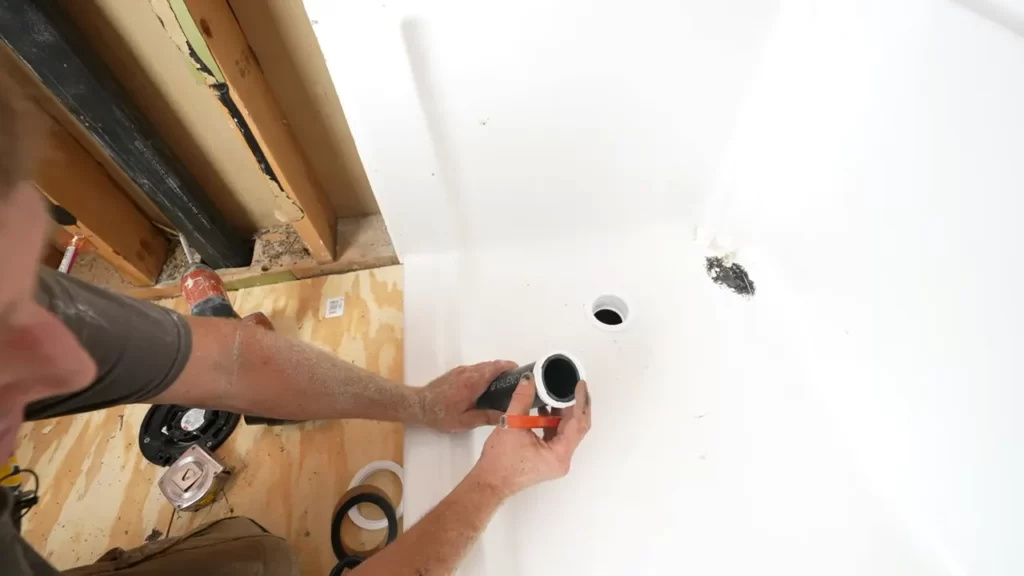
Ensuring Proper Drain Connections
Proper drain connections are crucial to ensure the efficient drainage of water from your one-piece fiberglass shower stall. Here’s what you need to do to ensure a proper drain connection:
- Start by removing the old drain assembly, if necessary, using a wrench or pliers.
- Apply plumber’s putty or silicone caulk around the flange of the new drain assembly.
- Insert the drain assembly into the drain hole on the shower floor, ensuring a tight seal.
- Tighten the drain assembly from underneath the shower floor using the provided hardware or a wrench.
- Connect the drain pipe to the lower end of the drain assembly, ensuring a secure and watertight connection.
- Use a level to check that the shower floor is sloping towards the drain, allowing proper water drainage.
- If necessary, adjust the shower floor by adding or removing shims until the desired slope is achieved.
- Test the drain by pouring water into the shower floor and checking for any leaks or slow draining.
Following these steps will ensure a proper drain connection in your one-piece fiberglass shower stall, allowing water to flow away efficiently after each shower.
Finishing Touches And Testing
Once you have successfully installed a one-piece fiberglass shower stall, it’s time to add the finishing touches and carry out important tests to ensure its functionality. These last steps are crucial in ensuring a watertight seal, proper drainage, and a seamless shower experience. In this section, we will cover the final steps you need to take to complete your shower installation process.
Applying a Final Waterproof Sealant
Before moving forward, it’s essential to apply a final layer of waterproof sealant to reinforce the enclosure’s integrity. This step provides an extra layer of protection against potentially damaging leaks. To do this, follow these simple steps:
- Clean the shower stall surface thoroughly to remove any dirt, dust, or residue.
- Use a silicone-based waterproof sealant that is compatible with fiberglass materials. This type of sealant offers excellent adhesion and flexibility.
- Load the sealant into a caulking gun and cut the nozzle at a 45-degree angle.
- Apply an even bead of sealant along the seams, edges, and corners of the shower enclosure.
- Smooth the sealant using a damp cloth or your finger, making sure it fills any gaps or crevices.
- Allow the sealant to cure as per the manufacturer’s instructions. Keep in mind that curing times may vary depending on the sealant.
Remember, a proper waterproof sealant application is essential for maintaining the longevity and functionality of your one-piece fiberglass shower stall.
Installing the Shower Door or Curtain
Now that the shower stall is properly sealed, the next step is to install the shower door or curtain. This step adds the final touch to your enclosure and ensures privacy while showering. Follow these guidelines for a smooth installation process:
- Measure the opening of the shower stall to determine the appropriate door or curtain size.
- Pre-drill any necessary holes for the door or curtain hardware, following the manufacturer’s instructions.
- Install the door or curtain hardware, making sure it aligns correctly and operates smoothly.
- Double-check that the door or curtain provides a proper seal when closed to prevent water leakage.
Once the shower door or curtain is installed, you’re one step closer to enjoying your new shower enclosure.
Testing for Leaks and Proper Drainage
Before considering the installation process complete, it is crucial to thoroughly test your one-piece fiberglass shower stall for leaks and proper drainage. Follow these testing procedures:
- Fill the shower base with water, ensuring it reaches a significant height.
- Observe the shower stall for any signs of leakage, such as dripping or pooling water.
- Check the sealant application areas, paying close attention to corners and seams.
- Inspect the drain to ensure it efficiently directs water flow without any blockages or backups.
- If you notice any leaks or drainage issues during the testing process, address them promptly to avoid any long-term damage.
By conducting these tests, you can rest assured that your newly installed one-piece fiberglass shower stall is not only visually pleasing but also fully functional.
Frequently Asked Questions
How To Install A Prefab Shower Stall?
To install a prefab shower stall, start by measuring the space and ensuring it meets the dimensions of the stall. Next, remove any existing fixtures, such as the old shower or tub. Once the area is prepared, follow the manufacturer’s instructions to assemble and install the shower stall.
Finally, connect the plumbing and seal all joints to prevent leaks.
What Do You Put Under A Fiberglass Shower Stall?
Place a solid, level base such as a cement or mortar bed under a fiberglass shower stall for stability and support.
Can Grab Bars Be Installed In A Fiberglass Shower?
Yes, grab bars can be installed in a fiberglass shower. It is possible to securely anchor them using proper installation techniques. However, it is recommended to consult a professional for safe and secure installation.
Can I Fit A One Piece Shower Through Door?
Yes, it is possible to fit a one piece shower through a door. Just make sure the dimensions of the shower and the doorway match. Measure carefully to ensure a proper fit.
Conclusion
The installation of a one-piece fiberglass shower stall can be a straightforward and achievable task with the right guidelines. By following the steps mentioned in this blog post, you will be able to efficiently complete the installation process. Remember to carefully measure, prepare the area, and follow the manufacturer’s instructions.
With a little effort and attention to detail, you can enjoy the benefits of a beautiful and functional shower stall in your bathroom.