
To install an extender to a drain, first, clean the drainpipe to remove any debris or blockages. Next, measure the length of the drainpipe and the extender, ensuring they are compatible in size.
Then, apply a waterproof sealant to the inside of the extender before attaching it to the drainpipe. Finally, use pipe clamps or screws to secure the extender in place. Installing an extender to a drain can be a simple and effective solution to address issues with drainage, such as clogs or slow water flow.
By extending the length of the drainpipe, an extender helps to improve the efficiency and effectiveness of the drainage system. We will discuss the step-by-step process of how to install an extender to a drain. By following these instructions, you can solve drainage problems and enhance the overall functionality of your plumbing system with ease. So, let’s dive into the details and learn how to get your drain working optimally again.
Factors To Consider Before Purchasing An Extender
Installing an extender to a drain can be a simple yet effective solution to ensure your plumbing system functions optimally. However, before making a purchase, there are several factors you should consider to ensure you select the right extender for your needs. These factors include the types of extenders available in the market, compatibility with different drain sizes, the material and durability of the extender, as well as pricing and budgeting options.
Types of Extenders Available in the Market
When it comes to drain extenders, you’ll find an array of options available in the market. Each type caters to specific drain configurations and needs. It’s essential to understand the types of extenders to choose the one that suits your requirements perfectly.
Compatibility with Different Drain Sizes
An extender should fit seamlessly with your drain, ensuring a tight and secure connection. Before purchasing, it’s crucial to determine the size and dimensions of your drain and select an extender that is compatible. Many extenders are designed to be adjustable, accommodating a range of drain sizes, making them a versatile solution.
Material and Durability Considerations
When it comes to plumbing fixtures, durability is of utmost importance. The material of the extender plays a vital role in its longevity. It’s essential to opt for extenders made from high-quality materials such as stainless steel, brass, or PVC, which are known for their excellent durability and resistance to corrosion.
Pricing and Budgeting Options
While selecting an extender, it’s equally important to consider your budget. Prices can vary depending on the type of extender, material, and brand. It’s advisable to compare prices from different sellers to ensure you get the best value for your money. Additionally, consider the long-term benefits and cost savings that a durable extender can provide, as it may be more cost-effective in the long run.
Clearing Any Blockages Or Debris From The Drain
Identifying common drain blockages
Before installing an extender to a drain, it’s essential to identify any common blockages that might impede the flow of water. Blocked drains are a common household issue that can cause inconvenience and even potential damage if left unattended.
To identify drain blockages, look out for signs such as slow drainage, gurgling sounds, foul odors, or overflowing water. These are indications that there might be a blockage in the drainpipe.
Common types of drain blockages can include:
- Food scraps and grease buildup in kitchen drains
- Hair and soap residue in bathroom drains
- Tree roots intruding into outdoor drains
Using safe and effective methods for clearing blockages
Once you’ve identified the blockage in the drain, it’s crucial to use safe and effective methods to clear it. Here are some methods you can use:
- Plunging: Plungers can be used for minor blockages. Create a tight seal around the drain and vigorously plunge up and down to help dislodge the blockage.
- Chemical drain cleaners: If plunging doesn’t work, you can try using a chemical drain cleaner. Follow the instructions carefully and use protective gloves and eyewear while applying these cleaners.
- Drain snakes: For more stubborn blockages, a drain snake can be used. Insert the flexible wire into the drain and rotate it to break up and remove the blockage.
- Hot water and baking soda: A mixture of hot water and baking soda can help dissolve minor blockages and eliminate any foul odors in the drain.
Ensuring a clean and smooth drain surface for installation
Before installing an extender to a drain, it’s crucial to ensure that the drain surface is clean and smooth. Here’s how you can prepare the drain:
- Remove any debris: Use a wire brush or cleaning tool to remove any debris or buildup present on the drain surface.
- Inspect for damage: Check the drain for any signs of damage, such as cracks or loose parts. Replace or repair any damaged components before proceeding with the installation.
- Apply drain cleaner: Use a pipe cleaner or drain cleaner to remove any remaining residue or potential blockages in the drain. Ensure that the cleaner is safe for the type of material your drain is made from.
By effectively clearing any blockages or debris from the drain and ensuring a clean and smooth surface for installation, you can ensure the successful installation of an extender. Remember to follow the manufacturer’s instructions for installing the extender and enjoy improved drainage in your home.
Measuring The Drain Size And Taking Accurate Measurements
Before installing an extender to a drain, it’s essential to measure the drain size accurately. Taking precise measurements ensures a proper fit and prevents any leakage or installation issues down the line. In this section, we will guide you through the process of measuring the drain size and the correct ways to take accurate measurements.
Tools required for accurate measurement
When it comes to measuring the drain size for extender installation, having the right tools on hand is crucial. Below is a list of tools you will need to take accurate measurements:
| 1. Tape Measure |
| 2. Digital Vernier Caliper |
| 3. Plumbing Snake |
Understanding the measurements needed for extender installation
Before taking any measurements, it’s important to have a clear understanding of the measurements needed for the extender installation. The two main measurements you need to consider are:
- The diameter of the existing drain pipe
- The length of the drain pipe that requires an extender
By accurately measuring these two aspects, you can select the appropriate extender that will fit seamlessly into your existing drain system.
Tips for taking precise measurements without errors
Taking precise measurements without errors is crucial to ensure a proper fit for your drain extender. Here are some tips to help you take precise measurements:
- Start by cleaning the drain pipe to remove any debris or blockages.
- Use a tape measure to measure the diameter of the drain pipe. Place the tape measure around the outer edge of the pipe and record the measurement.
- For more accurate measurements, consider using a digital vernier caliper. This tool provides precise measurements in millimeters, allowing for a more precise fit.
- If the drain pipe has bends or curves, use a plumbing snake to measure the length of the section that requires an extender. Insert the plumbing snake into the pipe, mark the length, and record the measurement.
- Double-check your measurements to ensure accuracy before purchasing an extender.
By following these tips and using the right tools, you can take accurate measurements and install an extender to your drain without any complications.
Step 1: Applying A Sealant To Ensure A Watertight Connection
Importance of a secure and leak-free connection
When it comes to installing an extender to a drain, ensuring a secure and leak-free connection is of utmost importance. A watertight seal is crucial to prevent any potential leaks that could cause damage to your wall, floors, or surrounding areas. Without a proper seal, water can seep through the connection, leading to costly repairs and potential health hazards from mold and mildew growth.
Selecting the right sealant for your specific drain type
Choosing the right sealant for your specific drain type is essential to achieve a strong and durable connection. Different drain materials may require different sealants for optimal adhesion and performance. Here are some common drain materials and their recommended sealants:
| Drain Type | Recommended Sealant |
|---|---|
| PVC | PVC-based sealant |
| ABS | ABS-based sealant |
| Cast Iron | Silicone-based sealant |
| Stainless Steel | Stainless steel epoxy sealant |
By selecting the appropriate sealant for your drain material, you can ensure a strong and long-lasting seal that can withstand everyday use and potential moisture exposure.
Proper application techniques to guarantee a strong seal
Applying the sealant correctly is crucial in guaranteeing a strong and watertight seal. Here are the steps to follow:
- Start by cleaning the surfaces of both the drain and the extender with a mild detergent and water. This will remove any dirt, debris, or residue that could hinder the adhesion of the sealant.
- Once the surfaces are clean and dry, apply a thin bead of sealant around the connection area. Make sure to cover the entire circumference of the joint without any gaps.
- Use a finger dipped in soapy water to smooth and level the sealant, ensuring an even and uniform layer. This will not only enhance the appearance but also improve the overall seal.
- Allow the sealant to cure according to the manufacturer’s instructions before testing for leaks. This will typically take a few hours or overnight, depending on the product used.
- After curing, turn on the water and observe the connection for any signs of leakage. If there are any leaks, tighten the connection or reapply the sealant as necessary.
By following these proper application techniques, you can guarantee a strong seal that will withstand the test of time, providing you with a secure and leak-free connection for your drain extender.
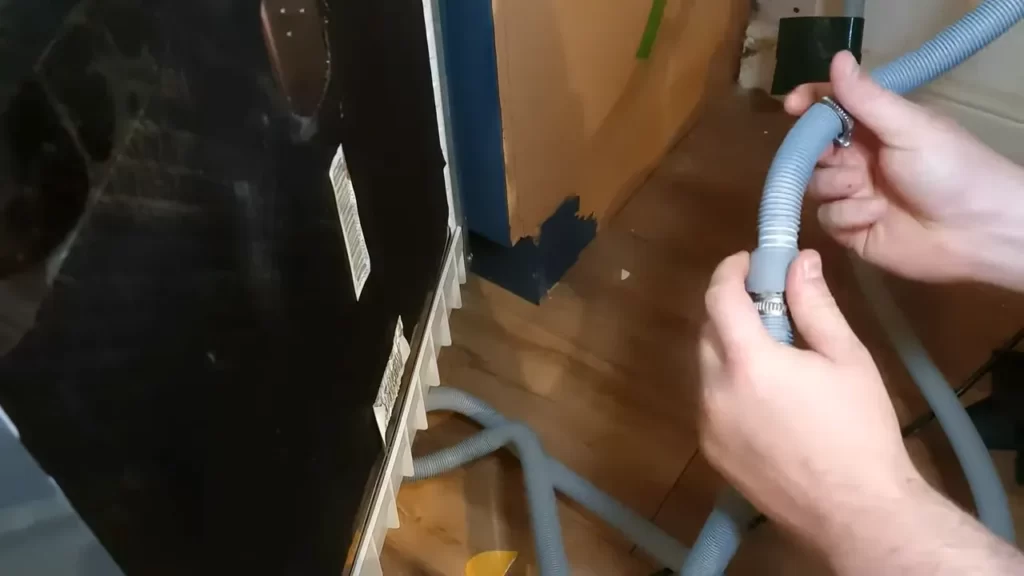
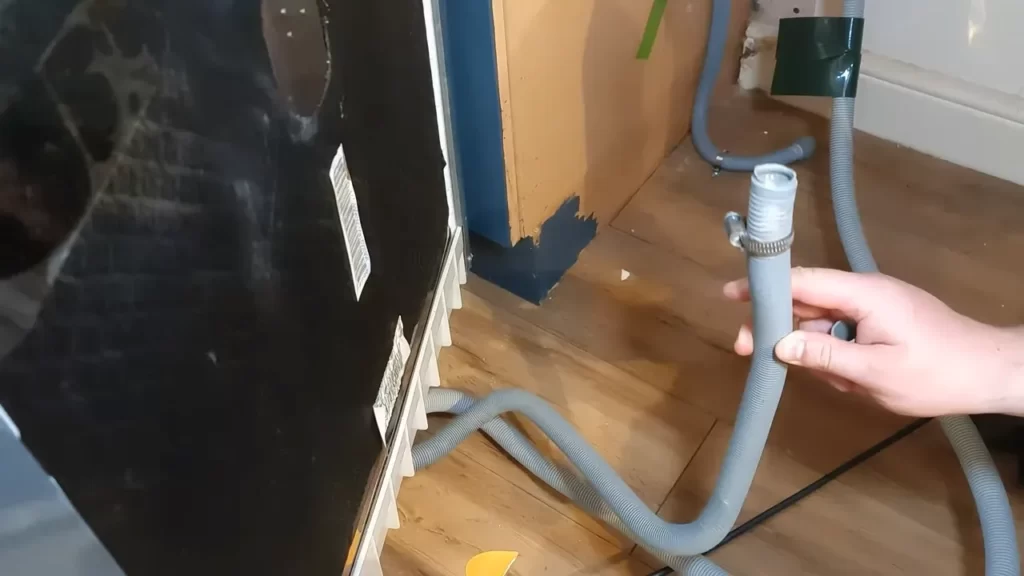
Step 2: Aligning The Extender With The Drain Pipe
Once you have gathered all the necessary tools and materials for installing an extender to a drain, the next step is to align the extender with the drain pipe. Proper alignment is crucial for a secure and leak-free connection. In this step, we will discuss the correct positioning and alignment techniques, as well as how to avoid potential misalignments and angle deviations. Additionally, we will explore the use of leveling techniques to achieve accurate alignment, ensuring a proper fit for your drain extender.
The correct positioning and alignment for a proper fit
To ensure a proper fit, it is essential to position and align the extender correctly with the drain pipe. Here are the steps you can follow:
- Measure and mark the pipe: Start by measuring the diameter and length of the drain pipe. Use a tape measure or ruler to mark the center of the pipe. This will serve as a reference point for aligning the extender.
- Apply lubricant: Apply a thin layer of lubricant to the end of the drain pipe and the inner surface of the extender. This will make it easier to slide the extender into position.
- Insert the extender: Gently insert the extender into the drain pipe, ensuring that it sits flush with the marked center point. Slowly twist or rotate the extender while pushing it in to help it slide smoothly into place.
By following these steps, you can ensure the correct positioning and alignment of the extender for a proper fit.
Avoiding potential misalignments and angle deviations
Misalignments and angle deviations can lead to leaks and difficulties in connecting the drain extender. Here are a few tips to help you avoid these potential issues:
- Avoid excessive force: While inserting the extender, avoid applying excessive force as it can cause misalignments. Gentle and controlled pressure is key.
- Check for even insertion: Keep an eye on the alignment as you insert the extender. Ensure that it is going in straight and even without any noticeable angle deviations.
- Make adjustments if needed: If you notice any misalignments or angle deviations, gently twist or rotate the extender to correct the positioning. It’s important to address any issues before proceeding with the installation.
By being mindful of these tips, you can prevent potential misalignments and angle deviations, ensuring a smooth installation process.
Using leveling techniques to achieve accurate alignment
Leveling techniques can be helpful in achieving accurate alignment, especially when dealing with uneven surfaces. Here’s how you can use leveling techniques:
- Place a level on top of the extender: Once the extender is inserted, place a level on top of it to check for any tilts or imbalances.
- Add shims if needed: If the level indicates an uneven surface, add shims under the extender to level it out. Shims can be small wedges or spacers made of plastic or wood.
- Re-check alignment: After adding shims, re-check the alignment using the level. Continue adding or adjusting shims until the extender is perfectly aligned.
Using leveling techniques can help you achieve accurate alignment, ensuring a secure and leak-free connection for your drain extender.
In this step, we have covered the correct positioning and alignment techniques, ways to avoid misalignments and angle deviations, as well as the use of leveling techniques. Now that you have properly aligned the extender with the drain pipe, you are ready to move on to the next step in the installation process.
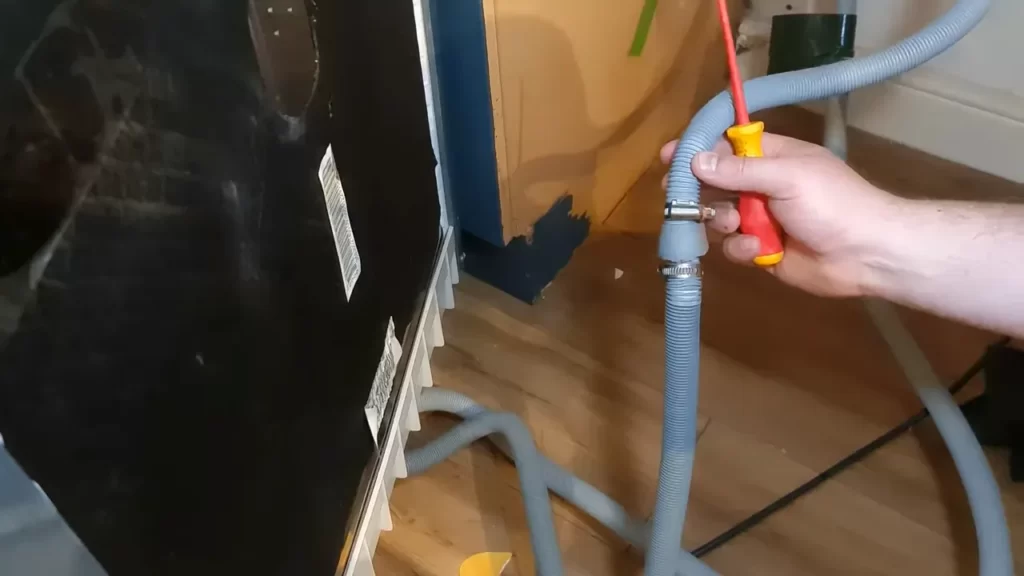
Step 3: Securing The Extender In Place
Step 3: Securing the Extender in Place
Now that you have examined the drain and chosen the suitable extender, it’s time to secure it in place. This step is crucial to ensure a proper fit and prevent any leaks or issues down the line. In this section, we will discuss various securing methods available, guidelines for selecting the most suitable technique, and provide you with step-by-step instructions to securely attach the extender to the drain.
Examining Various Securing Methods Available
Before you can start attaching the extender to the drain, it’s important to understand the different securing methods available. A proper examination will help you determine which method is best suited for your specific situation. Let’s take a look at a few popular options:
| Securing Method | Advantages | Disadvantages |
|---|---|---|
| Compression Fit | Easy to install | May require additional tools |
| Threaded Connection | Provides a secure and durable fit | Requires precise alignment |
| Adhesive | Offers a strong bond | Difficult to remove if adjustments are needed |
Guidelines for Selecting the Most Suitable Securing Technique
When selecting a securing technique for your extender, keep the following guidelines in mind:
- Consider the type of extender and drain you are working with.
- Check the manufacturer’s recommendations for the extender.
- Evaluate the accessibility and space around the drain.
- Assess the level of permanence you desire.
- Factor in any specific requirements or regulations.
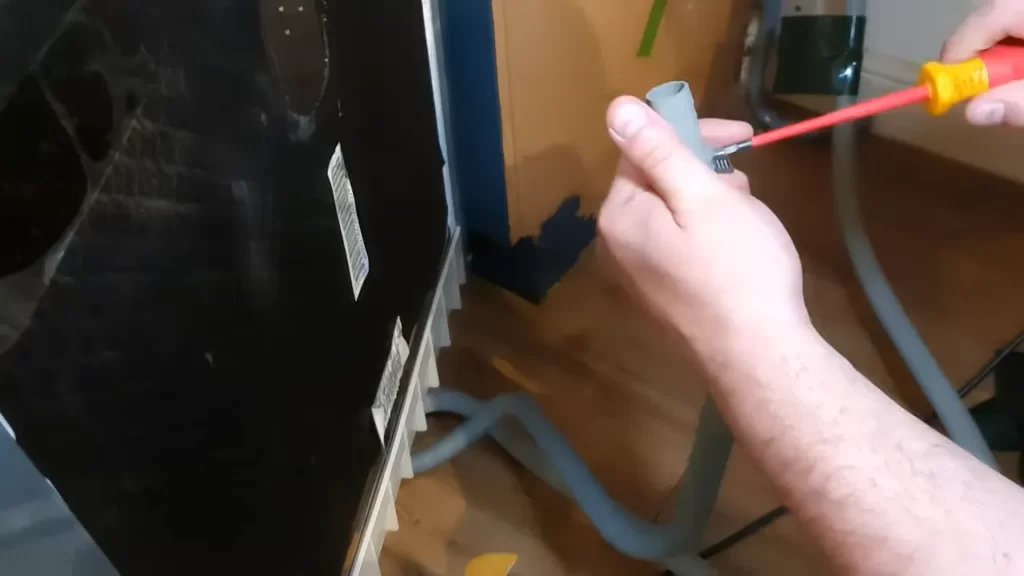
Step-by-Step Instructions to Securely Attach the Extender to the Drain
Following these step-by-step instructions will ensure a secure attachment for your extender:
- Clean the drain thoroughly to remove any dirt, debris, or old sealant.
- Position the extender over the drain and align it properly.
- Depending on the securing method you have chosen, follow the manufacturer’s instructions to complete the attachment.
- If using a compression fit, apply pressure and twist until snug.
- If using a threaded connection, align the threads and tighten using the appropriate tools.
- If using adhesive, apply a thin, even layer to both the extender and the drain, and press them firmly together.
- Double-check the attachment to ensure a secure fit.
- If any adjustments or additional sealing is required, follow the specific recommendations for your chosen securing method.
By carefully examining the available securing methods, following the guidelines, and adhering to the step-by-step instructions, you can confidently secure the extender to the drain, ensuring a proper fit and function.
Step 4: Testing The Installation For Leaks And Functionality
Once you have successfully installed the extender to your drain, it is imperative to conduct a thorough inspection to ensure there are no leakages. This step is crucial as it helps prevent any potential water damage or plumbing issues in the future. Along with checking for leaks, it is also important to examine the water flow and draining efficiency of the newly installed extender. In case any issues arise during the testing process, they need to be resolved promptly to ensure the proper functioning of the drain. Let’s take a closer look at each of these steps.
Conducting a thorough inspection to ensure no leakages
Inspecting the installation for leaks is a crucial step to ensure the longevity of your drain system. Begin by visually examining the connection points of the extender to the drain pipe. Look for any signs of water dripping, moisture buildup, or discoloration that might indicate a leakage. Additionally, run your hands along the connections to feel for any dampness. If you notice any leaks, it is important to tighten the connections or apply a sealant to prevent further leakage.
Examination of water flow and draining efficiency
After verifying that there are no leaks, it is essential to examine the water flow and draining efficiency of the newly installed extender. Start by letting some water flow through the drain and observe how quickly it drains away. Ideally, the water should smoothly flow through the extender and drain without any signs of blockage or slow draining. If you notice any issues such as slow drainage or water backup, there may be an obstruction that needs to be cleared. In such cases, disassemble the extender and check for any debris or blockage that might be hindering the water flow.
Resolving any issues that arise during the testing process
If any issues arise during the testing process, it is crucial to address them promptly to ensure the proper functioning of the drain. For example, if there are leaks, tighten the connections or apply a suitable sealant to prevent further leakage. In case of slow drainage or blockage, disassemble the extender and clear any debris or obstructions that may be causing the issue. Once the necessary adjustments or repairs have been made, repeat the inspection and testing process to ensure the issue has been resolved. Remember, a well-functioning drain system is essential for the overall efficiency of your plumbing system.
Cleaning The Extender To Prevent Blockages And Build-Up
Regularly cleaning your drain extender is essential for maintaining optimal performance and preventing blockages and build-up. Over time, debris and substances can accumulate, hindering water flow and increasing the risk of clogs. In this section, we will discuss the recommended cleaning frequency for optimal performance, safe and effective cleaning methods to avoid damage, and using appropriate tools and solutions to remove debris.
Recommended cleaning frequency for optimal performance
To ensure your extender functions efficiently and avoids blockages, it is crucial to clean it regularly. How often you should clean the extender depends on various factors such as the amount of usage and the type of substances that go down the drain. As a general rule of thumb, we recommend cleaning the drain extender at least once a month. However, in high-usage areas such as kitchens or bathrooms, it may be necessary to clean it more frequently, perhaps every two weeks or even weekly. Regular cleaning will help maintain water flow and prevent any potential clogs or build-up.
Safe and effective cleaning methods to avoid damage
When it comes to cleaning your drain extender, it is essential to use safe and effective methods to avoid causing any damage. Here are some simple steps you can follow:
- Begin by removing any visible debris or hair from the drain extender manually. You can use a pair of gloves or a tool like tweezers or pliers to carefully lift out the material.
- Next, rinse the extender with warm water to remove any remaining loose particles. This will help loosen any stubborn debris that may be sticking to the surface.
- For a deeper clean, you can use a mild detergent or dish soap. Apply a small amount to a cleaning brush or sponge and scrub the extender thoroughly.
- Rinse the extender again with warm water to ensure all the soap residue is removed.
- Finally, dry the extender with a clean cloth to prevent any moisture from attracting additional debris or causing a slippery surface.
Remember, be gentle while cleaning the extender to avoid causing any damage. Avoid using abrasive cleaners, wire brushes, or harsh chemicals as they can scratch or corrode the surface of the extender.
Using appropriate tools and solutions to remove debris
When it comes to removing debris from your drain extender, using the right tools and solutions can make the process much easier. Here are a few options:
- A plunger: If the blockage is more substantial and doesn’t seem to resolve with simple cleaning, you can use a plunger to help dislodge the debris. Make sure to cover any overflow outlets or nearby drains to ensure proper suction.
- A drain snake or auger: Another useful tool for removing clogs is a drain snake or auger. Insert the tool into the drain and rotate it gently to catch and pull out any stuck debris.
- Natural solutions: Instead of using harsh chemicals, consider using natural solutions like baking soda and vinegar to help break down any grease or organic matter in the extender.
By following these safe and effective cleaning methods and using appropriate tools and solutions, you can ensure your drain extender remains free from blockages and build-up, allowing water to flow smoothly.
Regular Inspections And Preventive Measures
Regular inspections and preventive measures are crucial when it comes to extending the lifespan and efficiency of your drains. By proactively identifying potential issues, taking necessary preventive measures, and conducting routine inspections, you can ensure that your drain extender works seamlessly for years to come. In this section, we will delve into the importance of inspecting the extender periodically, identifying potential issues, and troubleshooting common problems.
Importance of inspecting the extender periodically
Inspecting your drain extender periodically is of utmost importance as it helps you catch any developing issues before they become major problems. Regular inspections allow you to assess the condition of the extender, detect any signs of wear and tear, and prevent potential blockages or leaks. By proactive monitoring, you can minimize the risk of costly repairs or replacements, safeguarding your drainage system and preventing any inconvenience to your daily activities.
Identifying potential issues and taking necessary preventive measures
During your regular inspections, be sure to keep an eye out for potential issues that may arise with the drain extender. Some common problems include cracks, loose fittings, or corrosion. If any of these issues are left unattended, they can significantly impact the performance of the extender and potentially lead to more severe complications in your drainage system. Hence, it is essential to take necessary preventive measures to address these issues promptly. This may include tightening loose fittings, applying sealant to cracks, or replacing corroded parts.
Additionally, it is advisable to clean the drain extender regularly to prevent the accumulation of debris or sediment that may impede the flow of water. By doing so, you can maintain optimal functionality and prevent any clogging issues.
Troubleshooting common problems and seeking professional assistance if needed
Despite regular inspections and preventive measures, it is possible that you may encounter some common problems with your drain extender. If you notice a decrease in water flow, foul odors, or persistent leaks, it is essential to address these issues promptly. First, check for any visible blockages or obstructions that may be causing the problem. You can use a plunger or a plumber’s snake to remove any clogs.
If the issue persists, it is advisable to seek professional assistance. Plumbers have the expertise and specialized tools to diagnose and fix complex drain extender problems. They can perform a thorough inspection, conduct necessary repairs, and provide valuable advice on maintenance practices to prevent future issues.
Remember, regular inspections, timely preventive measures, and addressing common problems promptly are essential in ensuring the longevity and efficiency of your drain extender. By adhering to these practices, you can enjoy trouble-free drainage and peace of mind knowing that your drainage system is in optimal condition.
Frequently Asked Questions
How Do You Extend An Underground Drain Pipe?
To extend an underground drain pipe, follow these steps: 1. Locate the existing drain pipe and measure the needed extension length. 2. Dig a trench next to the existing pipe, ensuring it slopes downhill for proper drainage. 3. Connect a new section of pipe to the existing one using PVC connectors and adhesive.
4. Place the extended pipe in the trench, ensuring a secure connection. 5. Backfill the trench with soil, compact it, and restore the affected area.
How Far Should Downspouts Extend From House?
Downspouts should extend at least 5 to 10 feet away from the house. This helps to prevent water from collecting near the foundation, which can cause damage. Ensuring proper drainage is essential for maintaining the structural integrity of your home.
How Do You Connect A Downspout To A Drain?
To connect a downspout to a drain, follow these steps: 1. Position the downspout outlet directly above the drain. 2. Use a downspout connector to attach the downspout to the outlet. 3. Secure the connection with screws or rivets. 4. Ensure a snug fit by sealing any gaps with silicone caulk.
5. Test the connection by pouring water down the downspout to check for leaks.
Are Underground Downspouts A Good Idea?
Yes, underground downspouts are a good idea. They can efficiently channel rainwater away from your foundation, preventing water damage and flooding. Additionally, they provide a cleaner and more aesthetically pleasing look to your home’s exterior.
Conclusion
To wrap things up, installing an extender to a drain may seem like a daunting task, but with the right steps, it can be a breeze. Remember to gather all the necessary tools, measure accurately, and follow the manufacturer’s instructions closely.
By doing so, you can ensure a secure and leak-free connection. With this guide, you’ll have the confidence to tackle any drain extender installation project and improve the functionality of your plumbing system. So why wait? Get started and enjoy the benefits of a properly extended drain!