
To install a Delta Shower Handle, first, remove the old handle by unscrewing it counterclockwise. Then, attach the new handle by screwing it on clockwise until tight.
Understanding The Delta Shower Handle
When it comes to upgrading your bathroom, installing a Delta shower handle is a great choice. Delta is a well-known and trusted brand in the plumbing industry, offering durable and reliable products. To ensure a successful installation of your Delta shower handle, it is important to understand the components of the handle and why it is the ideal choice for your bathroom.
Components of the Delta Shower Handle
The Delta shower handle consists of several components that work together to control the water flow and temperature of your shower. These components include:
- Handle: The handle is the part of the shower handle that you turn to control the water flow and temperature.
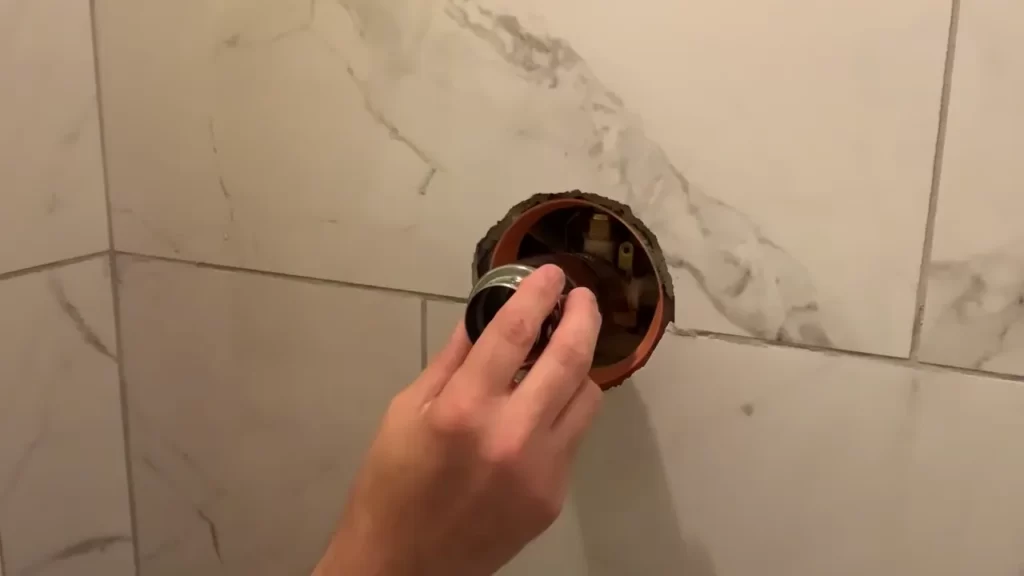
- Valve: The valve is the mechanism inside the handle that regulates the water flow and temperature.
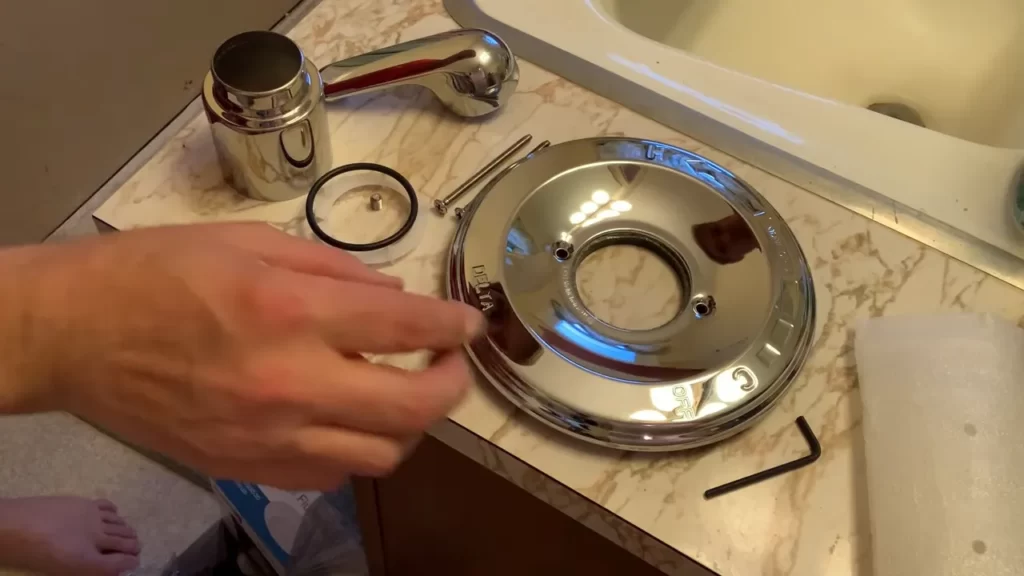
- Trim Kit: The trim kit is the decorative cover that goes over the valve and handle, adding a stylish touch to your shower.
Understanding these components will help you successfully install and operate your Delta shower handle.
Why Choose a Delta Shower Handle for Your Bathroom
When it comes to choosing a shower handle for your bathroom, there are several reasons why Delta is the ideal choice:
- Durability: Delta shower handles are made from high-quality materials, ensuring they will withstand daily use and last for years to come.
- Reliability: Delta is a trusted brand known for its reliable products. You can rely on your Delta shower handle to provide consistent water flow and temperature control.
- Easy Installation: Installing a Delta shower handle is a straightforward process, thanks to their user-friendly design.
- Stylish Design: Delta offers a wide range of shower handle designs to suit any bathroom style, allowing you to add a touch of elegance to your shower.
In conclusion, understanding the components of the Delta shower handle and the benefits it offers will help you make an informed decision when it comes to upgrading your bathroom. Choose Delta for a durable, reliable, and stylish shower handle that will enhance your showering experience.
Tools And Materials Required
In order to successfully install a Delta shower handle, you will need to gather a few essential tools and materials. Having these on hand before you begin will ensure a smooth and efficient installation process. Below, we have listed the tools and materials you will need:
List of tools needed for the installation:
To properly install a Delta shower handle, you will require the following tools:
- A adjustable wrench – You will need this to loosen and tighten various connections during the installation process.
- A screwdriver – This will be necessary for removing any screws or fasteners holding the old handle in place.
- A pipe wrench – If your shower handle is connected to a pipe, you may need a pipe wrench to disconnect it.
- Plumbers tape – This tape will be used to create a watertight seal between the shower handle and the pipe connections.
List of materials needed for the installation:
Before beginning the installation process, make sure you have the following materials on hand:
- A new Delta shower handle – This is the replacement handle you will be installing.
- A replacement cartridge – In some cases, you may need to replace the cartridge as well. Check your specific model to determine if this is necessary.
- Plumbers grease – This grease will lubricate the cartridge and ensure smooth operation of the shower handle.
- A rag or towel – It’s always a good idea to have a cloth nearby to wipe up any spills or excess water during the installation process.
- A bucket – If you need to drain any water from the pipes before installing the new handle, a bucket will come in handy.
By gathering all the necessary tools and materials beforehand, you will be well-prepared to tackle the installation of your Delta shower handle. It’s always a good idea to read through the installation instructions provided by Delta to ensure you have a full understanding of the process before getting started.
Step-By-Step Guide To Install Delta Shower Handle
If you’re looking to upgrade your shower and want to install a Delta shower handle, you’ve come to the right place. This step-by-step guide will walk you through the process of installing a Delta shower handle, ensuring a smooth and hassle-free experience. So, without further ado, let’s dive right in!
Preparation before installation
Before you begin the installation process, it’s crucial to gather all the necessary tools and materials. Here’s a list of everything you’ll need:
- Delta shower handle kit
- Adjustable wrench
- Phillips screwdriver
- Plumber’s tape
- Rag or towel
Shutting off the water supply
First things first, you’ll need to turn off the water supply to your shower. Locate the main water valve and shut it off to ensure no water flows while you’re working on the installation.
Removing the old shower handle
Once the water supply is turned off, it’s time to remove the old shower handle. Start by removing the handle’s trim plate by unscrewing the screws that hold it in place. Next, use an adjustable wrench to loosen the bolt that secures the handle to the cartridge. Once the bolt is loosened, you can easily remove the old shower handle.
Installing the new Delta shower handle
Now that you’ve successfully removed the old shower handle, it’s time to install the new Delta shower handle. Start by reading the manufacturer’s instructions carefully to ensure you understand the installation process. Then, following the instructions, attach the new handle to the cartridge and tighten the bolt to secure it in place.
Attaching the trim plate
Once the new shower handle is securely attached, it’s time to attach the trim plate. Align the trim plate with the handle and use the screws provided to secure it in place. Make sure the trim plate is flush against the wall for a seamless look.
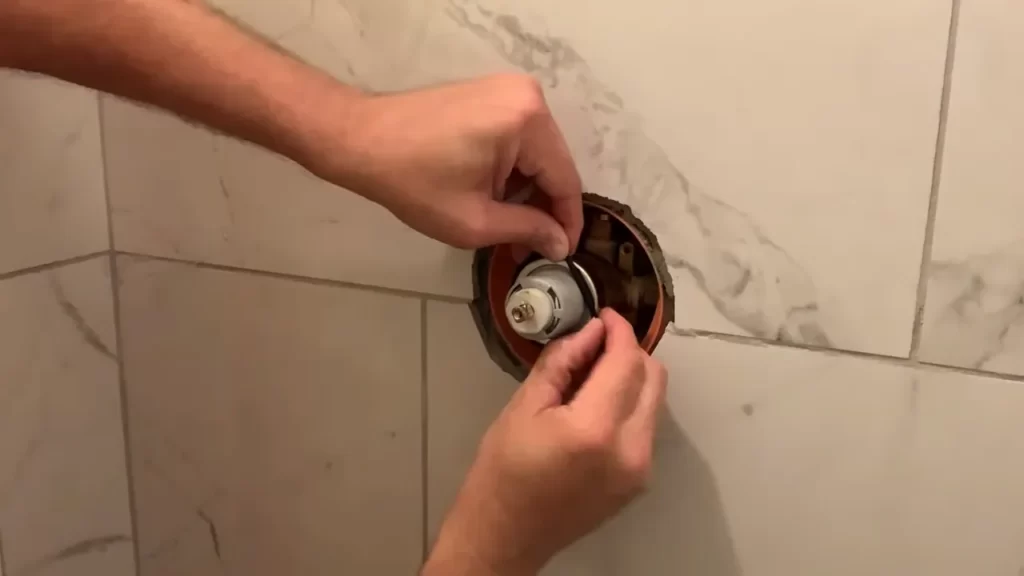
Connecting the valve cartridge
The next step is to connect the valve cartridge. Follow the manufacturer’s instructions to ensure a proper connection. Use plumber’s tape to seal any connections and prevent leaks. Ensure that all connections are tight and secure.
Securing the handle onto the cartridge
To ensure the handle functions properly, it’s important to secure it onto the cartridge. Tighten the bolt securely using an adjustable wrench. This will prevent any wobbling or instability when using the shower handle.
Testing the installation and troubleshooting
Now that the installation is complete, it’s time to test your new Delta shower handle. Turn on the water supply and check for any leaks or issues. Test the handle’s functionality by adjusting the water temperature and flow. If you encounter any problems, refer to the manufacturer’s troubleshooting guide to resolve them.
Conducting a leak test
After testing the functionality, it’s essential to conduct a leak test. Leave the water running for a few minutes and inspect all connections for any signs of leakage. If you notice any leaks, tighten the connections or replace any faulty parts.
Common issues and their solutions
During the installation process or after, you may encounter some common issues. Here are a few and their solutions:
| Issue | Solution |
|---|---|
| Leaking from connections | Tighten the connections or replace faulty parts |
| Handle is loose | Ensure the bolt is tightened securely |
| Handle is difficult to turn | Check for obstructions or loosen the bolt slightly |
By following this step-by-step guide, you can successfully install your new Delta shower handle. Enjoy your upgraded shower experience!
Tips For A Successful Installation
Proper positioning of the trim plate
Correctly positioning the trim plate is crucial for a successful installation of your Delta shower handle. The trim plate serves as a decorative cover and provides a clean, polished look to your shower. To ensure proper positioning, follow these steps:
- Start by measuring the distance from the center of the valve to the edge of the shower wall. This measurement will guide you in positioning the trim plate accurately.
- Use a level to ensure that the trim plate is straight and aligned with the shower wall. A level will help you achieve a professional and visually appealing result.
- Secure the trim plate to the wall using the provided screws or adhesive, following the manufacturer’s instructions. Take care not to over-tighten the screws to avoid damaging the plate.
Ensuring tight connections
Properly connecting the internal components of your Delta shower handle is essential for optimal functionality. To ensure tight connections:
- Carefully read the instruction manual provided by Delta to identify the specific connections required for your model.
- Use the appropriate tools, such as an adjustable wrench or pliers, to tighten the connections securely. Avoid using excessive force that could damage the fittings.
- Check for any leaks by turning on the shower and inspecting the connections for any water seepage. If you notice any leaks, double-check the tightness of the connections and make necessary adjustments.
Maintaining the shower handle for long-lasting performance
Proper maintenance of your Delta shower handle will ensure its longevity and smooth operation. Follow these tips to maintain your shower handle for long-lasting performance:
- Regularly clean the shower handle using a mild soap and water solution. Avoid harsh chemicals or abrasive cleaners that could damage the finish.
- Inspect the handle periodically for any signs of wear or damage. If you notice any issues, promptly replace any worn-out or broken components to prevent further damage.
- Keep the area around the shower handle dry to prevent water damage and the accumulation of soap scum or mineral deposits.
- If your Delta shower handle has a cartridge, periodically lubricate it with a silicone-based lubricant to ensure smooth operation.
By following these tips for a successful installation, including proper positioning of the trim plate, ensuring tight connections, and maintaining the shower handle, you can enjoy a functional and visually appealing Delta shower handle for years to come.
Additional Considerations
When it comes to replacing the shower handle in your bathroom, there are a few additional considerations to keep in mind. Understanding the different types of Delta shower handles and their features is essential in ensuring that you choose the right one for your needs. Exploring other options for shower handle replacement can also offer you more flexibility in terms of design and functionality. Let’s dive into these additional considerations in more detail.
Different types of Delta shower handles and their features
Delta offers a range of shower handles that cater to different preferences and requirements. By understanding the features of each type, you can make an informed decision when selecting your replacement handle.
Exploring other options for shower handle replacement
If you’re not satisfied with the available Delta shower handles, there are other options to consider for your shower handle replacement. These alternatives can provide you with additional design choices and functionalities to enhance your showering experience.
In conclusion, it’s important to consider the various types of Delta shower handles and their features before making a decision. Additionally, exploring other options for shower handle replacement can offer you more flexibility in terms of design and functionality. By carefully considering these additional factors, you can install a Delta shower handle that meets your specific needs and preferences.
Expert Advice And Maintenance
When it comes to the installation and maintenance of your Delta shower handle, expert advice and regular maintenance are essential. In this section, we will provide expert tips on how to ensure a smooth installation process and maintain your shower handle for optimal performance. Whether you are consulting professional plumbers for complex installations or implementing regular maintenance tips, this guide will help you keep your Delta shower handle in top condition.
Consulting professional plumbers for complex installations
If your installation requires expertise and involves complex procedures, it is highly recommended to consult professional plumbers. They have the necessary knowledge, skills, and tools to handle intricate installations with precision. Professional plumbers can provide advice on the most suitable Delta shower handle for your bathroom setup and ensure proper installation to prevent any potential issues later on.
Regular maintenance tips for a well-functioning Delta shower handle
Maintaining your Delta shower handle on a regular basis is crucial for its longevity and optimal performance. Here are some maintenance tips to keep in mind:
- Keep the handle clean: Regularly clean the handle using a mild soap and water solution to remove dirt, grime, and mineral deposits that can accumulate over time. Scrub gently with a soft brush or sponge, and avoid using abrasive cleaners that may damage the finish.
- Inspect and tighten connections: Periodically inspect the connections of your Delta shower handle to ensure they are secure. Use an adjustable wrench to tighten any loose connections, such as the handle, trim plate, or showerhead.
- Check for leaks: Examine your shower handle for any signs of leaks. If you notice water dripping from the handle or any other part of the shower system, it is important to address the issue promptly. Leaks can lead to water damage and inefficient water usage.
- Test the temperature: To ensure your Delta shower handle maintains the desired water temperature, test it periodically. Start by turning on the hot water and then gradually add cold water until you achieve the desired temperature. This will help you identify any changes or fluctuations in the temperature control mechanism.
- Apply lubrication: Lubricating the moving parts of your Delta shower handle can prevent rusting and ensure smooth operation. Use a silicone-based lubricant that is safe for plumbing applications. Apply a small amount of lubricant to the handle’s moving parts, such as the valve stem, cartridge, or diverter, as recommended by the manufacturer.
By following these regular maintenance tips, you can extend the lifespan of your Delta shower handle and enjoy a hassle-free showering experience for years to come.
Frequently Asked Questions
How Do I Know What Delta Shower Handle I Have?
To identify your Delta shower handle, check for a label on the handle itself or on the backside. You can also look for any model numbers or brand logos. If you’re unable to find any markings, contact Delta customer support with a picture of your shower handle for further assistance.
How Do You Remove A Delta Shower Faucet Handle?
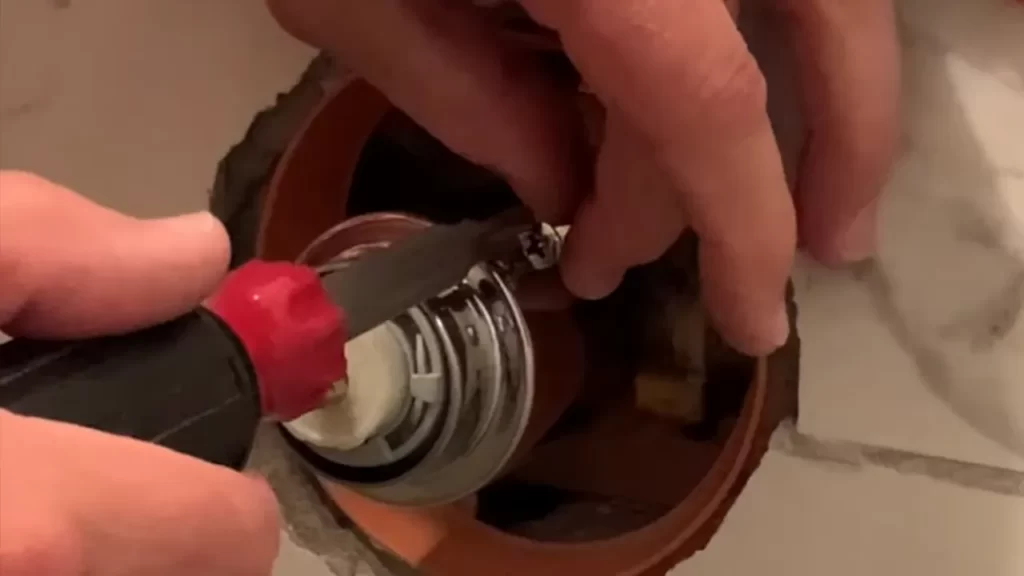
To remove a Delta shower faucet handle, you can follow these steps: 1. Locate the small set screw on the bottom or side of the handle. 2. Use an Allen wrench or screwdriver to loosen and remove the set screw. 3.
Once the set screw is removed, carefully pull the handle straight off the faucet stem. 4. If the handle doesn’t come off easily, use a handle puller tool for assistance.
How Do You Remove A Delta Shower Handle Without A Set Screw?
To remove a Delta shower handle without a set screw, look for a small button or cap near the handle. Gently pry it off and you’ll find a screw underneath it. Unscrew the handle counterclockwise to remove it.
How Do I Install A New Shower Handle?
To install a new shower handle, follow these steps: 1. Turn off the water supply to the shower. 2. Remove the existing handle by unscrewing any screws or bolts. 3. Align the new handle with the valve stem and secure it in place.
4. Tighten any screws or bolts to ensure a snug fit. 5. Turn on the water and test the handle for proper functionality. Note: Consult the manufacturer’s instructions for specific guidance.
Conclusion
To sum up, installing a Delta shower handle is a simple process that can be done by following a few easy steps. By properly removing the old handle, positioning the new one correctly, and tightening the set screw, you can have a functional and stylish shower handle in no time.
Remember to reference the manufacturer’s instructions for any specific details. With this guide, you’ll be able to tackle your shower handle installation confidently!